
NOTE: The new Online Bookings and Client Portal are being rolled out to clinics in phases. If Setup → Online Bookings does not show the Overview, Share and Add to website tabs described here, your account is still on the classic version — see Online Bookings and Client Portal instead.
Step 1: Choose the Booking Steps
In Pabau Studio (Setup → Online Bookings → Customise page), click Manage at the end of the Booking pages strip.
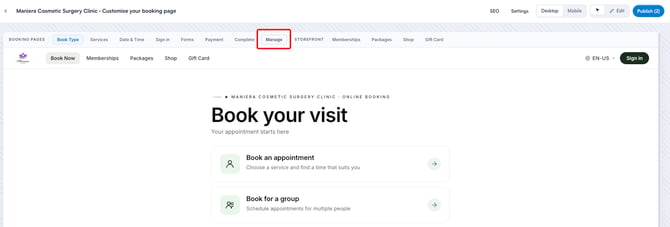
The Booking steps panel lists the steps in the order clients go through them. Switch a step off to skip it:
| Step | What it does | If you switch it off |
|---|---|---|
| Booking type | The landing page: who the booking is for. | Clients start on the next step. |
| Service | What the client is booking. | Always on. |
| Location | Which branch the visit is at. | The step is skipped. |
| Provider | Who the client sees. | The booking goes to “Any provider”. |
| Date & time | When the client comes in. | The step is skipped. |
| Forms | Intake forms to complete. | Clients see their forms after booking instead. Skipped automatically when a booking has no forms. |
| Payment | Checkout. | Always on, and always last. |
| Classes | Adds “Book a class” to the landing page. | Off unless you run classes. |
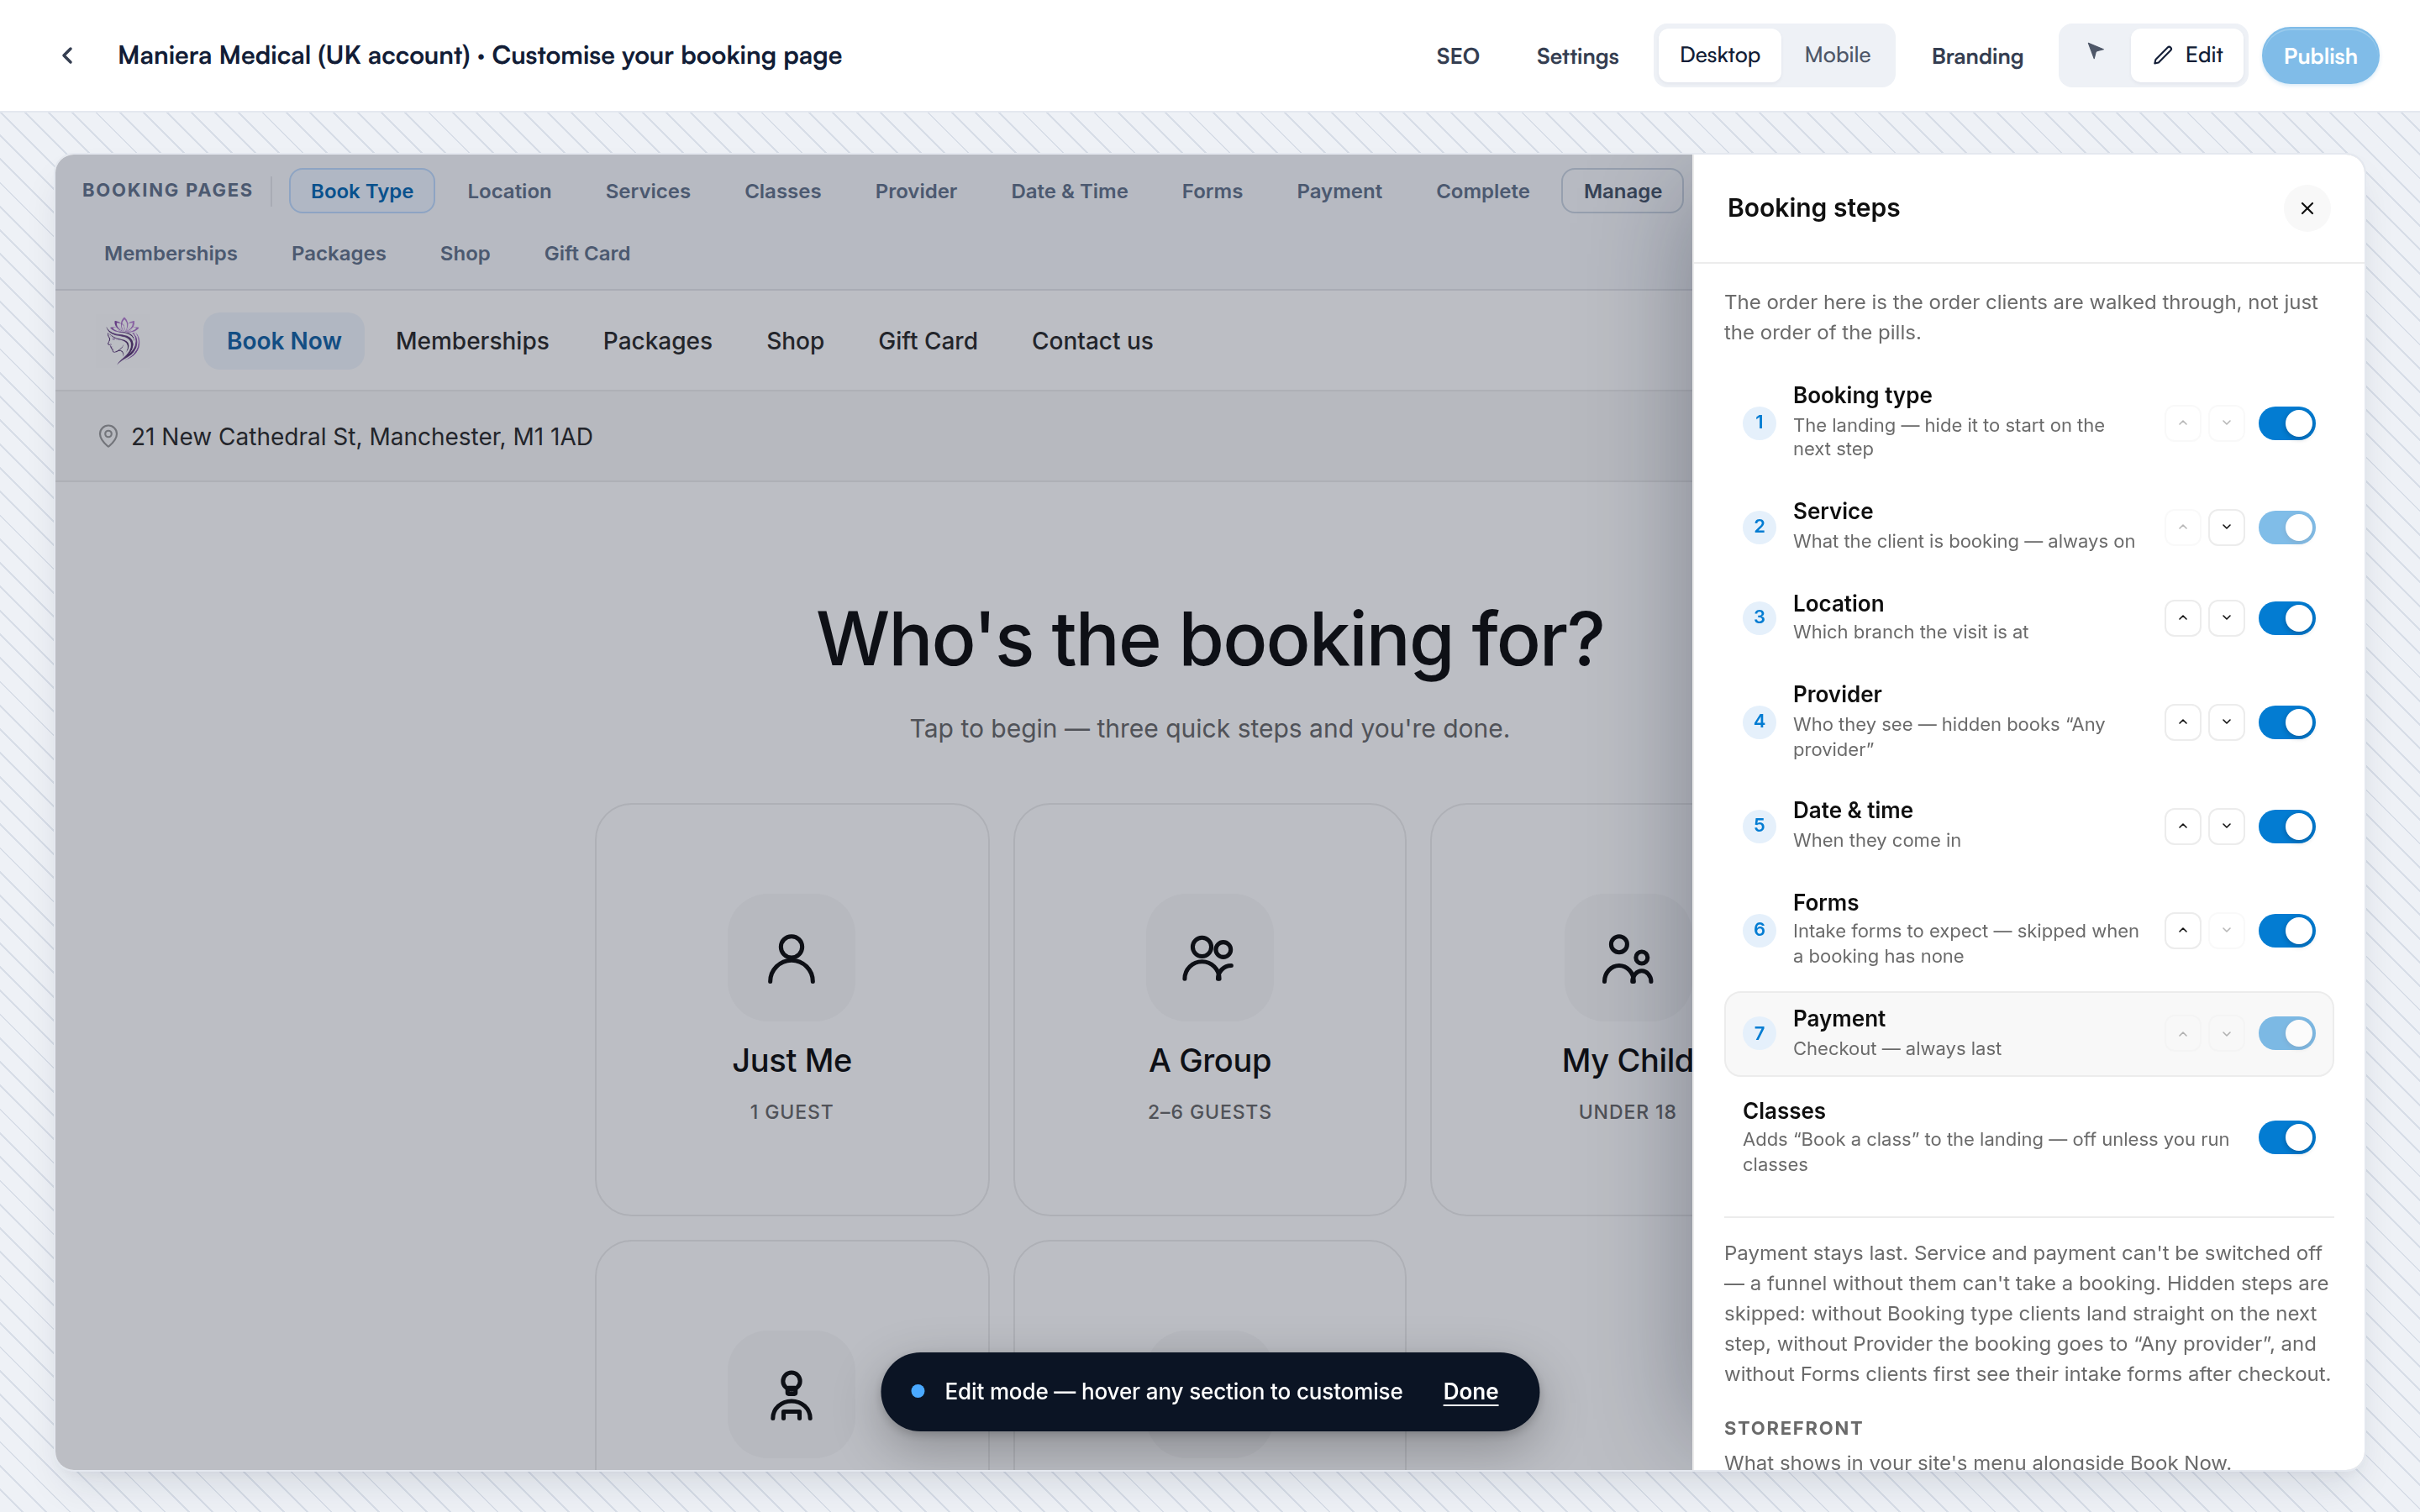
The Booking steps panel, with a switch for each step
NOTE: Steps with nothing to choose from are skipped for the client automatically — for example, a clinic with one location does not see the Location step.
Step 2: Choose the Booking Types
The first step asks Who’s the booking for?. Open the Book Type page in Studio, click Edit and click the section to choose which types are offered and how they are laid out:
- Just Me — 1 guest.
- A Group — 2 to 6 guests, booked together.
- My Child — a booking for someone under 18.
- Employee — staff only.
- Class — drop-in classes.
Step 3: Set Up the Date and Time Step
Open the Date & Time page in Studio, click Edit, hover the calendar and click the Date & Time label. The Date & time section panel has two tabs.
On Layout:
- Month view (a full-month calendar with availability stripes), Week (a week strip with grouped slots) or Minimal (a clean list of times with prices).
- Show waitlist — shows a “Can’t find a spot?” banner with a Join Waitlist button. Clients must sign in to join; their entry lands on your waitlist in Pabau (see How to Use the Wait List Feature).
- Hide fully booked days and Show prices on slots.
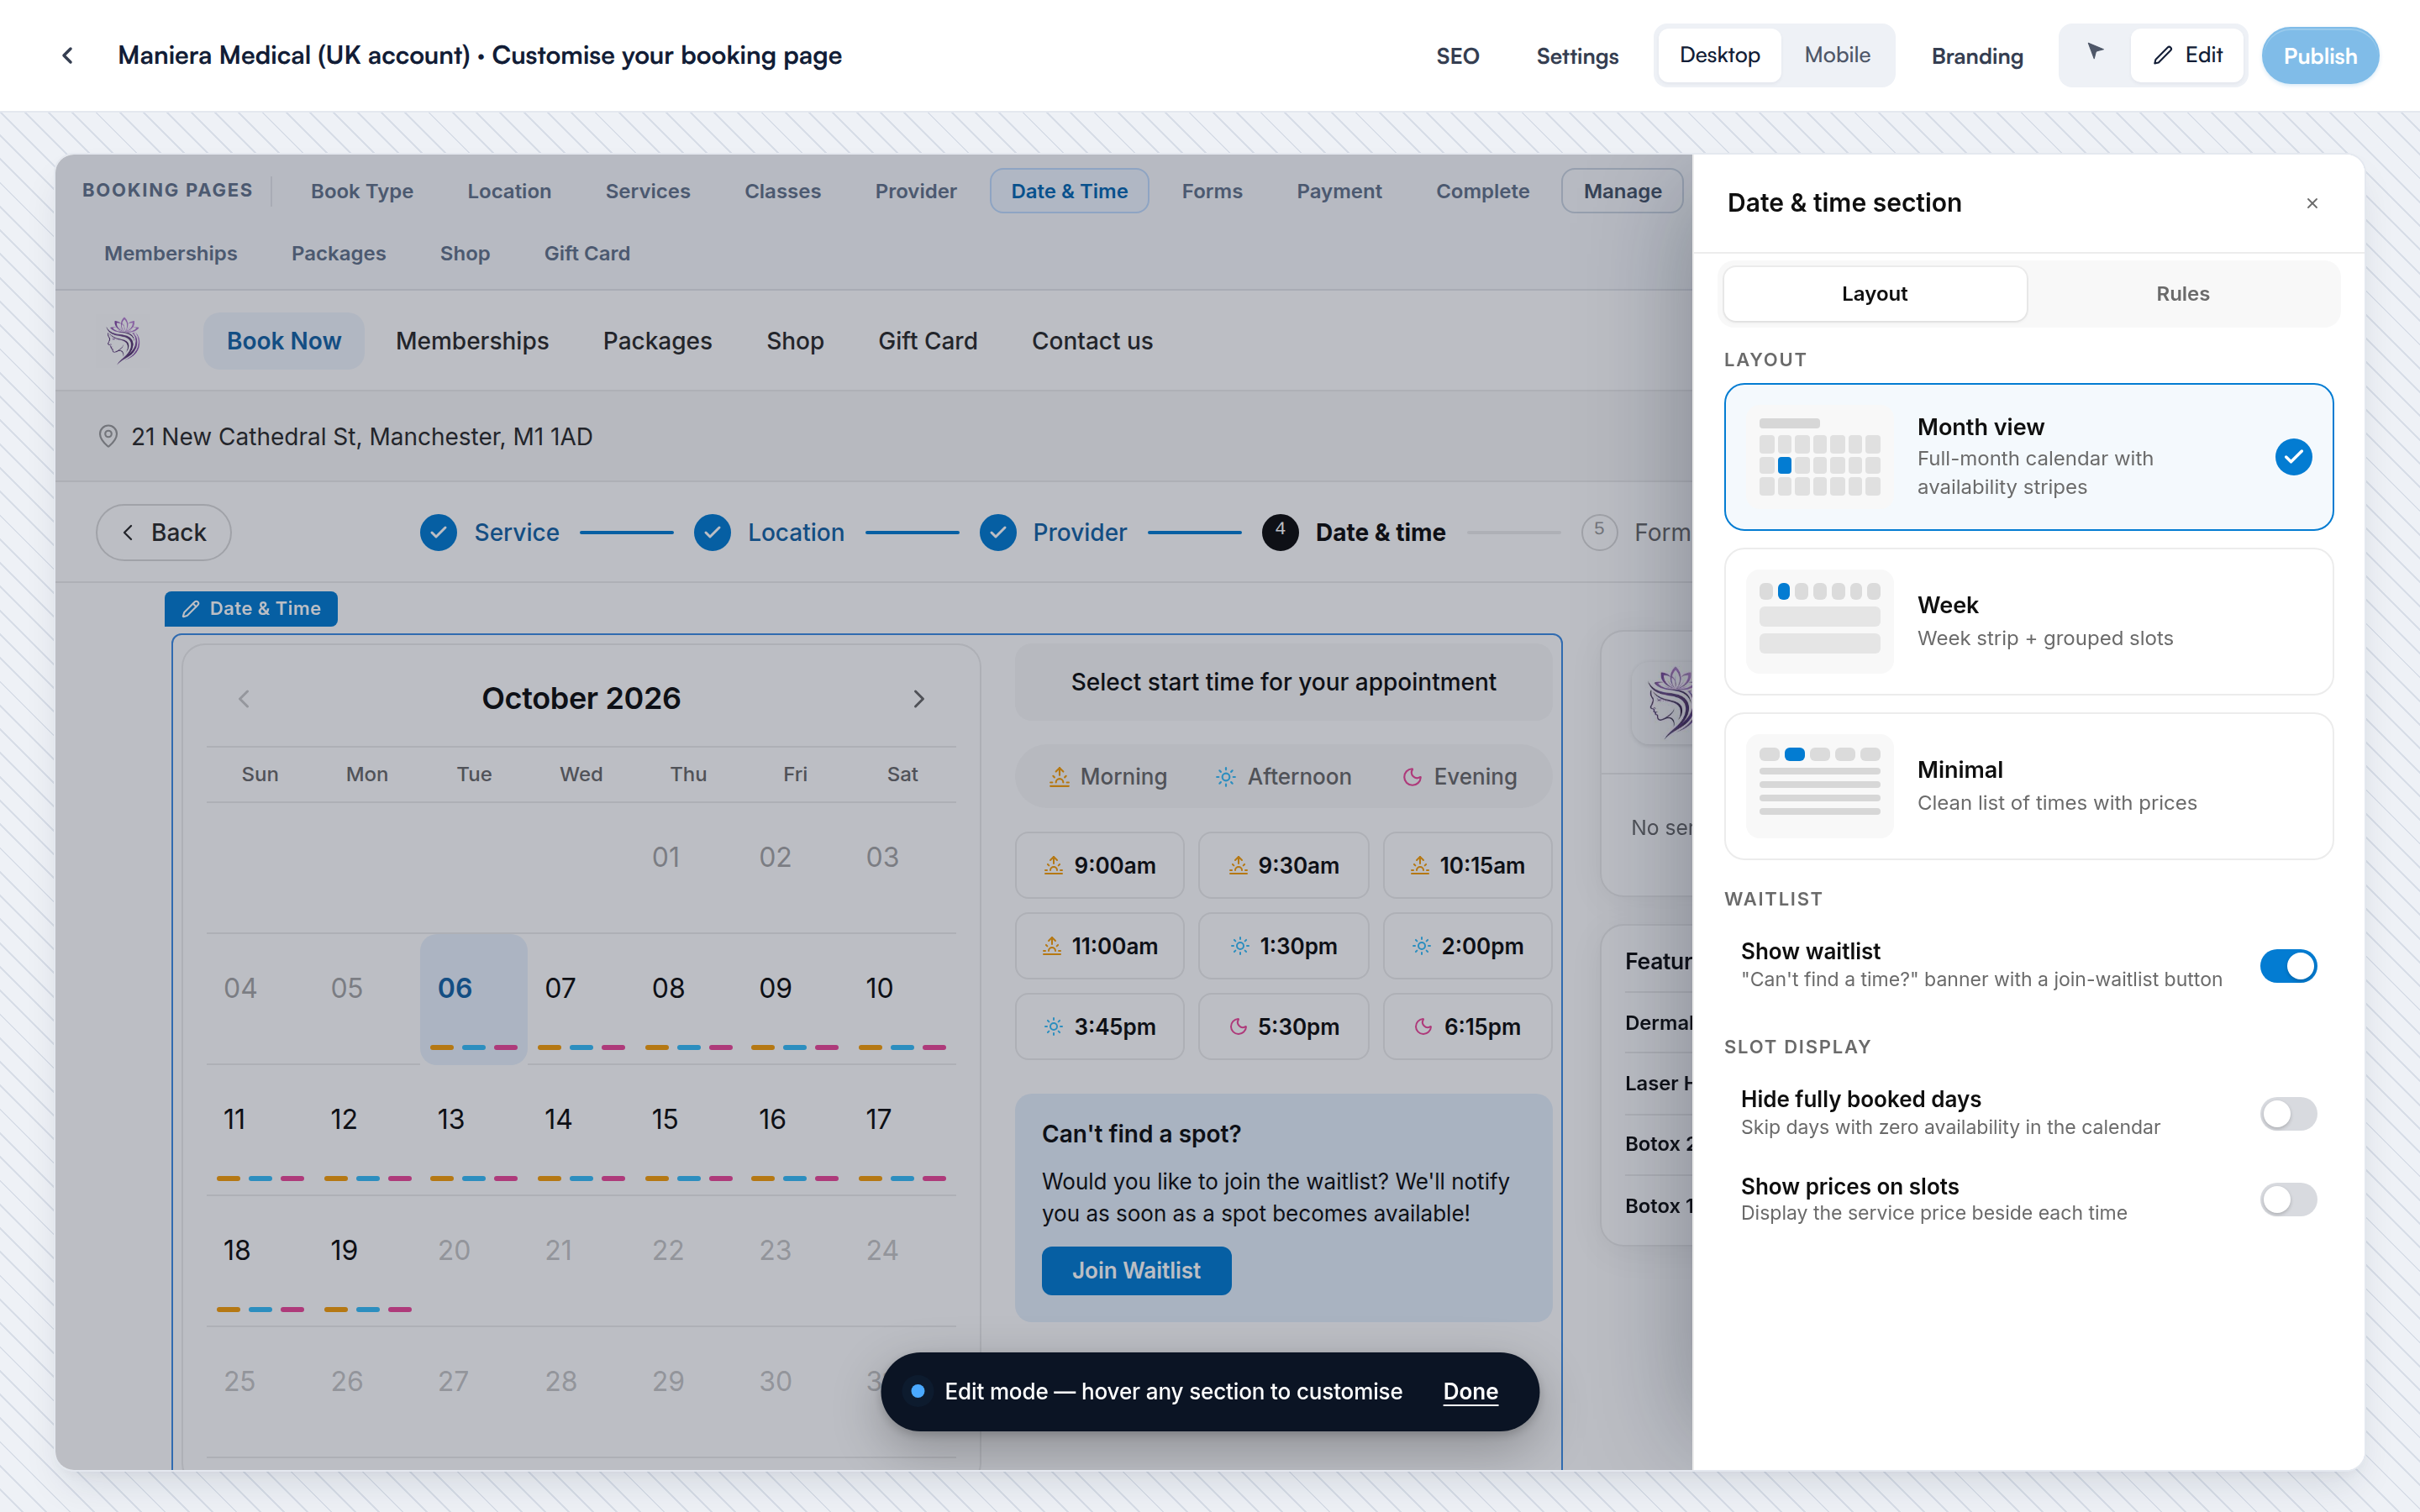
The Layout tab of the Date & time section
Step 4: Set the Availability Rules
Still in the Date & time section, open the Rules tab. Every rule is off until you turn it on.
| Rule | What it does |
|---|---|
| Minimum notice | The latest a client can book before the appointment: No minimum, 1, 2, 4, 24 or 48 hours. |
| Maximum advance | How far ahead clients can book: No maximum, 14, 30, 60, 90, 180 or 365 days. |
| No gaps rule | Only offers times directly before or after an existing appointment. |
| Minimum gap between bookings | Forces a buffer so providers always get reset time. |
| Max gap rule | Stops bookings that would leave large empty gaps in the day. |
| Cluster appointments | Fills the day in solid blocks rather than scattering bookings. |
| Start / end-of-day priority | Offers early-morning and late-afternoon times first, to avoid midday gaps. |
| Don’t allow booking if room in use | Hides times when the treatment room the service needs is already taken. |
| Don’t allow booking if equipment in use | Hides times when the equipment the service needs (a laser, machine or device) is already taken. |
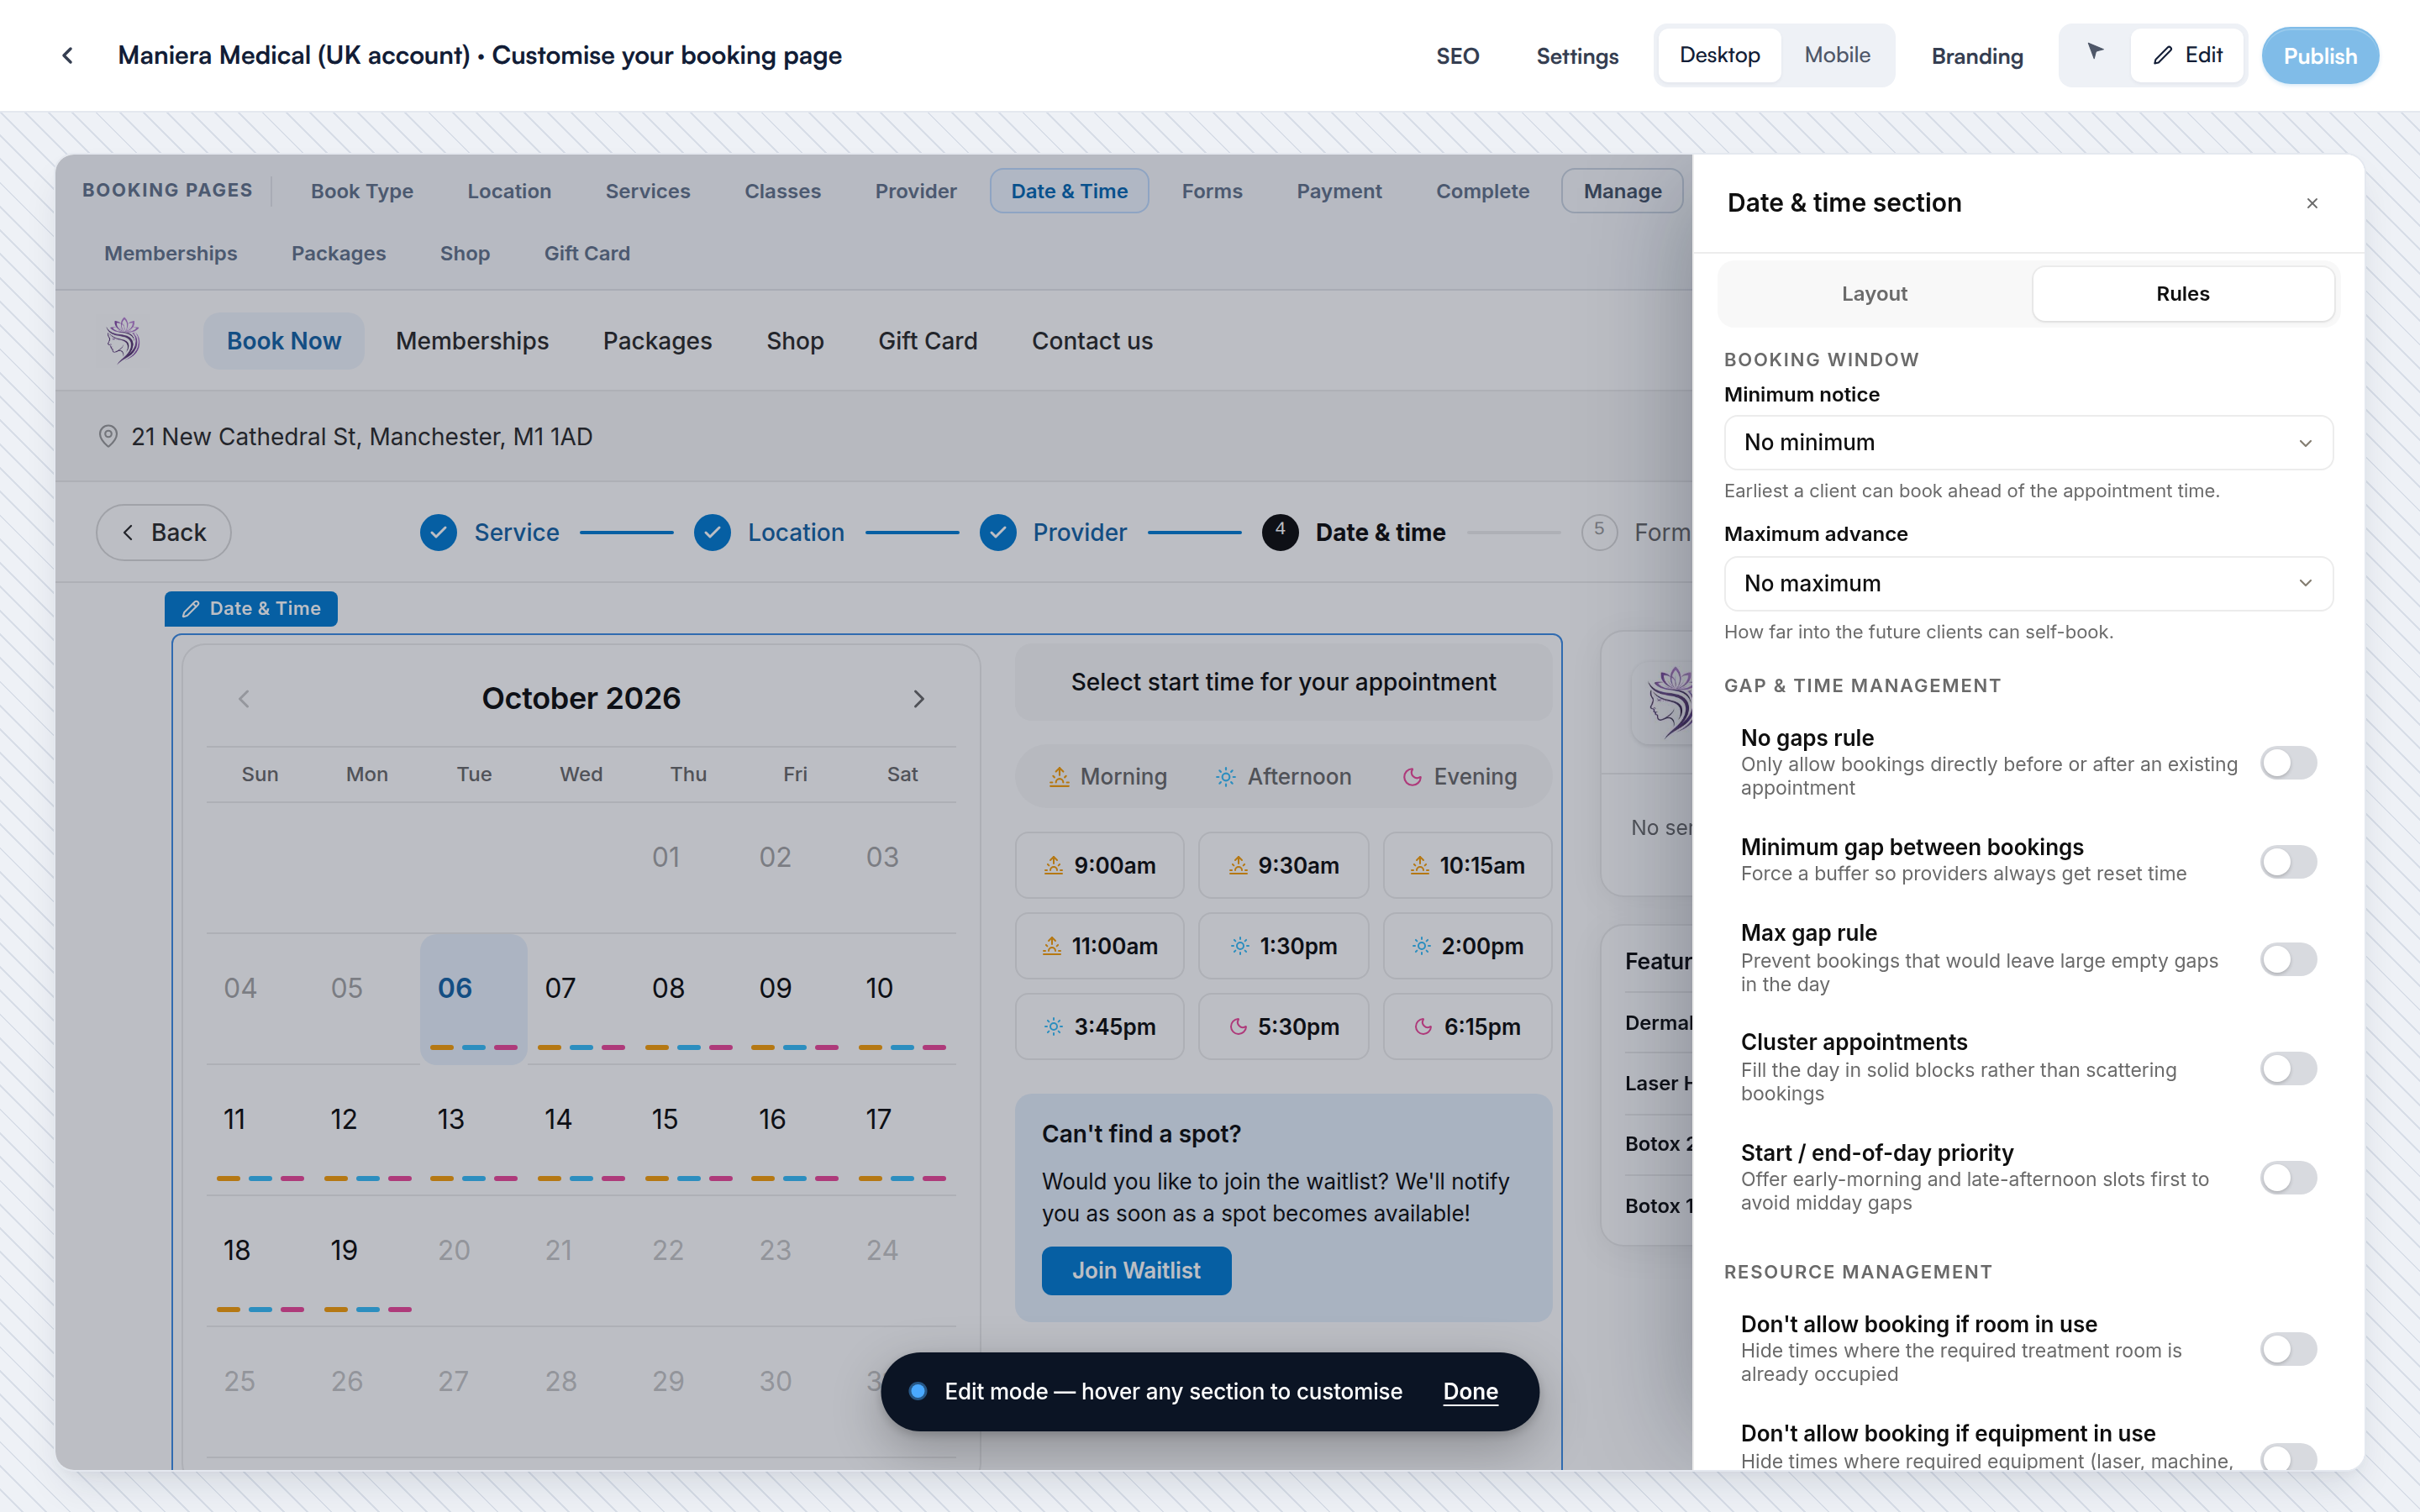
The Rules tab: booking window, gap and resource rules
NOTE: These rules apply on top of your rota. A client only ever sees a time when the provider is working, the service is available online and every rule you have turned on allows it.
Where the services, providers and locations come from
- Services — services available to book online in Setup → Services. See How to Make a Service Bookable Online and How to Make a Service Bookable Online Only by Existing Clients.
- Providers — staff who perform the service and are not hidden from online bookings, with their photo and bio from their staff profile.
- Locations — your locations set as bookable online.
Step 5: Publish
Click Publish to make your changes live.
What’s next?
Set up deposits and online payment in Part 4: Take Payments and Deposits Online.
The complete New Online Bookings series:
- Getting Started with the New Online Bookings and Client Portal — start here — what is new and the route through the set
- New Online Bookings Part 1: Get Your Booking Page Ready — check your booking page is ready to take bookings
- New Online Bookings Part 2: Customise and Publish Your Booking Page in Pabau Studio — brand your page and publish it
- New Online Bookings Part 3: Set Booking Steps and Availability Rules (this article) — choose the booking steps and the availability rules
- New Online Bookings Part 4: Take Payments and Deposits Online — take payments, deposits and card details online
- New Online Bookings Part 5: Share Your Booking Page and Add It to Your Website — share your link and put booking on your website
Questions? Reach us any time via the in-app chat — we’re happy to help.
Was this guide helpful? Let us know by voting below - your feedback helps us write clearer articles.
For more guides, browse the related articles below or use the search bar at the top of the page. You can also watch our video learning series, the Pabau Academy, or visit the Support page for additional help.