
The Calls channel gives your clinic a phone number that rings in the browser, records calls, takes voicemail and routes callers — all inside Pabau. This article shows you how to set it up.
Step 1: Open the Calls Channel Settings
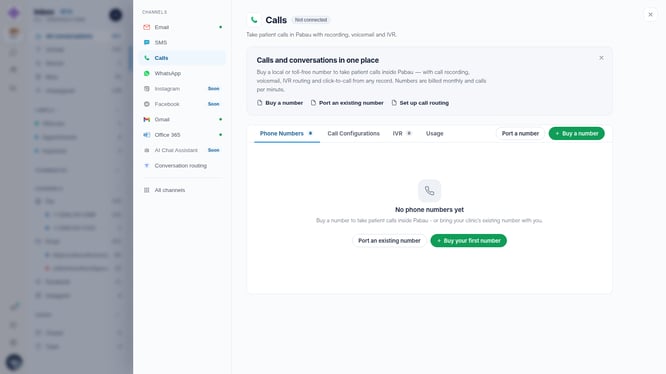
Click the Settings cog in the icon rail and choose Calls. The panel has four tabs — Phone Numbers, Call Configurations, IVR and Usage — plus Port a number and Buy a number buttons.
Step 2: Buy a Number (or Port Yours)
Click Buy a number and choose a local or toll-free number for your country — numbers are billed monthly and calls per minute, with the exact price shown before you confirm. Already have a clinic number? Choose Port an existing number instead and keep it — see our How to Port Your Phone Number to Pabau article.
NOTE: Buying a UK number involves a short business-verification step required by UK regulations — see our Buying a UK Number: Business Verification in Engage article.
Step 3: Configure How Calls Behave
The Call Configurations tab controls what happens when your number rings — opening hours, who it rings and where voicemail picks up — and the IVR tab holds call menus ("press 1 for bookings"). See our How to Set Up Call Routing for a Number and How to Set Up a Call Menu (IVR) in Engage articles.
Step 4: Assign Numbers to Your Team
Each teammate who takes calls needs a number assigned — done from the avatar menu at the bottom of the icon rail. See our How to Make and Receive Calls in Engage article.
Step 5: Watch It Work
Calls appear in the Calls tab of the inbox with recordings and outcomes, and the Usage tab of this panel tracks minutes.
How Do Numbers, the Call Menu, the AI Receptionist and Recordings Fit Together?
Calling in Engage is one chain. Each call passes through these pieces in order, and each has its own guide:
- Your number — the number callers dial. You buy one or port your existing clinic number from Settings → Calls → Phone Numbers, and each teammate who takes calls has a number assigned to them. See Call Setup: Numbers, Team Assignment and Call Settings and How to Port Your Phone Number to Pabau.
- The Call Menu (IVR) — an optional “press 1 for bookings” menu callers hear first. You build it on the IVR tab and attach it to a number’s routing; each option hands the caller to its own ring target and voicemail fallback. See How to Set Up a Call Menu (IVR) in Engage.
- Call routing — the Call Configurations tab decides your opening hours, which teammates ring (everyone at once or in order) and what happens when nobody answers. See How to Set Up Call Routing for a Number.
- Voicemail or the AI receptionist — when nobody picks up, voicemail catches the call, or your AI receptionist answers if it is enabled for your clinic and can book the caller in itself. See How to Use Voicemail in Engage.
- The call log and recordings — every call lands in the Calls tab as answered, AI answered, missed, voicemail or outgoing. Open a call for its recording (with playback speed and download), its outcome and, for AI-answered calls, a transcript with a summary. See The Calls Tab: Your Clinic’s Call Log in Engage and Call Recordings, Transcripts, Outcomes and Notes in Engage.
- Calling from anywhere in Pabau — the phone icon in the Pabau header, the call button on a client or lead’s number and the Incoming call panel all hand the call to Engage. See How to Call Clients and Answer Engage Calls Without Leaving Pabau.
Where this comes from: the label on each row of the Calls tab (for example AI answered or Voicemail) is the result of the number’s routing in Settings → Calls → Call Configurations. To change what happens to calls, change the routing, not the log. Reports → Voice shows where unanswered calls ended up — see Engage Reports.
NOTE: The phone system (numbers, the Call Menu, voicemail transcription and click-to-call) and AI agents on voice are part of Engage Plus. Calls and AI-answered calls are charged by usage, and AI agents use credits — see Engage Plus: Pricing, Features, and Credits Explained or your account manager for the rates.
Related Articles
We suggest reading our How to Make and Receive Calls in Engage article next.
Was this guide helpful? Let us know by voting below - your feedback helps us write clearer articles.
For more guides, browse the related articles below or use the search bar at the top of the page. You can also watch our video learning series, the Pabau Academy, or visit the Support page for additional help.