
NOTE: This guide covers the new Online Bookings and Client Portal, which are being rolled out to clinics in phases. If your screens look different, your account may still be on the classic version — message us via the in-app chat and we will help.
In this article, you will learn what clients can buy in your online store, what decides whether each item appears, and how to design the store pages.
What Is the Online Store?
Your booking page includes a store with four tabs — Memberships, Packages, Shop and Gift Card. Clients reach it from the menu at the top of your booking page. A tab only appears when you have something to sell in it.
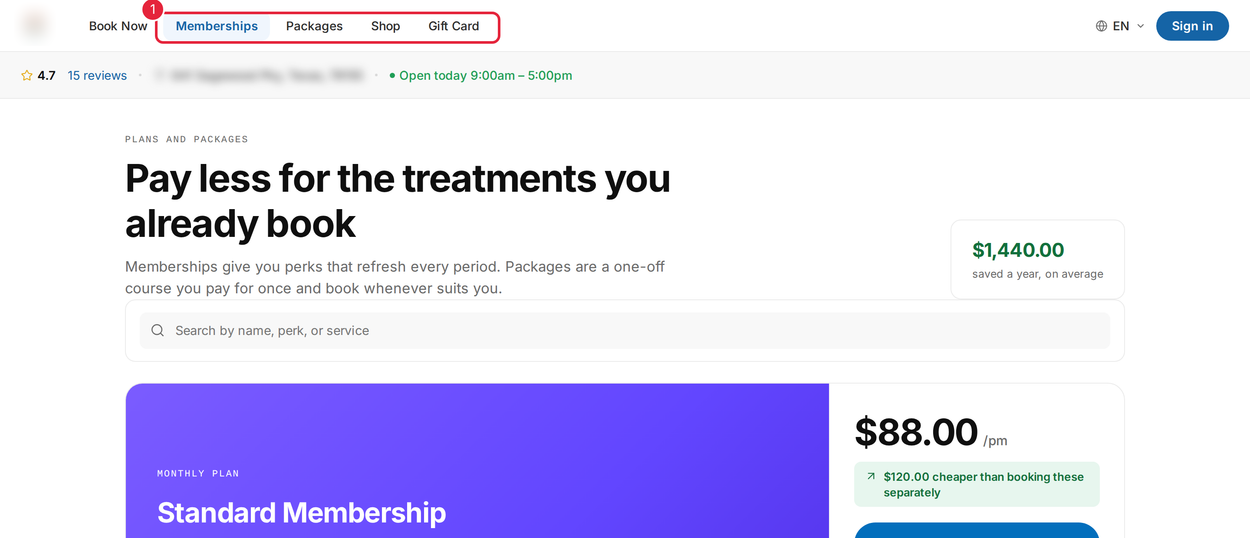
The store tabs at the top of your booking page
Step 1: Make Sure Each Item Is Available Online
| Tab | What appears | What decides it |
|---|---|---|
| Memberships | Active membership plans you offer online, with their perks, billing cycle and any joining fee. | The plan is active and set to be bought online. |
| Packages | Active packages you sell online, with the number of sessions and the saving against booking separately. | The package is set to be sold online, and Packages is enabled in Setup ▸ Online presence ▸ Client Portal. |
| Shop | Active products you show on your website, with stock for the chosen location. | The product is active and shown on the website. |
| Gift Card | Your online gift card designs. Clients choose an amount, a design, who it is for and how it is delivered. | At least one online gift voucher template (see How to Create Gift Vouchers), and Vouchers enabled in Client Portal. |
NOTE: Clients must sign in to buy anything in the store. If you have more than one location, clients choose the location they are buying from; stock is checked and the payment is taken for that location.
Step 2: Design the Store Pages
Open Online Bookings, click Customise page and then Edit (see Part 2).
- Choose Memberships, Packages, Shop or Gift Card from the Storefront strip.
- Hover a section and click its label — for example Membership plans on the Memberships page.
- Change the settings on the right. On the Memberships page, for example, you can choose the Card style, Feature a plan, show the search box or the monthly / annual chips, set the Plans per row and the colours, Show the yearly total or Hide the pence.
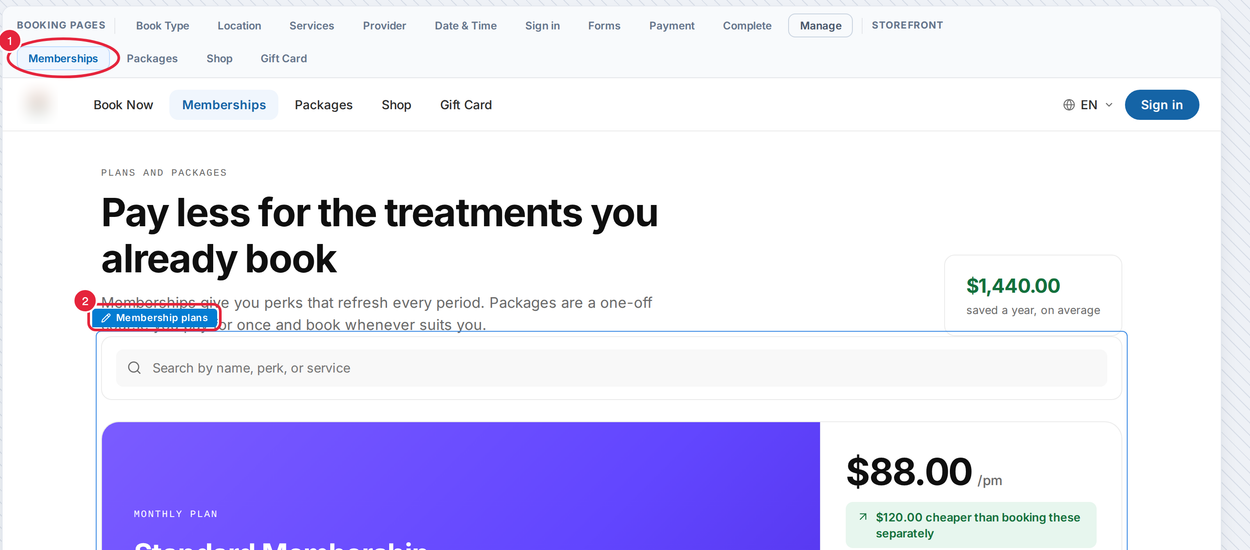
Choose a store page (1) and click a section label (2)
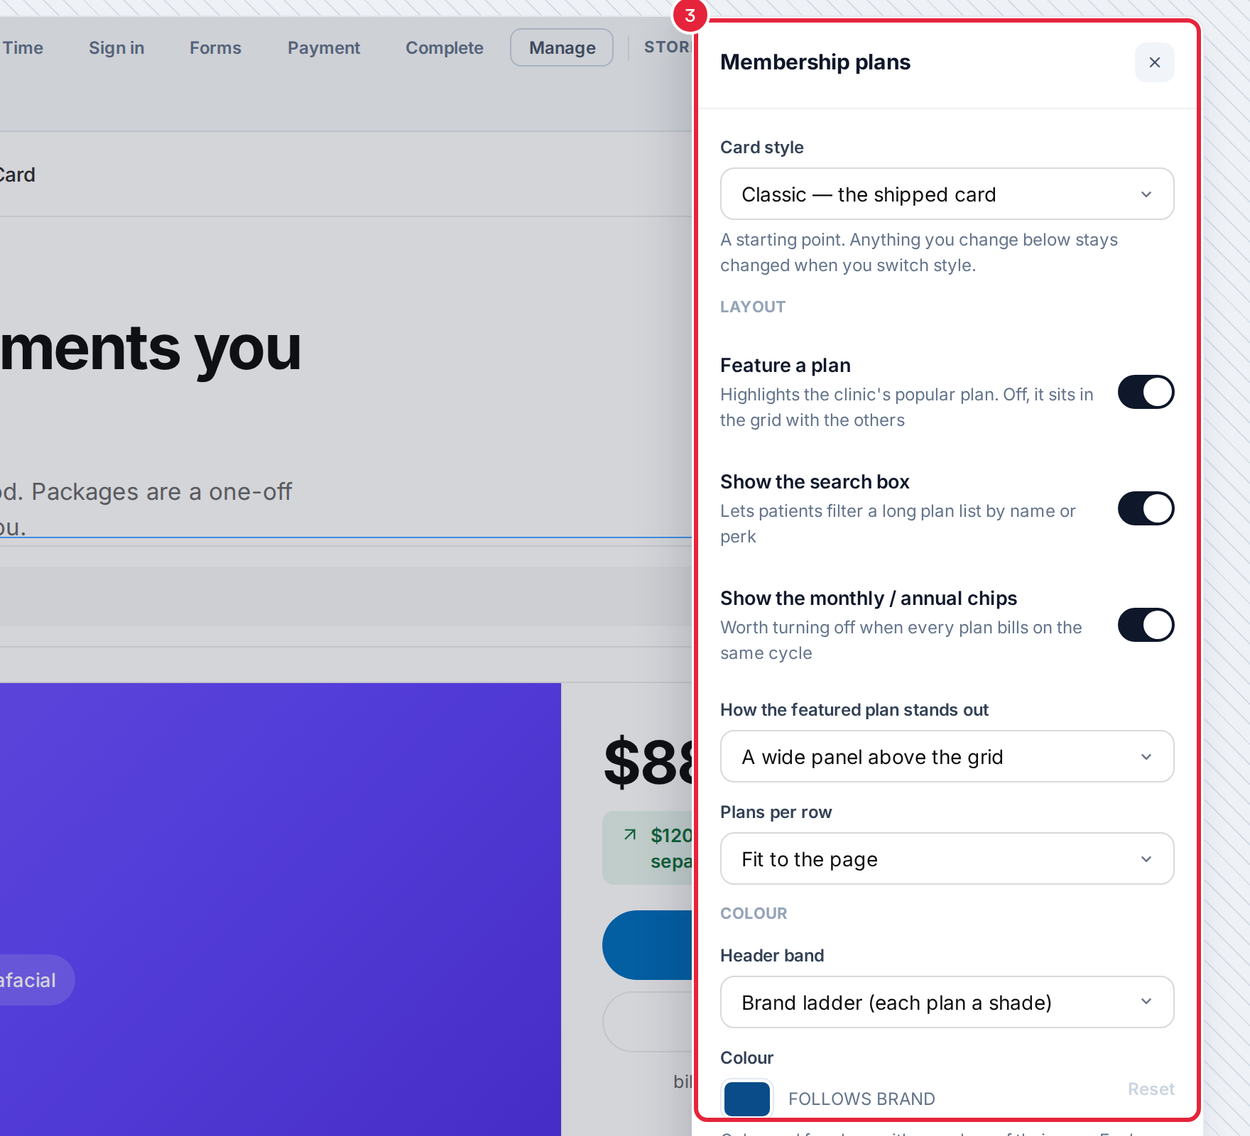
The Membership plans settings (3)
On the Shop page you pick the products to show, and the Packages page has its own layout, card and colour settings. Click Publish when you are done.
TIP: To keep a tab off your booking site without changing the items themselves, open the Header section in Studio and switch it off under Storefront.
Step 3: Know What Clients Pay
- Memberships — the first payment (and any joining fee) is taken when the client subscribes. The card is saved for renewals, which happen automatically on the billing date. Memberships are paid separately from anything else in the basket.
- Packages — paid in full at checkout. Clients can book their first session at checkout, or later from their account.
- Gift cards — clients pick one of the set amounts or their own. The card is emailed to the recipient or to the buyer.
- Clients can enter a gift card code or a promo code at checkout. Promo codes come from Setup ▸ Discounts — see How to Create and Manage Promo Codes for Online Bookings and Part 4.
What's next?
Send your clients How to Buy a Membership, Package or Gift Card Online (New Online Store). For payments and deposits, see Part 4: Take Payments and Deposits Online. For the whole set-up, start at Getting Started with the New Online Bookings and Client Portal.
Questions? Reach us any time via the in-app chat — we’re happy to help.
Was this guide helpful? Let us know by voting below - your feedback helps us write clearer articles.
For more guides, browse the related articles below or use the search bar at the top of the page. You can also watch our video learning series, the Pabau Academy, or visit the Support page for additional help.