
Step 1: Navigate to Gift Cards
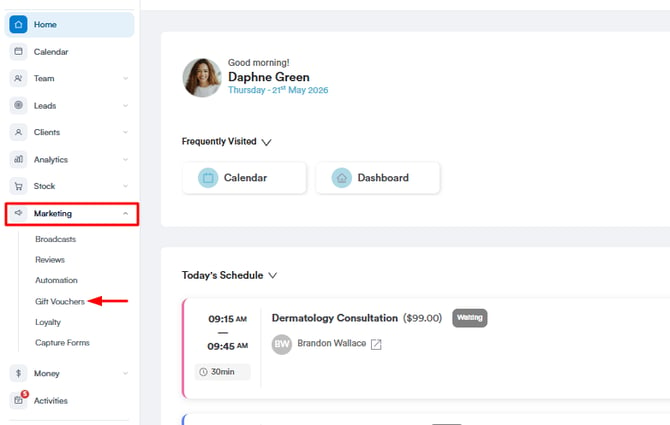
Log in to your Pabau account, and in the left sidebar menu, go to Marketing, then click on Gift Cards.
Step 2: Create a Gift Card
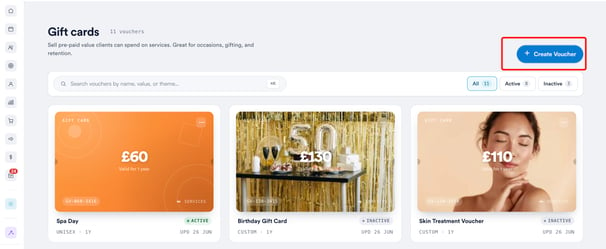
Click on "Create Voucher" to initiate the gift card creation process.
-
Set the card name
Choose a name for the card so it’s easy to recognize and market (e.g., “Birthday Treat Card” or “Luxury Facial Gift”). -
Set the terms and conditions
Define any rules around how the card can be used - such as expiry dates, usage limits, or exclusions (e.g., “Non-refundable” or “Cannot be combined with other offers”). -
Set the purchase price and card value
Set two amounts: the purchase price, which is what the client pays at checkout, and the gift card value, which is the amount loaded onto the card for the recipient to redeem. These can be the same or different if the purchase price is set lower than the card value. The card value determines what the recipient can redeem it for. -
Set the card validity
Choose how long the card will remain valid after it’s issued (e.g., 6 months, 1 year).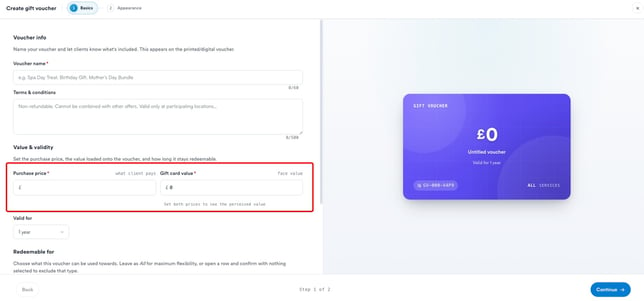
-
Specify what the card can be redeemed for
Under Redeemable for, decide what the card can be used towards across services, products, and packages. For each category, you can allow everything by leaving it set to All, narrow it down to specific items (e.g., selected facials or chosen retail products), or exclude that category entirely.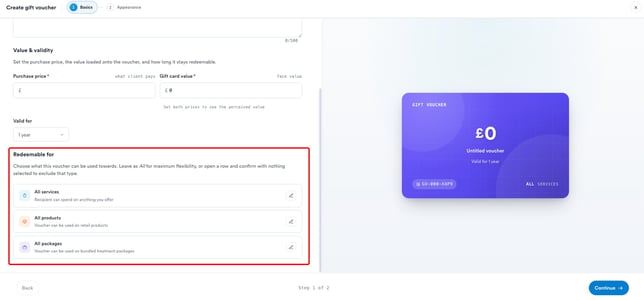
-
Preview changes to the name and value in the centre of the screen
As you update the name and value, a preview will appear in the middle of the screen so you can see how the card will look before saving it.
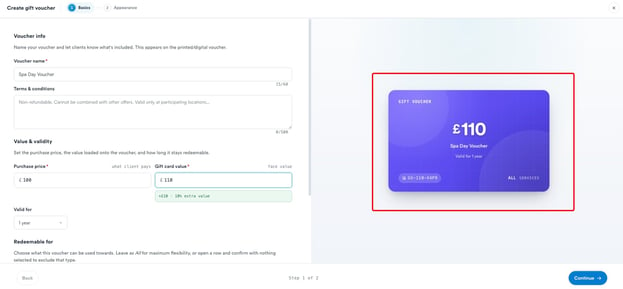
To customize the appearance of your gift card, head to the next step by clicking the “Continue” button in the bottom-right corner of the screen.
Step 3: Set Up Appearance and Behaviour
In the Appearance step, a live preview of the card appears on the right as you make changes.
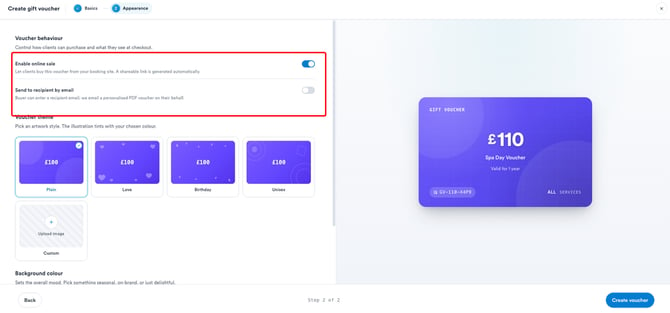
Voucher behaviour
Control how clients can purchase the card and what they see at checkout, using two toggles:
- ✅ Enable online sale - Let clients buy this card from your booking site. A shareable link is generated automatically.
- 📧 Send to recipient by email - The buyer can enter a recipient's email, and Pabau emails a personalised PDF card to them on the buyer's behalf.
Voucher theme
Pick an artwork style - Plain, Love, Birthday, or Unisex. 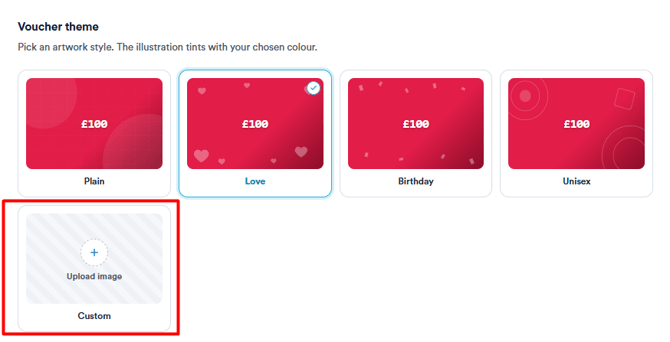
To use your own artwork instead, select Custom and upload an image ((Marketing Plus feature).
NOTE: To learn more, refer to our Marketing Plus guide.
Background colour
Choose a background colour to set the overall look based on your preference.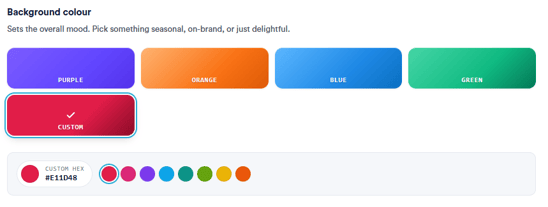
Step 4: Create the Card
Once you're happy with the preview, click Create voucher in the bottom-right corner to save it.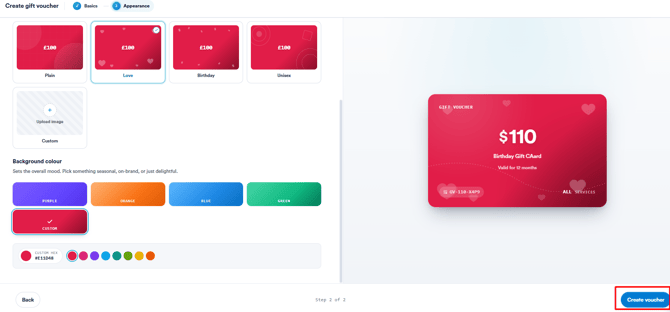
NOTE: You can also learn about this topic by watching a lesson on Pabau Academy.
In addition, we suggest reading our Gift Cards article for a more in-depth exploration of this topic.
For more guides, refer to related articles below, select additional guides, or use the search bar at the top of the page. These guides will help you get the most out of your Pabau account.
Additionally, to help you fully utilize and understand your Pabau account, we recommend exploring additional guides and resources offered at the Pabau Academy. It offers in-depth video tutorials and lessons, offering a holistic learning experience that can equip you with the essential skills for achieving success with Pabau.