
Table of Contents:
1. How to Create a Package
2. How to Find a Package
3. How to Edit a Package
4. How to Delete a Package
5. How to Sell a Package in the Point of Sale
6. How to Book an Appointment From a Package
7. How to Use a Package to Pay for an Appointment
8. How to Enable Online Sale of Packages
How to Create a Package
Packages in Pabau allow you to bundle multiple sessions of the same service, providing an opportunity for clients to enjoy a set of sessions, usually at a discounted price. Follow these steps to create a package:
Step 1: Navigate to Packages
Log in to your Pabau account, and in the left sidebar menu, go to Setup, then click on "Packages" under the "Catalogue" section.
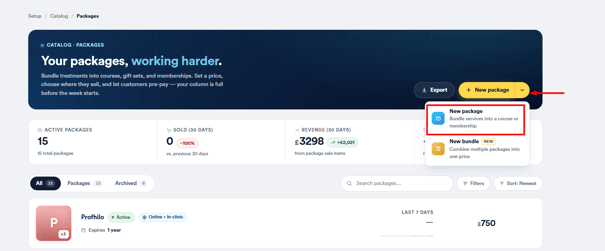
Step 2: Access New Package
On the "Packages" page, click the New Package button in the top right corner. (The button's dropdown also includes a New Bundle option.)
Step 3: Set the General Tab
The General tab covers the package's core details across three sections: Package Details, What's in this Package, and Validity Period.
1. Package Details
-
Enter a Package Name for internal reference and a Package Friendly Name, the name customers see online.
-
In the "Description" field, write a short summary of the package, or click "Generate with AI" to create one automatically, which you can then edit.
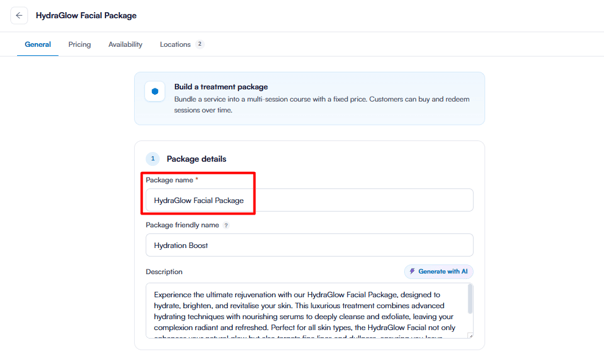
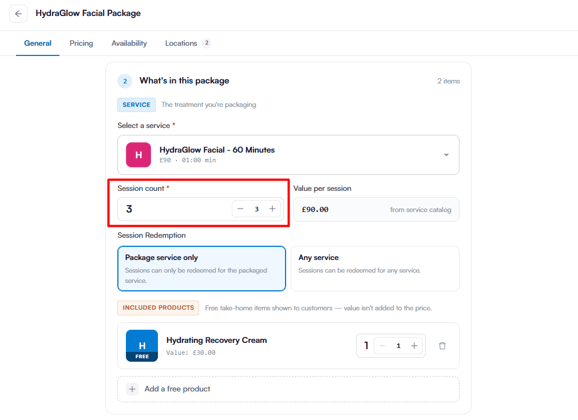
2. What's in this Package
- Select a Service: Choose the service this package covers.
- Session Count: Specify the total number of sessions included in the package.
- Value per Session: Pulled automatically from your service catalogue.
- Session Redemption: Choose "Package Service Only" so sessions apply only to the selected service, or "Any Service" so they can be redeemed against any service.
- Included Products: Optionally add free take-home items shown to customers. Their value isn't added to the package price.
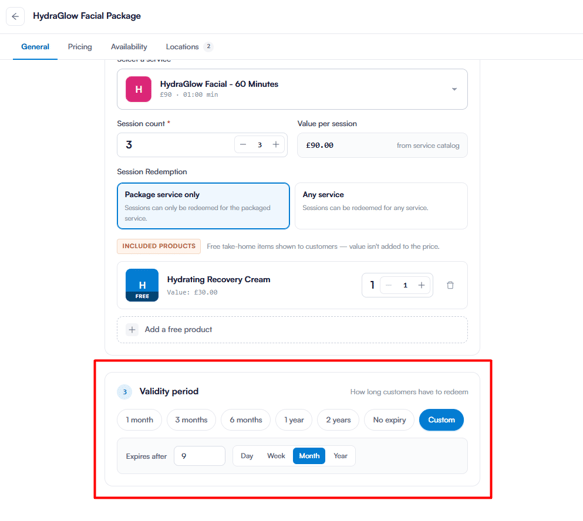
3. Validity Period
- Validity Period: Set how long customers have to redeem their sessions. Choose a preset (1 month, 3 months, 6 months, 1 year, 2 years, or No expiry), or set a custom duration by day, week, month, or year.
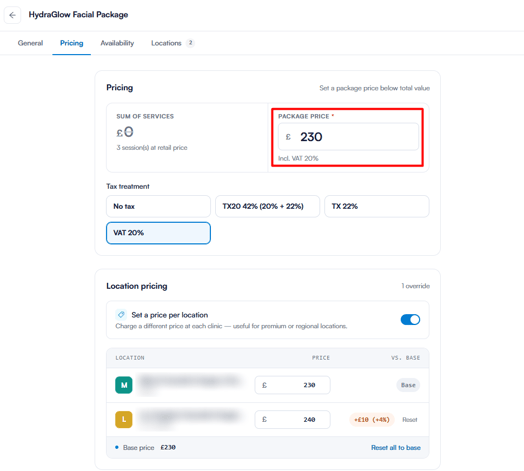
Step 3: Set the Pricing Tab
Switch to the Pricing tab to set what customers pay.
- Package Price: Set the price customers pay. Enter it below the combined retail value of the services to create a saving; the percentage saving is calculated automatically.
- Tax Treatment: Choose the applicable tax for the package.
- Location Pricing: Turn on the "Set a price per location" toggle to charge a different price at individual clinics. Enter a price for each location; any location you don't override keeps the base price, and all can be reset to base at once.
Step 4: Set the Availability Tab
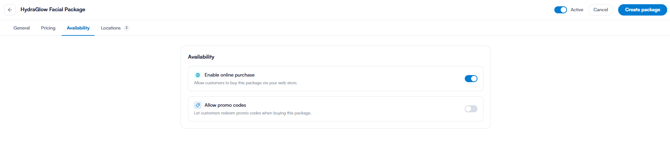
Switch to the Availability tab to control how customers can buy the package.
- Enable Online Purchase: Makes the package available to buy on your web store.
- Allow Promo Codes: Lets customers apply promotional codes at checkout.
Step 5: Set the Locations Tab
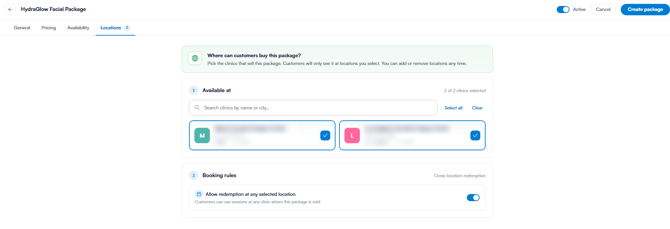
Switch to the Locations tab to control where the package is sold.
- Available at: Select which clinics sell the package. Customers only see it at the locations you choose.
- Booking Rules: Turn on the "Allow redemption at any selected location" toggle to let customers redeem their sessions at any clinic where the package is sold.
Step 6: Activate and Create the Package
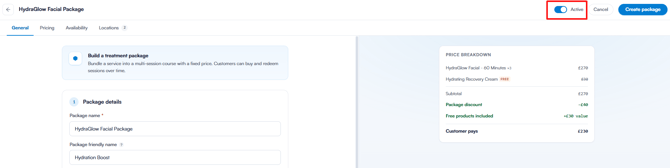
Make sure the Active toggle in the top right corner is enabled. Use the Price Breakdown on the right to confirm the service total, any included free products, the package discount, and the final price customers pay.
When you're ready, click the "Create Package" button in the top right corner to save it.
NOTE: To combine several packages into one offering, read our How to Create a Bundle article.
How to Find a Package
The Packages page lists every package and bundle you've created. As your list grows, use the tabs, the service category strip, the location picker, search and sort to get to the one you need.
Step 1: Open Packages and Choose a Tab
- Go to Setup, then click Packages under Catalogue.
- Choose a tab above the list. The number beside each tab shows how many items it holds:
- All: your active packages and bundles together.
- Packages: active packages only.
- Bundles: active bundles only (shown when your clinic uses bundles).
- Archived: packages and bundles that are no longer active.
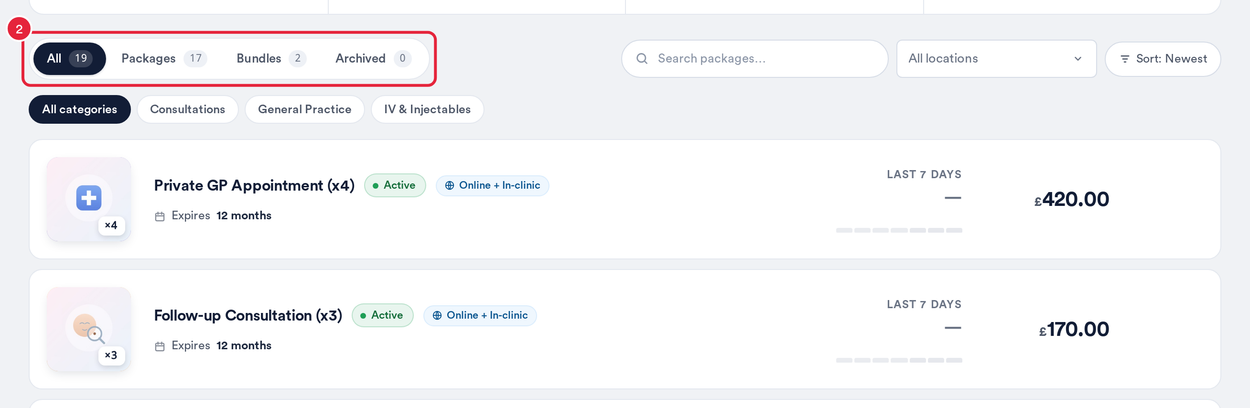
The tabs at the top of the package list
Each row shows the package's picture, whether it's Active, where it sells (Online + In-clinic or In-clinic only), when it expires and its price. Click a row to open the package.
Step 2: Filter by Service Category
- Click a category in the strip under the tabs. The list then shows only packages for services in that category. A bundle is shown when any package inside it belongs to the category.
- If your categories don't fit on one line, use the arrows at either end of the strip to scroll left or right.
- Click All categories to show everything again.
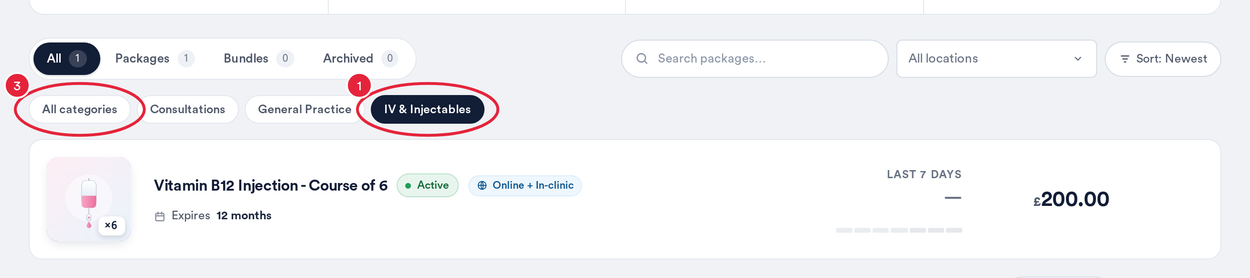
Pick a category to filter the list; All categories clears it
NOTE: The strip only lists service categories that hold at least one package.
Step 3: Filter by Location
- Click All locations.
- Type in Search locations… to find a clinic quickly.
- Tick one or more locations. The list shows the packages sold at those locations.
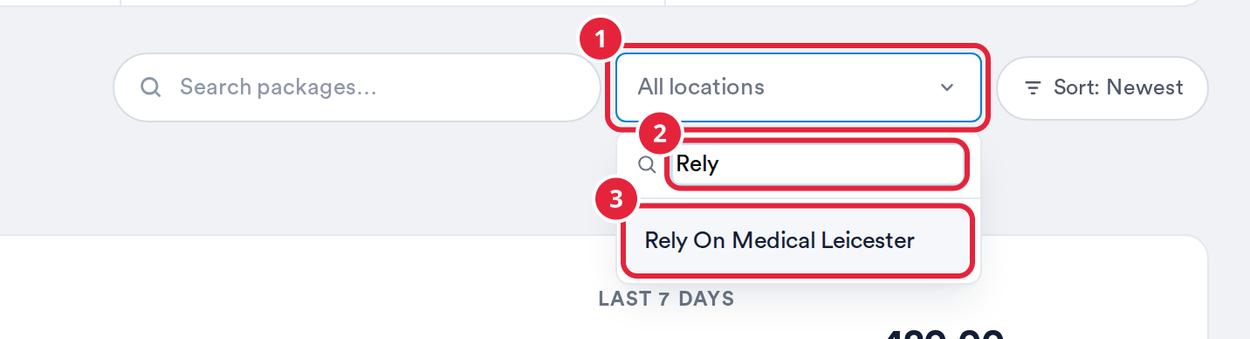
Search for and tick the locations to show
TIP: A package that isn't limited to particular locations is sold everywhere, so it stays in the list whichever location you pick. To clear the filter, untick every location.
Step 4: Search and Sort
- Type part of a package or bundle name in Search packages….
- Click Sort: Newest and choose Newest, Name A→Z, Price (high → low) or Price (low → high).
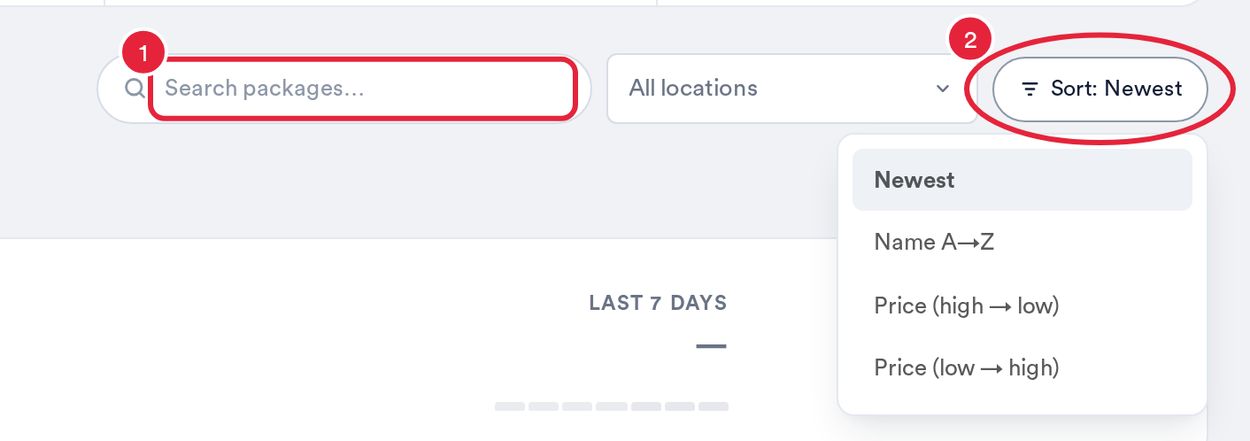
Search by name and change the order of the list
The tabs, category, location and search all work together, and the counts on the tabs update to match. For example, you can search within one category at one location.
How to Edit a Package
In this section, you'll learn how to update an existing package. Editing uses the same four-tab builder as creating a package, so you can adjust any detail at any time.
Step 1: Navigate to Packages
Log in to your Pabau account, and in the left sidebar menu, go to Setup, then click on "Packages" under the "Catalogue" section.
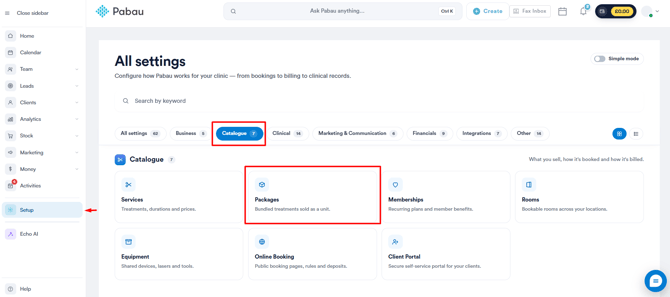
Step 2: Access the Package
On the "Packages" page, click on the name of the package you wish to edit.
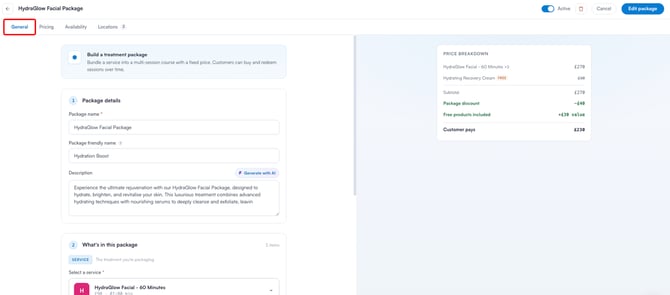
Step 3: Edit the General Tab
- Package Name: Change the package's internal name.
- Package Friendly Name: Update the name customers see online.
- Description: Update or add a description, or regenerate one with "Generate with AI".
- Service: Modify the service included in the package.
- Session Count: Adjust the total number of sessions.
- Session Redemption: Switch between "Package Service Only" and "Any Service".
- Included Products: Add or remove free take-home items.
- Validity Period: Change how long customers have to redeem their sessions.
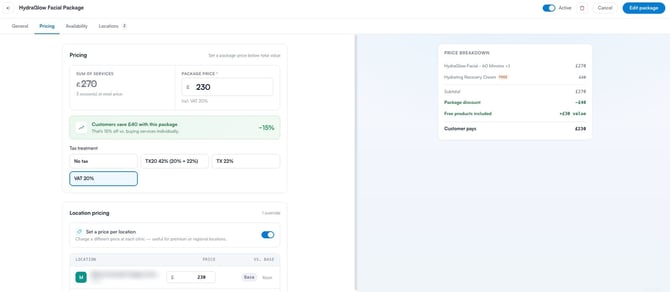
Step 3: Edit the Pricing Tab
- Package Price: Update the price customers pay.
- Tax Treatment: Change the tax applied to the package.
- Location Pricing: Set, update, or remove a different price per clinic.
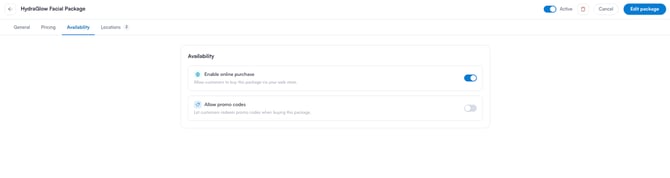
Step 4: Edit the Availability Tab
- Enable Online Purchase: Toggle whether the package can be bought on your online booking portal
- Allow Promo Codes: Toggle whether customers can apply promo codes at checkout.
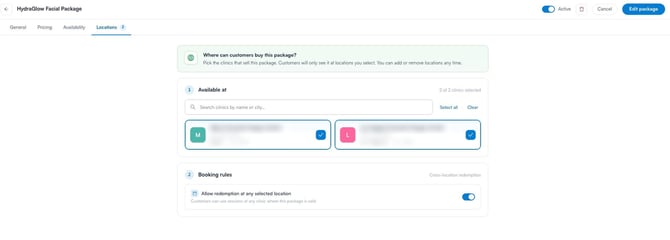
Step 5: Edit the Locations Tab
- Available at: Select which clinics sell the package.
- Booking Rules: Turn on the "Allow redemption at any selected location" toggle to let customers redeem their sessions at any clinic where the package is sold.
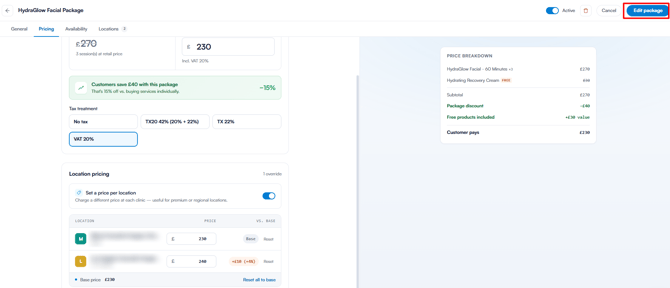
Step 6: Save Your Changes
Make sure the Active toggle in the top right corner is enabled, then click the "Edit Package" button in the top right corner to save your changes.
How to Delete a Package
In this article, we'll walk you through the steps to delete a package in Pabau. If you no longer offer a specific package, follow these steps:
Step 1: Navigate to Packages
Log in to your Pabau account, and in the left sidebar menu, go to Setup, then click on "Packages" under the "Catalogue" section.
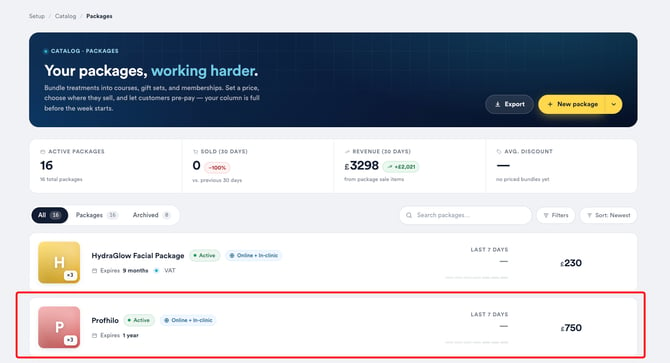
Step 2: Access the Package
In the "Packages" page, locate and click on the package you want to delete.
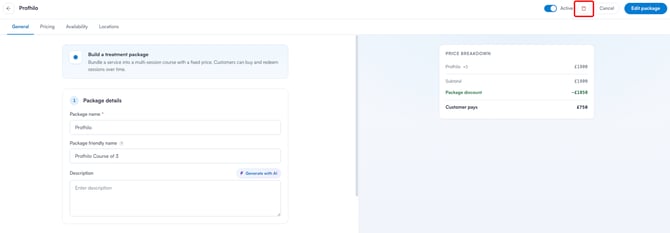
Step 3: Disable the Active Toggle
In the top right corner, click the Delete button, right next to the 'Active' toggle.
Step 4: Delete the Package
Click on "Delete," and in the prompt, confirm your decision by clicking on "Yes, Delete."
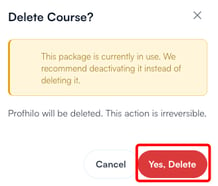
NOTE: Deleting a package will remove it from your package list, however, any existing clients with this package will still be able to use their remaining sessions.
How to Sell a Package in the Point of Sale
In this section, you'll learn how to sell a package or bundle to a client through the Point of Sale.
Step 1: Log into Pabau and Access Point of Sale
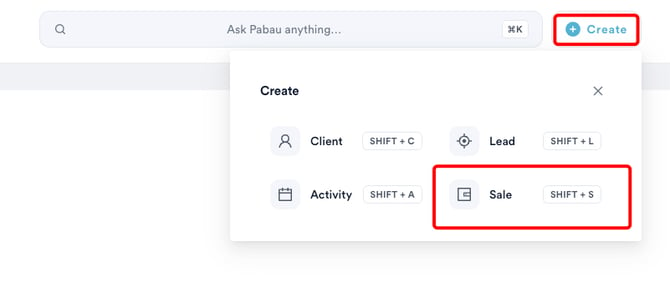
Log in to your Pabau account, click on the "Create" button at the top of the page, and then select "Sale" from the dropdown menu to access the Point of Sale.
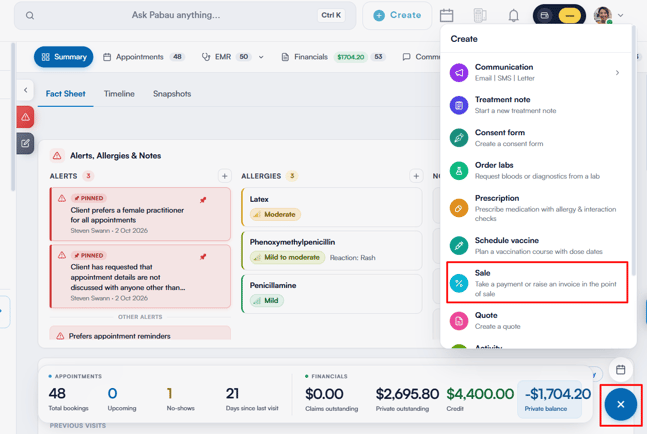
Alternatively, open the client card of the client you want to sell a package to, click on the plus sign in the bottom right corner, and choose "Sale". This will also lead you to the Point of Sale.
Step 2: Choose the Client and Access Packages
In the Point of Sale, select the client (automatically pre-populated if accessed from a client card). Click on "Packages" to view available packages and bundles.
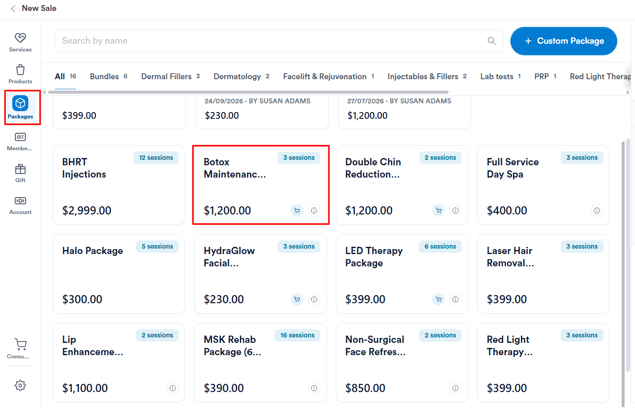
Packages are organized into per-category tabs alongside an "All" tab, and a separate "Bundles" tab lists your bundles. Use the search bar to find a package or bundle by name. Each card shows the number of sessions and the price; hover over a card to see the description and when it was last sold.
Choose the desired package you want to sell to the client. Click on "Continue" in the bottom right corner to proceed.
NOTE: To build a one-off package on the spot, click "+ Custom Package". To read more, see How to Sell Custom Packages.
Step 3: Complete the Transaction
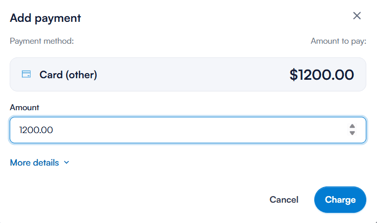
- Choose the preferred payment method.
- Click on "Charge" in the Add Payment menu.
- Confirm the payment by clicking on "Confirm Payment."
Step 4: Review in Client Card
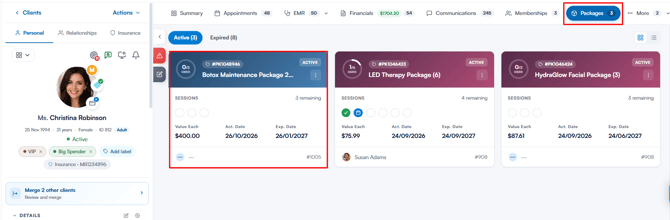
The sold package will be visible in the client card under "Packages." From here, you can monitor the remaining sessions the client has left.
How to Book an Appointment From a Package
Step 1: Navigate to the Calendar
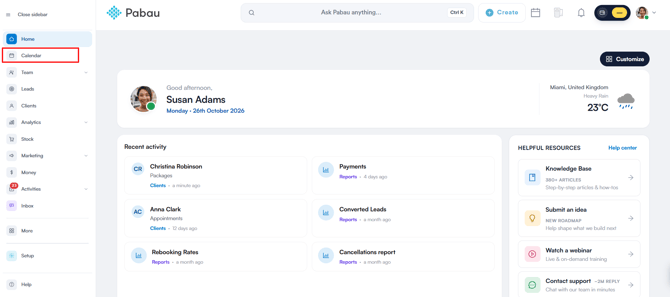
Log in to your Pabau account, and in the left sidebar menu, click on Calendar.
Step 2: Choose the Desired Timeslot
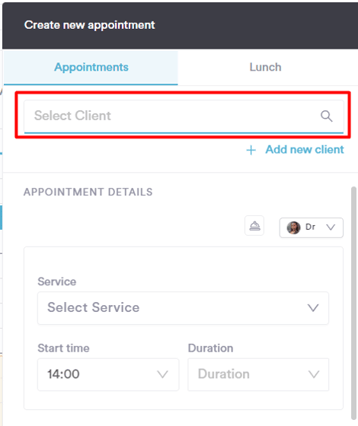
Select the timeslot where you intend to book an appointment, then search for the client to whom you've previously sold a package by using the client search bar.
Step 3: Select the Package
After clicking on the client's name, a "Book from package" section will appear in the "Book appointment" window. Click on the name of the package. This action will automatically fill out the service name in the Service field.
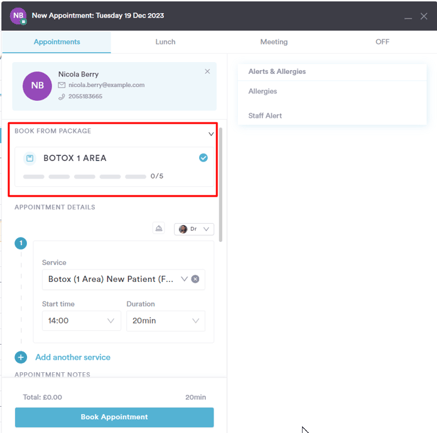
Step 4: Add Appointment Details and Confirm the Booking
Input appointment notes and choose notification preferences and click on "Book Appointment" to complete the booking.
How to Use a Package to Pay for an Appointment
Step 1: Navigate to Calendar
Log in to your Pabau account, and in the left sidebar menu, click on Calendar.
Step 2: Access Appointment Checkout
Click on the specific appointment you want to check out, then select "Checkout."
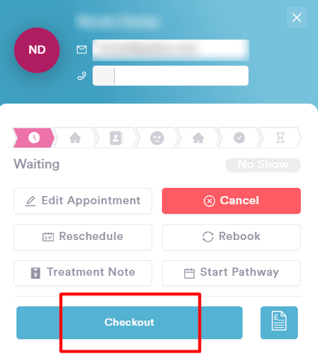
Step 3: Navigate through Point of Sale
In the Point of Sale screen, click "Continue" in the bottom-right corner to proceed.
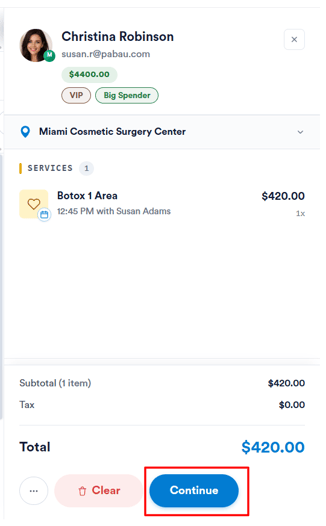
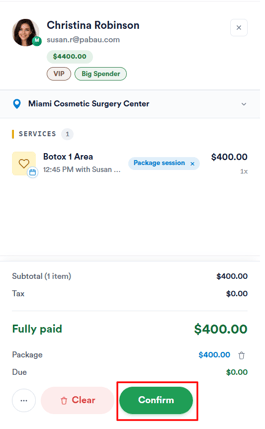
On the payment step, select the "Packages" tab and choose the client's package. One session is then applied to the invoice.
Sessions apply automatically when the appointment matches the package's service; for packages set to "Any Service", you can apply a session to any service.
NOTE: The Packages tab is only available when the client has a valid, active package. If a package is set to "Package Service Only" and the cart contains items it doesn't cover, the system won't let you apply a session to those items.
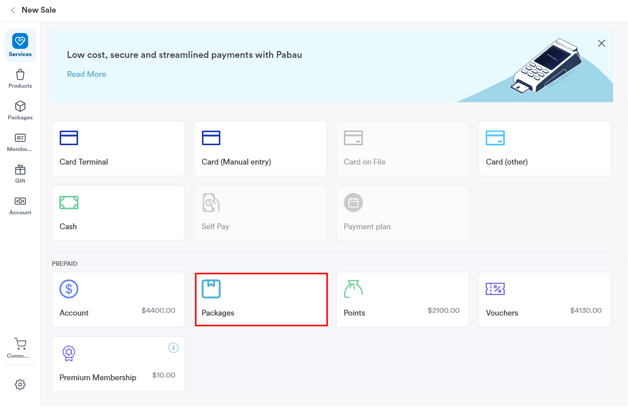
Click "Confirm Payment" to complete the checkout.
NOTE: The Packages tab is only available when the client has a valid, active package. If a package is set to "Package Service Only" and the cart contains items it doesn't cover, the system won't let you apply a session to those items.
Step 4: Apply Package Session
By selecting the appropriate package, one of the client's package sessions will be applied to the invoice. Click "Confirm Payment" to complete the checkout process.
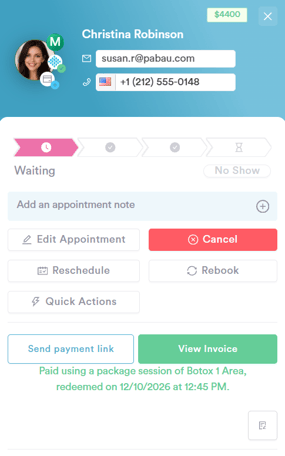
The appointment has now been successfully checked out using a package session. You can find detailed information by right-clicking on the appointment.
Why isn't a client's package offered when I book or check out?
Pabau only offers a client's package for a service when all of these are true:
- The package covers that service. A package pays for the service(s) set on it in Setup → Packages. If the package is set to redeem against any service, it is offered on every service instead.
- The package hasn't expired. A package past its expiry date is shown as expired and isn't offered. To give the client more time, extend the package's duration from the client card.
- It has sessions left. Redeemed sessions, sessions refunded back to the client and upcoming appointments already booked against the package all count as used.
- The service itself can be booked. The service must be active, its category must not be disabled, and it must not be set as sell-only. A class doesn't appear in the appointment service list.
- The service is available to the staff member. When you list only the staff member's own services, a service they are disabled for, or one that isn't allowed on their shift, doesn't appear. Check the service's staff settings and the staff member's shift, or switch the list to show all services.
If the client holds more than one package for the same service, the oldest one with sessions left is used first.
NOTE: A covered service doesn't use the package automatically when you book it. Choose to use the package on the appointment, otherwise it books as a normal paid appointment.
Where this comes from: the client's packages (client card → packages), each package's services and expiry (Setup → Packages), and the service's status and staff settings (Setup → Services).
How to Enable Online Sale of Packages
Step 1: Check Where Packages Appear Online
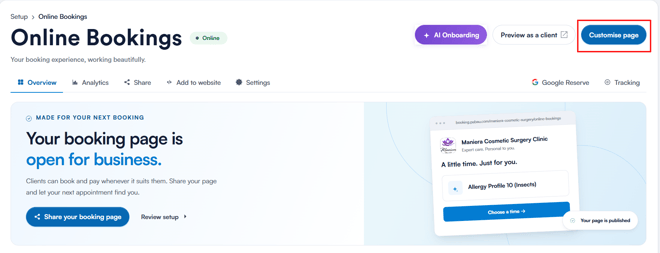
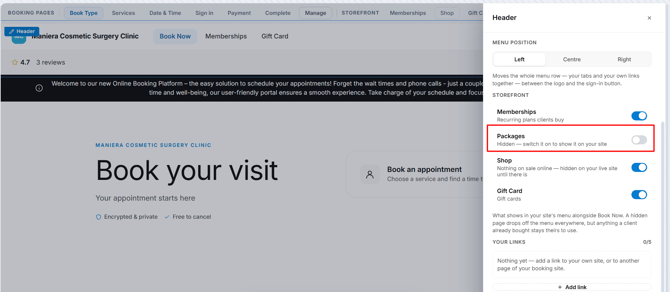
Clients buy packages on the Packages tab of your booking page’s online store. The tab appears as soon as you have an active package that is set to be sold online (Step 3) — there is no separate setting to switch on. To keep the tab off your booking site without changing the packages, switch Packages off under Storefront in the Header section of Pabau Studio. See How to Sell Memberships, Packages, Products and Gift Cards in Your Online Store.
Step 2: Connect Stripe
Packages are paid in full at checkout, so online sales need a connected payment processor. See New Online Bookings Part 4: Take Payments and Deposits Online.
NOTE: Packages are available for online purchase only if your Pabau account is integrated with Stripe.
Step 3: Enable Packages for Online Purchase
In the left sidebar menu, click on Setup, then select Packages under "Catalogue".
Click the name of the package you want to sell online, switch to the Availability tab, and turn on the "Enable online purchase" toggle.
To let clients use promotional codes, also turn on "Allow promo codes".
Click the "Edit Package" button in the top right corner to save.
Make any other necessary changes, and finally, click "Save" in the top-right corner.
Now, this package will be shown on the Packages tab of your online store. If you've created multiple packages for the same service but with varying numbers of sessions, clients will have the option to choose how many sessions they wish to buy.
Was this guide helpful? Let us know by voting below - your feedback helps us write clearer articles.
For more guides, browse the related articles below or use the search bar at the top of the page. You can also watch our video learning series, the Pabau Academy, or visit the Support page for additional help.