
The new calendar keeps everything you use every day in one slim bar at the top: a date navigator with quick jumps, the Day, Week and Month views, and a single More menu for everything else. This guide walks you round it so you can find your way quickly.
NOTE: This feature is being rolled out to clinics gradually. If you don't see it in your account yet, message us via the in-app chat.
TIP: If your calendar shows a Try the new calendar button, click it to switch to the new calendar. Back to the classic calendar switches you back. The choice only applies to the browser you are using, so your colleagues are not affected.
Step 1: Open the Calendar
In the left sidebar menu, click Calendar. The bar across the top holds:
- Filters opens the filters panel so you can choose which locations, staff, services and appointments you see. Below it, Scheduler opens the staff rota on the same date.
- The Privacy switch hides client details on the calendar, for example when a screen faces the waiting room.
- The date navigator moves you between dates (see Step 2).
- The More menu (three dots) holds the less-used options (see Step 6). The gear icon beside it opens Calendar settings.
- Day, Week and Month switch the view.

Everything you need sits in one bar above the staff columns
Step 2: Move Between Dates
The arrows either side of the date move you along: the single arrows go back or forward one day (one month in Month view) and the double arrows jump a whole week.
- Click the date itself to go straight back to today (Go to Today). Hover over it to open a two-month calendar and click any day to open it.
- Click a month name, such as October 2026, to switch the panel to a different month and year, then click a day in it.
- Use the In 1 week to In 5 weeks buttons to jump ahead, for example when a client asks for a follow-up in four weeks.
- Click More for longer jumps: In 3 months, In 6 months or In 12 months.
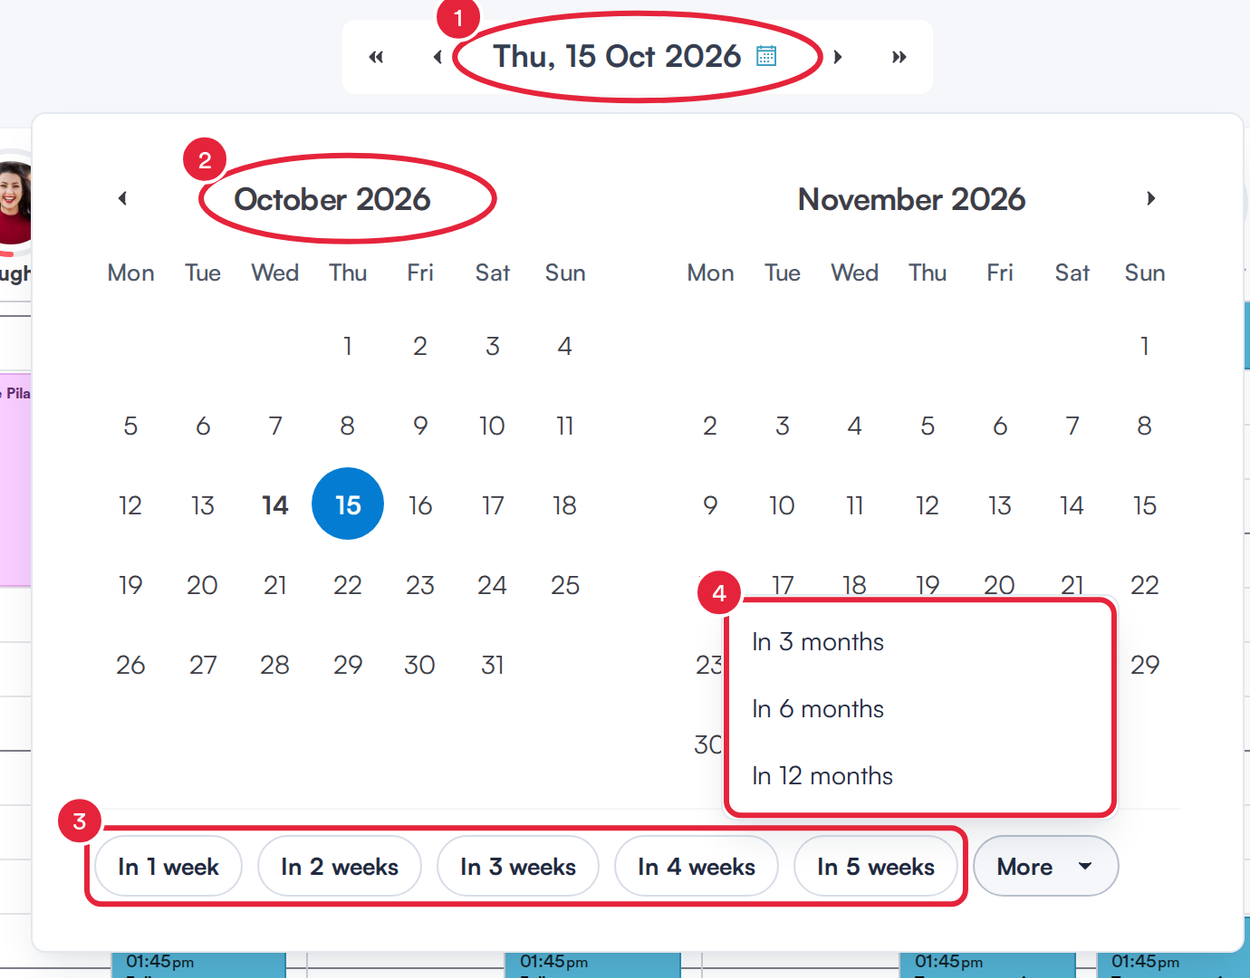
Hover over the date to open the date panel
Jumps always count from the date you are viewing, not from today. Your admin can change which week and month jumps appear in Calendar settings under General > Date quick-jumps.
Step 3: Switch Between Day, Week and Month
Click Day, Week or Month at the top right. In Week view, click a day's date heading to open that day in Day view.
Step 4: Open a Staff Member's Menu
In Day view, each column starts with the staff member's photo and name. The coloured ring around the photo shows how busy they are that day.
- Click the photo to open that person's week.
- Click their name (or the small arrow next to it) to open their menu.
- Choose 3 day view, Week view or Month view to see only this person's diary.
- Under Actions, click Add a day note (or Edit a day note) to leave a note on their day, or Edit [time] schedule to change the shift that starts at that time.
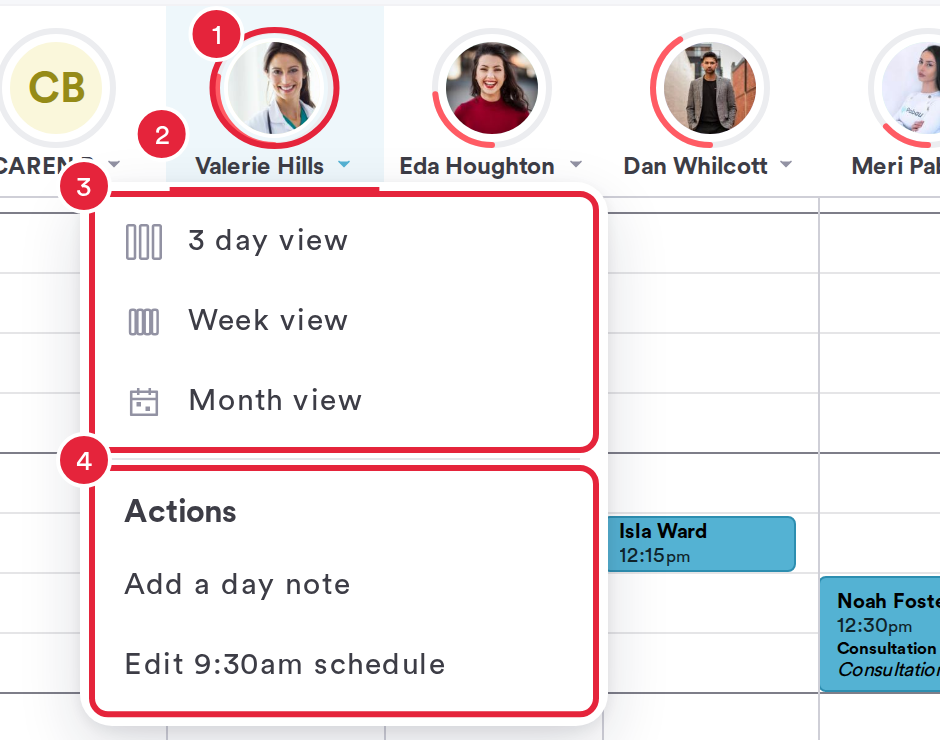
Each staff member has their own menu
Step 5: Focus on One Person
When you open one person's 3 day view, week or month, the calendar shows only their diary:
- In the 3 day view, the single arrows move three days at a time (Previous 3 days and Next 3 days). The double arrows still move a week.
- To look at someone else, click the staff member's name at the top right, then type in Search staff or pick a name from the list.
- Click Show everyone to go back to the whole team.
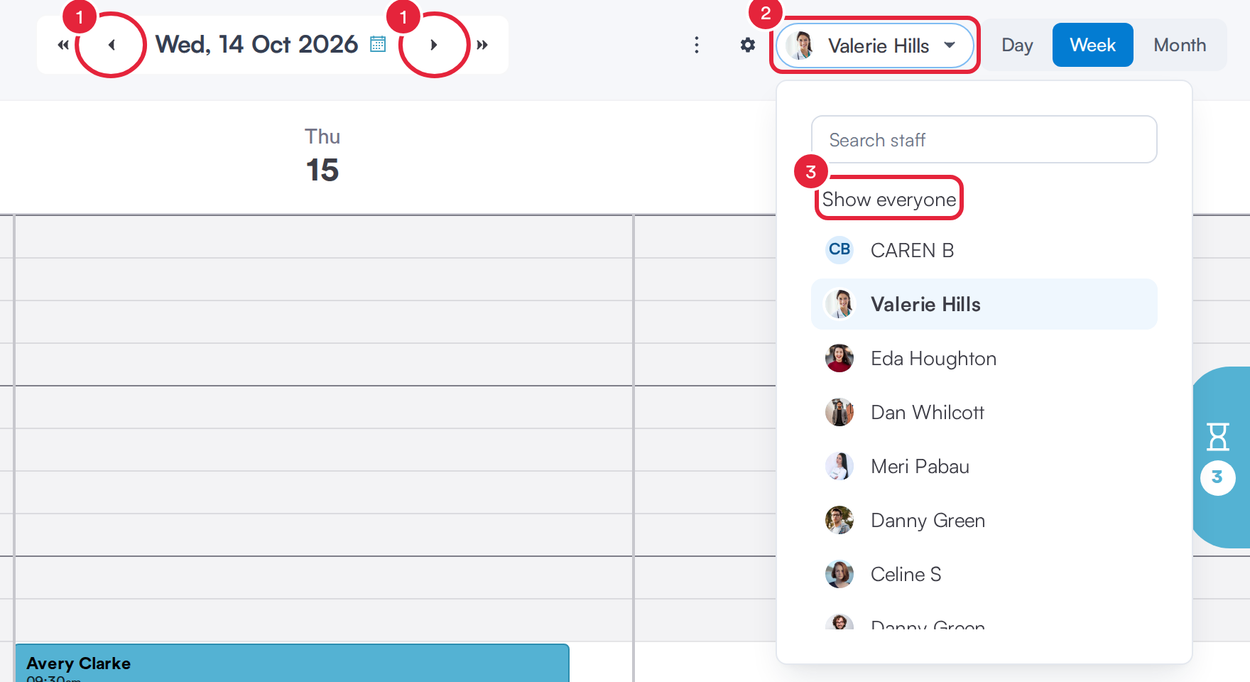
Switch person or go back to everyone from the staff picker
Step 6: Use the More Menu
Click the three dots (More) to open the rest of the calendar's options:
- Working days only (Week view) hides the days when none of the staff you are viewing has a shift.
- Show cancelled shows cancelled appointments in Day and Week view. A tick means it is on.
- Book by employee and Book by resource switch the columns between staff and your rooms or equipment. You only see these if your clinic has resources set up.
- Activity (Day view) switches to the activities view. Click Calendar in the same menu to come back.
- View appointment schedule lists the day's appointments by confirmation status: Unconfirmed, Waiting on Reply, Replied No, Confirmed and Unable to Contact.
- Fullscreen hides the rest of Pabau so the calendar fills the screen.
- Legend explains the icons on appointments.
- Clinic List opens the clinic list so you can print or share the day's appointments.
- Lock Screen locks the calendar until someone enters their passcode. It is greyed out until you set up a passcode. The keyboard shortcut is Shift+Alt+L (Option+Shift+L on a Mac).
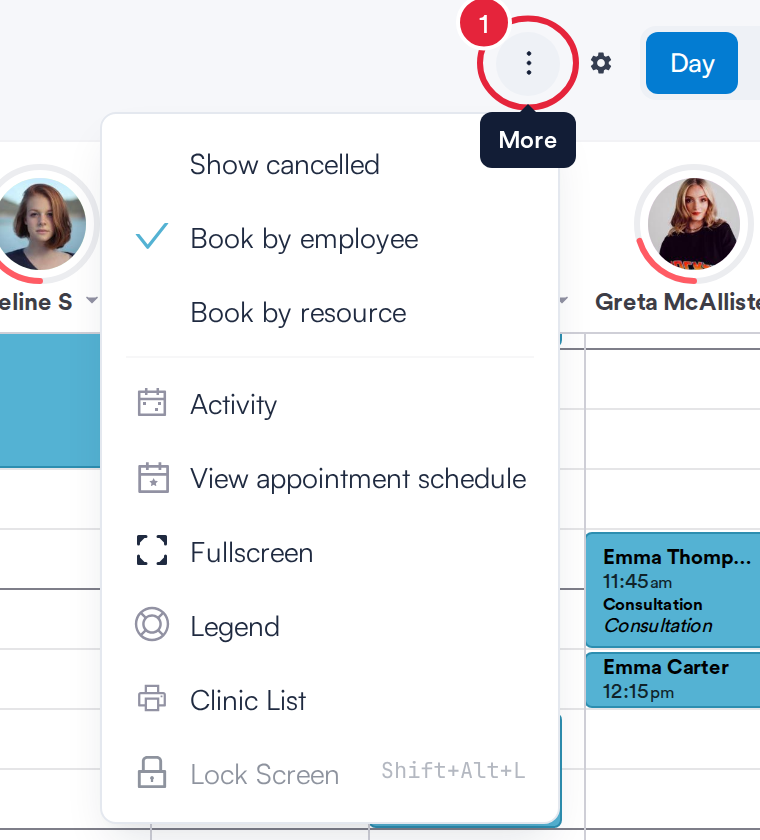
The More menu
Step 7: Hover Over an Appointment
Rest your mouse on any appointment to see its details without opening it:
- The dark band shows the appointment's status, time and length.
- Client shows the client's photo, labels, contact details and any alerts or allergies.
- Appointment shows the service, who it is with, where the appointment is in its journey (for example Waiting, Arrived, Complete) and the appointment note.
- The bottom line shows who booked it and when.
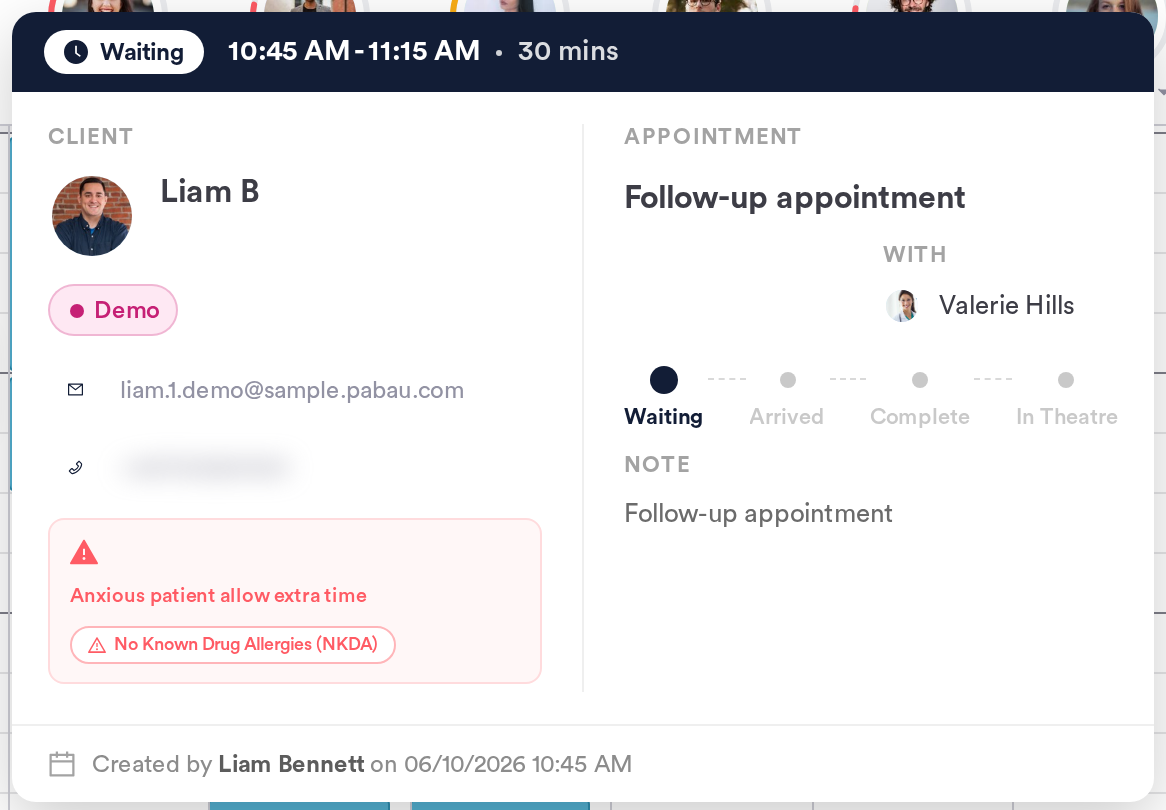
Hover over an appointment for a quick look
What's next?
- How to Set Up Calendar Filters
- How to Add a Day Note in the Calendar
- How to Read Appointment Icons in the Calendar (Legend)
- How to Lock and Unlock Your Calendar Screen
- Overview of the Clinic List
- How to Manage Activities in the Calendar
Was this guide helpful? Let us know by voting below - your feedback helps us write clearer articles.
For more guides, browse the related articles below or use the search bar at the top of the page. You can also watch our video learning series, the Pabau Academy, or visit the Support page for additional help.