
The Follow up form component lets clinicians raise follow-up activities, such as a call, a recall or a meeting, while they write a treatment note. Each activity is created in the client’s Activities straight away and stays listed in the note, so nothing agreed during the appointment gets forgotten.
NOTE: The Follow up component can only be added to forms whose one and only type is Treatment Form. Follow-ups are added when the note is written on the client card.
Step 1: Add the Follow Up Component to a Treatment Form
- Go to Setup, click Forms under Clinical and open your treatment form. To start a new one, click Create Form, choose Blank Template and pick Treatment Form on the Type tab.
- On the Components tab, scroll down to the Activities group and drag Follow up onto the form. You can also click it to add it to the end of the form.
- Click the component on the form to open its settings. The Question is set to Follow-up; change it if you like, then click Save component.
- Click Save Form (or Create Form for a new form), then Publish.
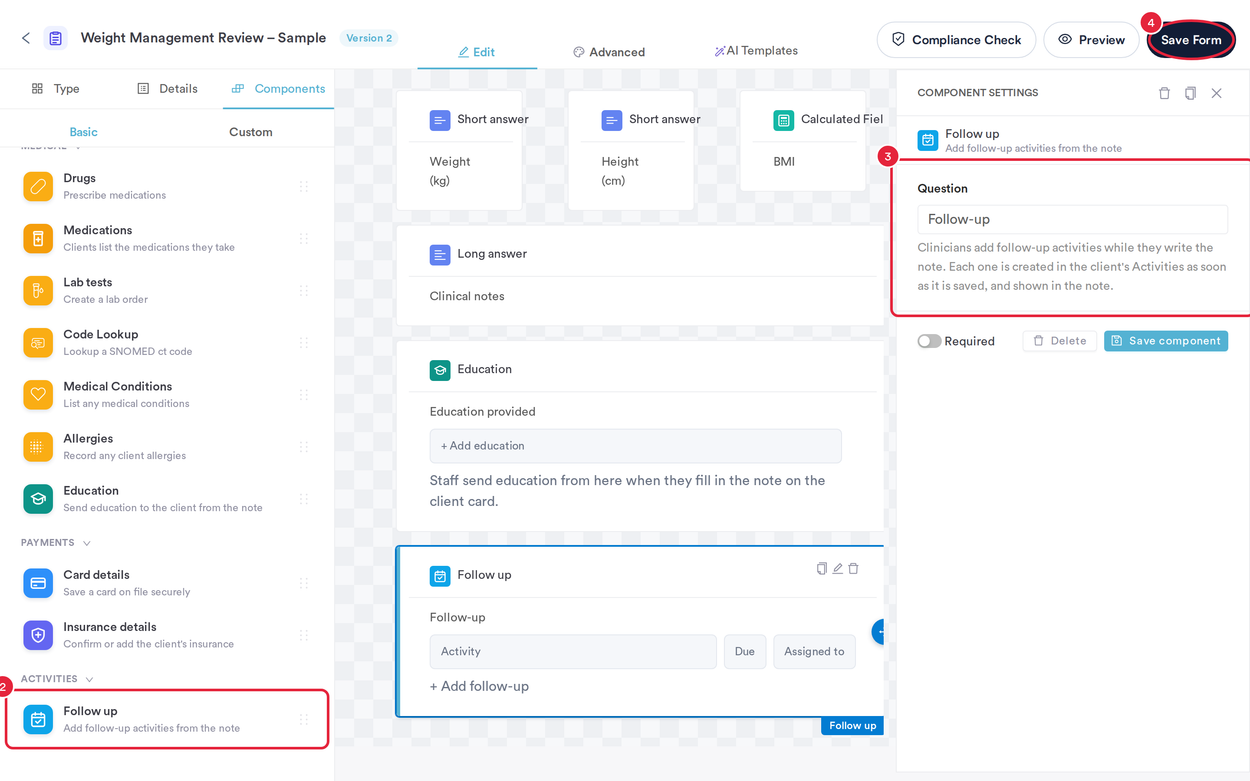
Follow up sits in the Activities group of the component list
Step 2: Add a Follow-Up While Writing the Note
- Open the client’s card, click the blue + button, choose Treatment note and pick the form.
- Write the note as usual. When a follow-up is needed, click + Add follow-up in the Follow-up field.
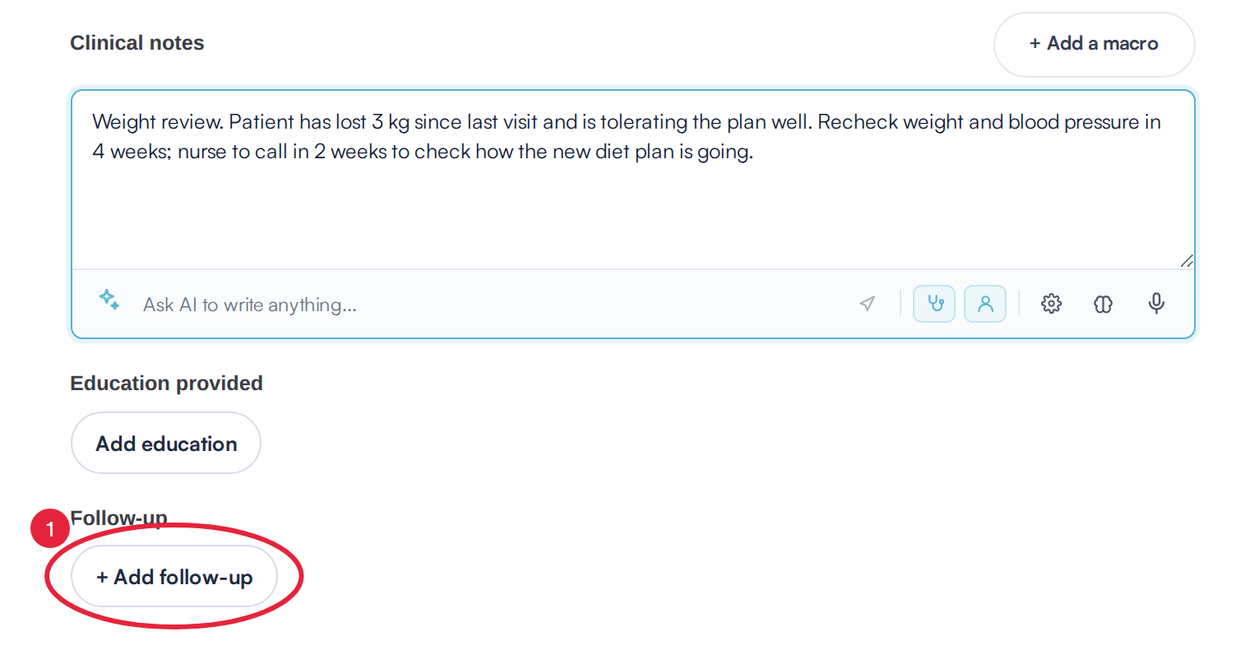
The Follow-up field in a treatment note
NOTE: If the button is greyed out, hover over it to see why. You need permission to create activities, and a note can hold up to 50 follow-ups.
Step 3: Check the Details and Save the Activity
The Create Activity window opens for the client. Pabau reads what you have already written in the note and pre-fills the activity where it can: the type, the name, the due date, a short note and, when it can tell, who it is assigned to.
- When suggestions are added, the window says AI suggestions added from the treatment form. Please check the details before saving. Check each field and change anything that isn’t right, including the employee it is assigned to.
- Click Save.
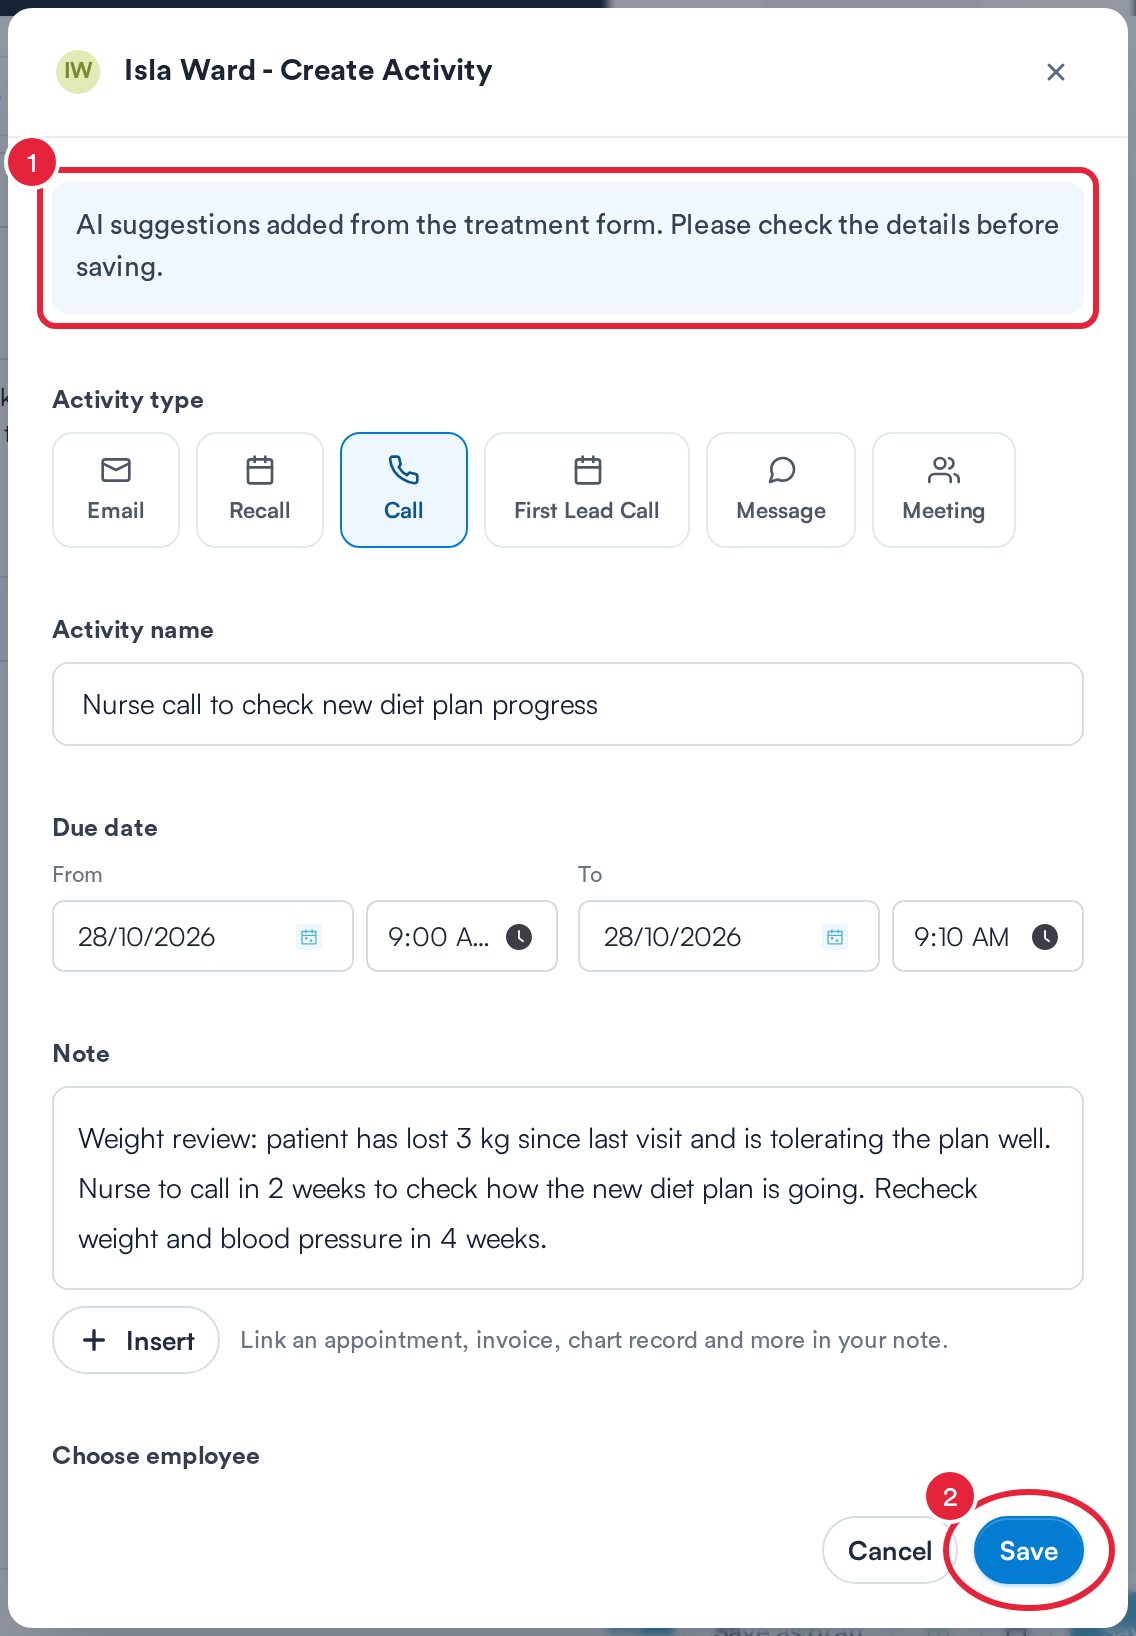
Suggested details, ready to check and save
TIP: You can start filling in the activity while Pabau checks the note; anything you change yourself is never overwritten by a suggestion. If there is nothing to suggest, or suggestions aren’t available, the window tells you and you fill in the activity yourself.
Step 4: Manage the Follow-Ups in the Note
The activity is created in the client’s Activities as soon as you click Save, even before you save the note. It also appears in the note, showing its name, due date, who it is assigned to and its note.
- Each follow-up is listed under the Follow-up field. Click + Add follow-up again to add another.
- Click the ⋮ menu on a follow-up to Edit it, or choose Remove from note to take it off the note. Removing it from the note doesn’t delete the activity; it stays in the client’s Activities.
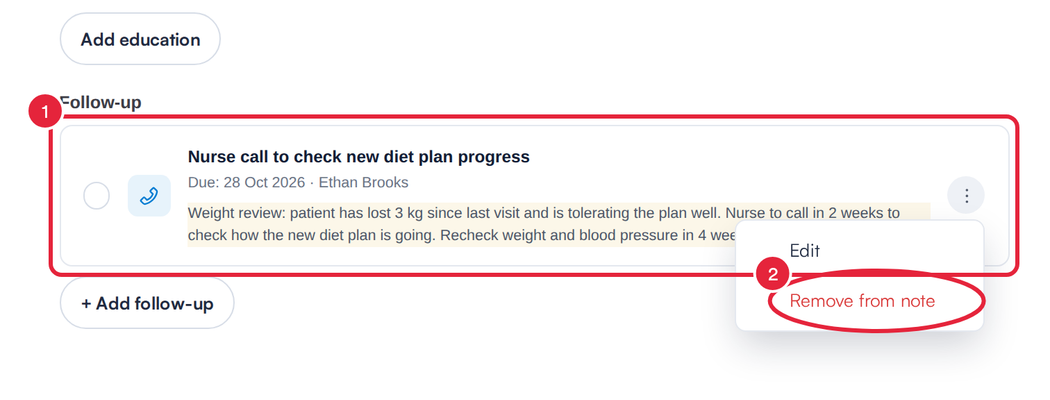
A follow-up listed in the note
When you save the note and open it again on the client card, each follow-up shows its current details. If an activity is later deleted from the client’s Activities, the note tells you. Printed notes list the follow-ups with their activity, type, due date and assignee as they were when they were added.
NOTE: Follow-ups can only be added on the client card. If the note is opened somewhere else, it shows Open this note in the client card to add follow-up activities.
What's next?
- Understanding the Activities Tab on the Client Card (New Client Card)
- How to Mark an Activity as Done from the Client Card (New Client Card)
- How to Write a Treatment Note From the Client Card (New Client Card)
- How to Use Medical Components in Pabau
Was this guide helpful? Let us know by voting below - your feedback helps us write clearer articles.
For more guides, browse the related articles below or use the search bar at the top of the page. You can also watch our video learning series, the Pabau Academy, or visit the Support page for additional help.