
NOTE: This feature is being rolled out to clinics gradually. If you don't see it in your account yet, message us via the in-app chat.
Patients with health insurance can book online without paying upfront. They choose Pay with insurance at checkout, and the appointment is billed to their insurer instead of them. In this article, you will learn how to turn this on for your new booking page, what your patients see, and what happens to the booking afterward.
NOTE: This guide is for practices in the United States, where claims go to payers through the Claim.MD clearinghouse. For the United Kingdom, see How Clients Can Pay With Insurance When Booking Online (UK).
Before You Start
- Insurance billing is set up for your practice. See Getting started with insurance billing and Insurance Guide Part 1: Set up the insurance essentials. Patients can only choose from the insurers you have set up there.
- You can open Online Bookings and customize your booking page.
Step 1: Open the Payment Options in Studio
Go to Setup, under Online presence click Online Bookings, then click Customise page. Pabau Studio opens.
- In the Booking pages strip at the top, click Payment.
- Make sure Edit is selected.
- Hover over Payment Options on the page and click the Alt payments label above it.
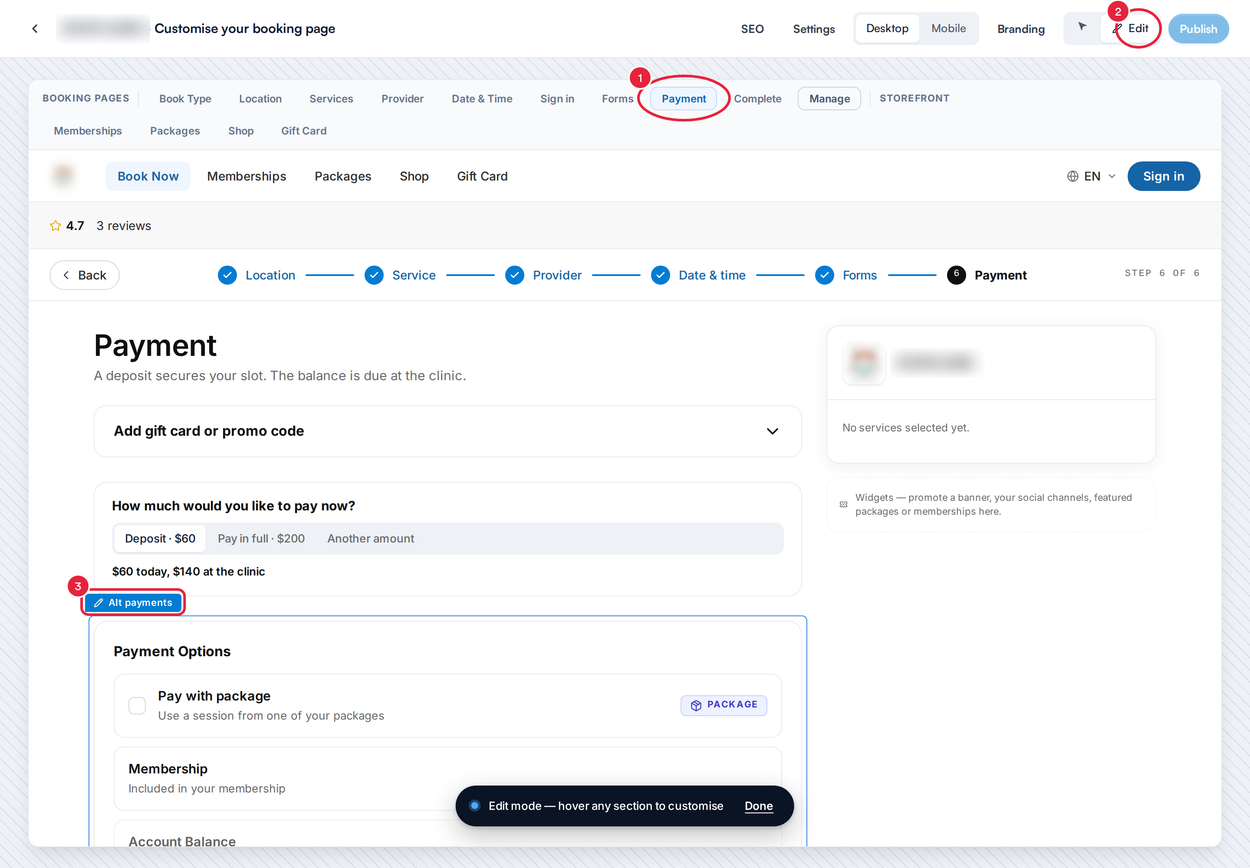
Open the Payment page, then click the Alt payments label
Step 2: Switch On Pay With Insurance
Pay with insurance is off until you switch it on.
- In Payment options, under Methods shown to clients, switch on Pay with insurance.
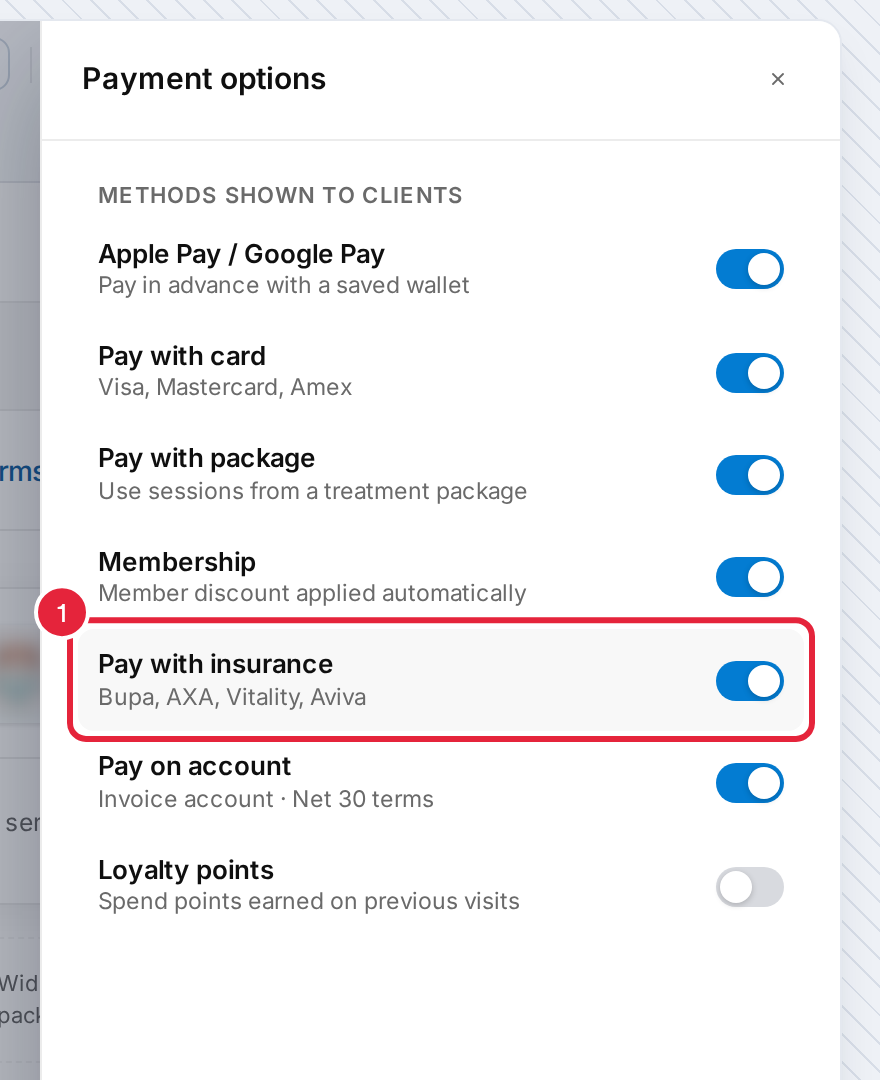
Switch on Pay with insurance
- Close the panel. Pay with insurance now appears under Payment Options in the preview. Click Publish to make the change live.
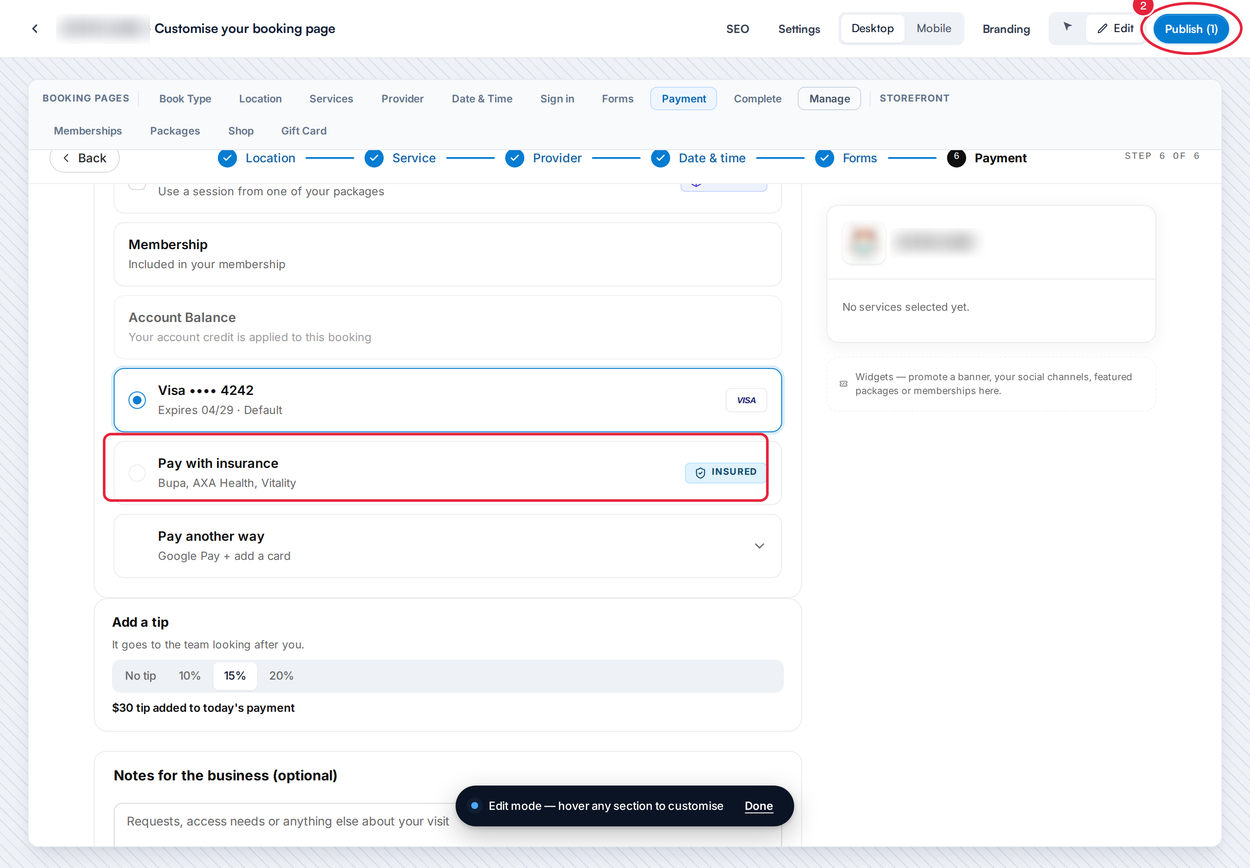
Pay with insurance in the Studio preview, then Publish
NOTE: Studio shows sample insurer names in this panel and in the preview. On your live booking page, the line under Pay with insurance names well-known US insurers, such as UnitedHealthcare, Aetna and Cigna, and patients choose from your own insurer list.
TIP: To show an Insurance accepted label next to services, open the Services page in Studio, click the Services label and switch on Show insurance labels.
Step 3: Know What Patients See
On the last step of the booking, patients see Pay with insurance under Payment Options. When they choose it:
- If they are not signed in, they are asked to sign in first. Paying with insurance always needs a patient account, because the policy is saved to their record.
- If they already have a policy on file (added in your client portal, by your team, or at an earlier booking), it is selected straight away and reads Covered by their insurer · Nothing due today.
- If they don’t, the Add insurer window opens. They choose their insurer under Select your insurer, enter their Member ID and, if they have one, a Pre-authorisation code, then click Add policy. The policy is saved to their record and selected.
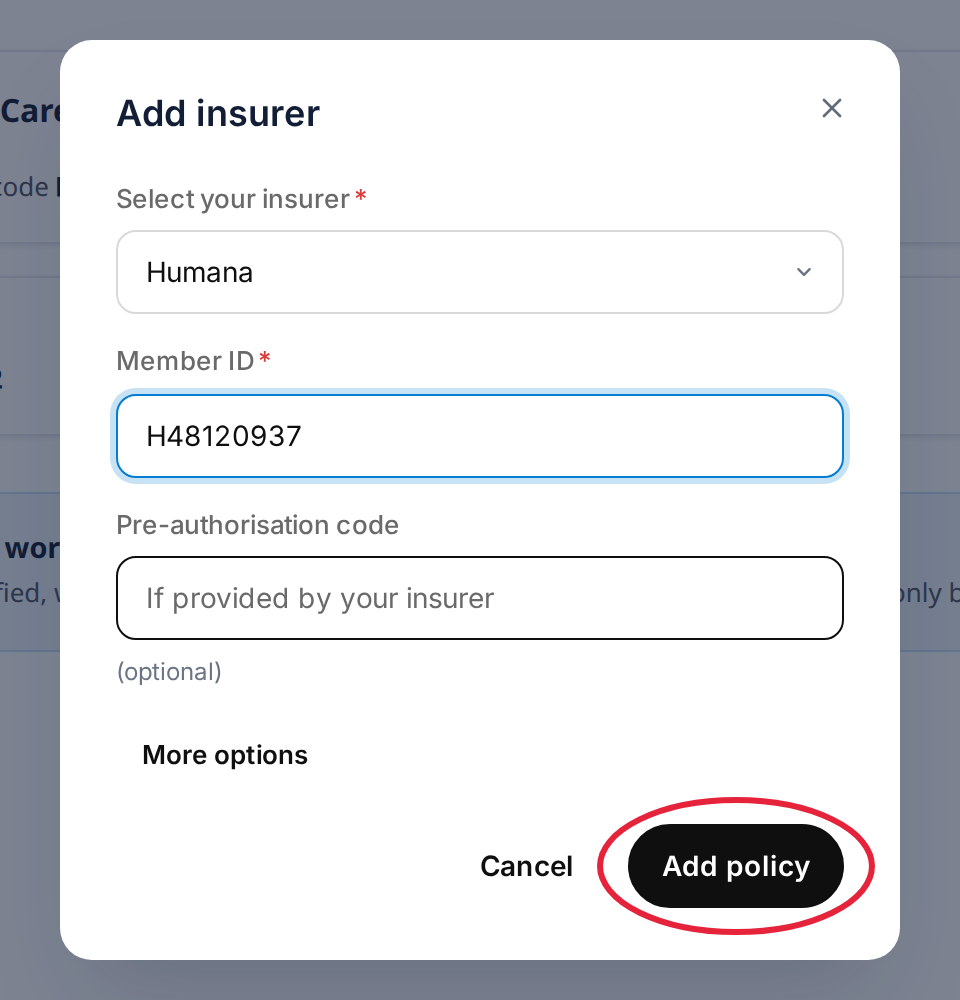
The Add insurer window patients fill in
To finish, the patient clicks Confirm booking — nothing due today. Nothing is charged to their card.
Step 4: Bill the Visit to the Insurer
The appointment arrives in your calendar issued to the patient’s insurer, and the policy they used is on their client record. From there, follow your normal claims process: see Insurance Guide Part 3: Connect appointments to insurance and Insurance Guide Part 4: Submit and track insurance claims.
IMPORTANT: Pabau checks the insurer and that the policy hasn’t ended, but it doesn’t check the patient’s coverage when they book. Check eligibility before the visit (see Request eligibility and benefits report).
Good to Know
- Nothing is charged online for an insurance booking, so tips, part-payments, gift cards and promo codes can’t be added to it.
- If a patient’s saved policy is marked Closed or Expired, or its end date has passed, they are asked to update it or choose another way to pay.
- Patients can add and update their policies under Insurance Details in your client portal. Switch it on in Setup → Online presence → Client Portal (it needs Payments switched on too). See How to Set Up the New Client Portal.
- A new policy that a patient adds online starts with Signature on file switched on. They can switch it off under More options.
What's next?
- Insurance Guide Part 2: Client Insurance Setup
- New Online Bookings Part 4: Take Payments and Deposits Online
Questions? Reach us any time via the in-app chat. We're happy to help.
Was this guide helpful? Let us know by voting below - your feedback helps us write clearer articles.
For more guides, browse the related articles below or use the search bar at the top of the page. You can also watch our video learning series, the Pabau Academy, or visit the Support page for additional help.