
As soon as you save a new client, Pabau opens a window of next steps so you can carry straight on: book their first appointment, send them your intake forms, finish their record or raise an invoice, without searching for the client again.
Step 1: Create the Client
- Click Create at the top of the screen (or press Shift + C to go straight to the client form).
- Choose Client. You can also click Create client on the Clients list.
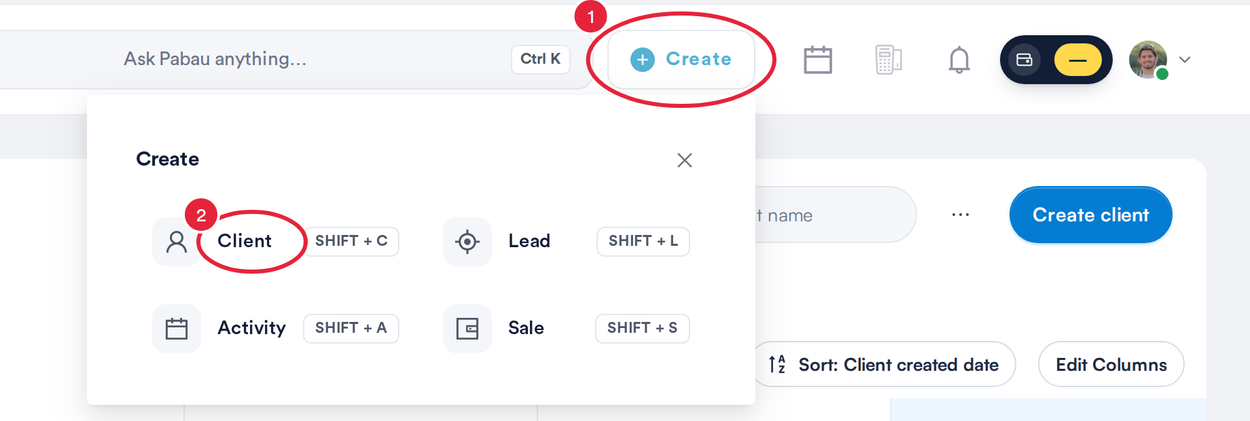
Click Create, then Client
- Fill in the New Client form. First Name and Last Name are always required, and your clinic may require more. Add an email address if you have one, because some next steps need it.
- Click Create.
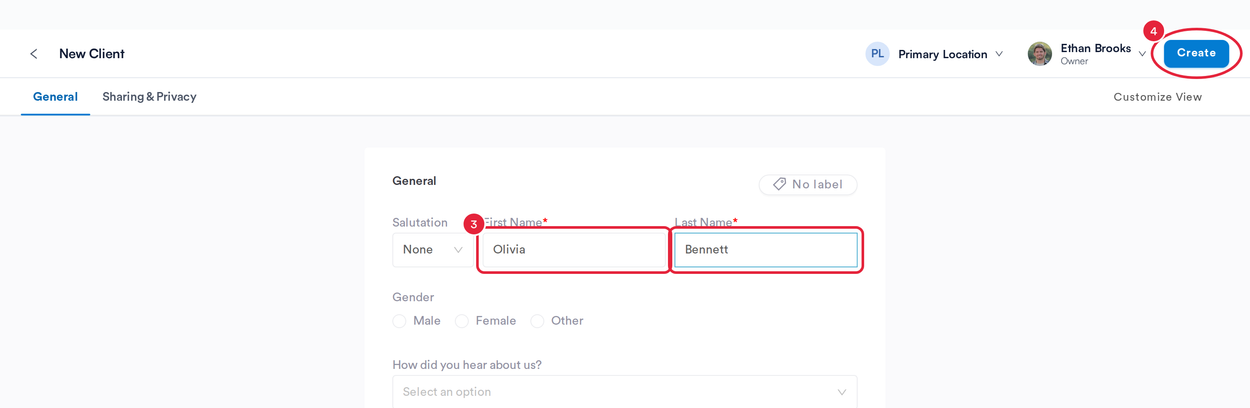
Enter the client’s name, then click Create
TIP: For a walkthrough of every field on the form, see How to Create a Client.
Step 2: Choose What to Do Next
A window opens marked Successfully added. It shows the client’s name and email address (or No email address added if you left it blank). The client is already saved, so closing the window never undoes anything.
- Under What would you like to do next?, click a card:
- Book appointment (A great first step): opens the Calendar ready to book the client’s first visit. See Step 3.
- Send intake: opens a new email to the client on their client card’s Communications page, with your list of forms open so you can add the forms they need to fill in.
- Complete client record: opens the client card so you can add the rest of their details.
- Send message: opens a new email to the client on their Communications page.
- Notes & documents: opens the client’s documents, where you can add a note or upload a file.
- Create invoice: opens the Point of Sale with the client already selected.
- Add insurance: shown only if your clinic uses insurance billing. It opens the client card’s Insurance tab with a new policy ready to fill in.
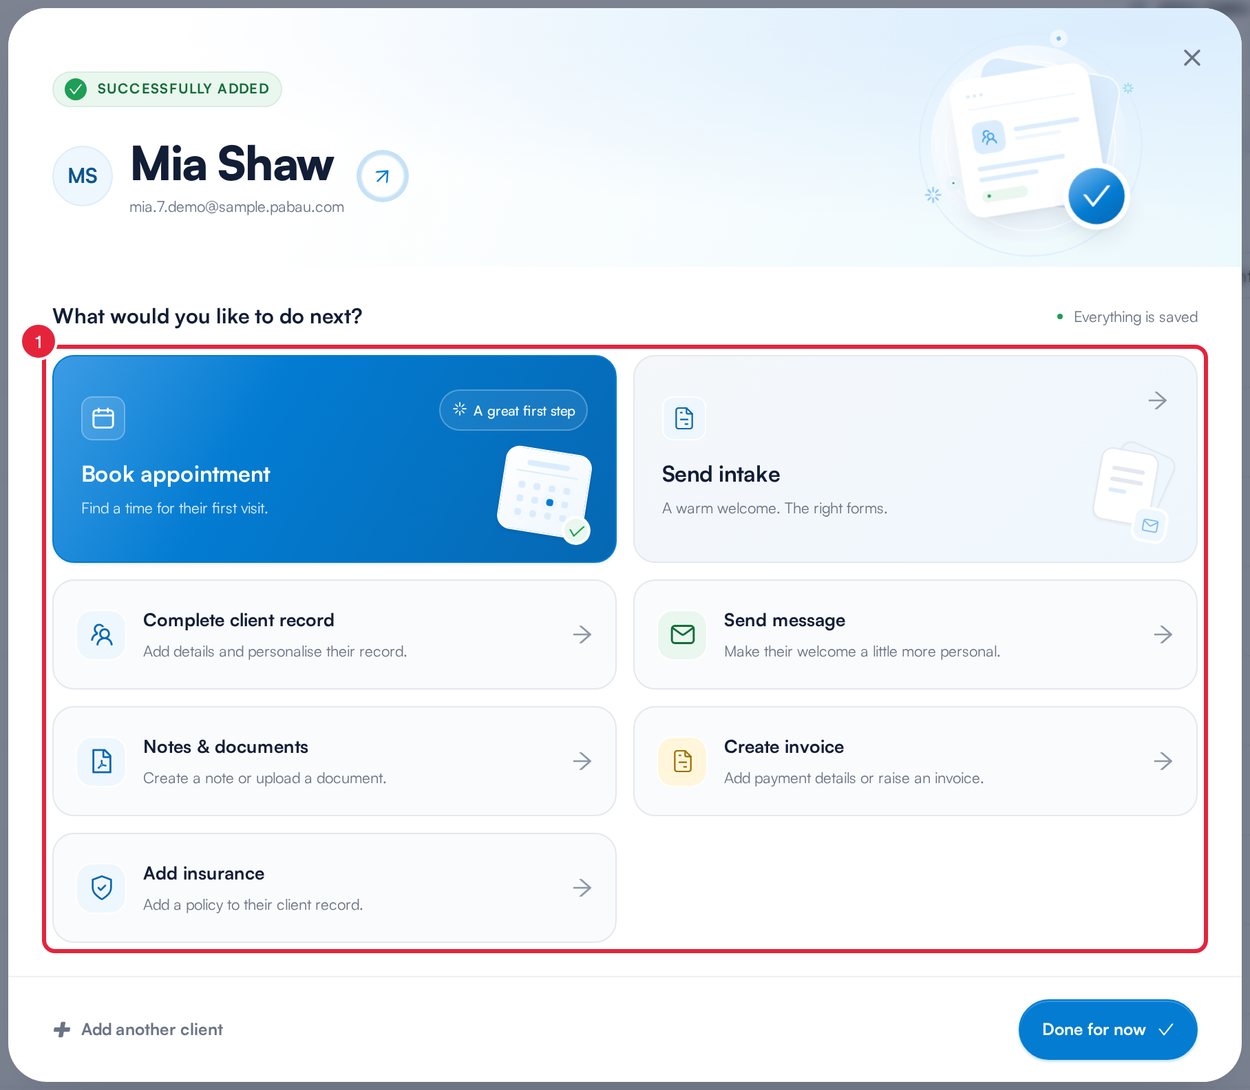
Pick what to do next
Step 3: Book the First Appointment
After Book appointment, the Calendar opens in booking mode. The banner at the top reads Booking for and the client’s name.
- Click an available slot on the calendar to book the appointment for the client.
- Changed your mind? Click the ✕ at the right of the banner to leave booking mode.

The Calendar opens ready to book for the new client
Step 4: Finish Up
If you don’t need any of the cards right now:
- Click the arrow next to the client’s name to open their client card.
- Click Add another client to open a blank form for the next client.
- Click Done for now (or the ✕ in the top corner) to close the window.
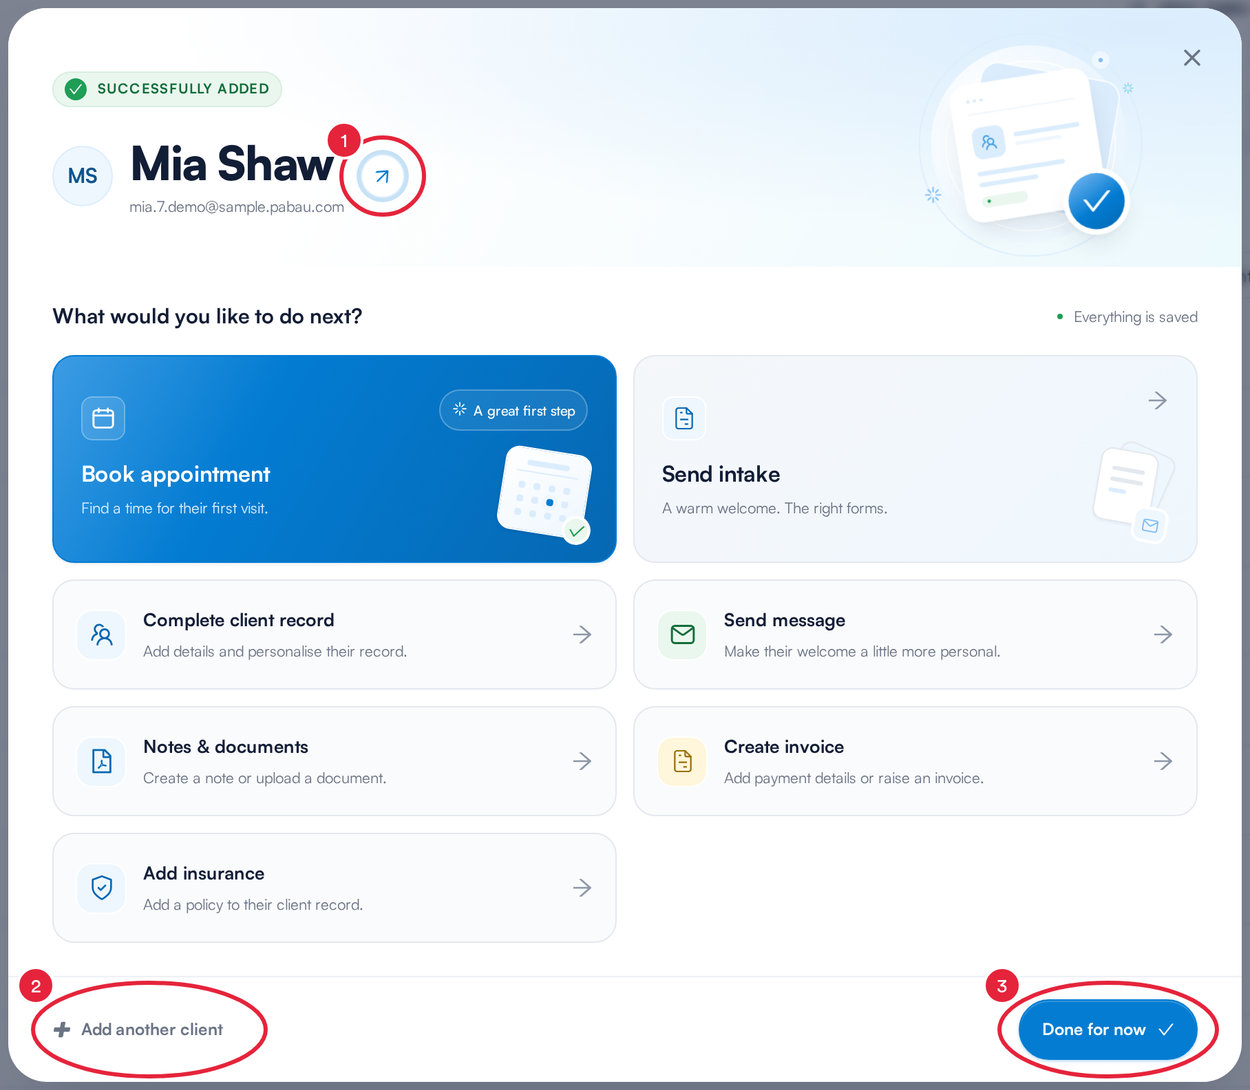
Open the client card, add another client or close the window
Why Are Some Cards Greyed Out?
Hover over a greyed-out card to see why:
- Send intake and Send message need an email address. Without one you see Add an email address to the client record first. Click Complete client record, add the email address, then send from the client’s Communications page.
- Book appointment needs permission to book appointments (You do not have permission to book appointments.).
- Create invoice needs permission to create invoices (You do not have permission to create invoices.).
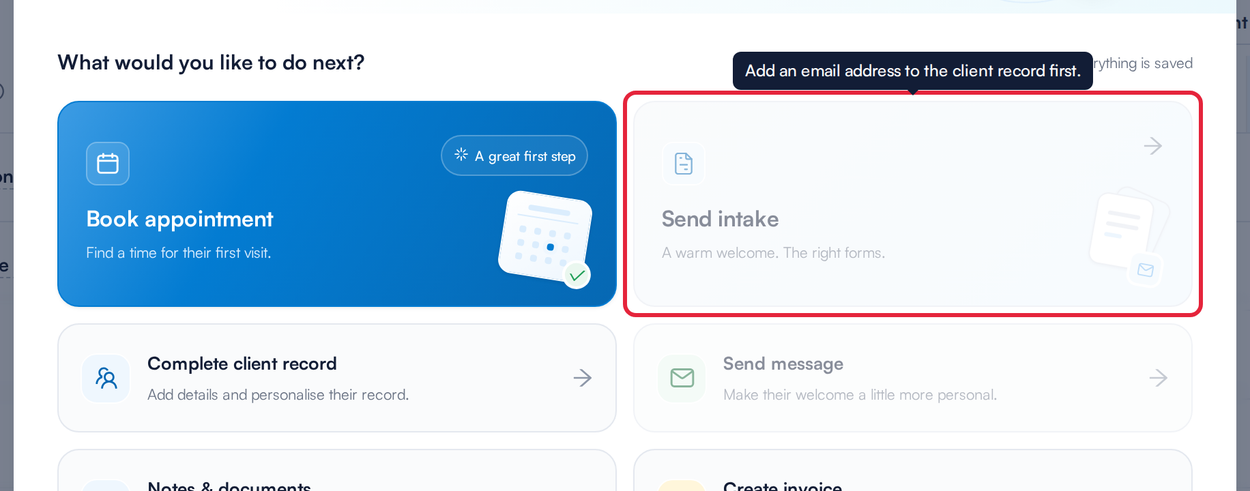
Without an email address, Send intake and Send message are greyed out
NOTE: If a card you need is greyed out because of a permission, ask a clinic admin to check your user permissions.
What's next?
- How to Create a Client
- How to Customize the Layout of the Client Creation Form
- How to Send an Email from the Client Card (New Client Card)
- How to Manage Insurance Policies in the Client Card (New Client Card)
- Clients (New Client Card)
Was this guide helpful? Let us know by voting below - your feedback helps us write clearer articles.
For more guides, browse the related articles below or use the search bar at the top of the page. You can also watch our video learning series, the Pabau Academy, or visit the Support page for additional help.