
Bulk actions lets you change many shifts in one go. Filter the shifts you need across a date range, tick them, then copy or move them to another employee, change their times or location, transfer the appointments booked on them, or delete them. You don't have to open each shift.
NOTE: You need the Can edit shifts or Can remove shifts permission to see Bulk actions. Each action also checks its own permission: copying needs Can create shifts, deleting needs Can remove shifts, and the rest need Can edit shifts. Actions you don't have permission for are hidden.
Step 1: Open Bulk Actions
- Go to Team → Schedule and click the Tools icon (the spanner) under the date.
- Choose Bulk actions. The Bulk actions screen opens on top of the schedule.
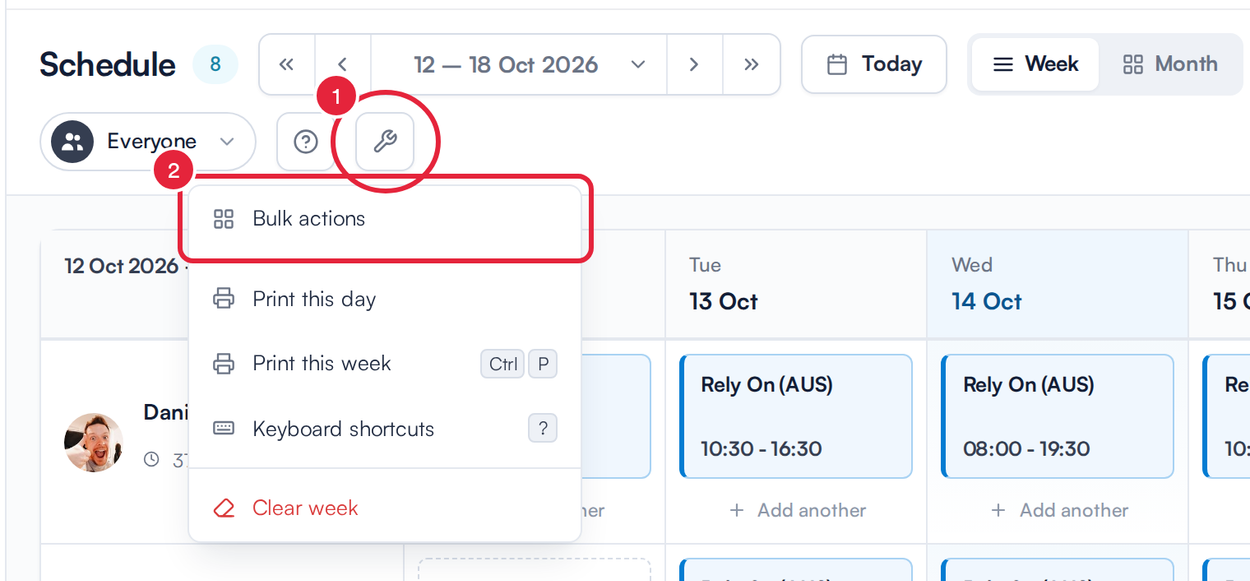
Bulk actions is the first item in the Tools menu
Step 2: Filter the Shifts
The list on the right shows every shift that matches the filters on the left, and the counter at the top shows how many match. Filters apply as soon as you pick them.
- Click Date and choose a quick range: This week, Next week, Last week, Next 30 days or any month of this year. For another period, choose Custom…, pick a start and end date (a range of up to 92 days) and click Apply. The list starts on the current month.
- Narrow the list further with Employees, Locations, Roles, Day of Week, Start Time, End Time and Added by (the person who created the shift). You can tick several employees, locations, roles or days; the time filters use Night, Morning, Afternoon and Evening.
- Click Reset all to clear every filter and start again.
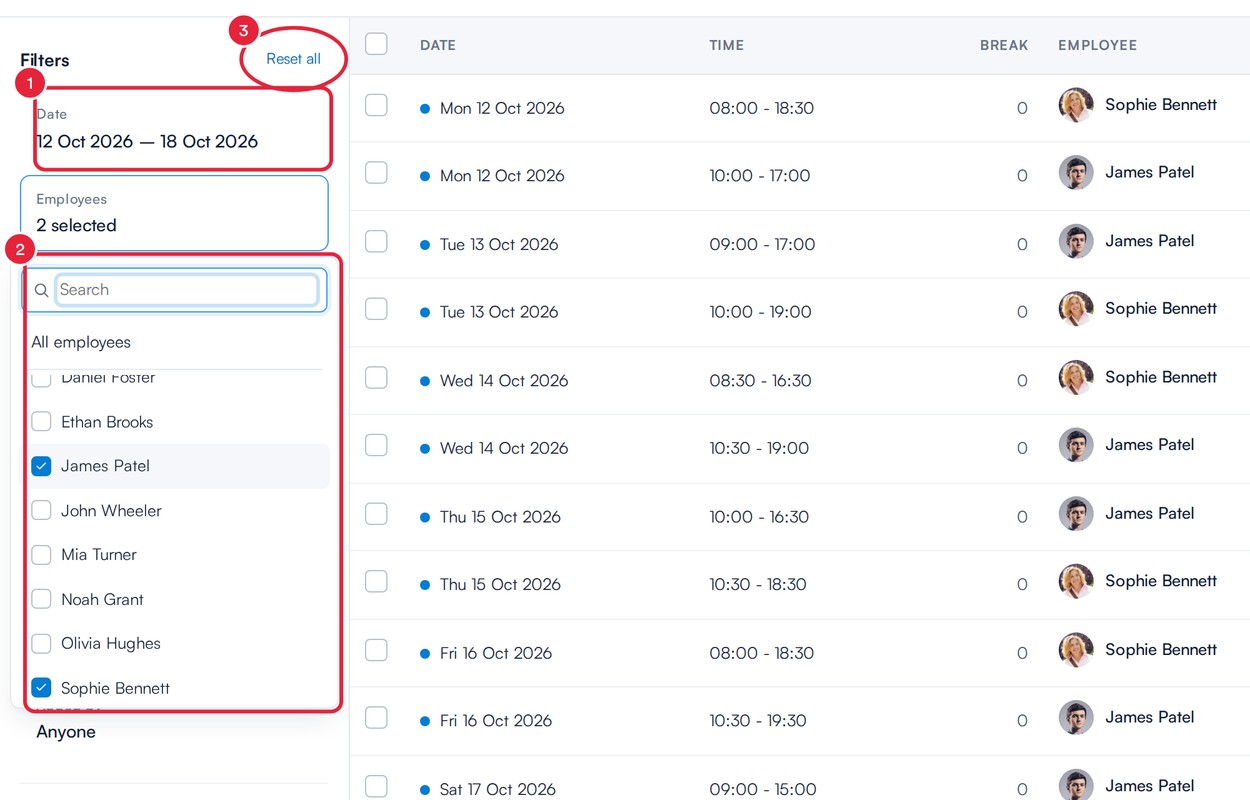
This week's shifts for two employees
Step 3: Select the Shifts
- Tick the box beside each shift you want to change. You can also click anywhere on a row.
- To select every shift in the list, tick the box at the top of the column. Tick it again to clear them.
- The bar at the bottom shows how many shifts are selected. When you're ready, click Select action. Clear selection unticks everything.
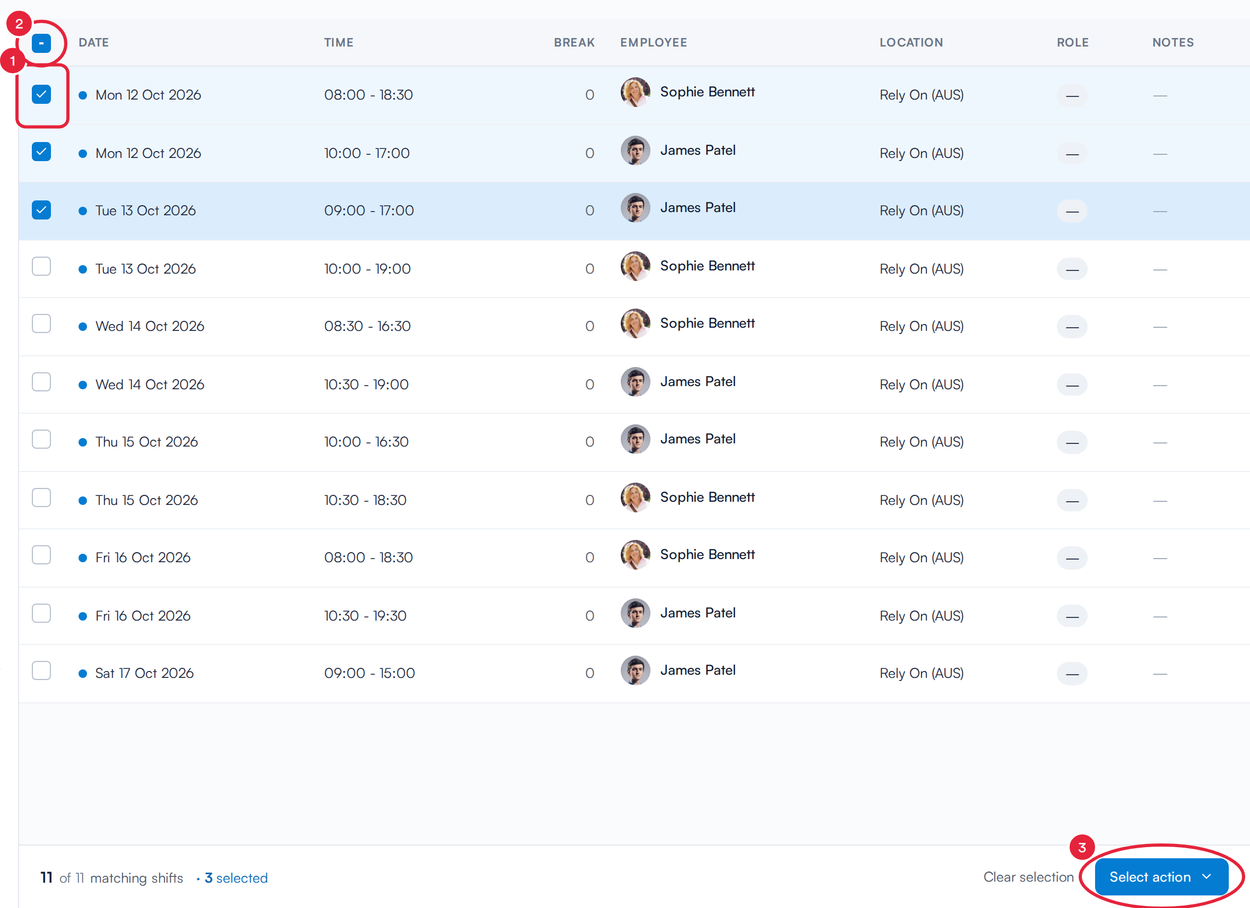
Three shifts selected and ready for an action
Step 4: Choose an Action
The Select action menu lists what you can do with the selected shifts:
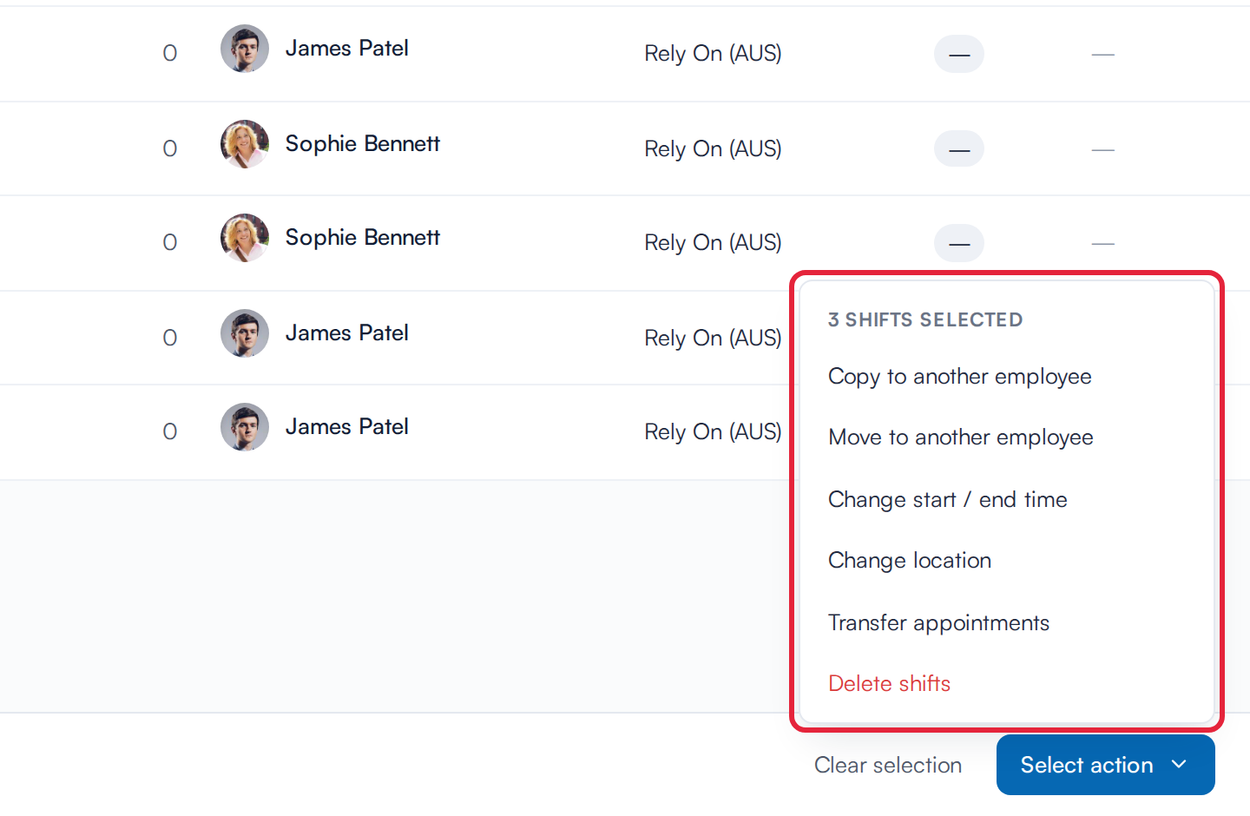
The actions you can apply to the selected shifts
- Copy to another employee: duplicates the shifts for the employee you pick, on the same dates and times. The originals stay where they are. Only employees who can work at the shifts' locations are listed. Annual leave and blockouts (sickness, training and so on) are not copied.
- Move to another employee: reassigns the shifts, so they are removed from their current owner. Appointments booked during those shifts move to the new employee with them. A shift that would overlap one the new employee already has is skipped.
- Change start / end time: gives every selected shift the same new hours. Each shift keeps its original date. Type the range the same way you do when creating a shift, for example 9am - 5pm or 09:00 - 17:00, and check the New window line underneath.
- Change location: moves the shifts to another location. Only locations that every selected employee can work at are offered. Appointments booked during those shifts move to the new location too.
- Transfer appointments: moves the appointments booked on the selected shifts to another employee and leaves the shifts as they are. Only employees with a shift that covers each appointment, and who can perform its service, are listed.
- Delete shifts: removes the shifts. This can't be undone.
Step 5: Confirm the Change
A window opens with the number of shifts at the top.
- Fill in what the action needs: pick the employee from Select employee (start typing to search), enter the new Time range, or choose the location.
- Click the button to apply it, for example Copy 3 shifts, Move 3 shifts, Apply to 3 shifts or Transfer 16 appointments. Click Cancel to go back without changing anything.
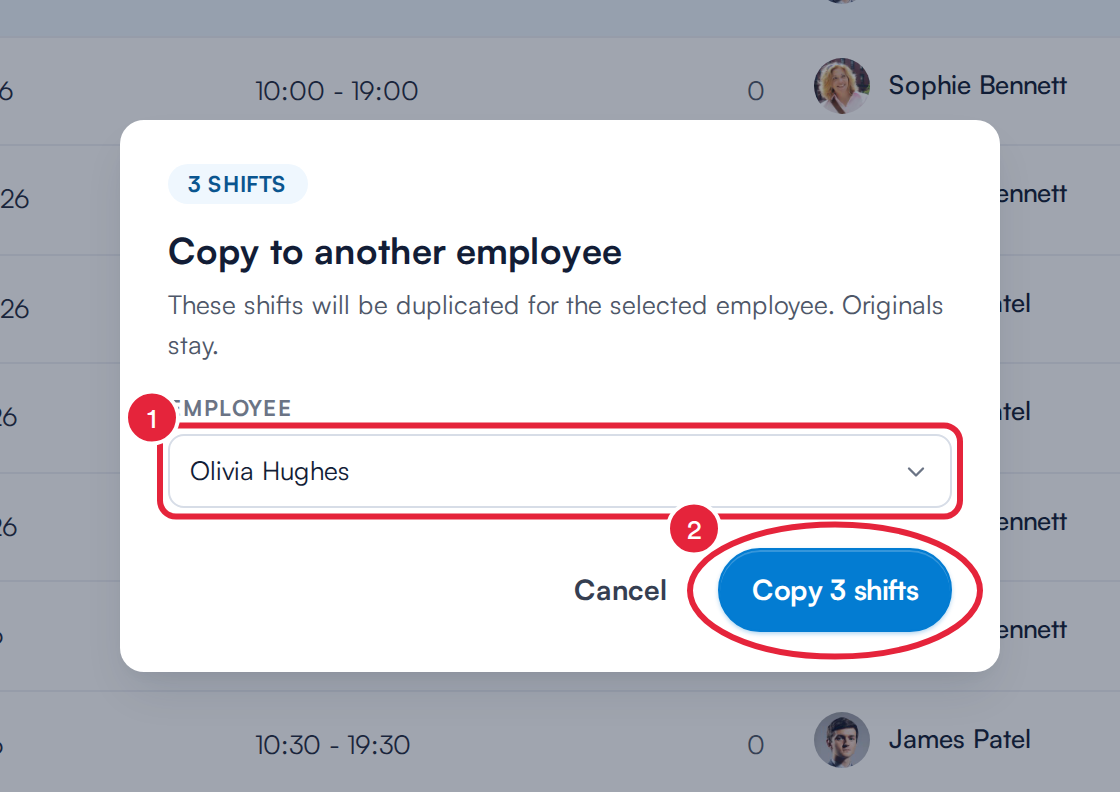
Pick the employee, then confirm
IMPORTANT: If any of the shifts you delete still have appointments, Pabau stops and shows how many. Click Transfer appointments to give them to another employee first, or Cancel appointments & delete to cancel them and delete the shifts. Tick Notify the clients if you want clients told about the cancellation.
NOTE: When you transfer appointments, Pabau checks the new employee's diary first. If any appointments would overlap ones they already have, you're warned and can choose Transfer anyway. If overlapping appointments are turned off in your calendar settings, the transfer is blocked instead. Clients receive your rescheduled appointment notification if you have it switched on.
Step 6: Check the Result
A message at the bottom of the screen shows the progress and then the result, for example 3 shifts copied. If some shifts couldn't be changed, it tells you how many, for example 2 of 3 shifts copied — 1 failed, with the reason (such as an overlap with an existing shift). The list refreshes straight away.
When you've finished, click Back to schedule at the top left, or press Esc.
What's next?
- Scheduler: Detailed walkthrough
- How to Delete Shifts from the Scheduler
- How to Transfer Appointments Before Deleting a Shift
- How to Create a Repeating Shift in the Scheduler
Was this guide helpful? Let us know by voting below - your feedback helps us write clearer articles.
For more guides, browse the related articles below or use the search bar at the top of the page. You can also watch our video learning series, the Pabau Academy, or visit the Support page for additional help.