
NOTE: Your clinic decides which options you see, so some of the steps below may look slightly different or be skipped.
There is no separate sign-up form for your clinic’s client portal. Your account is created the first time you sign in with your email address, and no password is needed. In this article, you will learn how to create your account and then check your details.
Step 1: Start From Your Clinic’s Booking Page
Open your clinic’s booking page, for example from their website. Then either:
- Tap Sign in at the top right, or
- start a booking with Book an appointment. You will be asked to sign in before you confirm.
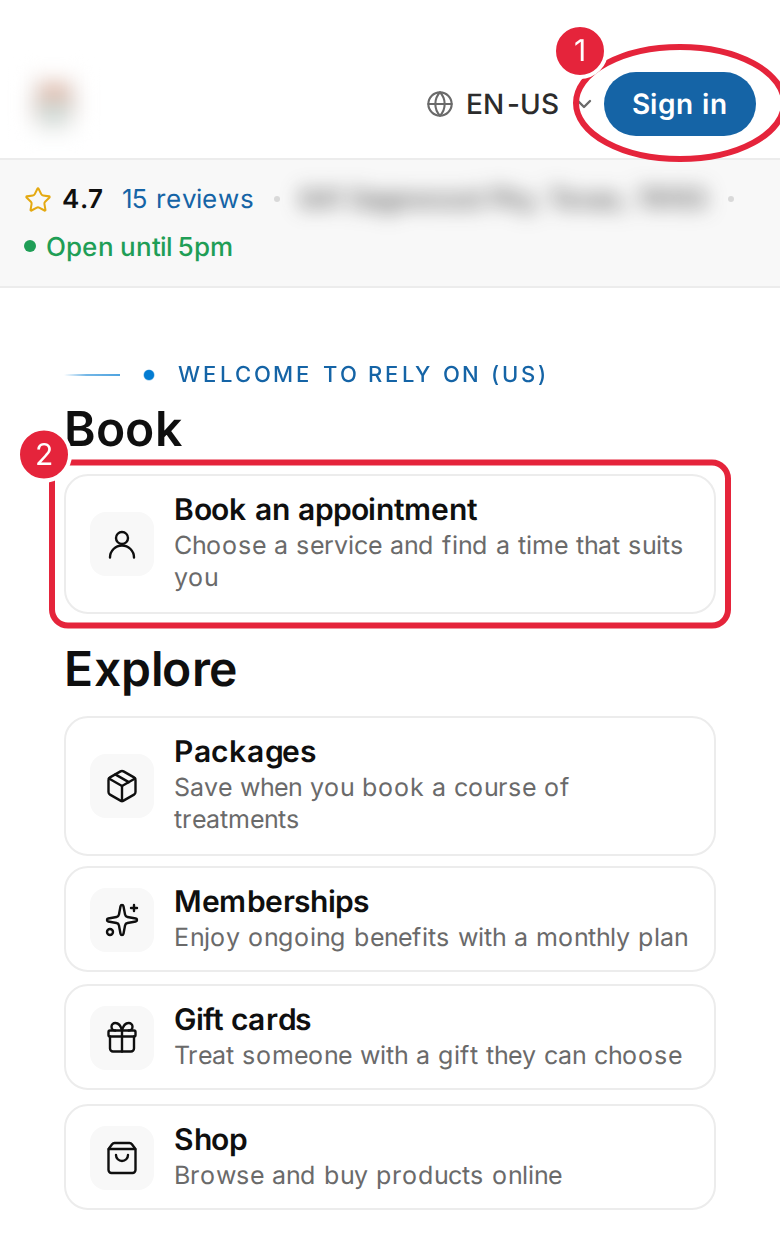
Tap Sign in, or start a booking
Step 2: Enter Your Email and the Code We Send You
- Enter your email address.
- Click Continue. We email you a six-digit code. Enter it and click Verify and continue.
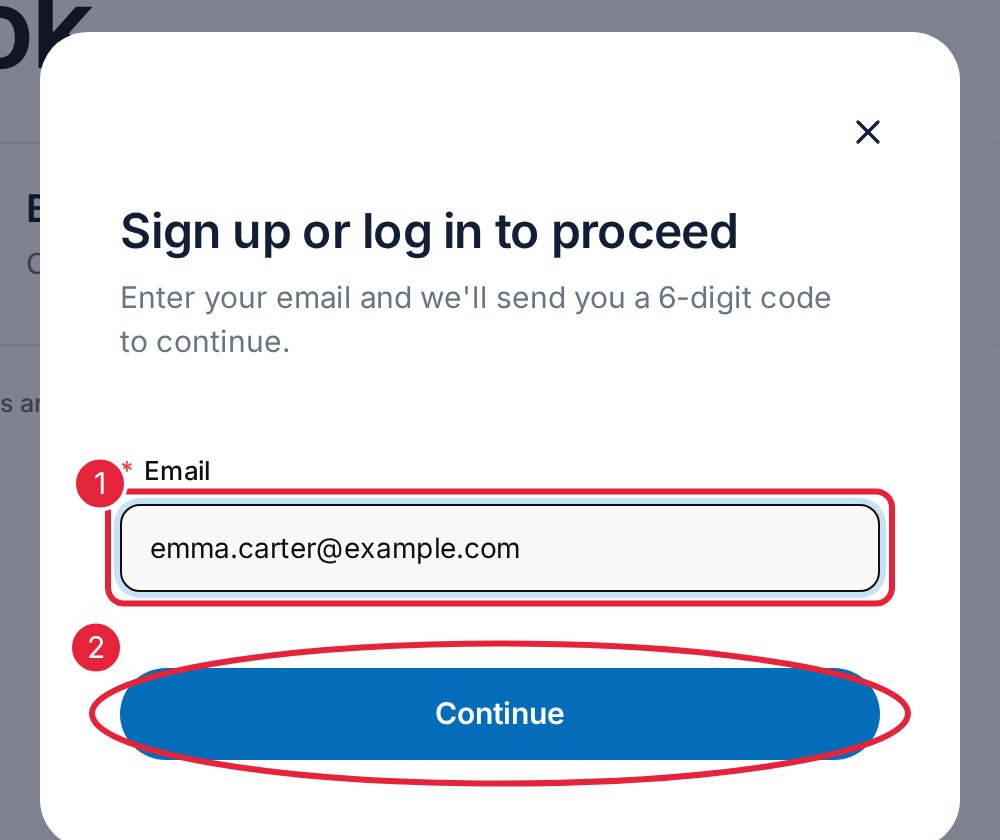
Enter your email address and click Continue
That’s it — your account is set up. If your clinic already has a record for you, for example because you have visited before, your online account is linked to it automatically when you use the same email address. For more help with codes, see How to Log In to the Client Portal.
Step 3: Complete Your Details
If the clinic does not have your full details yet, you are asked to Complete your details before you book. Enter your First name, Last name and Mobile number. Under Marketing promotion, tick Email, SMS, Phone or Post if you are happy for the clinic to send you offers and news that way. These are unticked unless you choose them. Then click Save and continue.
Step 4: Check Your Details in the Portal
Click your name at the top right of the booking page, then Account details. On Personal Details:
- Check your name, date of birth and mobile number, and correct them if needed.
- Click Save changes.
- Under Marketing promotion, choose how the clinic may contact you about offers, then click Save changes in that box.
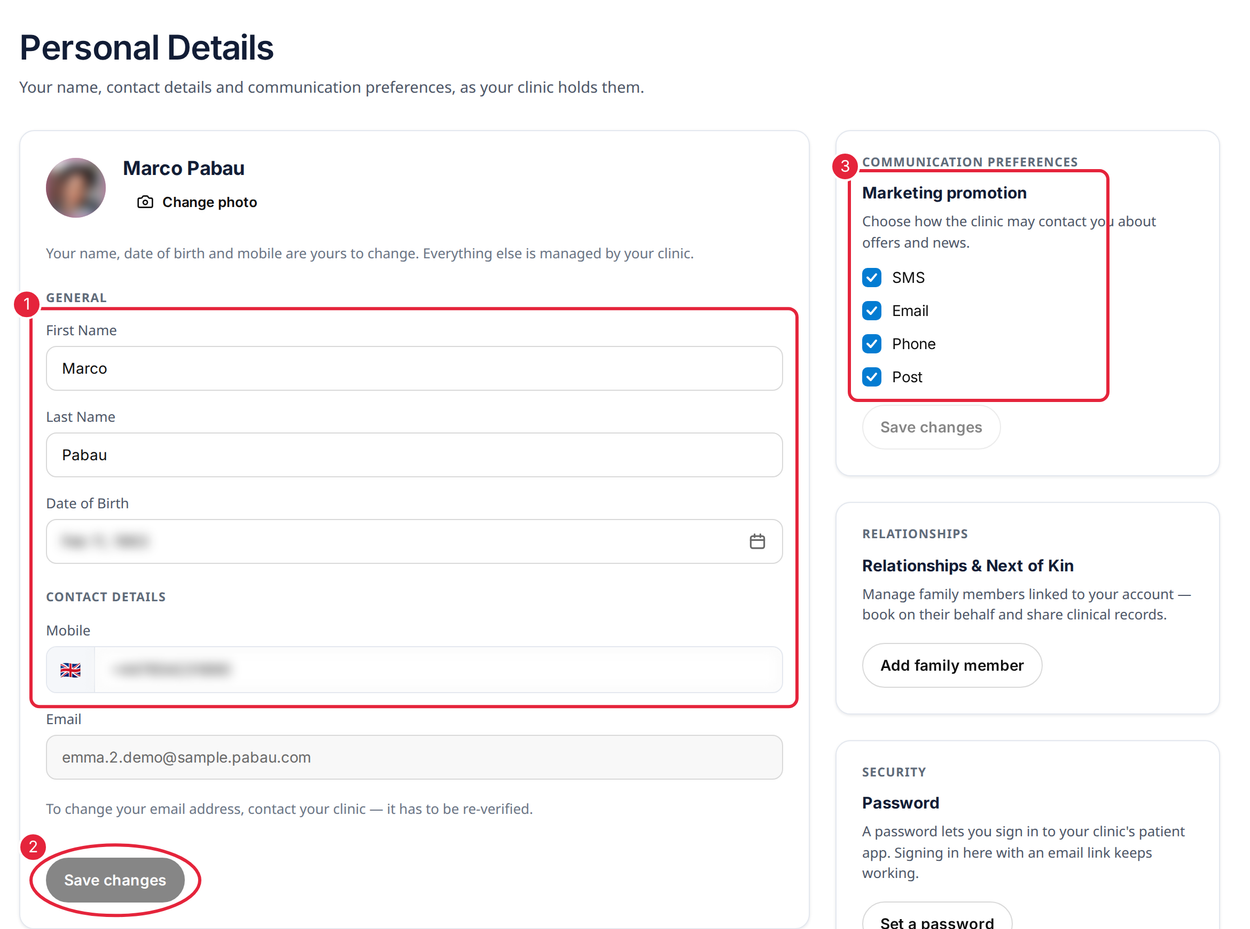
Check your details and marketing choices on Personal Details
NOTE: To change the email address you sign in with, contact your clinic, as the new address has to be verified.
What's next?
- How to Book an Appointment via Online Bookings
- How to Log In to the Client Portal
- Client Portal Help Guide (for Patients)
Questions? Contact your clinic directly — they will be happy to help.
Was this guide helpful? Let us know by voting below - your feedback helps us write clearer articles.
For more guides, browse the related articles below or use the search bar at the top of the page. You can also watch our video learning series, the Pabau Academy, or visit the Support page for additional help.