
Your booking page can show your membership plans to clients while they choose a treatment, so the people most likely to come back regularly see what a plan would save them. In this article, you will learn where clients see your memberships, how to choose how they look on the Services step, and what happens when a client clicks a plan.
NOTE: This guide covers the new Online Bookings and Client Portal, which are being rolled out to clinics in phases. If your screens look different, your account may still be on the classic version — message us via the in-app chat and we will help.
Where Clients See Your Memberships
| Where | What clients see |
| The Memberships page of your online store | Every membership you sell online. Clients reach it from the menu at the top of your booking page. |
| The Services step while booking | A Memberships section below your treatments, with a card for each plan. |
| Any page you choose | A Featured memberships widget with the plans you pick. |
IMPORTANT: Only active plans with Allow online purchases switched on appear on your booking page. You’ll find the switch on the plan’s Appearance step in Setup → Memberships (see How to Create Memberships). Clients pay for memberships by card, so your account must be connected to Stripe. See How to Sell Memberships, Packages, Products and Gift Cards in Your Online Store.
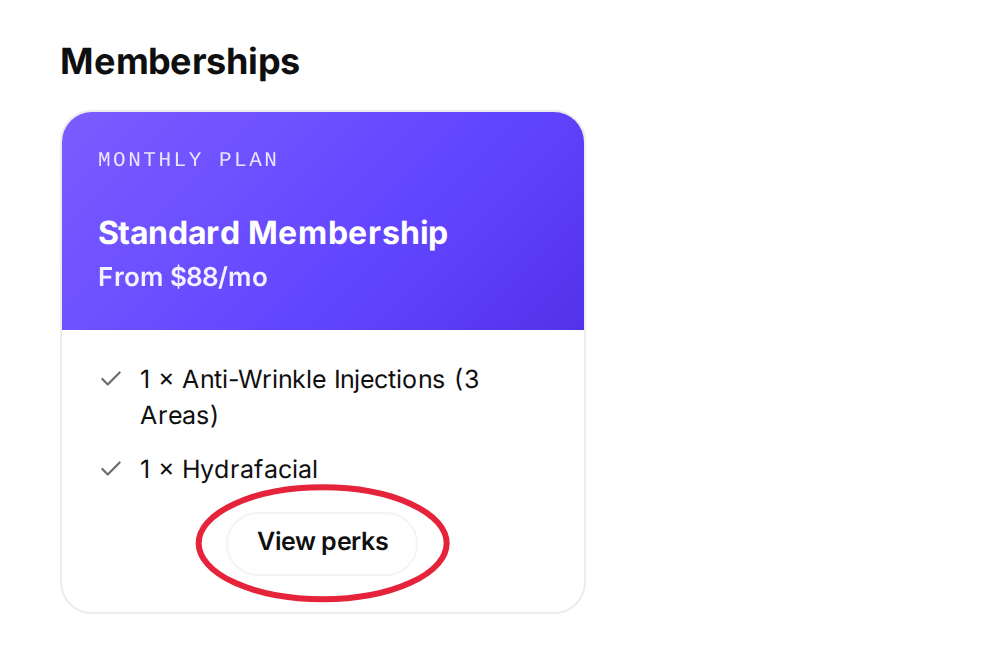
The Memberships section on the Services step, with the View perks button
Step 1: Open the Memberships Section in Pabau Studio
- Go to Setup → Online presence → Online Bookings and click Customise page.
- Click Services in the Booking pages strip.
- Make sure Edit is selected at the top right.
- Scroll down past your treatments, hover over the membership cards and click the blue Memberships label. The Memberships panel opens on the right.
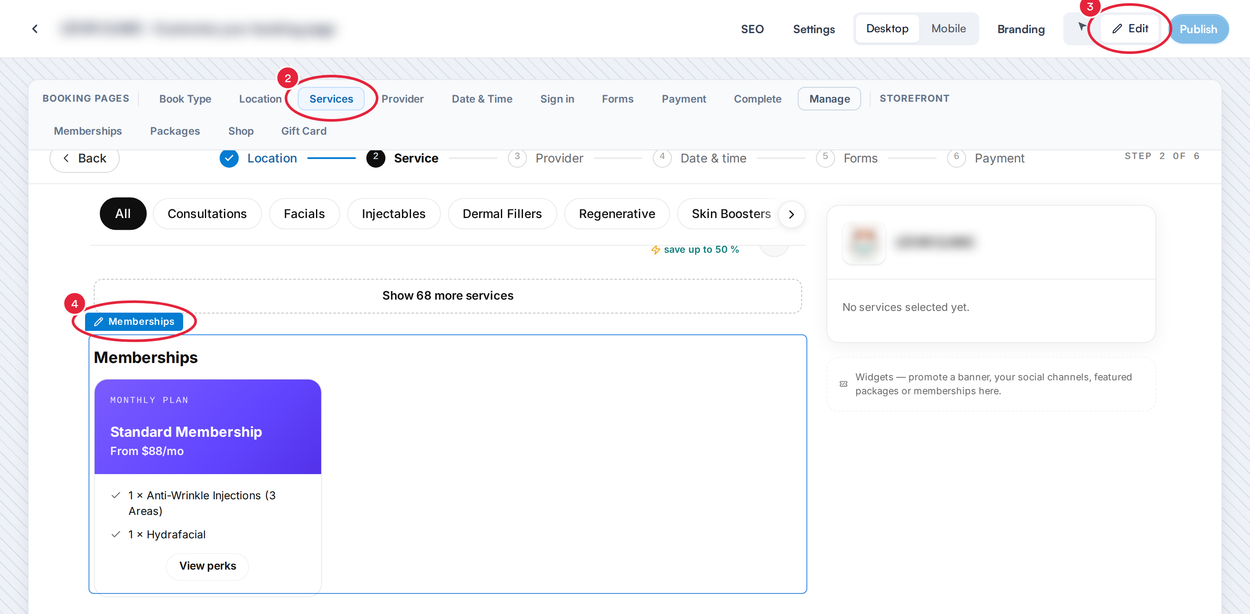
Open Services (2), select Edit (3), then click the Memberships label (4)
NOTE: If you don’t sell any memberships online yet, the section is empty in Studio and clients don’t see it at all. It fills in as soon as a plan has Allow online purchases switched on.
Step 2: Choose What Clients See
- Under Visibility, keep Show this section switched on so clients see your plans on the Services step. Switch it off to hide your plans from the Services step. This doesn’t remove the Memberships page from your online store.
- Under Layout, choose how the plans look. The preview changes straight away.
- Cards (the default): one card per plan, in the plan’s Theme Colour, showing how often it is billed, its name, price and first few perks. A plan marked Popular gets a Popular badge.
- Editorial: tall, clean columns with a thin accent line, showing each plan’s name, price and first few perks.
- Spotlight: one plan shown large as your Featured plan, with your other plans as smaller cards. The featured plan is the one marked Popular, or your first plan if none is.
- Under Discount perks, switch Show "View Discount Perks" button on or off. When it is on, each plan has a View perks button so clients can see everything the plan includes.
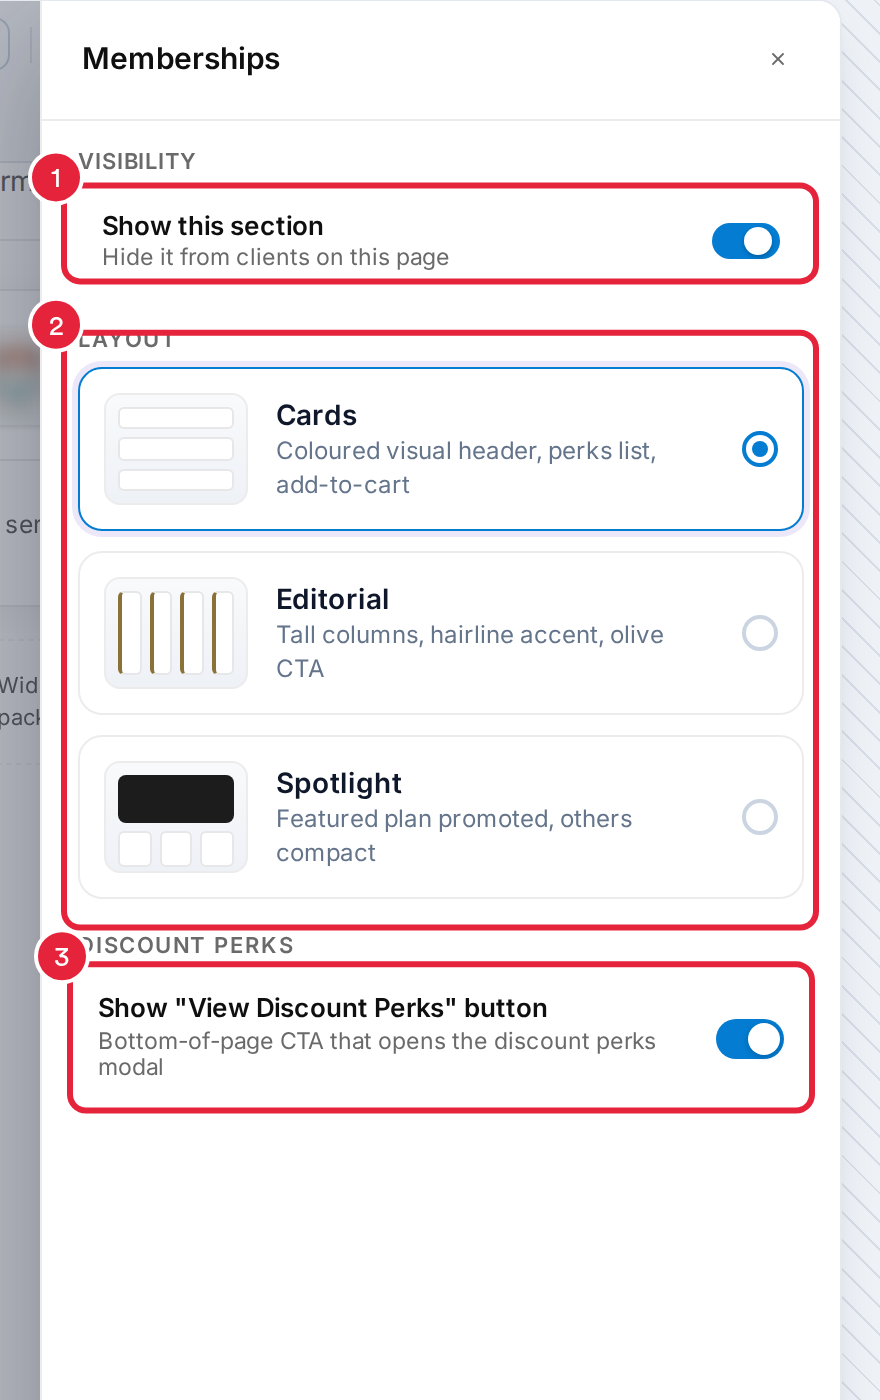
The Memberships panel: Show this section (1), Layout (2) and the View perks switch (3)
TIP: To mark a plan as Popular or change its colour, edit the plan in Setup → Memberships and open its Appearance step.
Step 3: Publish Your Changes
- Click the × to close the panel and check the preview.
- Click Publish at the top right. Clients don’t see your changes until you publish.
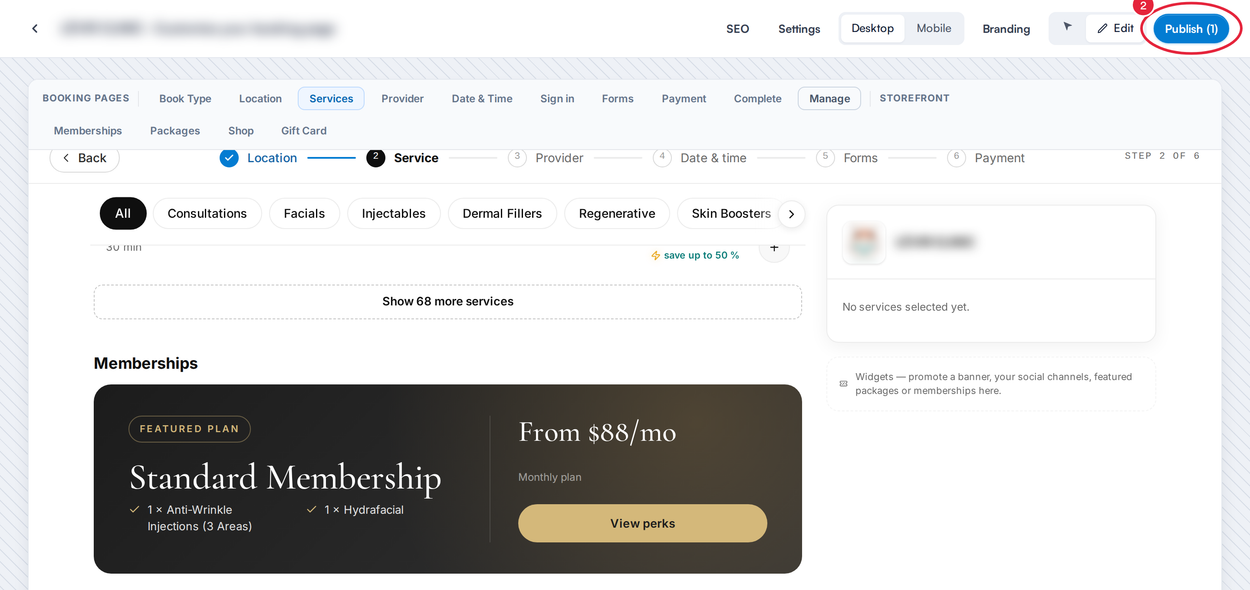
The Spotlight layout in the preview, ready to publish (2)
What Happens When a Client Clicks View Perks
The plan opens in a window over the booking page. Clients see the plan’s card, the price, what the perks would cost at pay-as-you-go prices, each perk and how often they can use it, and the plan’s terms. The button at the bottom (for example Subscribe monthly) takes them to your online store, where they sign in and finish joining. The treatment they were booking is not affected.
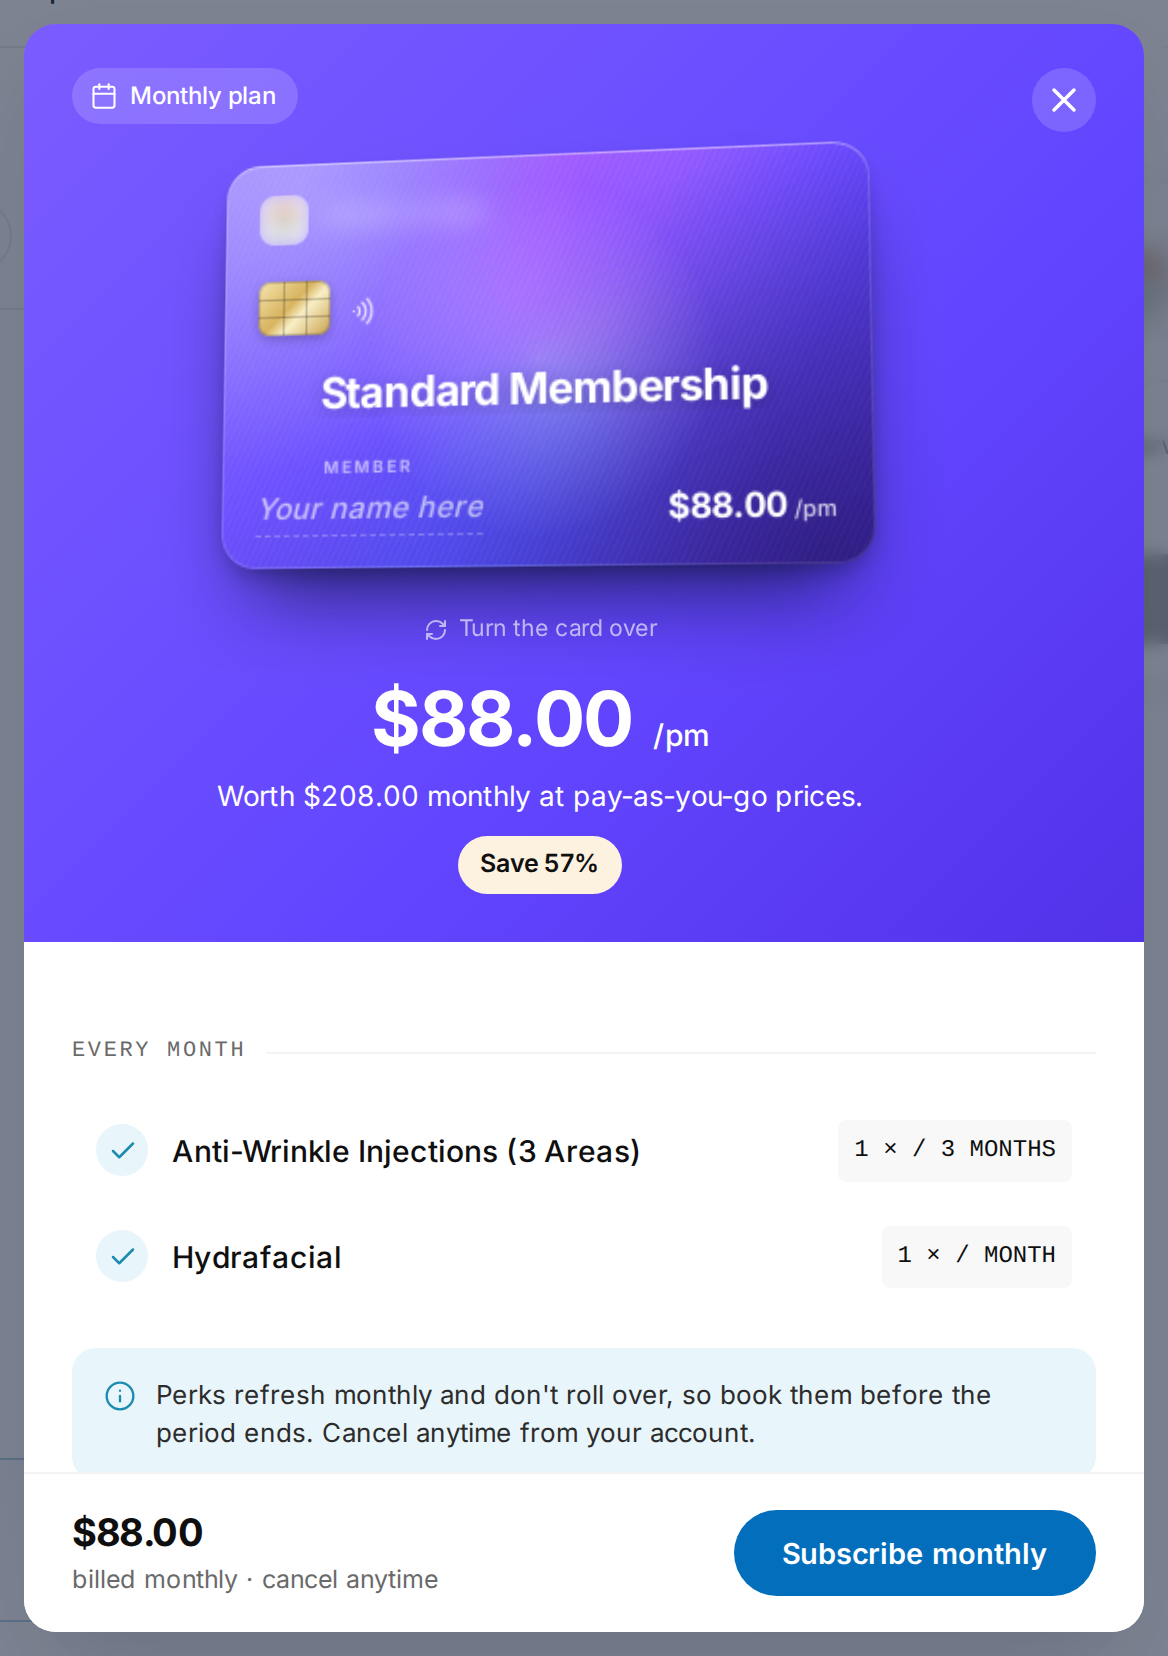
The plan window a client sees after clicking View perks
NOTE: The Membership switch under Visible items in the Buy section panel (open it from the Buy / upsells label on the same page) is the same setting as Show this section, so switching either one off hides your plans on the Services step. When booking opens inside your own website (an embedded booking, or the floating or pop-up book button), the Memberships section is not shown, so clients there go straight through the booking.
Feature Your Plans on Other Pages
To promote a few plans on any page of your booking site, add a Featured memberships widget: in Studio, hover over the widgets area, click the Widgets label and choose Featured memberships. See How to Add Widgets to Your Booking Page.
TIP: To design the Memberships store page itself (card style, featured plan, plans per row), open Memberships in the Storefront strip in Studio. See How to Design Your Online Store Pages.
What's next?
- How to Promote Your Packages Online
- How to Sell Memberships, Packages, Products and Gift Cards in Your Online Store
- How to Buy a Membership, Package or Gift Card Online (New Online Store) — a guide you can send to your clients
- New Online Bookings Part 2: Customise and Publish Your Booking Page in Pabau Studio
Questions? Reach us any time via the in-app chat — we’re happy to help.
Was this guide helpful? Let us know by voting below - your feedback helps us write clearer articles.
For more guides, browse the related articles below or use the search bar at the top of the page. You can also watch our video learning series, the Pabau Academy, or visit the Support page for additional help.