
Step 1: Access Analytics
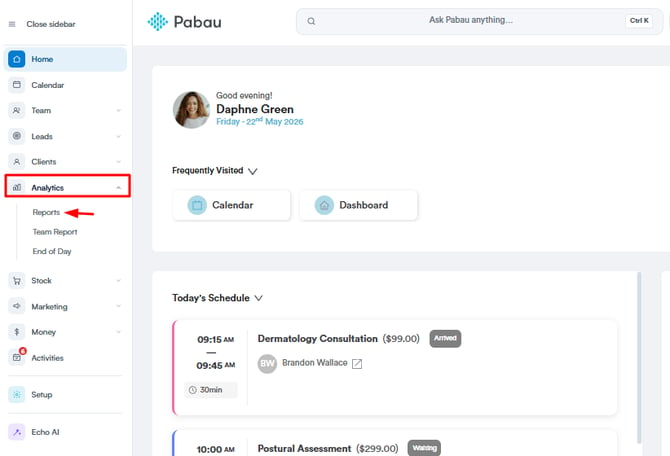
Begin by logging into your Pabau account using your credentials. Once logged in, navigate to the "Analytics" section in the left sidebar menu. Then, click on "Reports" to access the reports management page.
Step 2: Selecting the Report
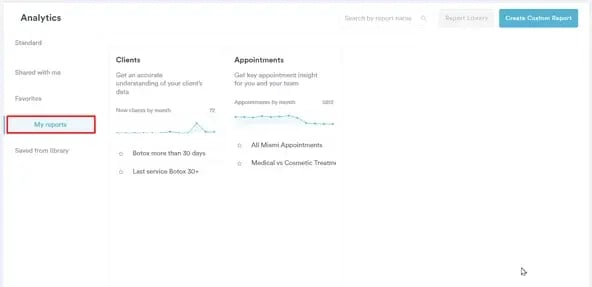
On the "Try our new suite of reports" banner, click Try it now to open the new reports view. Then, click on the "My reports" tab on the left sidebar. Here, you'll find a list of all the custom reports you've created in your account. Locate the report for which you want to change the access settings.
Step 3: Opening the "Manage access" Menu
Click the three dots icon on the report’s row, then select "Manage access."
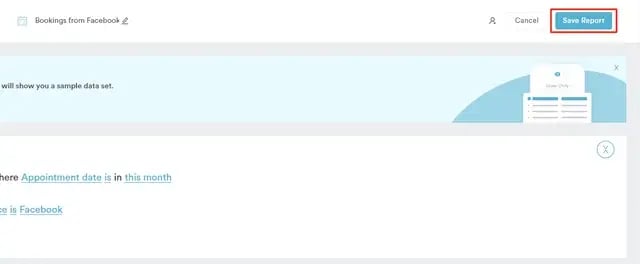
You can also open the same menu while customizing a report: with the report open in the report builder, locate the "Manage access" button (marked with a person icon) in the top right corner, next to the "Save Report" button, and click on it.
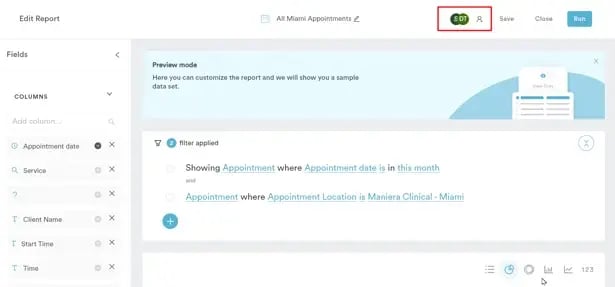
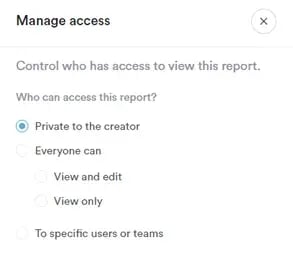
This will open the "Manage access" menu on the right side of the screen. Within the "Manage access" menu, you can choose who can access the report:
- Private to the creator — only you can open the report.
- Everyone can access — every employee can view the report.
- Specific users or teams — grant access person by person, choosing between view and edit access.
If you select the "Specific users or teams" option, you’ll see a list of your employees. Next to each employee, choose whether they can view or can edit the report — access is granted individually, per person.

To grant access to an entire team, click the team’s name at the top of the menu to filter the employee list down to that team’s members, then open the "Set all" menu and choose "Everyone can view" or "Everyone can edit." This applies the chosen access level to all of the listed team members at once. The "Set all" menu also includes "Hide from everyone," which removes access from everyone currently listed.
Keep in mind that the team names only filter the employee list — access is always saved per person. Employees who join a team later won’t automatically gain access to the report, so revisit "Manage access" when your teams change.
NOTE: Reports that were shared with whole teams in the older reports experience show an extra, read-only "Shared with team(s)" option. They keep working as before, but as soon as you change who has access, the share is converted to the per-person model described above.
Step 4: Save Changes
Once you've made your selections, click on "Save access" in the bottom right corner of the "Manage access" menu to save your changes.

If you opened the "Manage access" menu from within the report builder, remember to also click "Save Report" in the top right corner once you’re done, to confirm and apply any changes to the report itself.
Step 5: Review the Report
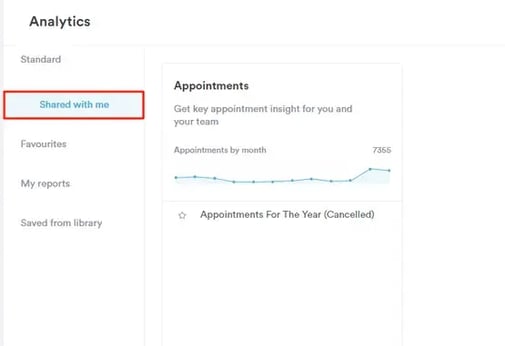
Staff members you’ve shared the report with can find it in the "Shared with me" tab on the reports page. For more details, see How to Find Reports Shared With Me.
By following the steps outlined above, you can effectively manage access to your custom reports by teams in Pabau. This allows you to control who can view and edit specific reports, ensuring that only relevant team members have access to the necessary data and insights.
For more guides, refer to related articles below, select additional guides, or use the search bar at the top of the page. These guides will help you get the most out of your Pabau account.
Additionally, to help you fully utilize and understand your Pabau account, we recommend exploring additional guides and resources offered at the Pabau Academy. It offers in-depth video tutorials and lessons, offering a holistic learning experience that can equip you with the essential skills for achieving success with Pabau.