
This feature is part of the new client card version and is currently available to select users only, starting August 2026. A wider rollout to all accounts is coming soon.
Step 1: Access the Client Card
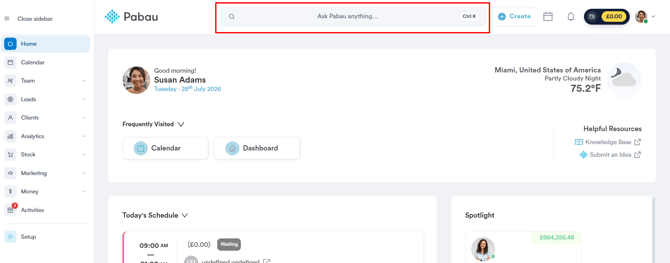
Start by logging into your Pabau account, then navigate to the Client Card of the client you want to update by using the search bar at the top of the screen.
Step 2: Navigate to the Insurance Tab
In the panel on the left side of the Client Card, click the Insurance tab, next to Personal and Relationships.
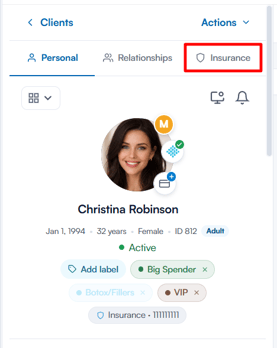
NOTE: If you don’t see the Insurance tab, the Insurance Billing feature is switched off for your account. An administrator can enable it in Setup > Business Details > Features.
Step 3: View Insurance Policies
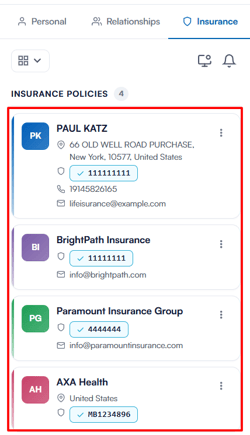
All insurance providers linked to the client appear under Insurance Policies, showing the provider’s name, address, membership number, phone, and email where available. The provider set as the client’s default payer shows a Default Payer chip, and you can click a membership number to copy or edit it.
Step 4: Add a New Policy
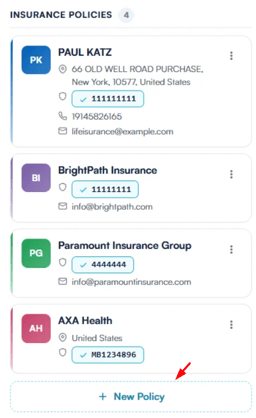
Click New Policy at the bottom of the list.
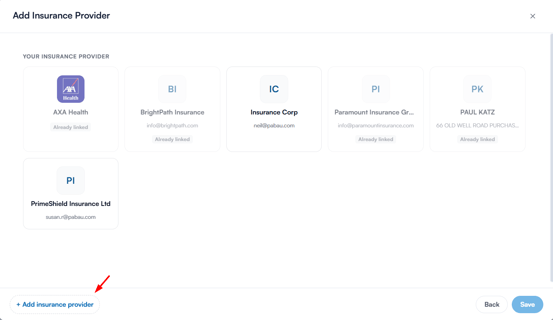
In the Add Insurance Provider window, select an existing provider from “Your Insurance Provider” — a tick appears on the selected card — then click Save. If the provider you need isn’t listed, click + Add insurance provider in the bottom-left corner to create a new one.
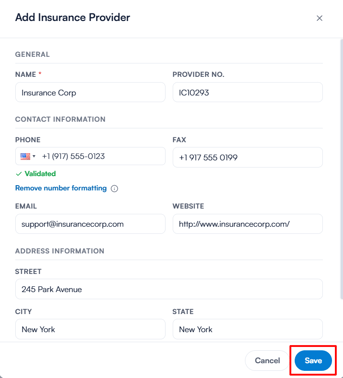
If adding a new provider, fill in the following details, then click Save:
- Name - The provider’s name (required).
- Provider No. - The provider’s reference number.
- Phone / Fax / Email / Website - The provider’s contact details.
- Street / City / County / Post Code / Country - The provider’s address.
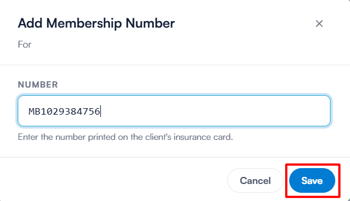
Once the provider is linked, the New insurance policy window opens. Enter the client’s Member ID — the membership number printed on their insurance card — then click Create. To record fuller policy details, such as the policy type, status, dates, and scans of the insurance card, click More options before saving.
NOTE: To learn more about linking an insurance policy to a client, please refer to this article.
Step 5: Manage an Existing Policy
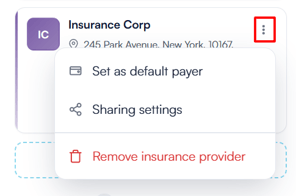
Click the three-dot menu on a policy card to:
- Set as default payer - The provider will be billed first by default on new invoices for this client. Once set, the same menu shows Remove as default payer.
- Sharing settings - Choose whether information about the client is shared with this provider (Share) or kept private (Restrict).
- Remove insurance provider - Unlink the provider from the client. Membership numbers and cases tied to the provider stay on file.
NOTE: The Insurance tab also includes a Case Details section, where you can track insurance cases — including authorisation codes, sessions, linked appointments, and attachments. Click Add Case to create one.
By following the steps above, you can view, add, and manage a client’s insurance policies directly from their Client Card, keeping all their coverage details in one place.
Was this guide helpful? Let us know by voting below - your feedback helps us write clearer articles.
For more guides, browse the related articles below or use the search bar at the top of the page. You can also watch our video learning series, the Pabau Academy, or visit the Support page for additional help.