
The Closed Lost Trend report lists the leads you have lost, sorted by the date they were marked as lost, so you can scan your losses in chronological order and spot patterns over time — for example, a week where losses spiked or a campaign that stopped converting.
In this article, we'll explain how to find the report, how its default filters work (including one important detail about the date filter), and how to customize, export, and save your view.
NOTE: Despite its name, this report displays as a table rather than a chart. The "trend" comes from the chronological ordering — rows are sorted by "Lead lost time" from oldest to newest, so reading down the table shows you how your losses developed over the period.
Step 1: Navigate to Analytics
Log in to your Pabau account, and in the left sidebar menu, go to Analytics, then click on the "Reports" button.
Step 2: Open the Closed Lost Trend report
On the "Try our new suite of reports" banner, click Try it now.
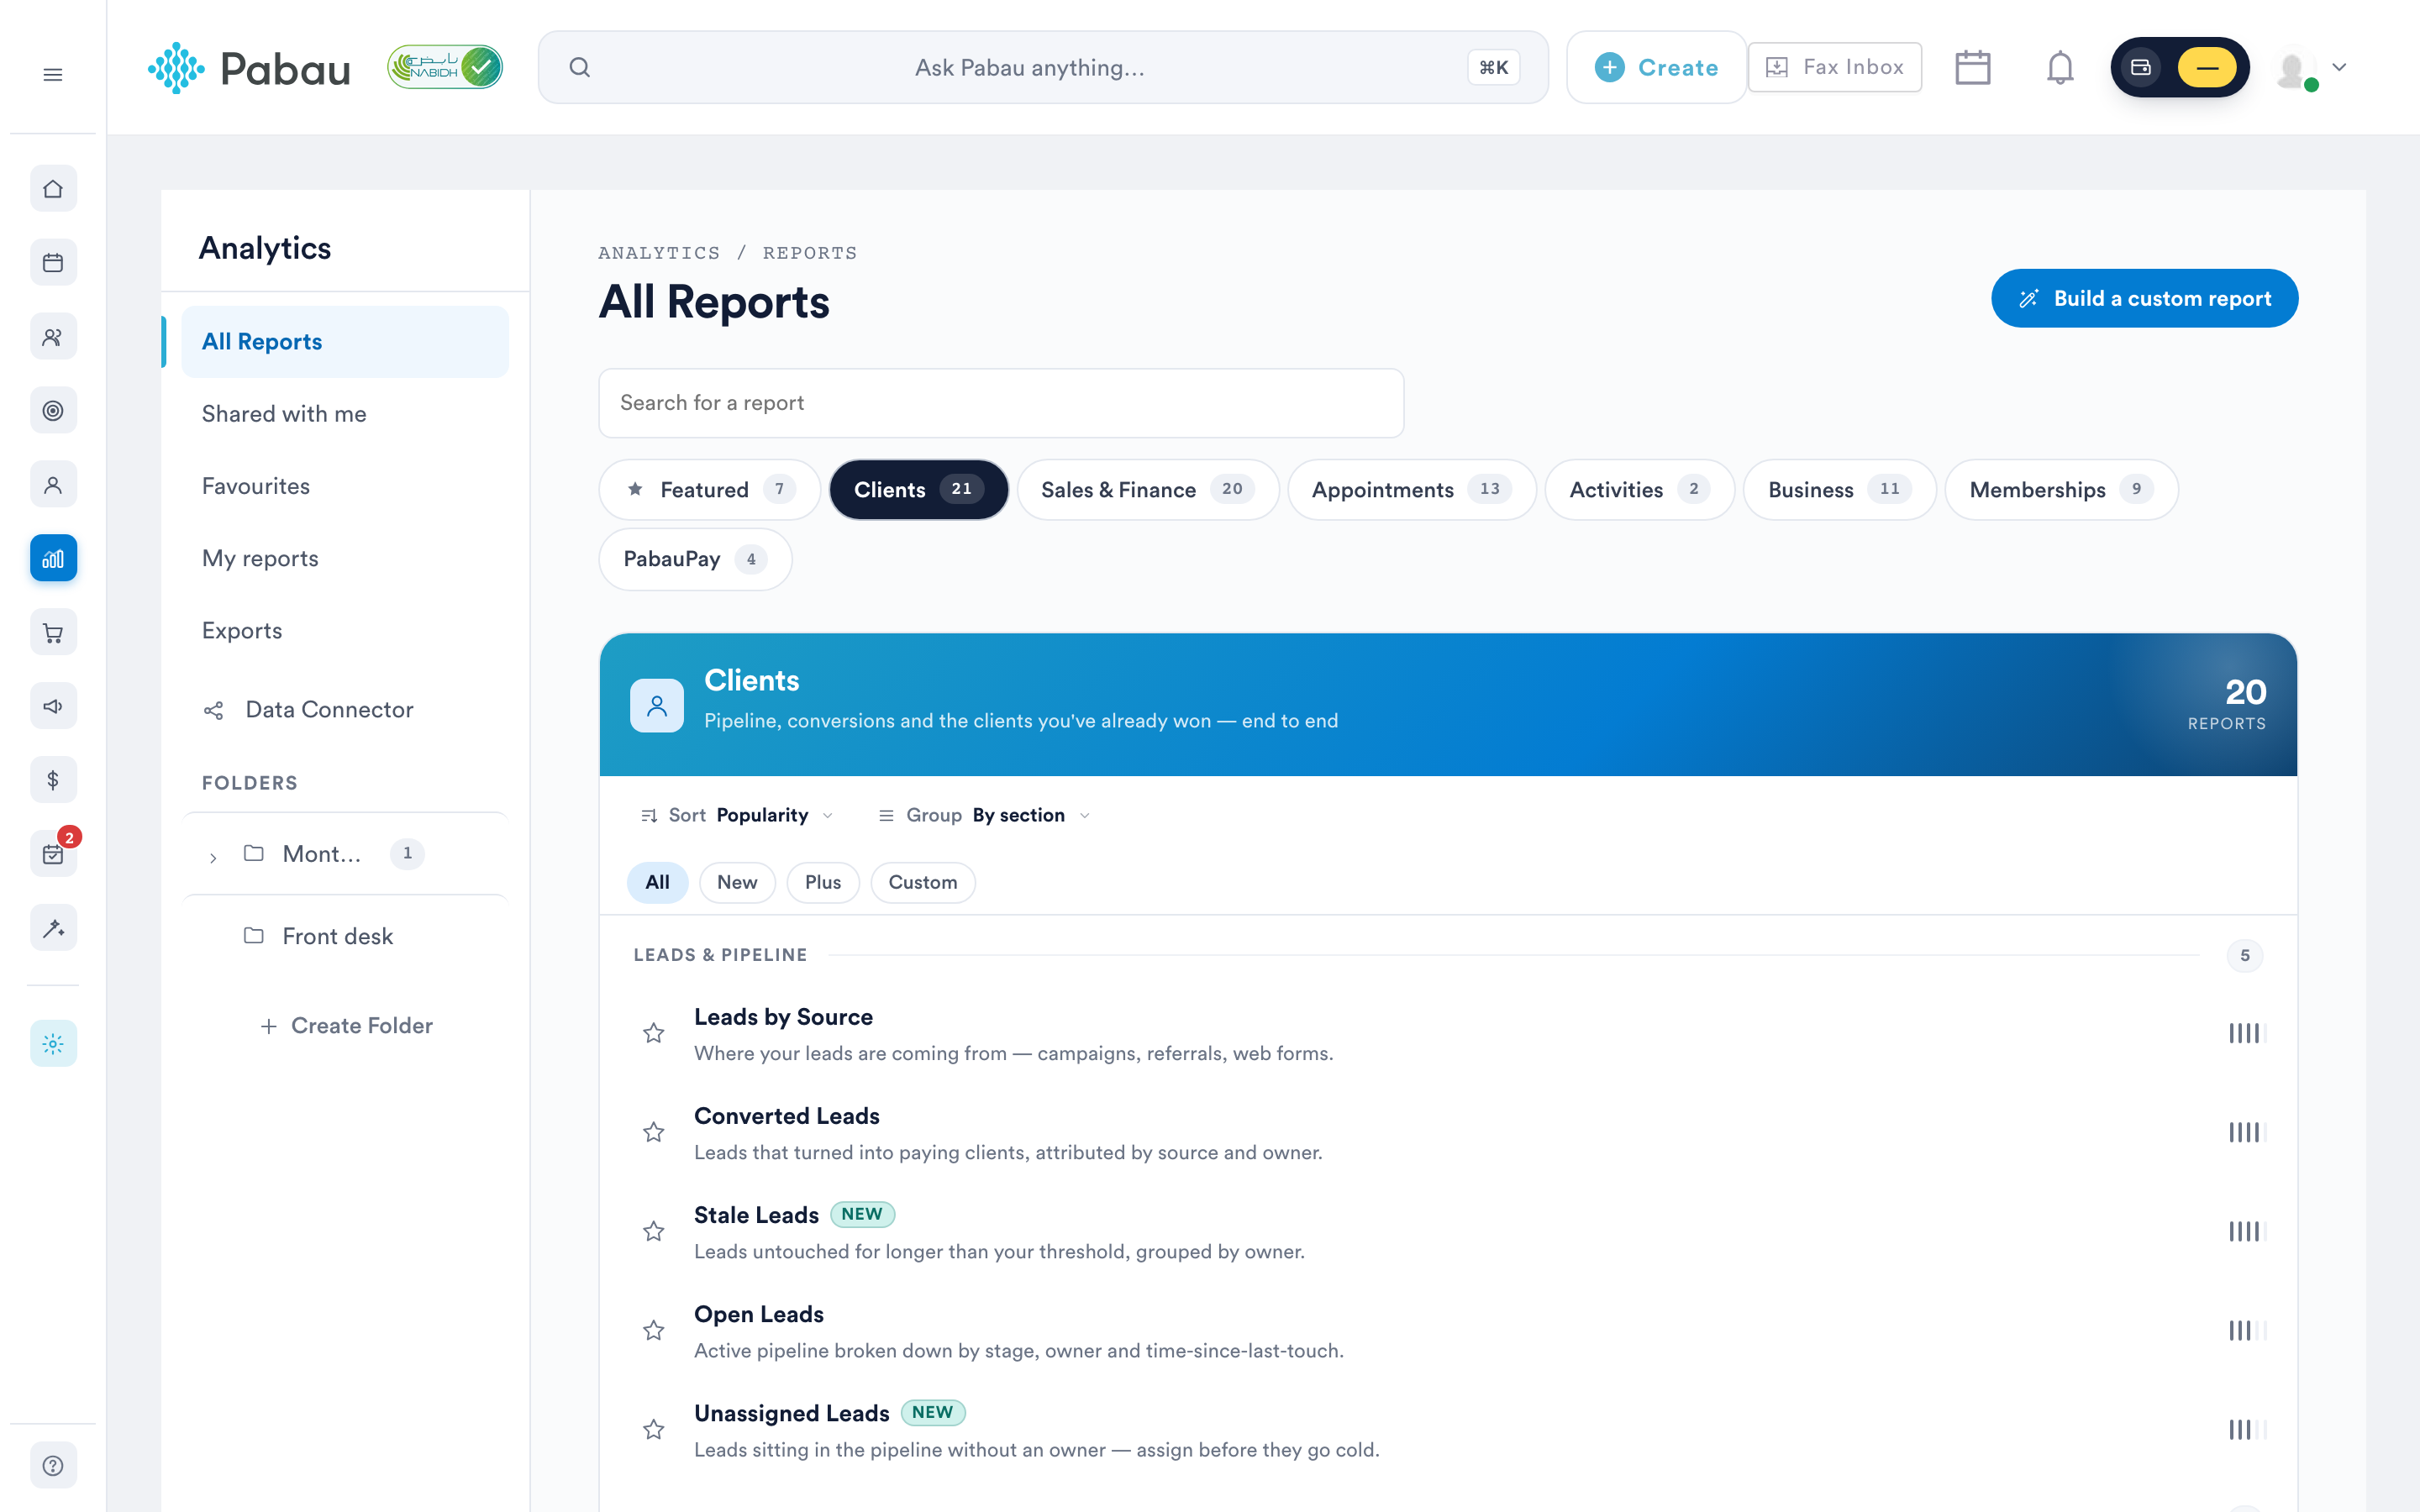
Once you're in the new reports catalog, open the Clients tab, scroll to the "Win/loss analysis" group, and click on Closed Lost Trend (it carries a "New" badge). The report opens in the reports viewer, where you can adjust filters and columns.
Step 3: Understand the default filters
The report opens with two filters already applied. Each filter is shown as a pill made up of four elements — object, field, operator, and value — and each element can be changed by clicking on it.
- Lead status is Lost — limits the report to leads that have been marked as lost.
- Lead created is exactly or later than in Last 30 days — limits the report to leads created in the last 30 days.
IMPORTANT: The default date filter is applied to the lead's creation date, not the date it was lost. That means a lead created 60 days ago and marked as lost yesterday will not appear with the default filters. If you want a true losses-over-time view, click on "Lead created" in the date filter pill and change the field to "Lead lost time" — the report will then include every lead lost within your chosen window, regardless of when it was created.
Step 4: Adjust the filters
- Adding a new filter: Click the plus sign (+) beneath your current filters, then specify the details of the new filter. Custom fields can be used as filters as well.
- Editing an existing filter: Click directly on the element you want to change (the field, operator, or value) and pick a new option from the dropdown.
- Removing a filter: Hover over the filter pill and click the "X" icon that appears.
After adjusting the filters, click the "Run" button in the top right corner to refresh the results.
Step 5: Review the data
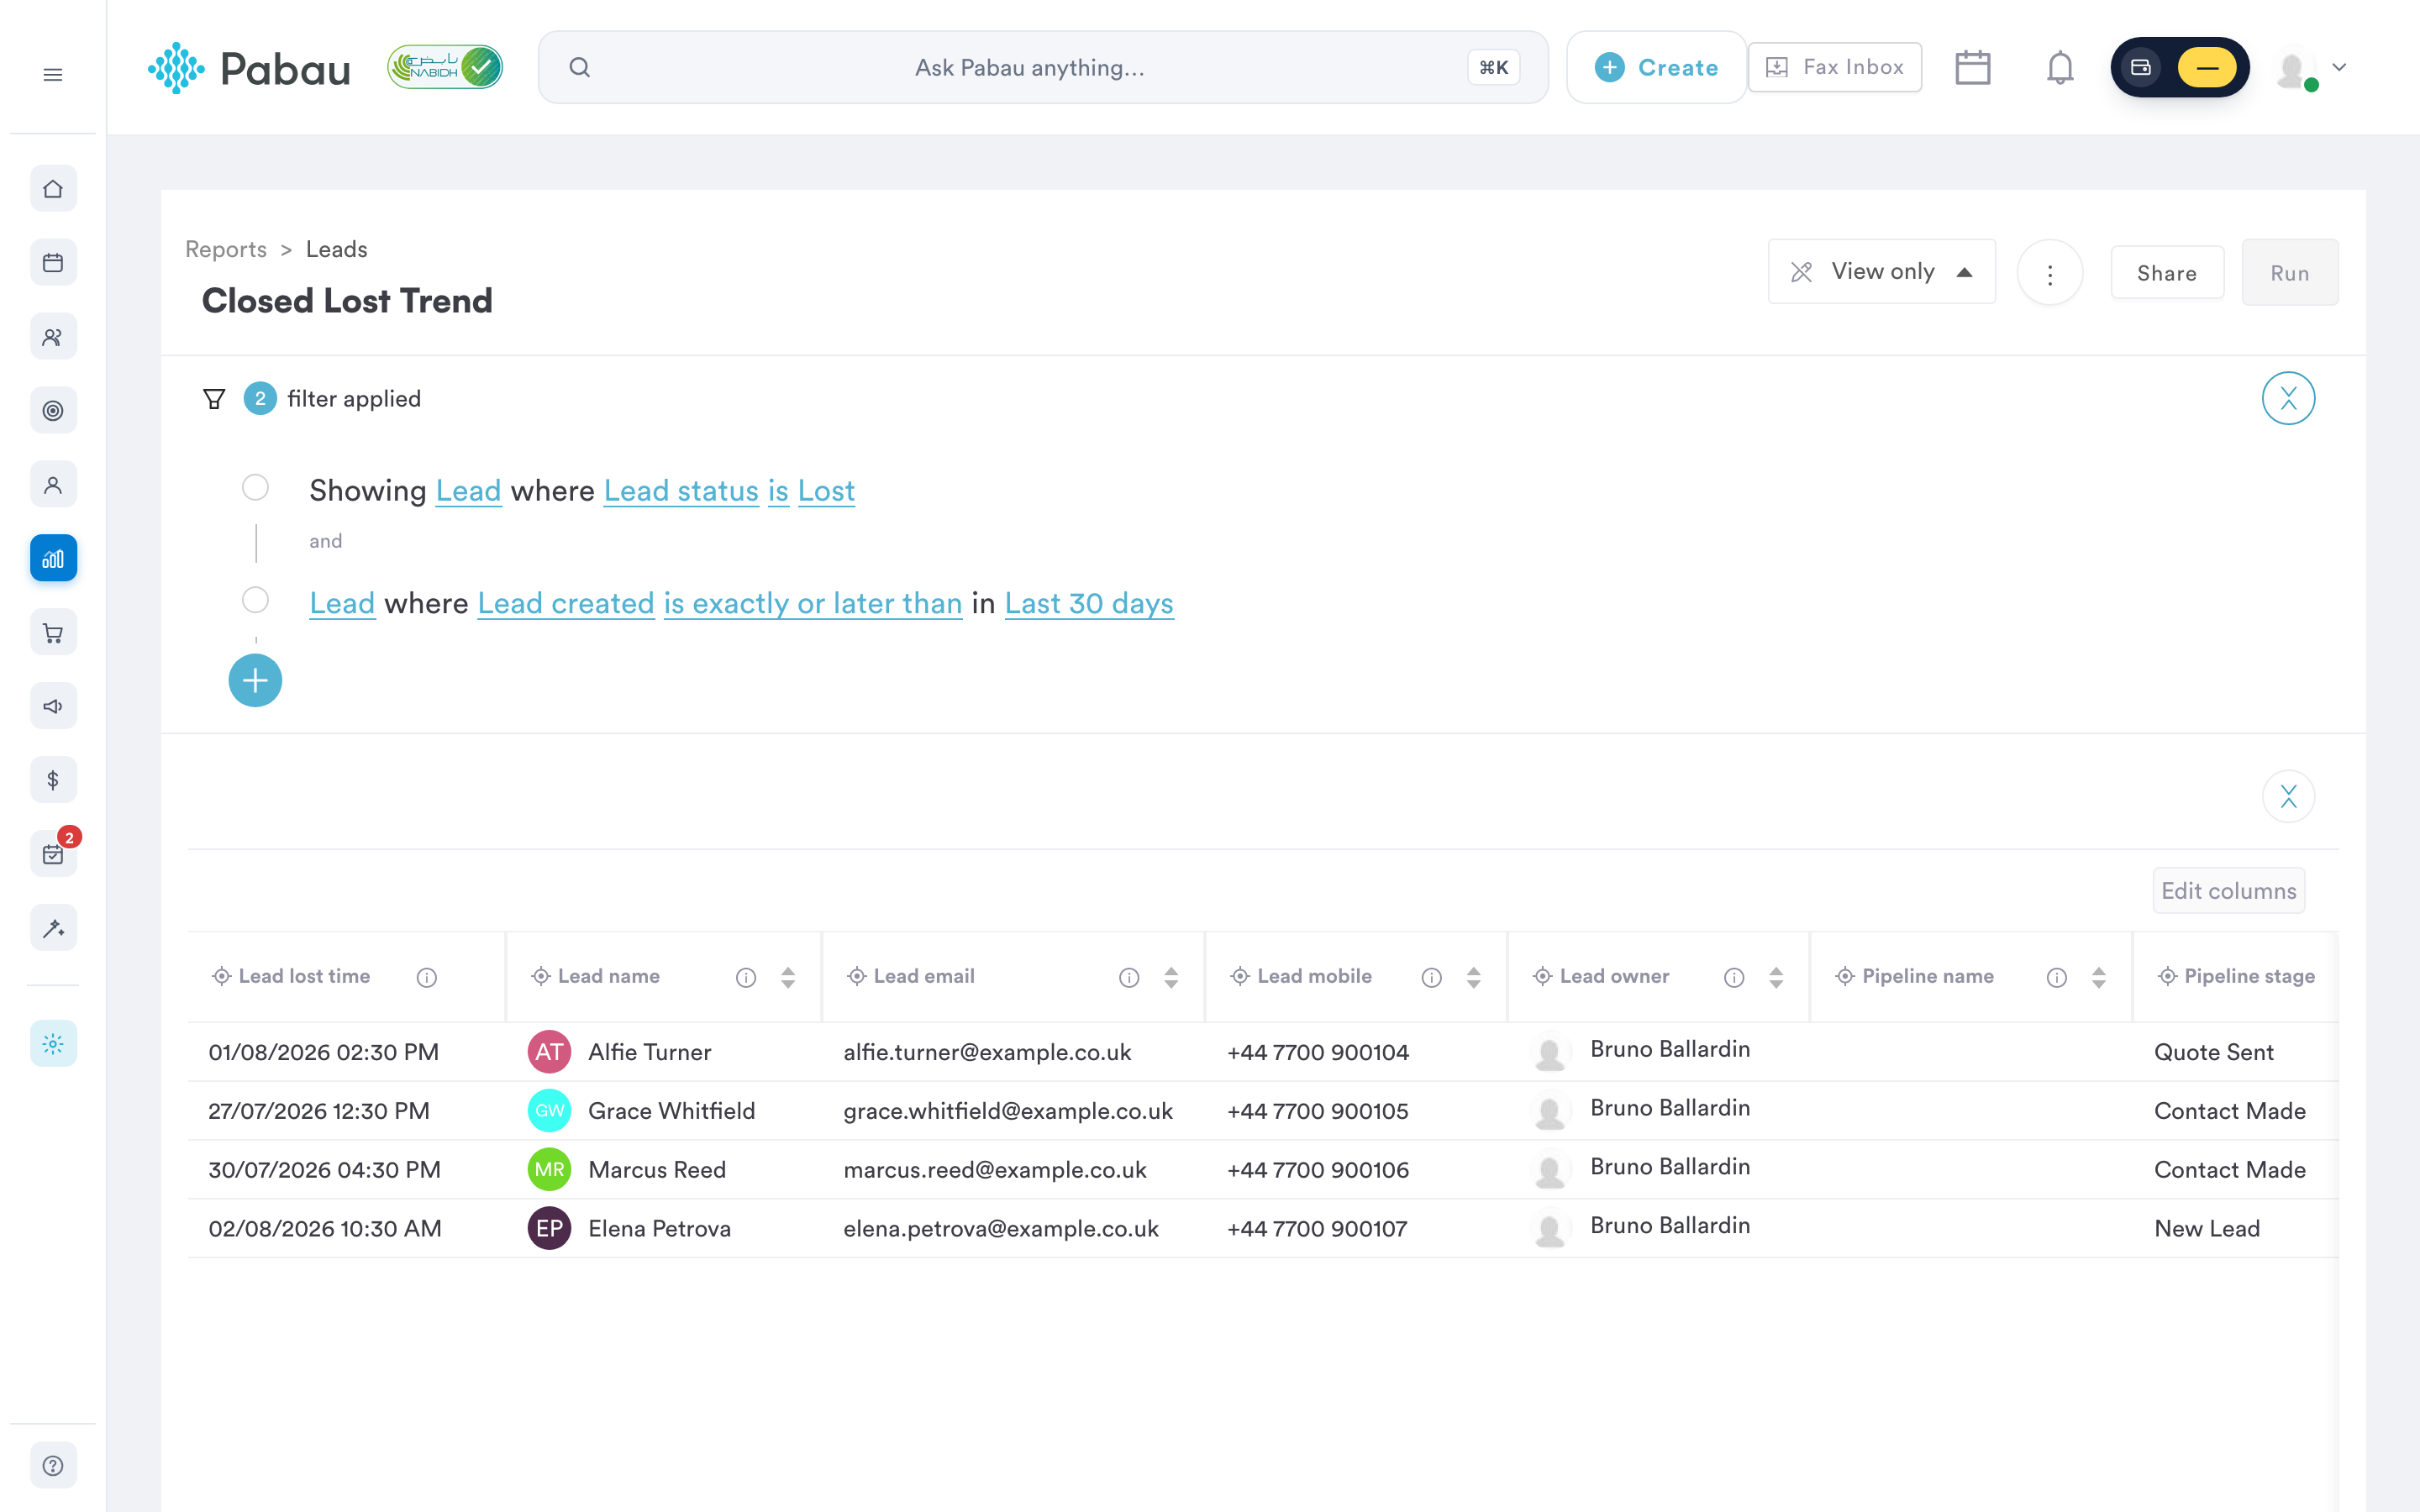
By default, the report includes the following columns:
- Lead lost time: when the lead was marked as lost — the report is sorted by this column, oldest first.
- Lead Name: the name of the lead, through which you can access their lead card.
- Lead email and Lead mobile: the lead's contact details.
- Lead owner: the team member the lead is assigned to.
- Pipeline name and Pipeline stage: where the lead sat in your pipelines.
- Lead lost reason: the reason recorded when the lead was lost.
You can include more columns using the "Add column" option — for example, Lead source or Lead created.
Step 6: Export, print, or save your view
- Click the three dots in the top right corner to Export the results — in the "Export results" dialog, choose CSV (comma-separated values) (the default) or XLSX (Excel) — or select Print (detailed) for a printable copy.
- Use "Save as" to keep your adjusted filters and columns as your own report, and "Share" to share it with teammates.
- You can also mark the report as a favorite for quick access — see How to Favorite a Report.
NOTE: To open the reports page you need the "Can access reports page" permission. The Clients tab of the new reports catalog is visible with either "Can access clients company reports" or "Can access leads company reports", and viewing this report's data requires "Can access leads company reports". Non-owner users may additionally need "Can access financial company reports" for the report to open.
By following these steps, you can use the Closed Lost Trend report to keep an eye on how your losses develop over time. To dig into why leads are being lost, pair it with the Lost Leads by Reason report, or review your wins with the Win Rate by Owner report and the Converted Leads report.
For more guides, refer to related articles below, select additional guides, or use the search bar at the top of the page. These guides will help you get the most out of your Pabau account.
Additionally, to help you fully utilize and understand your Pabau account, we recommend exploring additional guides and resources offered at the Pabau Academy. It offers in-depth video tutorials and lessons, offering a holistic learning experience that can equip you with the essential skills for achieving success with Pabau.