
The Clients list shows everyone on your books in one table. Quick tabs, a name search and saved views let you narrow it down in a couple of clicks, and you can act on several clients at once: edit them in bulk, print address labels or delete them.
Step 1: Open the Clients List
In the left sidebar, click Clients, then Clients again. The header shows how many clients the list holds (for example 24 Clients). Click Create client to add a new one.
Step 2: Narrow the List
- Use the tabs above the table: All, Active, Inactive or New this month (clients created since the first day of the current month). Inactive is the quickest way to find clients who have been made inactive.
- Type in Search by client name to find someone by name.
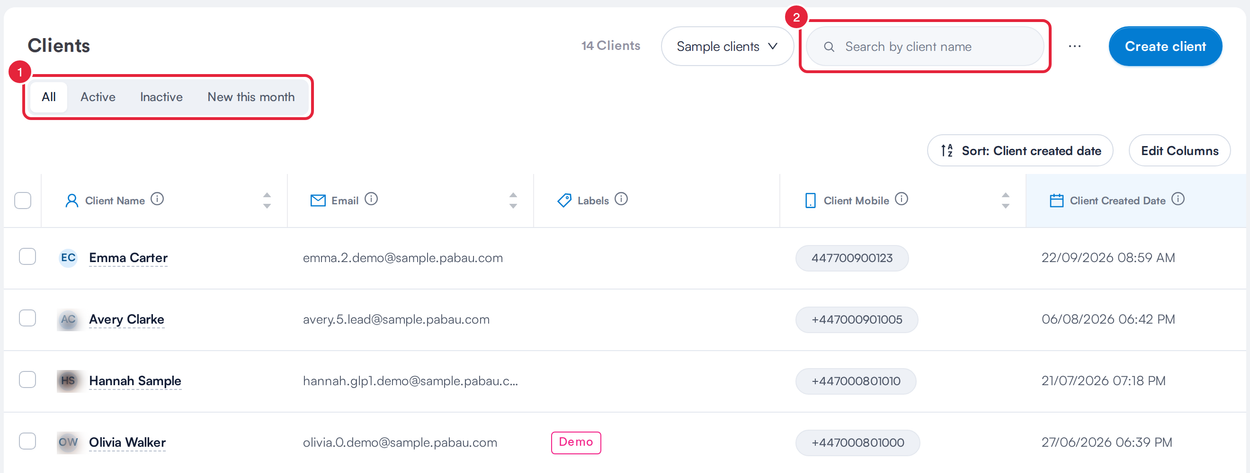
Tabs and the name search narrow the list
TIP: Hover over a client's name for shortcuts: send them a message, view their financials, start a treatment note or open their client card in a new tab.
Step 3: Switch Between Views
A view is a saved filter. Click the views button next to the client count. It reads All clients, or the name of the view you are using.
- Type in Search for client view to find a view by name.
- Click a view to apply it. A padlock means the view is private to you. Choose All clients to go back to the full list.
- Hover over a view and click the pencil to change it.
- Click Add to create a new view.
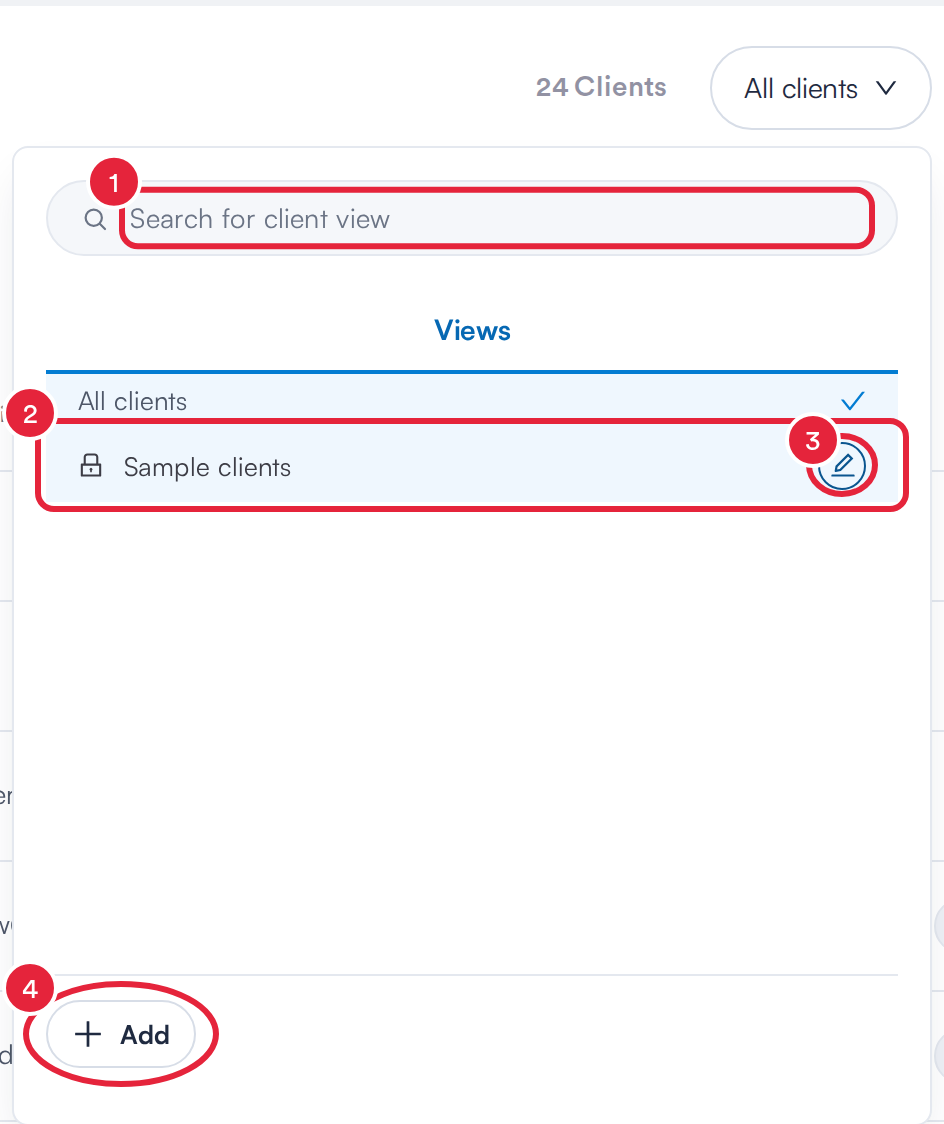
Pick, edit or add a view
Step 4: Create a View
After clicking Add, the Create New Client View window opens.
- Under Show client's that match ALL of these conditions:, click Add Condition and build the rule: choose a field (for example Email), how it should match (Is, Is not, Contains, Is empty and so on) and the value. Add more conditions if you need them. Conditions under Show client's that match ANY of these conditions: work as "or": a client only has to meet one of them.
- Enter a View Name.
- Choose the Visibility: Shared (all users in the company can see and use it) or Private (only you can see it).
- Leave Save selected columns with the view ticked to keep the columns you have on screen with this view.
- Click Save View.
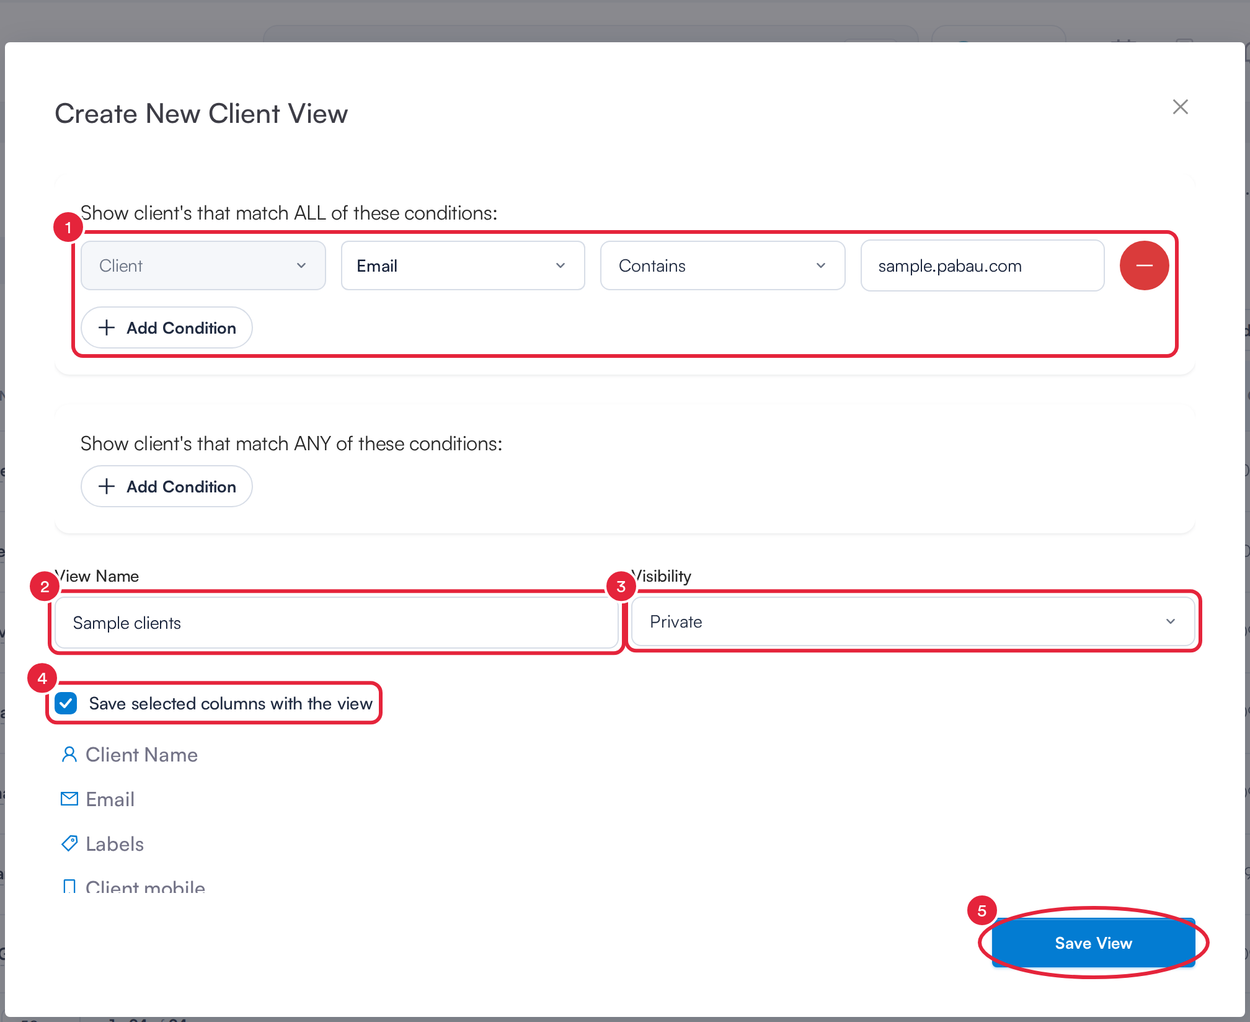
Build the rule, name the view and save it
To delete a view you no longer need, open it with the pencil and click Delete View.
Step 5: Sort the List and Choose Columns
- Click Sort (it shows the current order, for example Sort: Client created date), choose the field to sort by and pick Ascending or Descending. Clear goes back to the default order.
- Click Edit Columns. In Choose Columns, pick the details you want in the table (contact details, address, appointment and spend figures, opt-ins and more), then click Save.
Step 6: Act on Several Clients at Once
- Tick the box next to each client you want. The tick box in the header selects every client on the page.
- Click the pencil for Bulk Edit to change details such as labels, location or owner for all of them. See How to Edit a Client (New Client Card).
- Click the bin to Delete clients. Pabau asks you to confirm, because deleting can't be undone.
- Click the printer to Print Address Labels. See How to Print Client Labels (New Client Card).
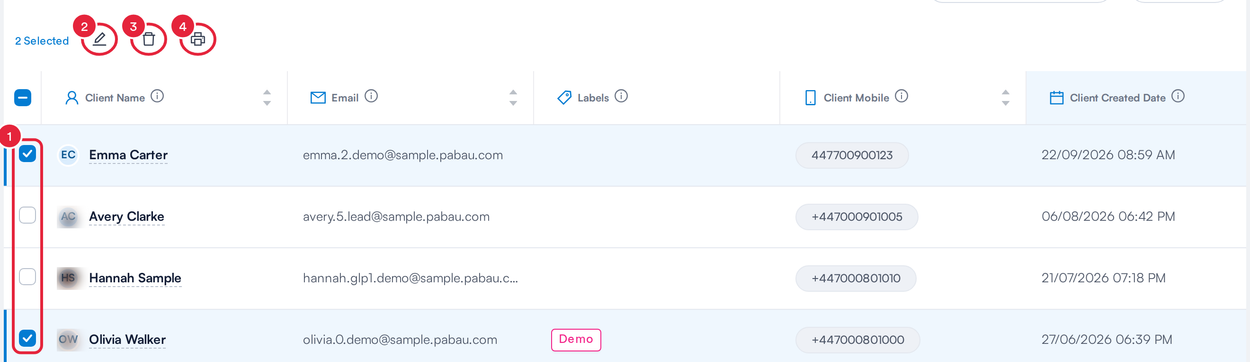
Bulk actions appear when you tick clients
NOTE: Bulk Edit needs the Can edit clients permission. Without the Can delete clients permission the bin is greyed out, and hovering over it explains that you need that permission and should ask a clinic admin.
Step 7: Merge Duplicate Clients
- Click ⋯ (More options) next to the search box.
- Choose Merge Clients to open the merge screen. See How to Merge Client Records (New Client Card).
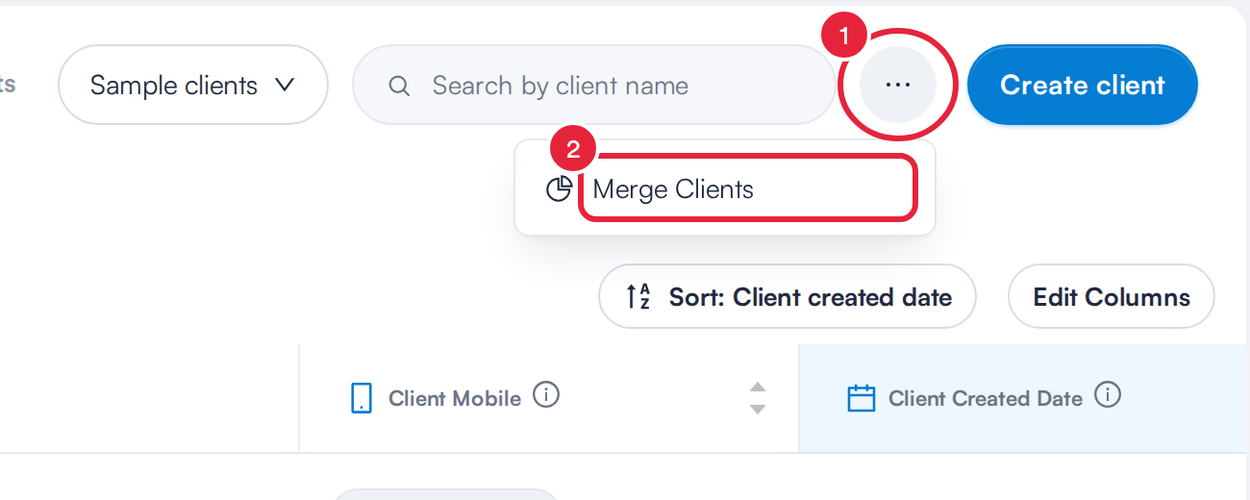
Merge Clients lives under More options
What's next?
- Overview of Clients and Client Card (New Client Card)
- How to Edit a Client (New Client Card)
- How to Delete a Client (New Client Card)
- How to Use the Search Bar in Pabau
Was this guide helpful? Let us know by voting below - your feedback helps us write clearer articles.
For more guides, browse the related articles below or use the search bar at the top of the page. You can also watch our video learning series, the Pabau Academy, or visit the Support page for additional help.