
This feature is part of the new client card version and is currently available to select users only, starting August 2026. A wider rollout to all accounts is coming soon.
The New Client Card includes a built-in label composer, so you can print a full A4 sheet of address or patient labels for a client without leaving Pabau. Each sheet repeats the same client’s details across a grid of labels — ideal for sample pots, paper records, referral letters and envelopes.
You choose what appears on each label, how many columns and rows the sheet has, and exactly which positions on the sheet to print — handy when you’re reusing a partially used sheet of sticky labels. Pabau also remembers your setup for next time.
1. Open the client card
- Go to Clients and search for the client — for example, Christina Robinson.
- Click the client’s name to open their client card.
2. Open the Print Labels window
- At the top of the client details panel on the left, click Actions.
- Select Print Labels from the menu.
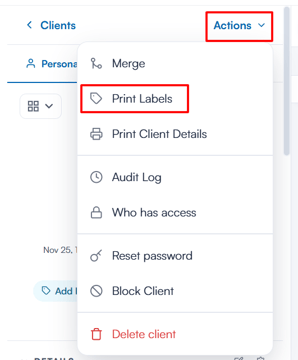
The Print Labels window opens with a live preview of your label sheet.
3. Choose what appears on your labels
Use the Label content dropdown to pick one of three layouts:
- Patient details (the default) — the client’s name with the surname first, date of birth, patient number, mailing address and GP name.
- Address details — the client’s name and mailing address only, laid out like an envelope label.
- Patient details (no address) — the client’s name with a gender marker, date of birth and patient number, with no address.
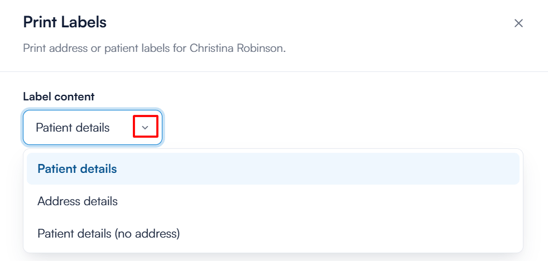
Labels only include fields that have a value — if the client has no date of birth or patient number recorded, that line is simply left off. The GP name is read from the client’s ‘GP Name’ custom field.
4. Set the label sheet layout
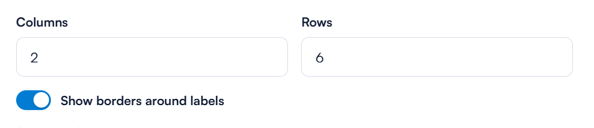
- Enter the number of Columns (up to 8) and Rows (up to 20) to match the label sheet you’re printing onto. The default is 2 columns by 6 rows.
- Turn on Show borders around labels if you’d like a printed outline around each label — leave it off for pre-cut sticky label sheets.
The preview updates as you make changes, so you can see exactly how the sheet will look.
5. Choose which labels to print
Every position on the sheet is selected to begin with. Click any label in the preview to exclude it, and click it again to include it — the bottom of the window shows how many labels are currently selected.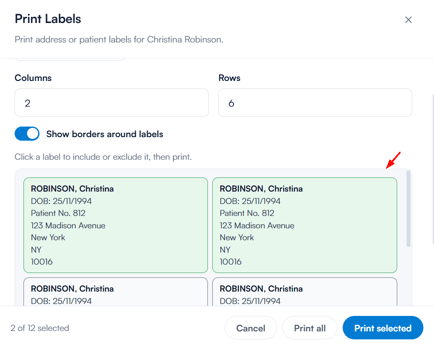
Printing onto a partially used sheet? Click the positions that have already been peeled off to exclude them — those spots are left blank on the printout, so the remaining labels line up perfectly with your sheet.
6. Print your labels
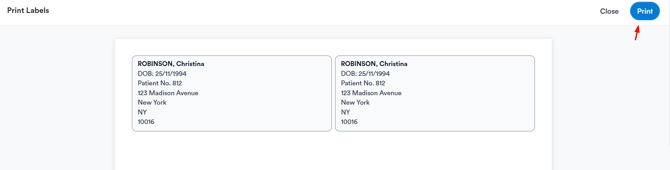
- Click Print selected to print only the labels you’ve chosen, or Print all to fill every position on the sheet.
- A full-page print view opens and your browser’s print window appears automatically, set up for A4. Choose your printer and confirm.
- Need another copy? Click Print at the top of the print view. When you’re finished, click Close (or press Escape) to return to the client card.
Pabau saves your label content, layout and border settings when you print, so the composer opens with the same setup next time. These preferences are personal to your user account.
That’s it — you can now print neat, consistent client labels straight from the New Client Card whenever you need them.
Was this guide helpful? Let us know by voting below - your feedback helps us write clearer articles.
For more guides, browse the related articles below or use the search bar at the top of the page. You can also watch our video learning series, the Pabau Academy, or visit the Support page for additional help.