
The Leads board and its list share one set of tabs, search and filters, so you can quickly find a lead or narrow down what you are looking at: just your own leads, leads nobody owns yet, leads that need a follow-up, or leads from one marketing source. You can also save a set of filter rules as a view to use again later.
Step 1: Get to Know the Toolbar
Click Leads (the target icon) in the left sidebar and open the Board. Click List at the top right if you prefer a table: it has the same toolbar.
- The tabs All leads, My leads, Unassigned and Needs attention (see Step 2).
- Views opens your saved views (see Step 6).
- Search leads… finds leads by name. Type at least three letters.
- Lead status shows Open leads, Converted (won) leads, Lost leads or All statuses.
- The quick filters Lead stage, Lead owner and Lead source (see Step 3).
- The date filter narrows leads by the date they were created (see Step 4).
- Filters opens the advanced filters (see Step 5).
- Sort changes the order of the leads (see Step 7).

The tabs, search and filters on the Leads board
Step 2: Use the Tabs
- All leads shows every lead.
- My leads shows the leads you own.
- Unassigned shows leads that have no owner yet.
- Needs attention shows open leads with nothing planned (no open activities) or with an overdue activity, so you can see who needs a follow-up.
Step 3: Narrow Down With Quick Filters
- Click Lead owner (or Lead stage or Lead source).
- Tick the values you want. Lead owner lists your team members and teams, and All team members includes everyone.
- Click Apply. Click Clear instead to remove that filter.
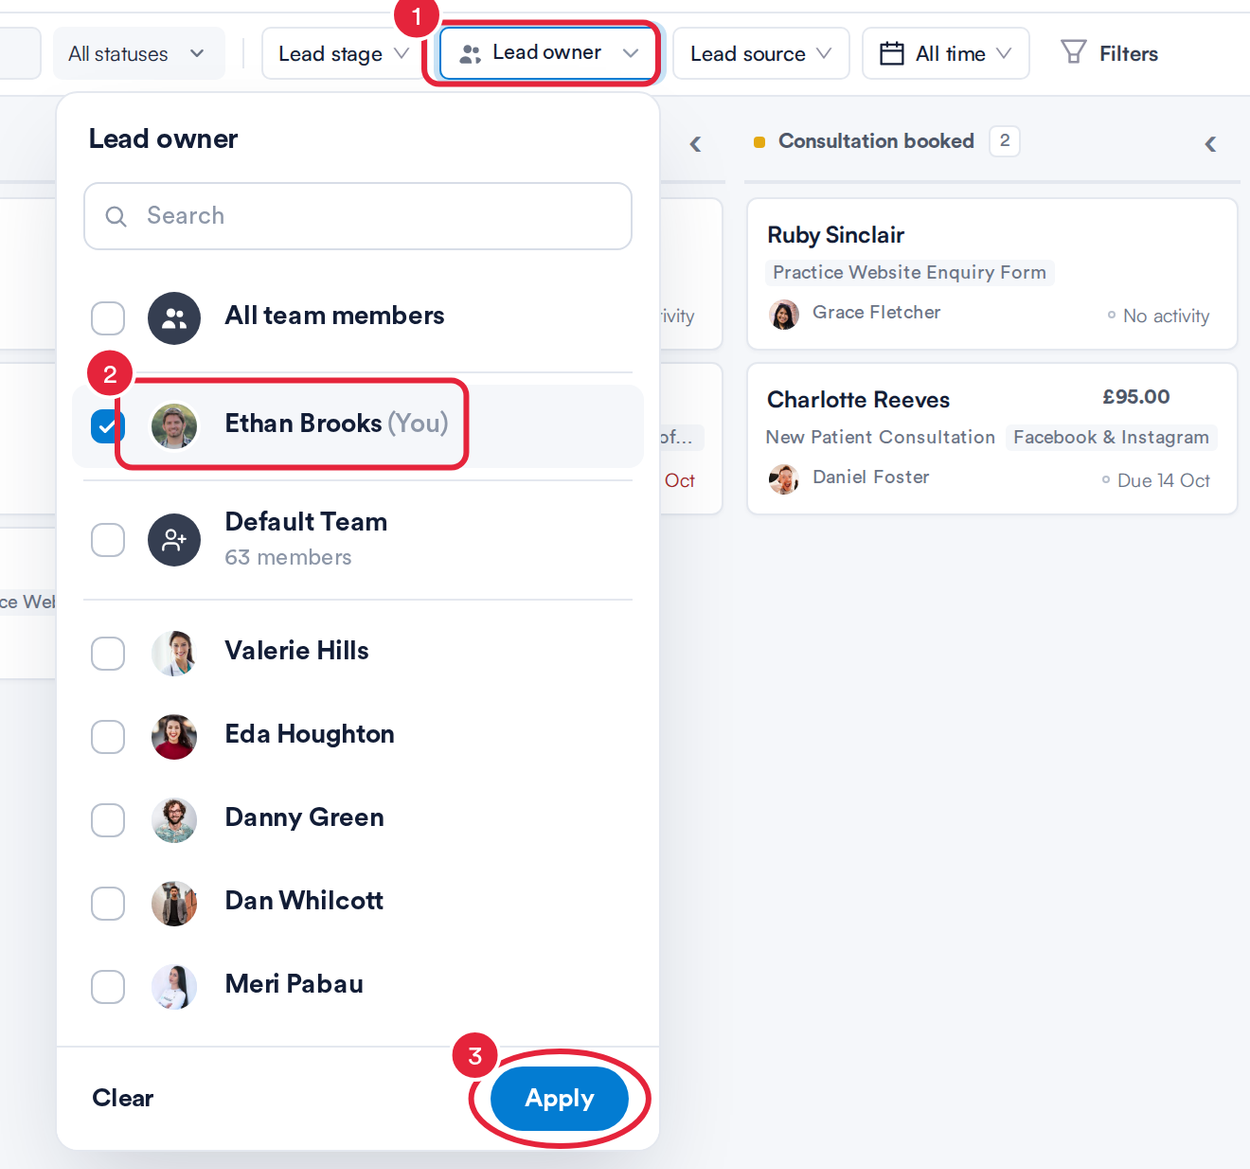
Filter the leads by owner
Step 4: Filter by the Date a Lead Was Created
Click the date filter (it shows All time to start with) and choose Today, Last 14 days, This month, Last month, Last 3 months or Custom range to pick your own dates.
Step 5: Build Advanced Filters
Click Filters to open Advanced filters. Here you can filter on any lead field, related record or custom field.
- Under Show lead's that match ALL of these conditions, click Add Condition.
- Choose the record and field to filter on, then the comparison (for example Is) and the value.
- To find leads that match at least one of several conditions instead, use Add Condition under Show lead's that match ANY of these conditions.
- Click Apply filters. The Filters button shows how many rules are active.
- To remove every rule, open Filters again and click Clear rules.
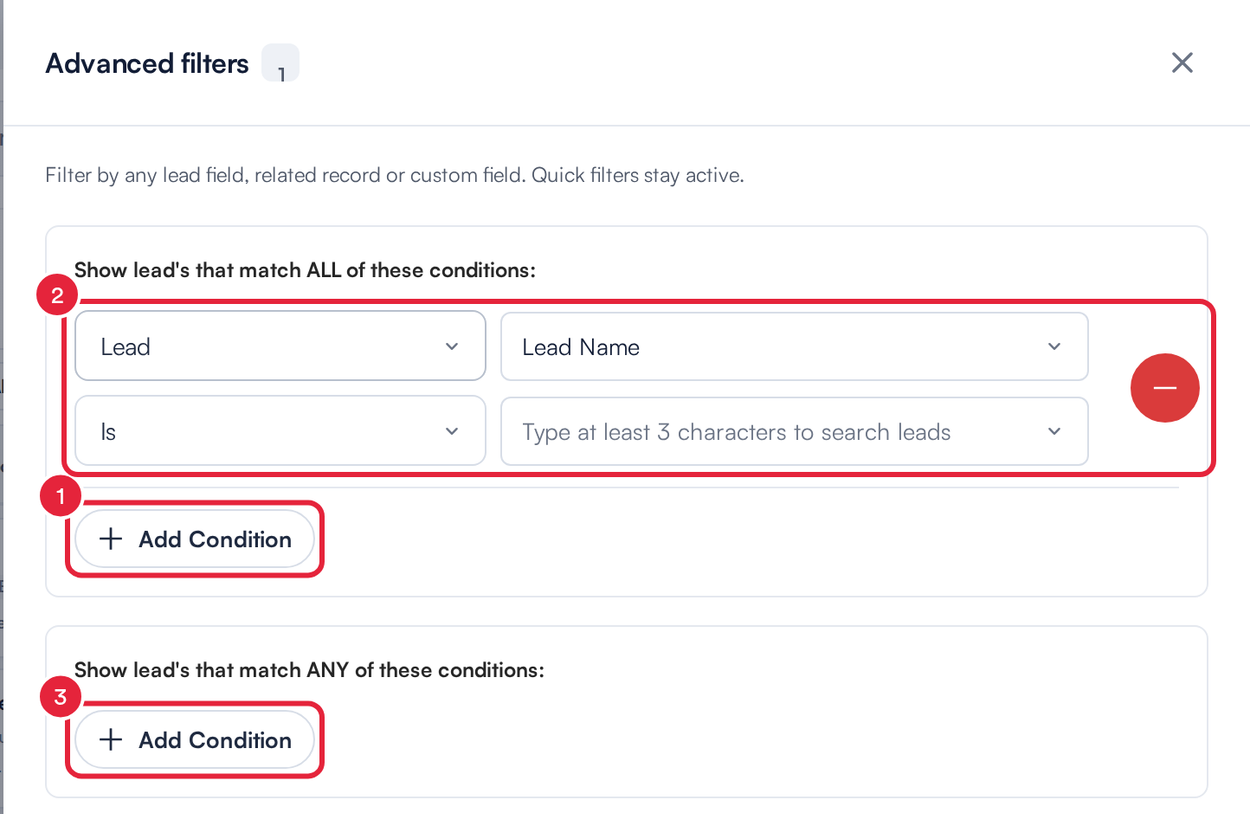
Add conditions to the ALL or ANY group

Add conditions, then apply them
NOTE: Quick filters stay active alongside your advanced filters. Applying advanced filters, or choosing a saved view, sets the tab back to All leads and the status to All statuses.
Step 6: Save Your Rules as a View
In Advanced filters, after adding your conditions:
- Click Save as a view.
- Enter a View Name.
- Set Visibility: Private (only you can see it) or Shared (everyone in your clinic can see and use it).
- Leave Save selected columns with the view ticked to save the list’s columns with it.
- Click Save and apply view.
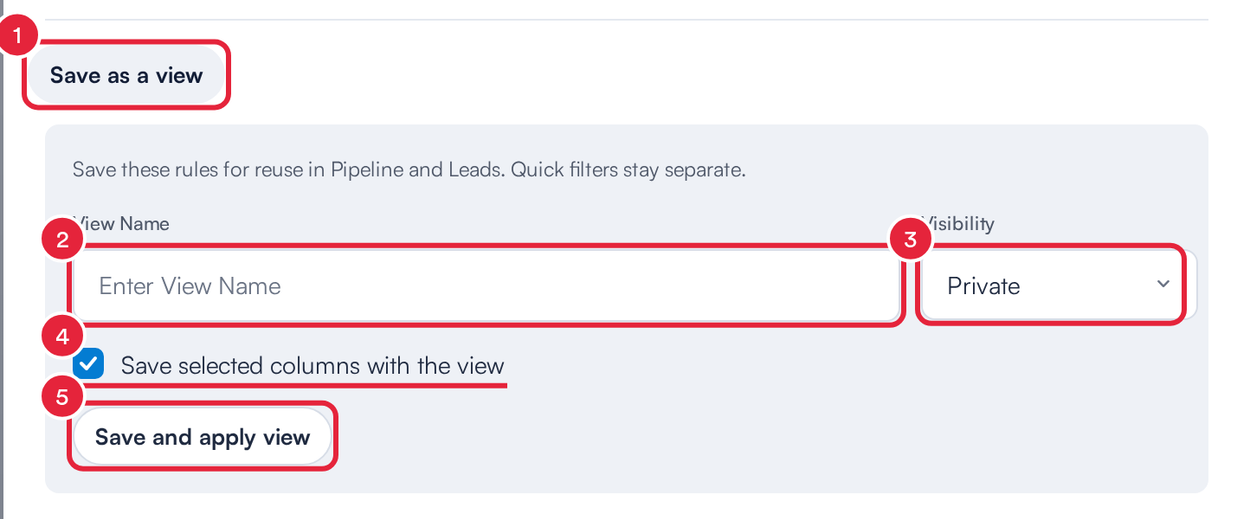
Save your rules as a view
Your saved views appear under Views on the board and in the Leads list. Choose one to apply its rules again.
Step 7: Sort the Leads
Click Sort (it shows Sort: Lead Created to start with), choose a column under Sort by and pick Ascending or Descending. On the board, the leads in each stage follow this order.
Step 8: Clear Everything in One Go
As soon as any search, tab, status or filter is in use, a Clear button appears next to Filters. Click it to reset the search, tab, status, quick filters, date, view and advanced rules all at once.
TIP: Pabau remembers the tab, lead status and advanced filter rules you last used, on the browser you are using.
Step 9: See the Leads From One Marketing Source
- Go to Setup › Marketing Sources and click View leads next to a source.
- The Leads list opens showing only that source’s leads, with a Source: chip and the source’s name at the top. Click × on the chip to see all your leads again.
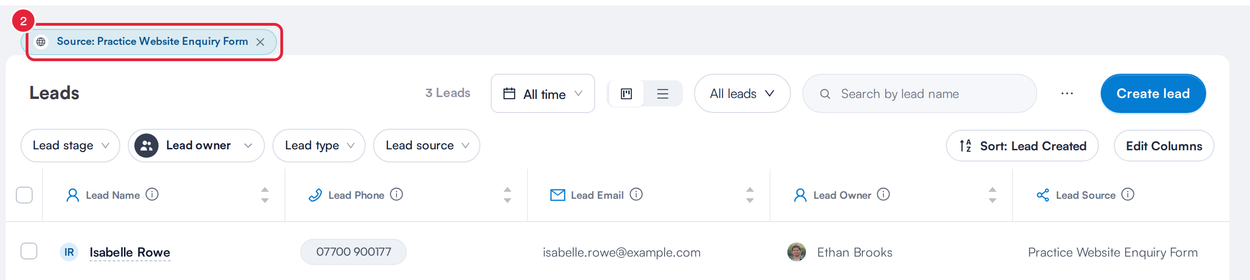
A list of the leads from one marketing source
Filtering the Leads List
When the Leads list opens on its own (for example from View leads in Marketing Sources, or when you last used the list), its toolbar looks slightly different, as in the screenshot above: the quick filters are Lead stage, Lead owner, Lead type (Open, Converted or Junk) and Lead source, saved views are under All leads, and the search box reads Search by lead name. The date filter, Sort and Edit Columns work the same way. To create views from there, see How to Create Lead Views.
What's next?
- Overview of the Lead Pipeline Board
- How to Create Lead Views
- Overview of Leads
- How to Filter by Teams in Leads
Was this guide helpful? Let us know by voting below - your feedback helps us write clearer articles.
For more guides, browse the related articles below or use the search bar at the top of the page. You can also watch our video learning series, the Pabau Academy, or visit the Support page for additional help.