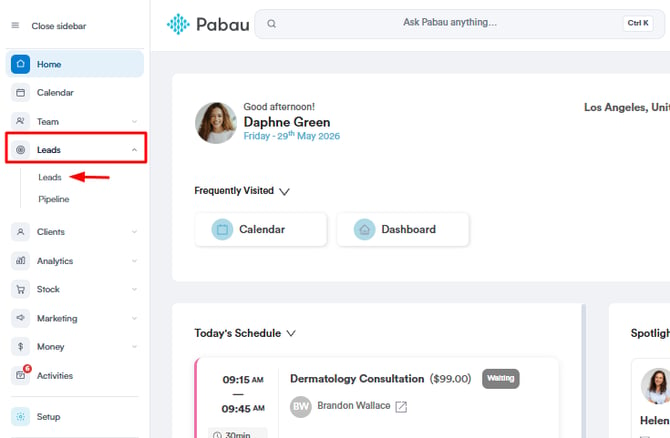
Step 1: Navigate to Leads
Log in to your Pabau account, navigate to Leads in the left sidebar menu, and then from the dropdown menu, select "Leads" again.
Step 2: Edit Lead Views
On the Leads page, navigate to the top right of the screen and click the All Leads button. A dropdown will appear showing:
- A filter option by Owner
- All existing views saved in your system
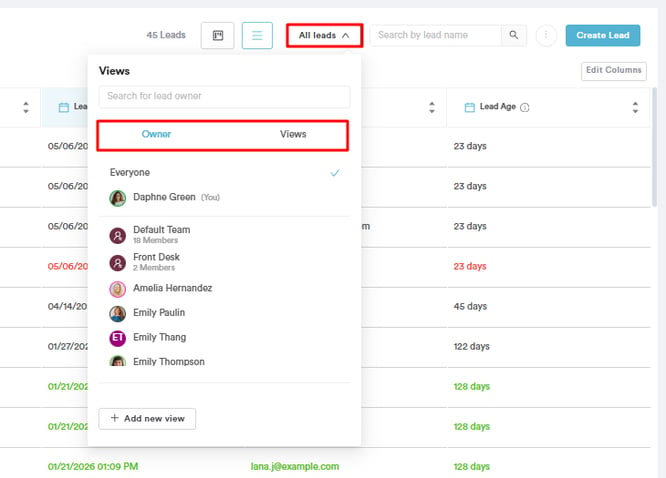
Step 3: Create a New View
Click + Add new view to open the Create New Lead View pop-up window.
Setting Conditions:
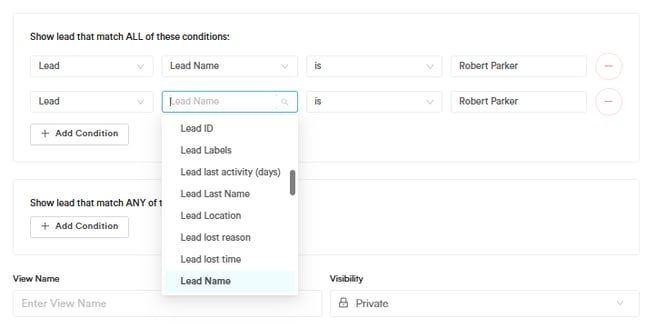
You can define which leads appear in the view using two condition groups:
-
Show leads that match ALL of these conditions — Every condition in this group must be true for a lead to appear (AND logic).
-
Show leads that match ANY of these conditions — At least one condition in this group must be true for a lead to appear (OR logic).
For each condition row, configure three fields:
- Entity — Select the type of record (e.g. Lead).
- Field — Choose which lead property to filter by. Available options include:
- Lead ID
- Lead Labels
- Lead Last Activity (days)
- Lead Last Name
- Lead Location
- Lead Lost Reason
- Lead Lost Time
- Lead Name
- (and more)
- Operator — Choose the comparison (e.g. is, is not, contains).
- Value — Enter the value to match against (e.g. a specific name, label, or location).
Click + Add Condition to add more rows within either group.
View Name and Visibility

- View Name — Enter a descriptive name for the view so it's easy to identify later.
- Visibility — Set who can see this view:
- Private — Only visible to you.
- Public — Visible to all team members.
Save Selected Columns with the View
Check the Save selected columns with the view option to preserve your current column layout alongside the filters.
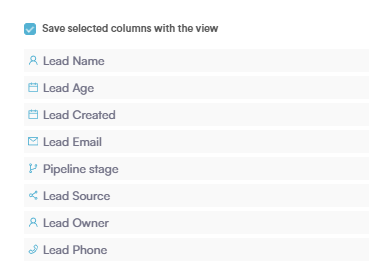
The columns saved with the view include:
- Lead Name
- Lead Age
- Lead Created
- Lead Email
- Pipeline Stage
- Lead Source
- Lead Owner
- Lead Phone
Once everything is configured, click Save View to save.

Step 4: Adjust Columns
To adjust the columns and modify the view of your clients, simply go to the top right corner and click on "Edit columns." From here, you can select which lead information you want to see when opening the view.
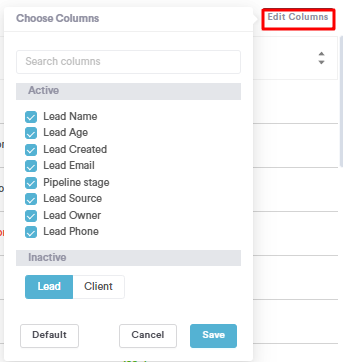
Once you've finished editing, you can apply the filter, and you'll have a filtered view of your leads for improved visibility in the system.
For more guides, refer to related articles below, select additional guides, or use the search bar at the top of the page. These guides will help you get the most out of your Pabau account.
Additionally, to help you fully utilize and understand your Pabau account, we recommend exploring additional guides and resources offered at the Pabau Academy. It offers in-depth video tutorials and lessons, offering a holistic learning experience that can equip you with the essential skills for achieving success with Pabau.