
NOTE: This guide covers the new Online Bookings and Client Portal, which are being rolled out to clinics in phases. If your screens look different, your account may still be on the classic version — message us via the in-app chat and we will help.
When the times a client wants are taken, they can join your waitlist from the booking page instead of leaving empty-handed. In this article, you will learn how to switch on the waitlist for your new booking page and what happens when a client joins it.
Step 1: Open the Date & Time Page in Pabau Studio
Go to Setup, under Online presence click Online Bookings, then click Customise page.
- In the Booking pages strip, click Date & Time.
- Make sure Edit is selected at the top right.
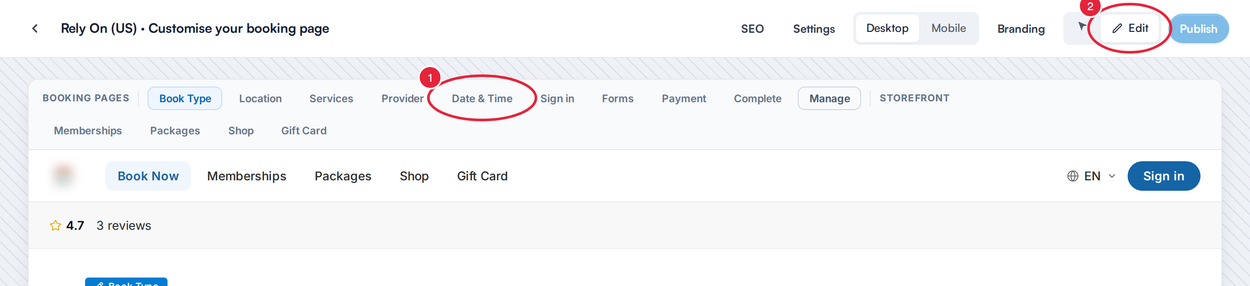
Open the Date & Time page in Edit mode
- Hover over the calendar and click the Date & Time label.
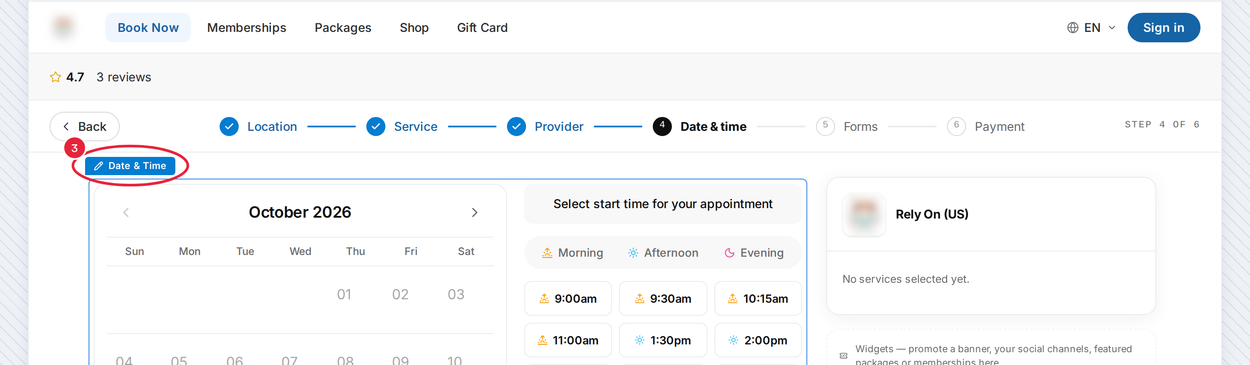
Click the Date & Time label above the calendar
Step 2: Switch On the Waitlist
- In the Date & time section panel, stay on the Layout tab.
- Under Waitlist, switch on Show waitlist.
- Close the panel and click Publish.
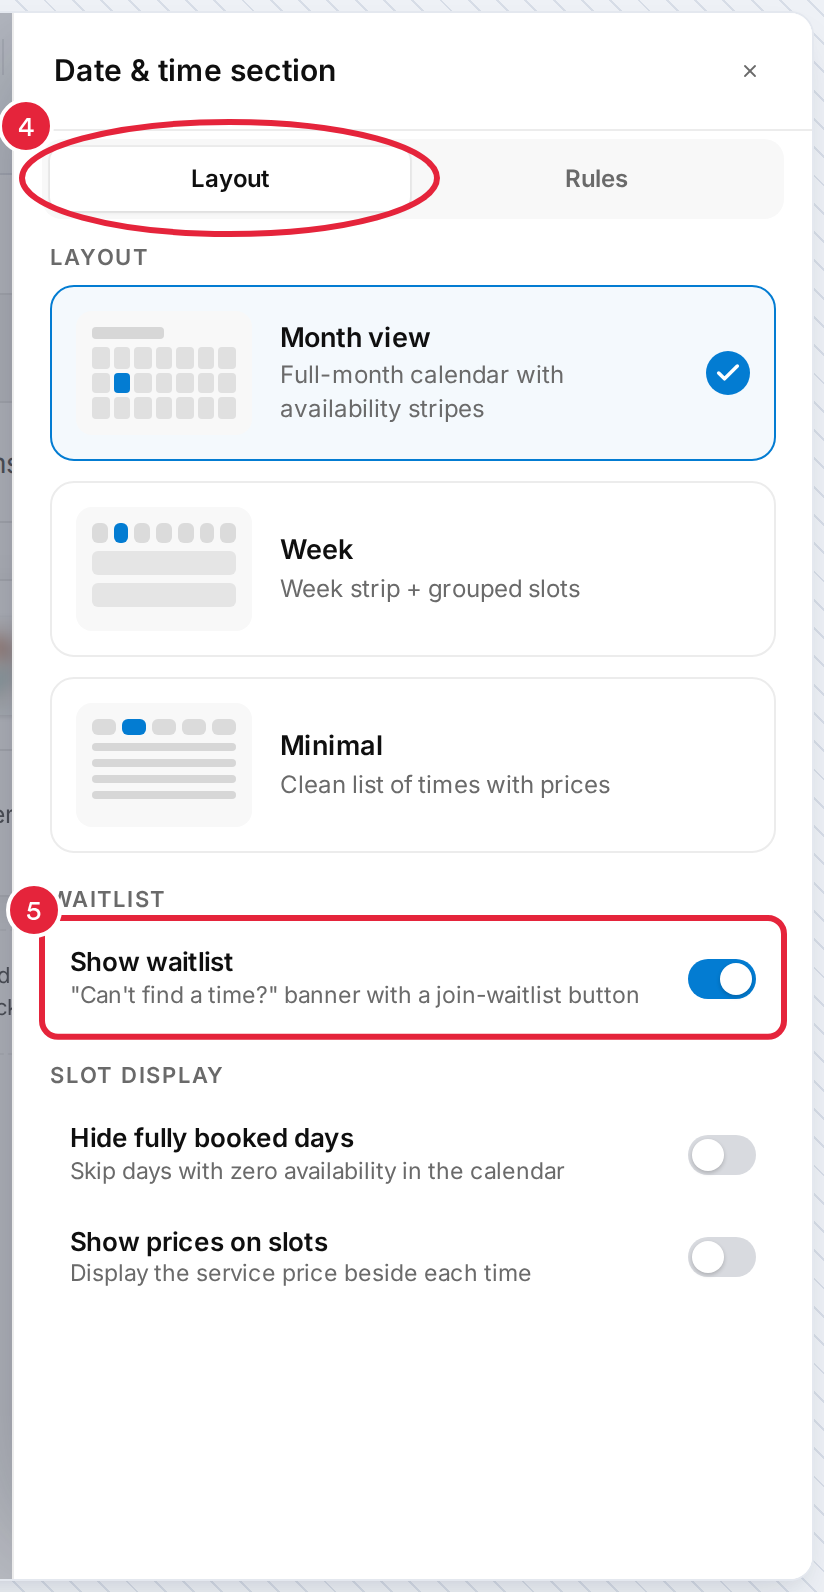
Layout tab → Waitlist → Show waitlist
NOTE: In the classic version this was the Allow Waitlist tick box on the General tab of the online booking settings.
Step 3: Know What Clients See
On the Date & time step, clients see a Can't find a spot? banner with a Join Waitlist button. If a day is fully booked, they can also join the waitlist for that day. They choose Any slot, a part of the day, or a Custom slot, and then click Join waitlist.

Clients join from the Can't find a spot? banner
- Clients must sign in to join. There is no guest waitlist.
- The entry goes straight onto your waitlist in the Pabau calendar, with the service, the day and the times the client chose. If they picked Any professional, a note on the entry says so.
- Joining the waitlist does not book an appointment.
IMPORTANT: Pabau does not contact waitlisted clients automatically when a time frees up. Check your waitlist in the calendar and get in touch with the client, or send them a self-booking notification from the waitlist — see How to Send Waitlist Notifications for Self-Booking.
TIP: Send clients How to Join the Waitlist via Online Bookings so they know what to expect.
What's next?
To manage your waitlist, see How to Operate a Waitlist and How to Book a Client from the Waitlist. For the other Date & Time options, see Part 3: Set Booking Steps and Availability Rules.
Questions? Reach us any time via the in-app chat — we’re happy to help.
Was this guide helpful? Let us know by voting below - your feedback helps us write clearer articles.
For more guides, browse the related articles below or use the search bar at the top of the page. You can also watch our video learning series, the Pabau Academy, or visit the Support page for additional help.