
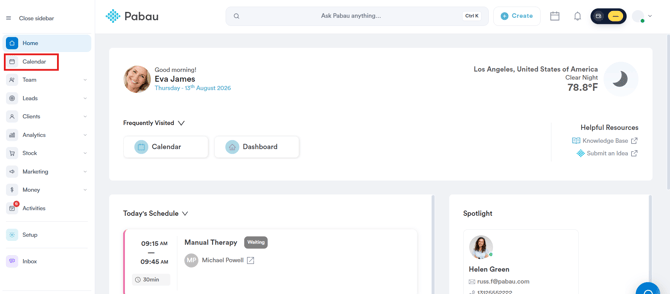
Step 1: Navigate to the Calendar
Start by logging into your Pabau account using your login credentials. In the left-hand sidebar, click Calendar.
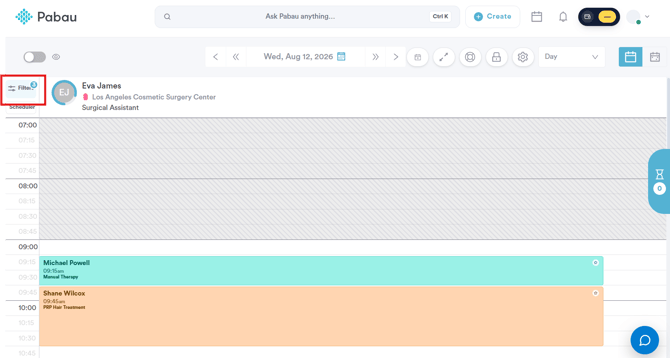
Step 2: Open Filters
On the Calendar, click Filters in the top-left corner.
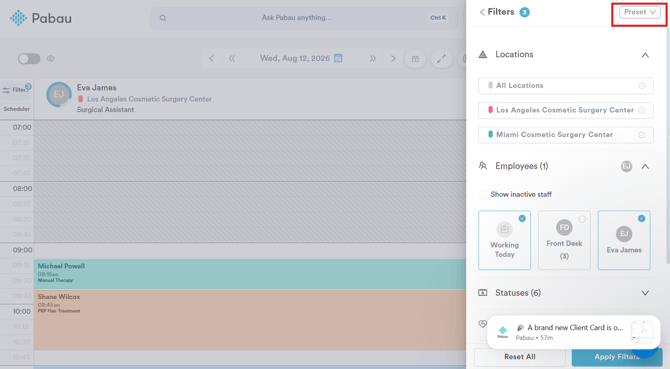
Step 3: Set Up Your Filters
Click Preset in the top-right corner of the panel to manage presets.
NOTE: If you haven't created a preset yet, follow this guide first, then come back here to edit it.
Step 4: Edit the Preset
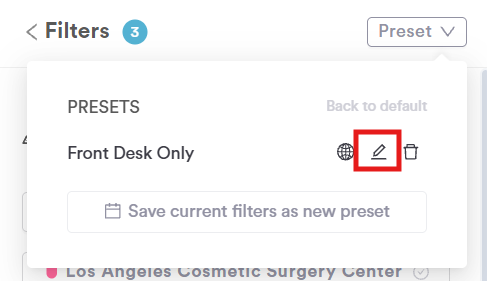
Click the pencil icon next to the preset you want to update. This opens the Edit preset window, pre-filled with its current settings:
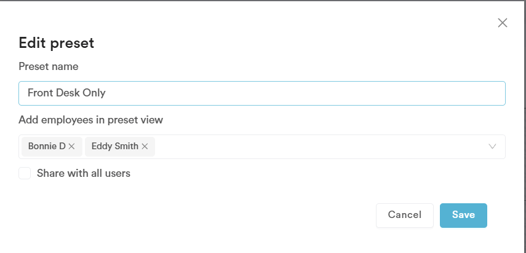
- Preset name — update the name if needed.
- Add employees in preset view — add or remove staff members. Existing employees appear as tags with an × to remove them; use the dropdown to add more.
- Share with all users — tick or untick this to change whether the preset is available to your whole team or just you.
Click Save to apply your changes, or Cancel to discard them.
Step 5: Delete a Preset (Optional)
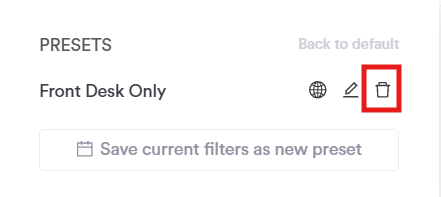
If you no longer need a preset, click the trash icon next to it in the Preset dropdown to remove it. This can't be undone.
By following these steps, you can keep your saved calendar filter presets up to date in Pabau as your team or workflow changes.
Was this guide helpful? Let us know by voting below - your feedback helps us write clearer articles.
For more guides, browse the related articles below or use the search bar at the top of the page. You can also watch our video learning series, the Pabau Academy, or visit the Support page for additional help.