
The Results & Insights report turns a client’s lab result into a branded, multi-page health report: a cover, your personalised plan, the results by category, a comparison with the previous result, a glossary and more. You choose which pages go in and in what order, write your own advice on the plan pages, pick your colours, then print it, email it, text the client, or publish it to their client portal. Save the layout as a template and the whole clinic can reuse it.
Step 1: Open Results & Insights
- On the client’s Lab Tests tab, click the three-dot menu on a received result and choose Print. Then, in What would you like to print?, open the Results tab.
- Click Results & Insights.
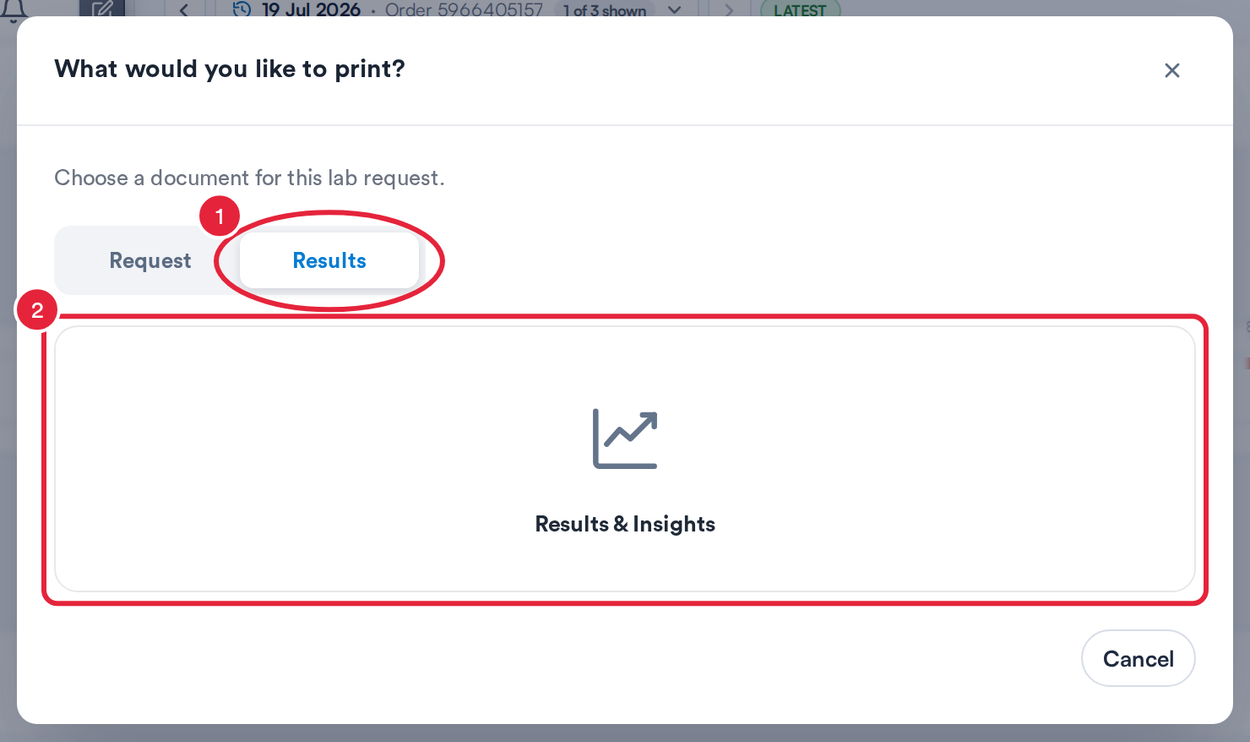
Print ▸ Results ▸ Results & Insights
NOTE: Results & Insights needs the result’s values in Pabau. If the option is greyed out with Please convert to a lab result, convert the result first.
The Advanced Health Report opens, with the report on the right and four panels on the left: Components, Measures, Design and Templates.
Step 2: Choose and Arrange the Pages
The Components panel lists every page the report can include. The Cover always comes first.
- Drag a page by its handle to move it up or down the report.
- Click the pencil to write on a page, or to edit the cover.
- Click the eye to take a page out of the report. It stays in the list, crossed out, so you can bring it back with one click.
- Pages that start switched off (for example System Overview, Functional Body Systems, Nutrient Status and Health Concerns) are crossed out. Click their eye to add them.
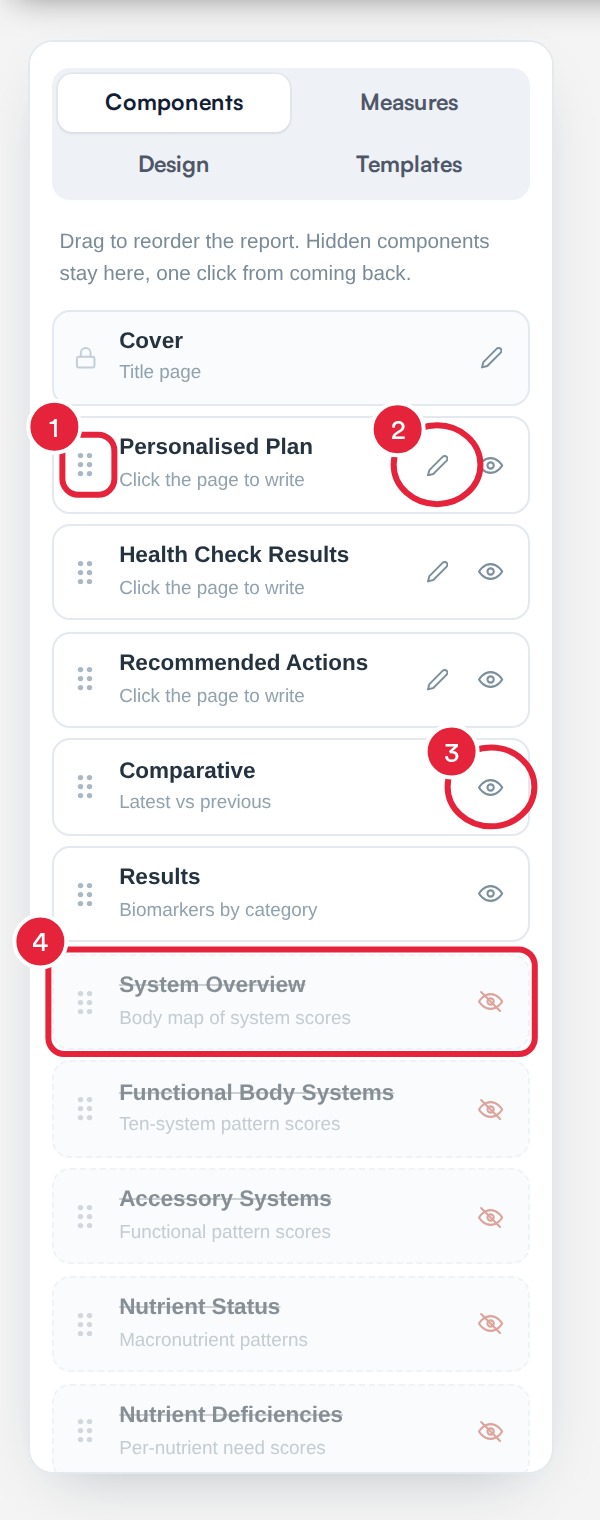
Drag, write on, hide or add the report’s pages
The pages you can include are Personalised Plan, Health Check Results, Recommended Actions, Comparative (latest against previous result), Results (biomarkers by category), System Overview, Functional Body Systems, Accessory Systems, Nutrient Status, Nutrient Deficiencies, Clinical Dysfunctions, Health Concerns, Health Metrics, Glossary and My Notes. Click + Add custom page at the bottom of the list to add a page of your own.
IMPORTANT: The body-system, nutrient and clinical pattern pages are scored from the biomarkers on the result. They are there to support your clinical judgement, not to diagnose. Clinical Dysfunctions is for practitioners only and is left out when you email the report to the client or save it to their client portal.
Step 3: Write Your Advice
The Personalised Plan, Health Check Results, Recommended Actions and My Notes pages are yours to write. Click the page in the report (or its pencil in the list) and type your advice. What you write is saved with this lab result.
A page you leave empty stays faded on screen and is left out of the printed and emailed report, so you never send a blank page.
TIP: On the Measures panel you can drag the client’s recorded measures onto the report. They appear on the Health Metrics page.
Step 4: Choose the Colours
- On the Design panel, pick one of the Palettes: Classic, Midnight, Plum, Forest or Ember.
- Or set your own Custom colours for the Cover, the Accent and the Headings, for example to match your brand.
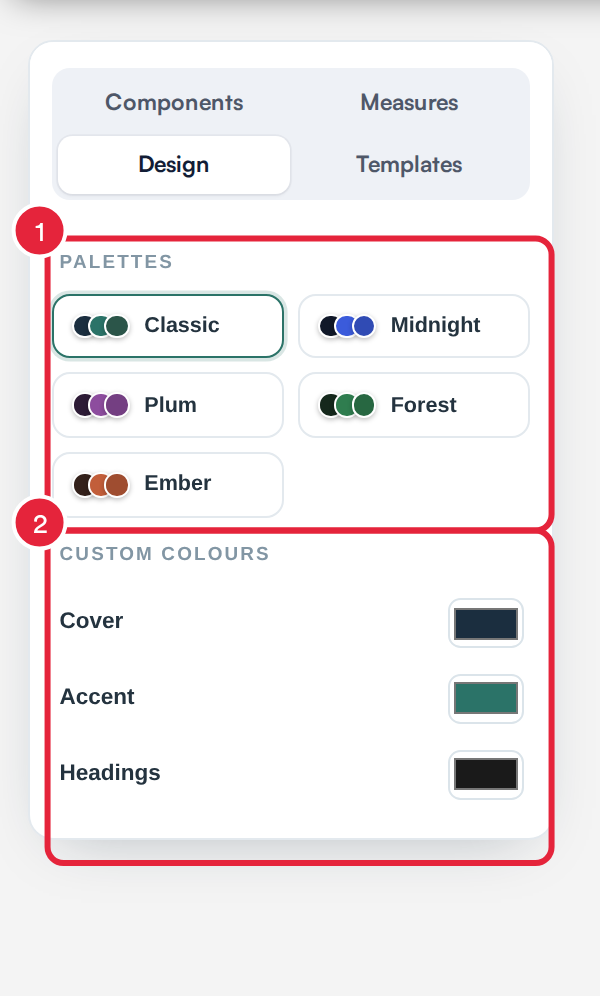
The Design panel
Step 5: Save the Layout as a Template
- On the Templates panel, click + Save current as template and give it a name. The template keeps the pages, their order, the colours and any custom pages.
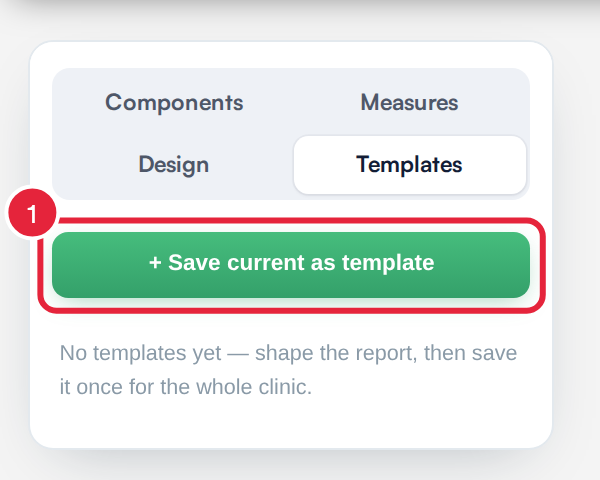
Save the layout once for the whole clinic
Templates are shared across your clinic. Next time, open the Templates panel and apply a saved template to lay out the report in one click, or delete one you no longer need.
Step 6: Print or Send the Report
- Click Print at the top right to print the report or save it as a PDF.
- Click Send Email to open an email to the client with the report attached as a PDF.
- Click Send SMS to close the report and open a text message to the client, for example to let them know their report is ready.
- Click Save to patient portal to publish the report as a PDF the client can open in their client portal. If you change the report and save it again, the new version replaces the old one.
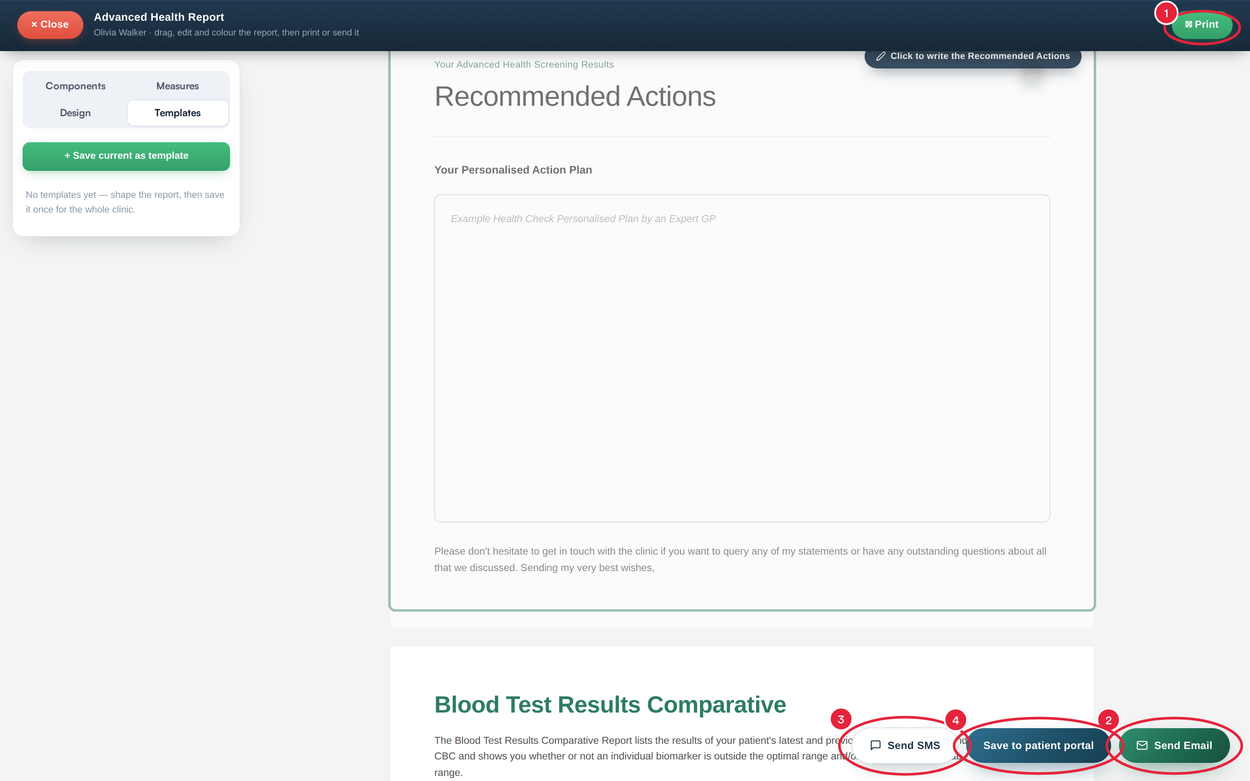
Print, email, text or publish the report
Click Close at the top left when you’re done.
TIP: If your clinic has set its own ranges for a biomarker in Setup ▸ Biomarkers, the report uses them for its range bars and summaries instead of the lab’s range.
What's next?
- How to Print and Send Lab Results (New Client Card)
- How to Review and Share Lab Results (New Client Card)
- Labs (New Client Card)
Was this guide helpful? Let us know by voting below - your feedback helps us write clearer articles.
For more guides, browse the related articles below or use the search bar at the top of the page. You can also watch our video learning series, the Pabau Academy, or visit the Support page for additional help.