
Views are saved filters that appear in the sidebar for your whole team — one click and everyone sees the same slice of the inbox, such as "Waiting on us" or "VIP messages". This article shows you how to create one.
Step 1: Start a New View
In the inbox sidebar, hover over Views and click the +. The Create view window opens.
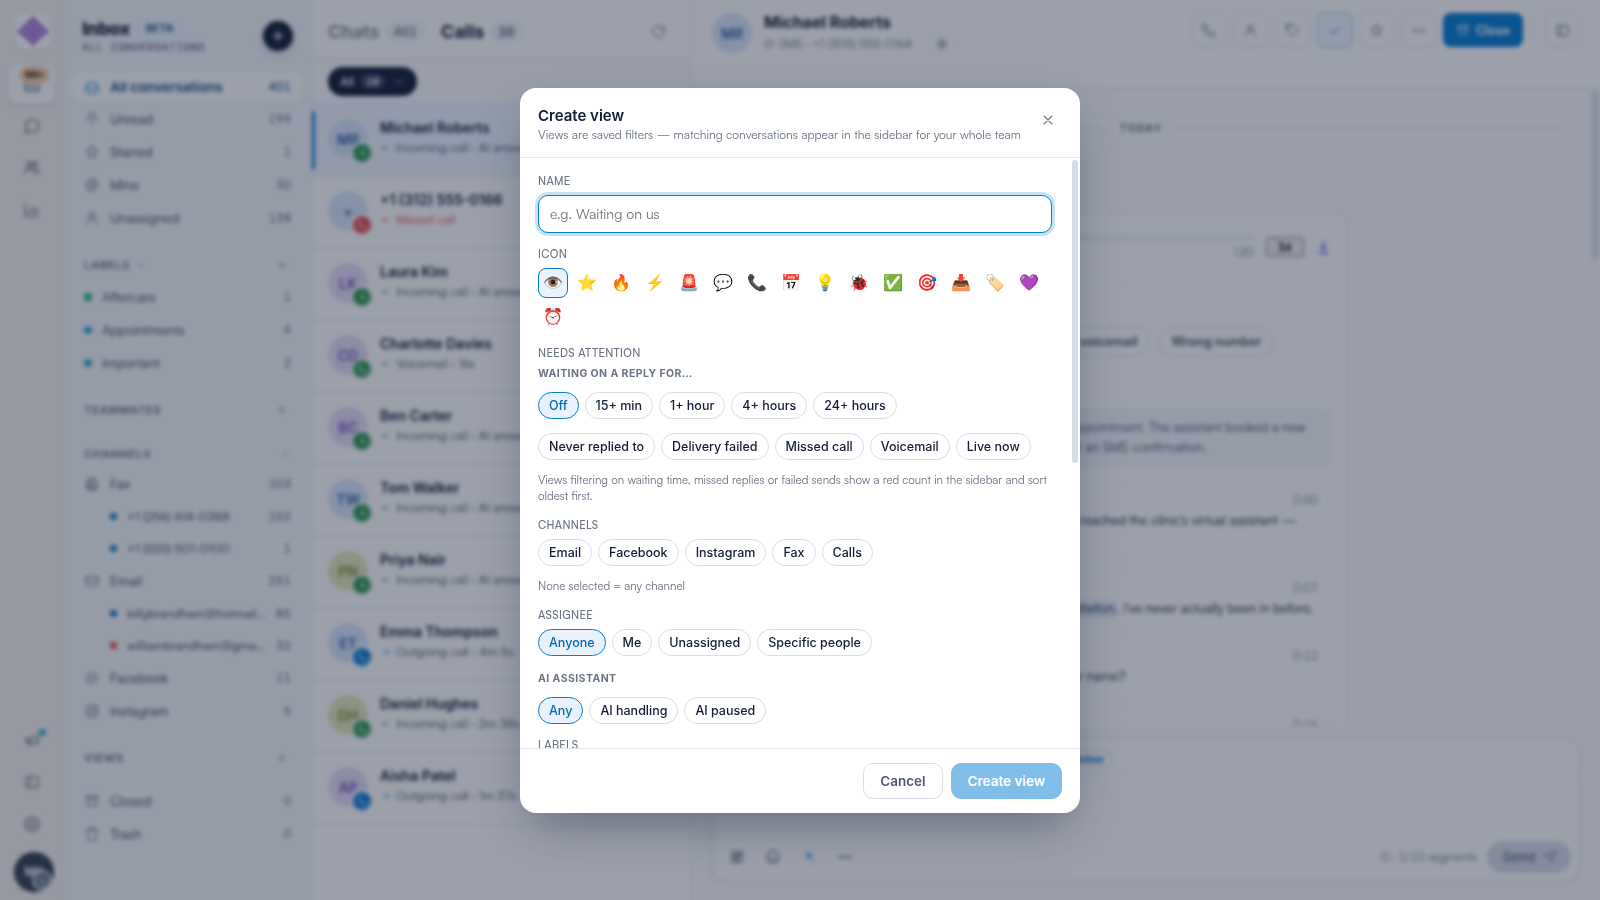
Step 2: Name It and Pick an Icon
Give the view a short name your team will recognise — for example "Waiting on us" — and pick an icon. The icon is what the team sees next to the view in the sidebar.
Step 3: Choose What the View Catches
- Needs attention — conversations waiting on a reply for 15+ minutes, 1+ hour, 4+ hours or 24+ hours, plus Never replied to, Delivery failed, Missed call, Voicemail and Live now.
- Channels — limit the view to specific channels; none selected means any channel.
- Assignee — Anyone, Me, Unassigned or Specific people.
- AI assistant — Any, AI handling or AI paused, so you can watch conversations the AI is (or is not) covering.
- Labels — only conversations carrying the labels you pick.
NOTE: Views that filter on waiting time, missed replies or failed sends show a red count in the sidebar and sort oldest first — so the most overdue conversation is always at the top.
Step 4: Create It
Click Create view. The view appears under Views in the sidebar for the whole team, with a live count.
TIP: A good starter set: "Waiting on us" (waiting 1+ hour), "Missed calls" (missed call + voicemail), and "Unassigned SMS" (channel SMS + assignee Unassigned).
Related Articles
We suggest reading our
-
How to Filter, Search and Sort Conversations in Engage article for one-off filtering,
-
How to Organise Conversations with Labels in Engage article for labelling.
For more guides, refer to related articles below, select additional guides, or use the search bar at the top of the page. These guides will help you get the most out of your Pabau account.
Additionally, to help you fully utilize and understand your Pabau account, we recommend exploring additional guides and resources offered at the Pabau Academy.