
Handling your medical forms through Pabau has many benefits. For starters, no more clutter from all those paper forms, and you even get to save some money while doing it. Additionally, all of your client forms will be available to you from anywhere, at any time.
Follow these instructions to create a medical form in your Pabau account, check it and publish it to your clinic.
Step 1: Open Forms
- Go to Setup and click Clinical at the top of the page.
- Click Forms.
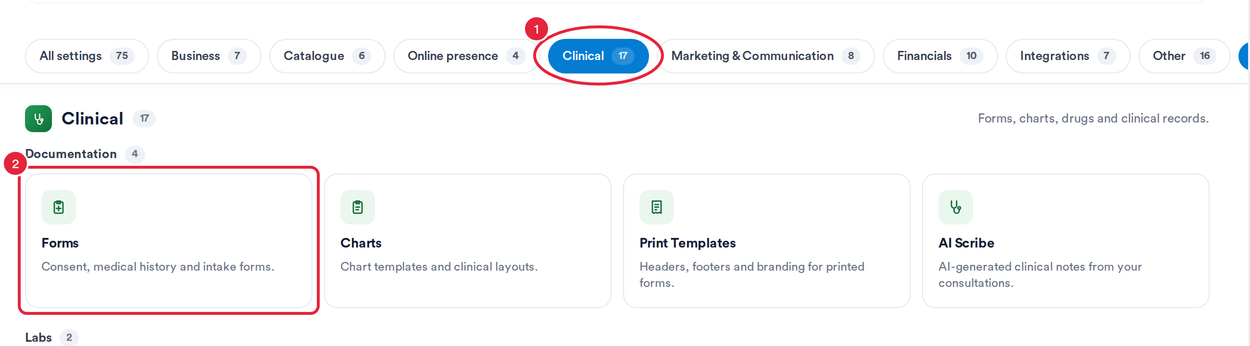
Setup → Clinical → Forms
Step 2: Start a Blank Template
- Click Create Form in the top right corner.
- In What would you like to do?, choose Blank Template.
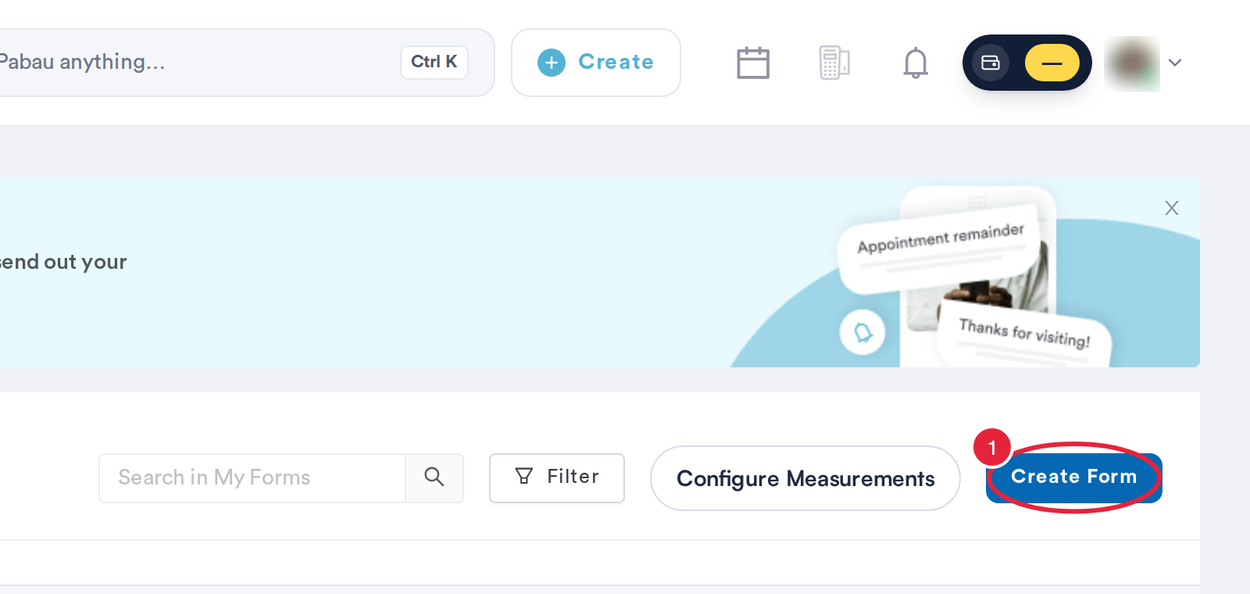
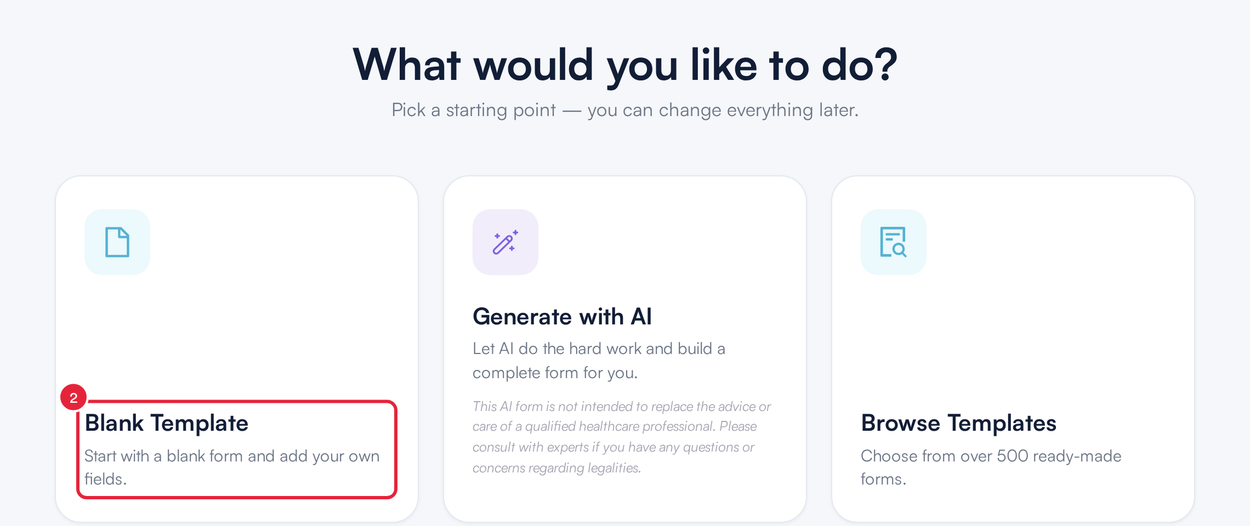
Start from a blank form
NOTE: You can also choose Generate with AI to have a complete form drafted for you, or Browse Templates to start from one of Pabau's ready-made forms. See How to Use a Medical Form Template.
Step 3: Choose the Form Type
The builder opens on the Type tab on the left. Click the type that matches what the form is for:
- Medical History: a reusable record of the client's health background. It is not needed for every appointment.
- Consent: tells the client about their treatment, including the risks, and collects their signature. We recommend a consent form before each treatment.
- Treatment Form: completed by the practitioner as a record of the appointment, for example batch numbers and doses for injectables.
- ePaper: scan or upload an existing PDF form.
- Prescription: used by prescribers to prescribe medication.
- Lab Form: request tests from a lab. This type appears when your clinic uses lab requests.
- Registration Form: capture a new client's details.
- Case Form: incident and case reporting.
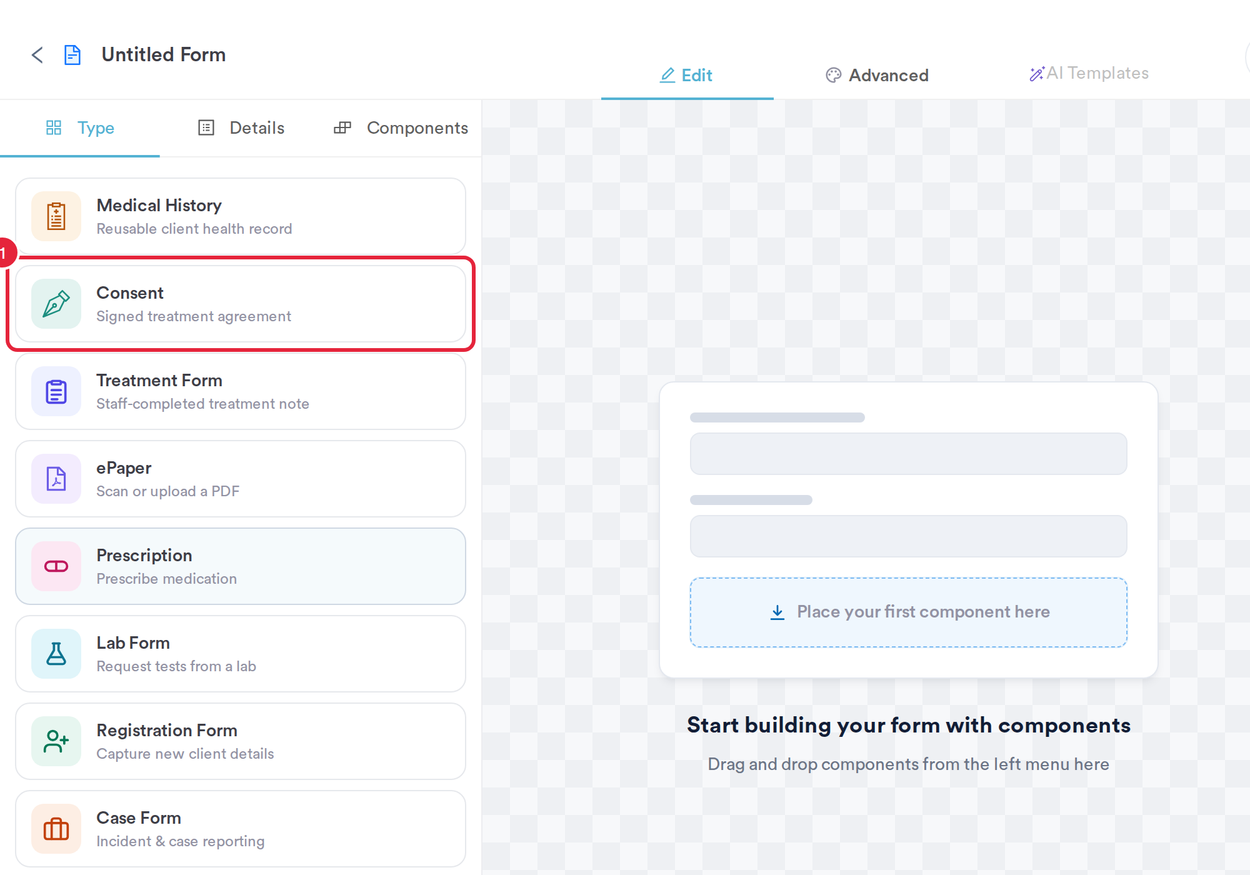
Pick the form type on the Type tab
Some types start you off with ready-made components. For example, a Consent form starts with a consent statement and a required client signature. You can edit or remove them like any other component.
Step 4: Add the Form Details
Click the Details tab.
- Enter a descriptive Form name.
- Under Which service should this form be used for?, tick the services this form belongs to. Linking services lets Pabau offer the right form for each appointment.
- Turn on Request to be completed prior to appointment if clients should fill the form in before they arrive.
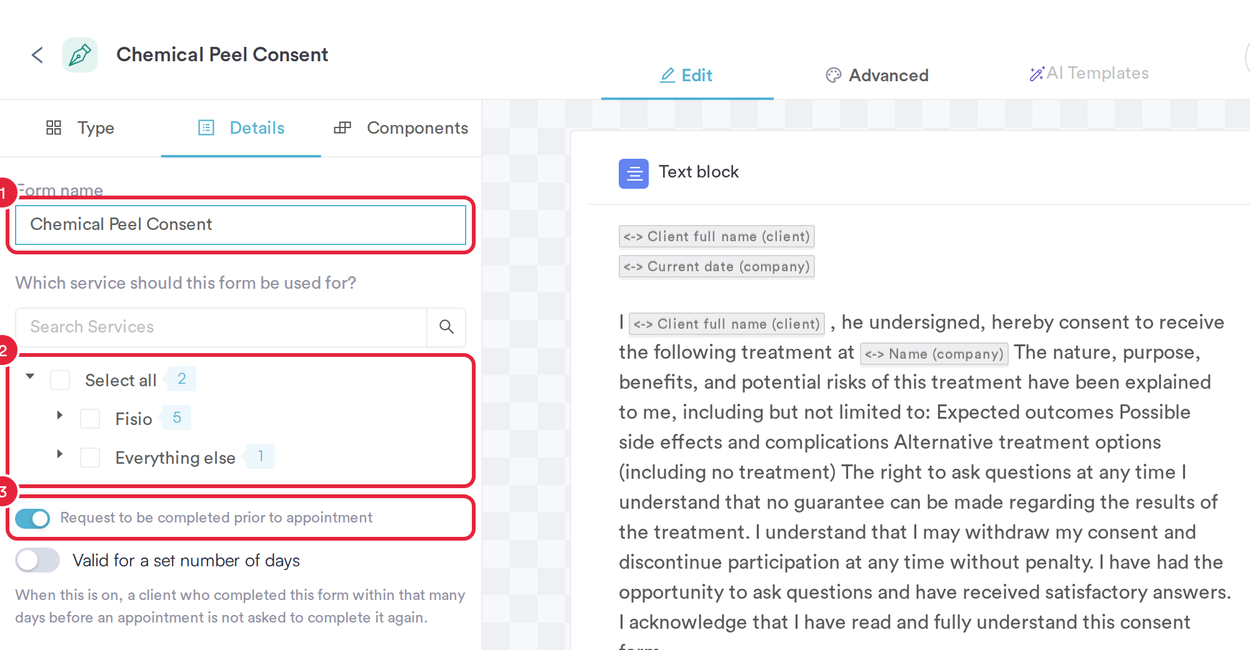
Name the form and link it to services
How do I stop a form being requested automatically before appointments?
The switch is on the Details tab of the form builder, not the Type tab. Go to Setup → Clinical → Forms, open the form, click Details and turn off Request to be completed prior to appointment. Then save the form.
NOTE: The switch only appears on Consent and Medical History forms. On the Medical History form marked Default in your Forms list, the switch is always on and greyed out, because the default form is included in the confirmation that asks clients to complete it. To change which form that is, open another Medical History form's menu in the Forms list and click Set as default.
TIP: For a consent form, you can also turn on Valid for a set number of days so a client who signed recently isn't asked to sign again. See How to Stop Clients Re-Signing a Consent Form That Is Still Valid.
Step 5: Add Components to the Form
Click the Components tab. Components are the building blocks of your form, grouped into Basic and Custom. Drag the one you want from the list onto the centre of the screen. The components on offer depend on the form type you chose, and each one has a short description of what it is for.
Click a component on the form to open Component settings on the right:
- Type your Question.
- Click Show advanced settings for extra options, such as a linked field or a default value.
- Turn on Required if the question must be answered.
- Click Save component to confirm your changes. Use Delete to remove the component instead.
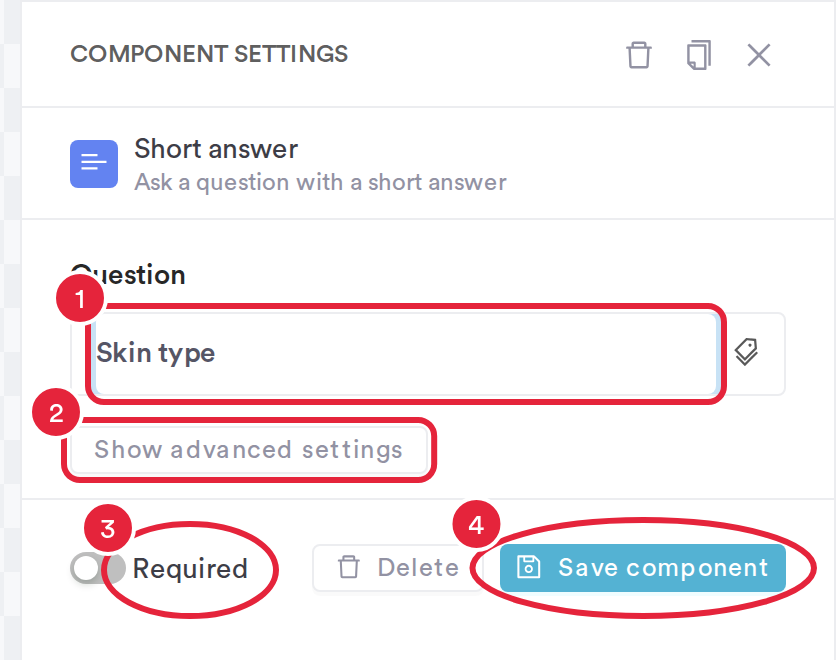
Component settings
NOTE: In Show advanced settings, a Linked field copies the client's answer into the field you pick, and a Default value pre-fills the answer from a merge tag. For example, the "Client Full Name" merge tag as the default value of a Short answer fills in the client's name automatically. For every component, see How to Use Medical Components in Pabau.
Using the Matrix Component
One of the available options is the Matrix component, which allows you to collect multiple related answers in a structured table format. Instead of adding several separate questions, the Matrix component lets you group them together under one label — making your form more concise and easier for patients to complete.
This is especially useful when you want patients to respond to a list of items using the same set of answer options. For example, you can ask patients to rate different symptoms — such as pain, fatigue, and nausea — using the same scale: None, Mild, Moderate, or Severe.

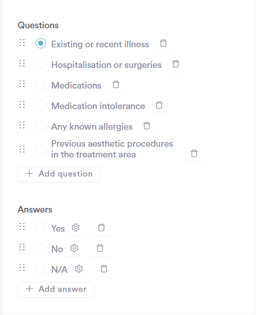
The Matrix component is made up of two elements:
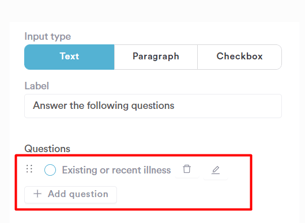
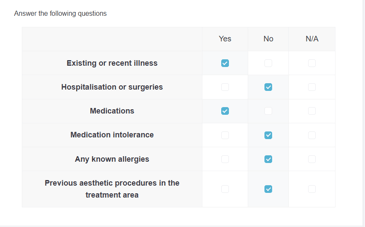
Rows – the individual items or statements you want responses for (for example: Existing or recent illness, Hospitalisation or surgeries, Medications, Medication intolerance, Any known allergies)
Columns – the answer options patients can choose from (for example: Yes, No, or a custom scale)
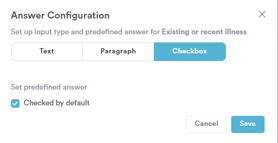
When setting up a Matrix component, you can also choose the input type for the answer columns:
Text – patients type a short response for each row
Paragraph – patients enter a longer, multi-line response
Checkbox – patients tick one or more options per row

To configure the Matrix, add your questions one by one using the “+ Add question” button, and set up the answer options using “+ Add answer.” You can reorder both rows and columns by dragging the handle icon on the left. To remove an item, click the trash icon next to it.
Patients simply select or complete one option per row, making it quick and straightforward to respond — even when the form covers a long list of topics.
Once you have finished configuring the Matrix, click “Save component” to confirm your changes.
TIP: To ensure your medical forms reflect your clinic’s branding, you can customize their design by adding various elements.
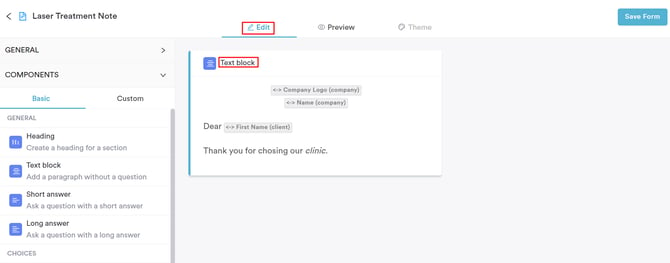
Instead of manually uploading your clinic’s logo, you can insert the <-> Company Logo (company) merge tag inside a Text component, which will automatically pull the logo stored in your system.
Additionally, you can include your company name by adding a Text component and enhance personalization by inserting other merge tags that populate patient and clinic details dynamically.
You also have the option to customize text and formatting to match your brand identity, creating a cohesive and professional appearance.
Setting up branded medical forms not only strengthens brand recognition but also ensures consistency across all patient communications. A well-structured and visually appealing form improves readability, making it easier for both patients and staff to navigate while reinforcing trust in your clinic.
Using the AI Summary Component
The AI Summary component is a long answer that your team can draft with AI, using the answers already captured elsewhere on the same form. Instead of writing a visit summary or handover note from scratch, a staff member clicks a button and Pabau turns the form's answers into a first draft they can review and edit before saving.
You will find it in the General group of the Components list, alongside Short answer and Long answer. Drag it onto your form just like any other component.

Once it is on the form, click the component to open its settings on the right. An AI Summary is configured with three details:
Prompt – the instruction you want the AI to follow, for example "Write a warm, plain-English visit summary for the client based on their answers below." As you tick source answers below, Pabau drops each one in as a [label] tag, so you can position an answer exactly where you want it inside the instruction.
Button name – the label of the button staff will click on the form to generate the draft, for example "Draft visit summary".
Use answers from – tick the components whose answers should be fed to the AI. These can be short answers, long answers, dropdowns, single or multiple choice, sliders and grids elsewhere on the form.
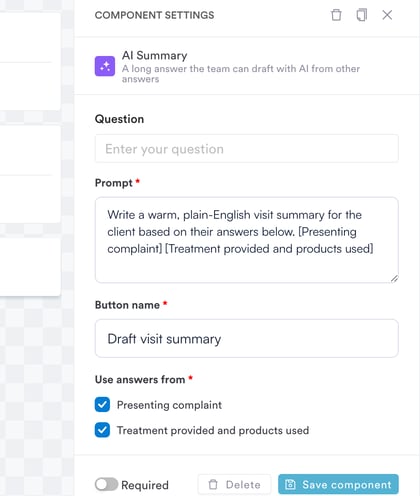
NOTE: An AI Summary needs a question, a prompt, a button name and at least one source answer before it can be saved. When a colleague completes the form, they click your button to generate the summary into the field, then review and edit it before saving — the AI drafts, a person always signs off. Everywhere else (the iOS app, the client portal) the component behaves as a normal long answer, so responses stay editable in every view.
Placing Components Side by Side
By default, every component sits on its own line. With the side-by-side layout, you can place two, three, or four smaller components next to each other in a single row — for example, putting two short questions such as height and weight on one line, or pairing a Dropdown with the Short answer that explains it. This keeps longer forms compact and quicker to scan.
To create a row, drag a component onto the left or right edge of another component on the canvas. While you drag, a drop zone lights up along the edge of any component that can share a row — release it there and the two components will sit next to each other. You can drag straight from the Components list or move a component that is already on your form, and you can keep adding to the same row, up to four components per row.
To break a row apart, drag one of its components out of the row and drop it anywhere else on the form — the remaining components adjust automatically. Deleting, duplicating, and reordering components all work exactly as before.
Not every component can share a row. The compact components can: Short answer, Long answer, Dropdown, Single choice, Multiple choice, Slider and AI Summary, along with ready-made fields based on them, such as Gender, Date of birth, and Telephone number. Larger components — headings, text blocks, grids, matrices, signatures, drawings, and uploads — always take the full width of the form.
Use the Preview button at any time to check how your rows will look when the form is filled in.
NOTE: On narrow screens, the components in a row automatically stack back into a single column, so the form stays easy to complete on a phone. In the Pabau GO iOS app and the Client Portal, components currently display one per line — the layout only changes how questions are arranged, so the answers themselves are always captured in the same way.
Step 6: Check Your Form
Before you publish, check the form for gaps.
- Click Compliance Check at the top of the builder. Pabau reviews the form against the rules for your country, the form type and the treatment it covers, and gives it a Form score out of 10. It lists Issues to resolve (for example, a missing privacy notice) and Warnings it recommends you fix, each with the reason and a suggested fix.
- Click Quick add on any finding you want to fix, or Queue all, then click the Apply button (it shows how many fixes you queued) to add the suggested wording or question to your form. Click Re-run to check again, or Close to go back to the builder.
- Click Preview to see the form as it will look when it is filled in.
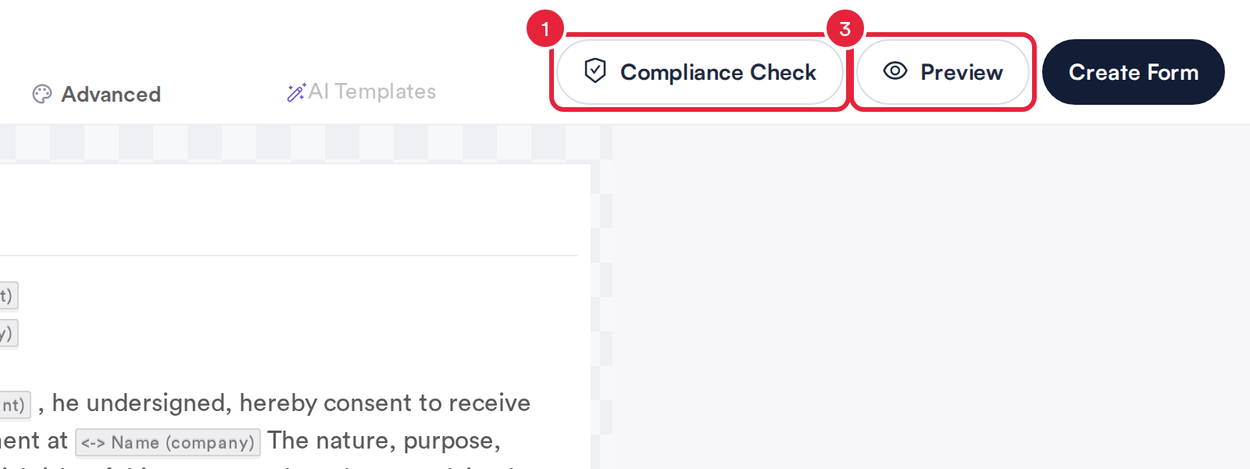
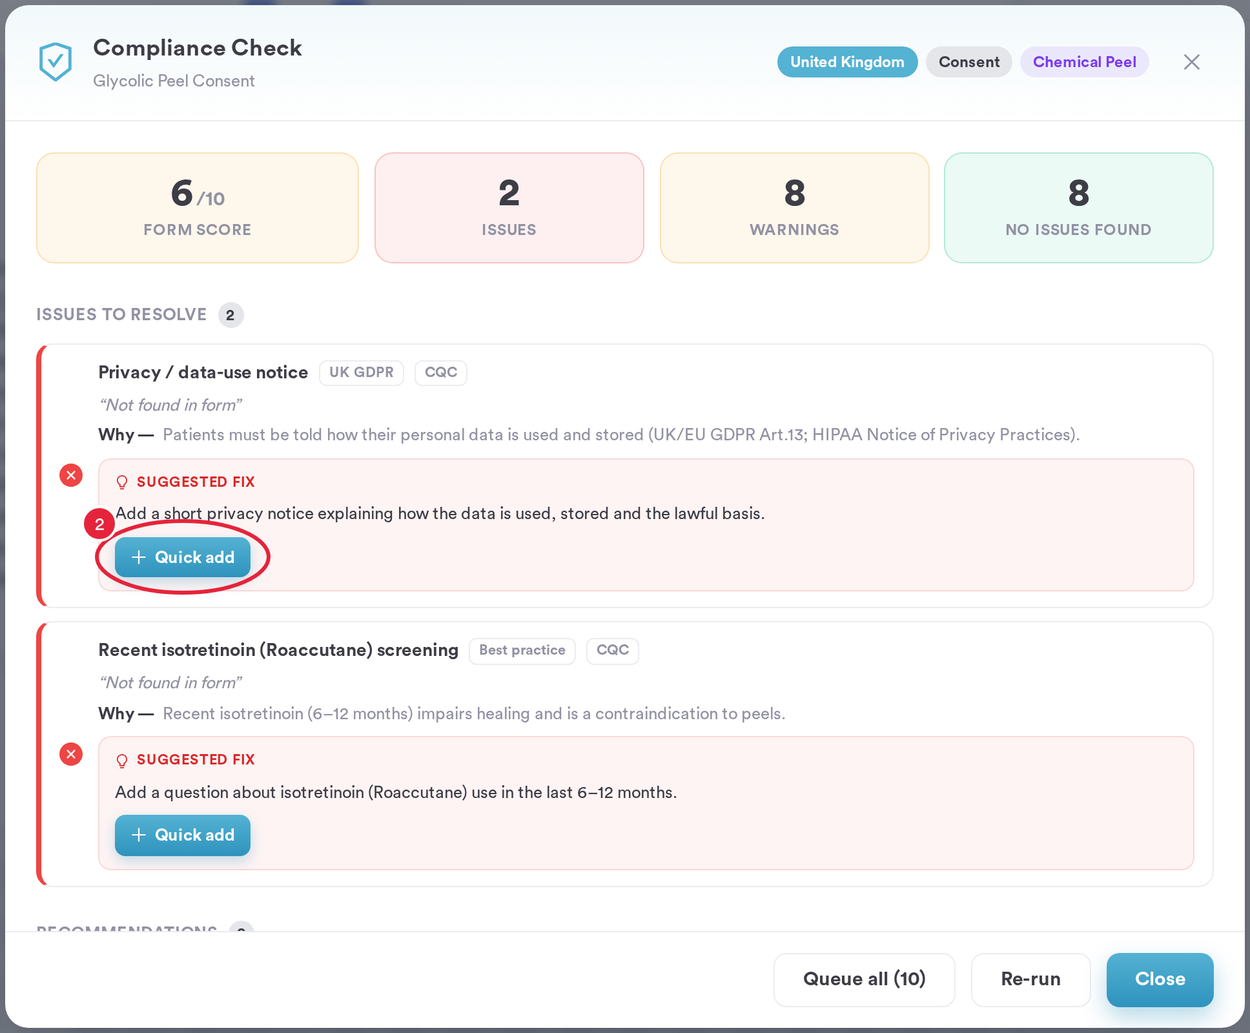
Compliance Check scores the form and suggests fixes
IMPORTANT: Compliance Check is automated guidance to help your review. It is not a substitute for professional clinical or legal sign-off.
Step 7: Create and Publish the Form
- When the form is ready, click Create Form in the top right corner. When you're editing a form that already exists, this button reads Save Form.
- Pabau asks Ready to publish?: "Publishing makes [form name] available across your clinic." Click Publish, or Cancel to go back and keep editing.
- After a moment you see Published!: "[form name] is now live and ready to use." Click Done. You're taken back to your list of forms, where the new form now appears.
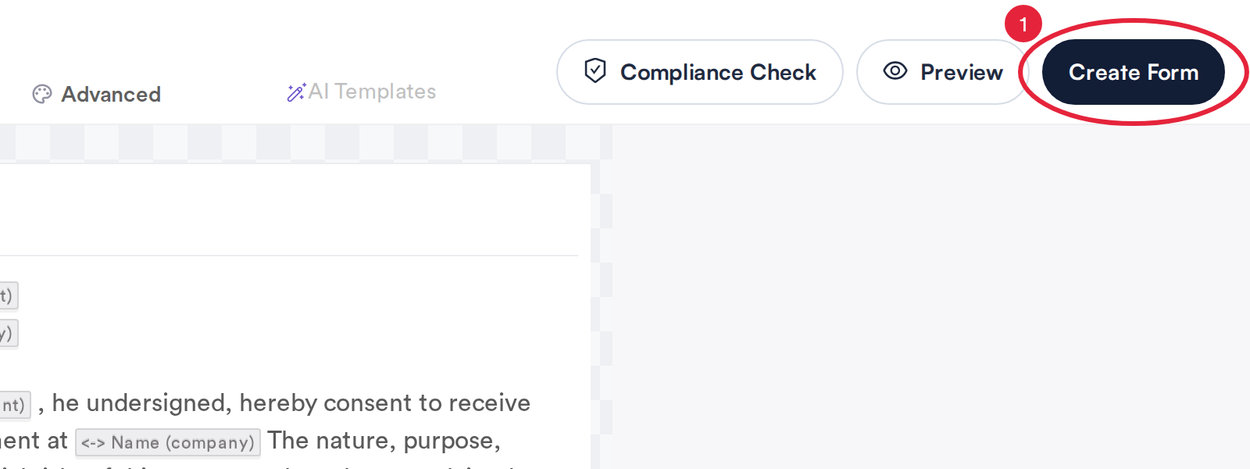
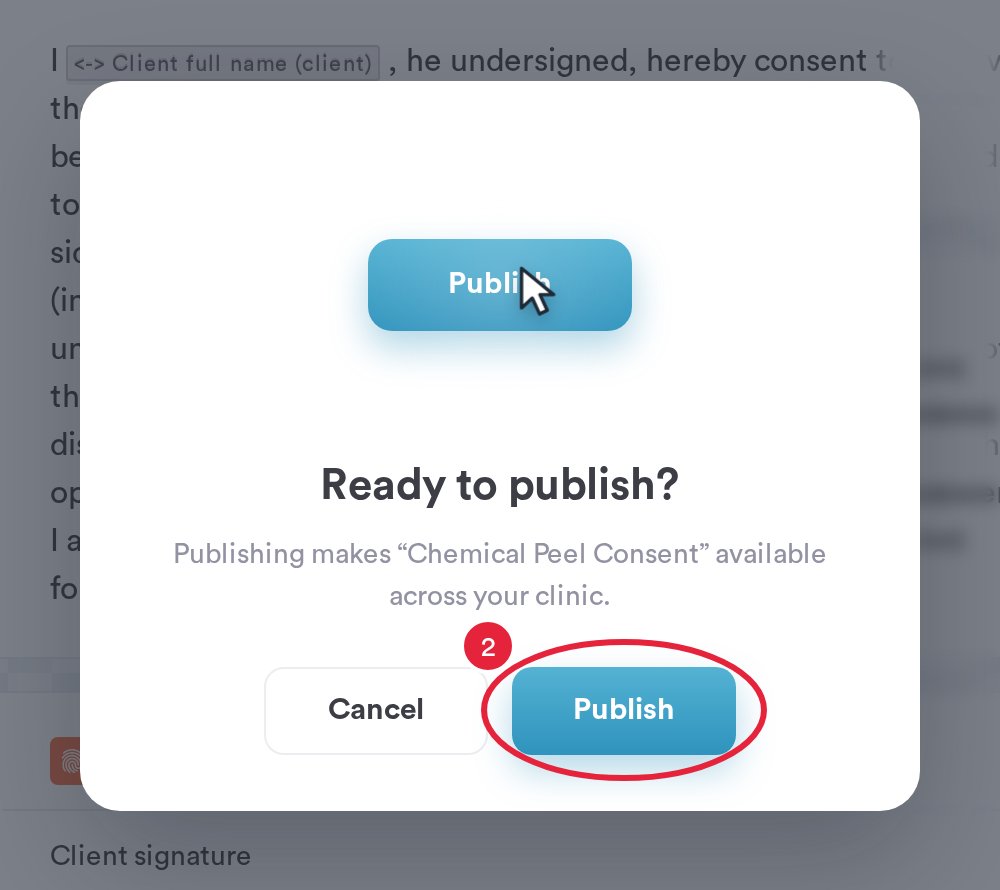
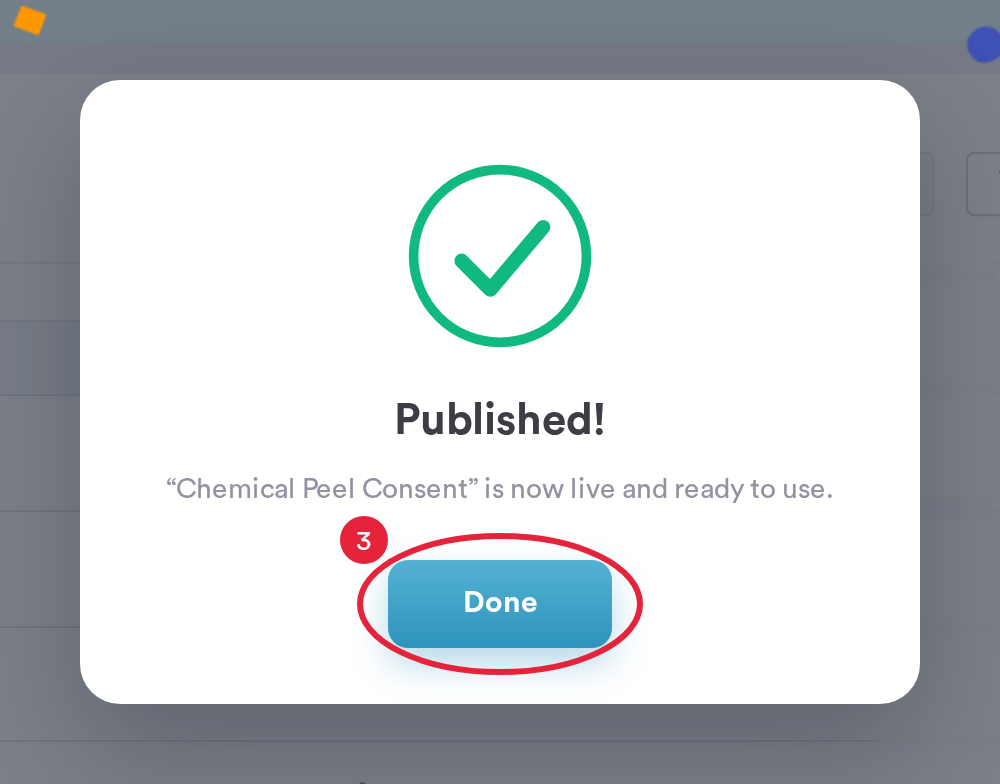
Publish the form and it is ready to use across your clinic
NOTE: If the form can't be saved, the window closes, an error message appears and the builder stays open, so nothing you built is lost. Fix the problem and click Create Form again.
TIP: If you want a form that is similar to one you already have, clone that form instead of building the second one from scratch. You can also watch this lesson on the Pabau Academy.
What's next?
- How to Use Medical Components in Pabau
- Medical Forms
- How to Use a Medical Form Template
- How to Restrict a Form to Certain Locations or Staff
- How to Send a Medical Form from the Client Card
- How to Use Form Analytics to See How a Medical Form Is Used
Was this guide helpful? Let us know by voting below - your feedback helps us write clearer articles.
For more guides, browse the related articles below or use the search bar at the top of the page. You can also watch our video learning series, the Pabau Academy, or visit the Support page for additional help.