
When your booking page offers Book a class, clients choose a class from a weekly timetable. In Pabau Studio you decide how that timetable looks: the layout on computers, the layout on phones, which details each class shows, and the colour of the day headers.
NOTE: This guide covers the new Online Bookings and Client Portal, which are being rolled out to clinics in phases. If your screens look different, your account may still be on the classic version — message us via the in-app chat and we will help.
Step 1: Open the Classes Page in Studio
- Go to Setup → Online presence → Online Bookings and click Customise page.
- Click Classes in the Booking pages strip at the top. If you can’t see it, switch on Book a class first (see How to Book and Manage Classes in Online Bookings).
- Make sure Edit is selected at the top right.
- Hover over the timetable and click its Classes label. The Classes panel opens on the right.
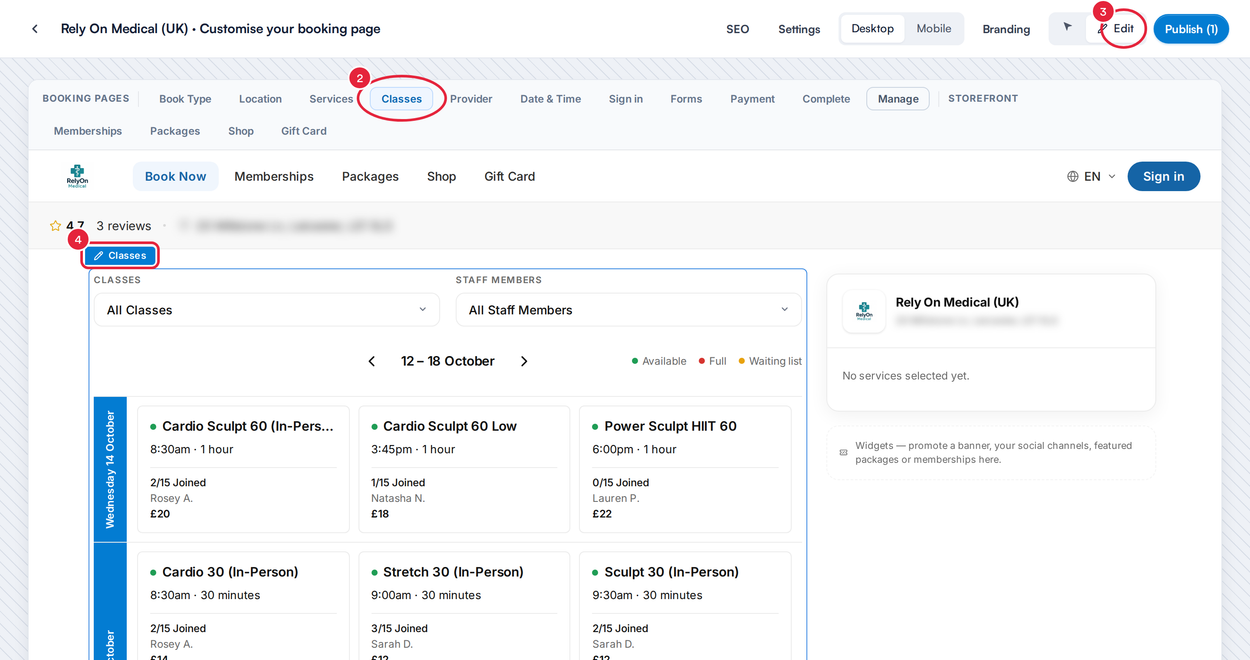
Open Classes (2), select Edit (3), then click the Classes label (4)
Step 2: Choose the Layout, Details and Day Colour
- Under View, choose how the week looks on a computer:
- Week grid (the default): day-by-day rows with class cards in a grid.
- Agenda list: a single chronological list with day headers.
- Day columns: seven side-by-side columns, with classes stacked by time.
- Under Display, switch off anything you don’t want clients to see: Staff member filter, Class filter, Number of participants (how many have joined, out of the places), Staff member, Price and Duration. All six are on to start with.
- Under Day colour, pick a colour for the day headers. Until you pick one, they follow your Brand colour from Branding. Once you have picked your own, click Use Brand colour to go back.
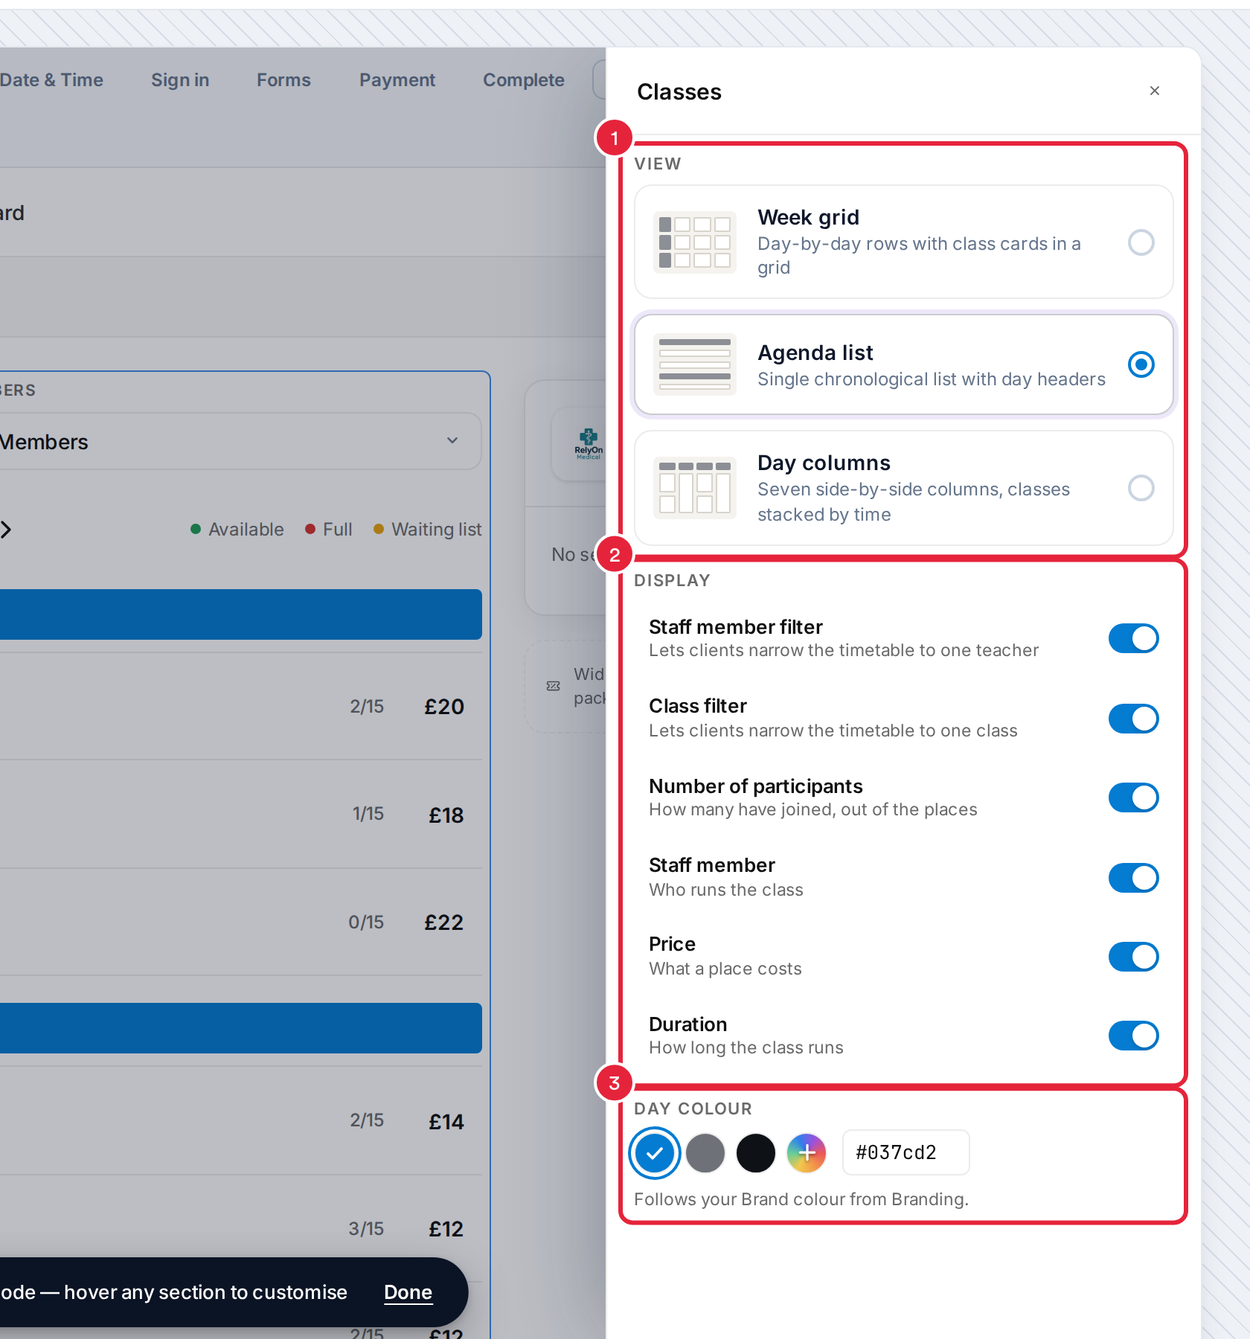
The Classes panel, with Agenda list chosen
The preview updates as you go, so you can see each change straight away.
Step 3: Choose the Layout on Phones
A phone always shows the timetable as an agenda list, so the phone settings live in their own place.
- Click Mobile at the top of Studio.
- Hover over the timetable in the phone preview and click its Classes label.
- Under On a phone, choose Week range (the default: the week as one agenda, where clients tap a day to jump to it) or Per day (one day at a time, picked from a date picker).
- If you chose Per day, pick the Date picker: Month view, Week (the default) or Minimal. These are the same pickers clients see on the Date & Time step.
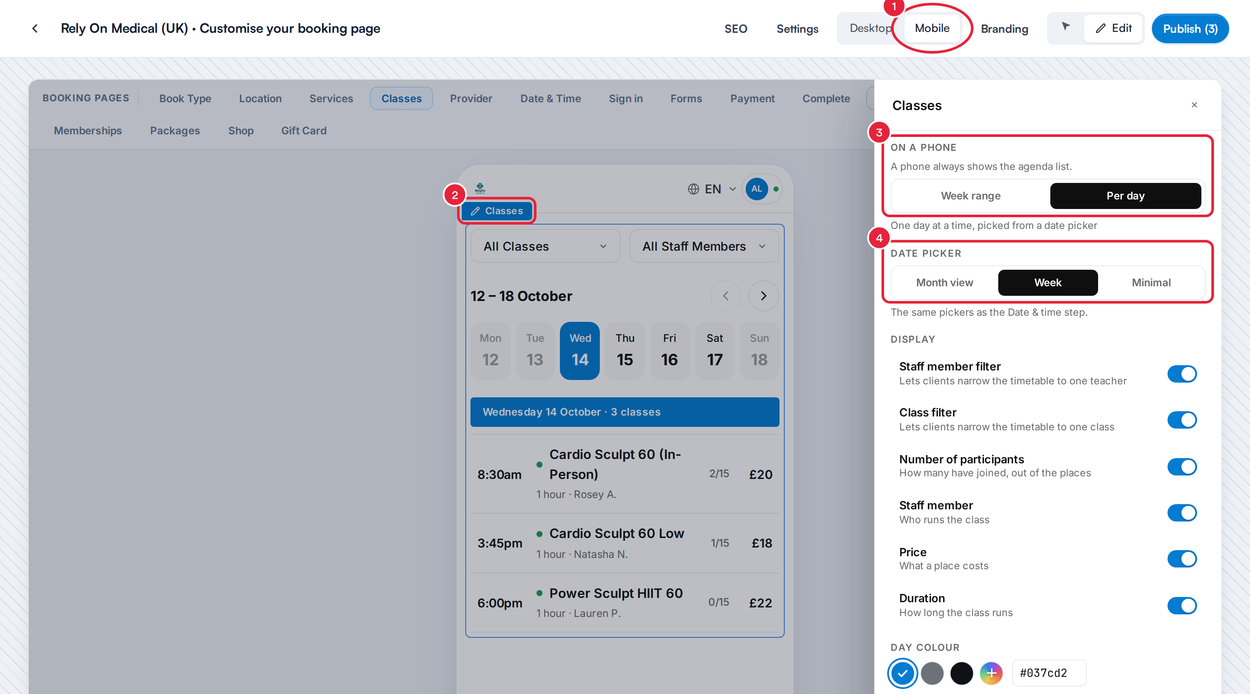
The phone layout settings, with Per day and the Week picker chosen
TIP: Display and Day colour apply to computers and phones alike, so you only need to set them once.
Step 4: Publish Your Changes
- Click Publish at the top right. The number beside it shows how many changes are waiting.
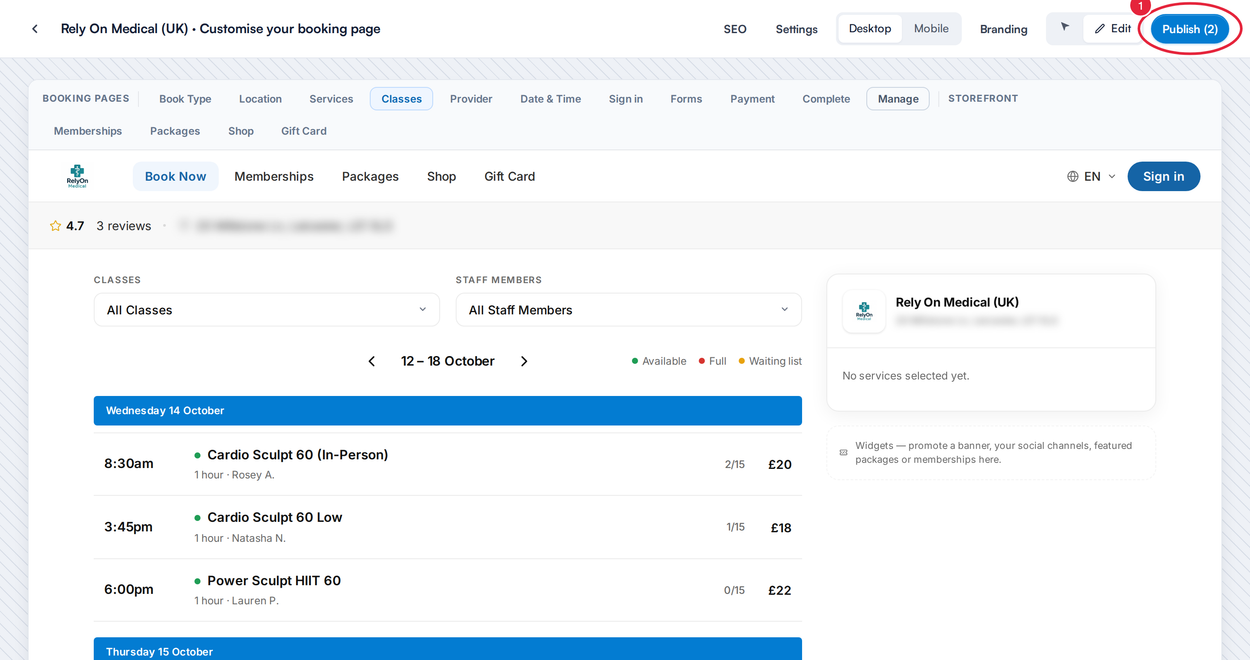
The Agenda list on a computer, ready to publish
NOTE: Nothing you change in Studio reaches your clients until you click Publish. If you close Studio first, you are asked whether to discard your changes.
What Clients See
Clients see the classes you have scheduled in your calendar, a week at a time, and can step between weeks with the arrows. Each class is marked Available, Full or Waiting list, and full classes can’t be chosen. How clients book a place is covered in How to Book and Manage Classes in Online Bookings.
What's next?
- How to Book and Manage Classes in Online Bookings
- How to Create a Class
- New Online Bookings Part 2: Customise and Publish Your Booking Page in Pabau Studio
- New Online Bookings Part 3: Set Booking Steps and Availability Rules
Was this guide helpful? Let us know by voting below - your feedback helps us write clearer articles.
For more guides, browse the related articles below or use the search bar at the top of the page. You can also watch our video learning series, the Pabau Academy, or visit the Support page for additional help.