
NOTE: This guide covers the new Online Bookings and Client Portal, which are being rolled out to clinics in phases. If your screens look different, your account may still be on the classic version — message us via the in-app chat and we will help.
If you run group classes — fitness, workshops or group treatments — clients can book a place in a class from your booking page. In this article, you will learn how to show classes on your new booking page and what clients see when they book one.
Before You Start
Your booking page shows the class sessions you have scheduled in your calendar, with the number of places set on each class. If you have not set up classes yet, see How to Create a Class.
Step 1: Show Classes on Your Booking Page
Go to Setup, under Online presence click Online Bookings, then click Customise page. Pabau Studio opens on the Book Type page.
- Make sure Edit is selected, hover over the booking options and click the Book Type label.
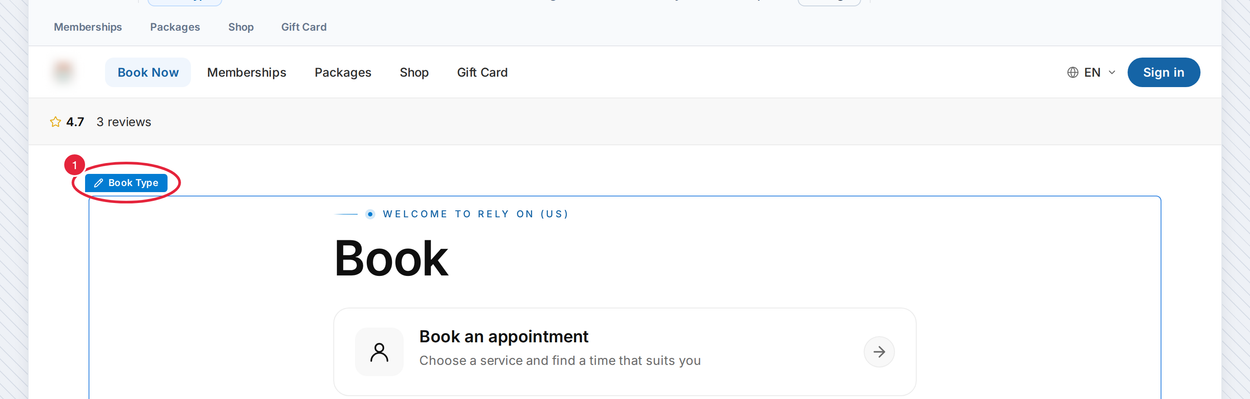
Hover over the booking options and click the Book Type label
- Under Show / hide options, switch on Book a class.
- Close the panel and click Publish.
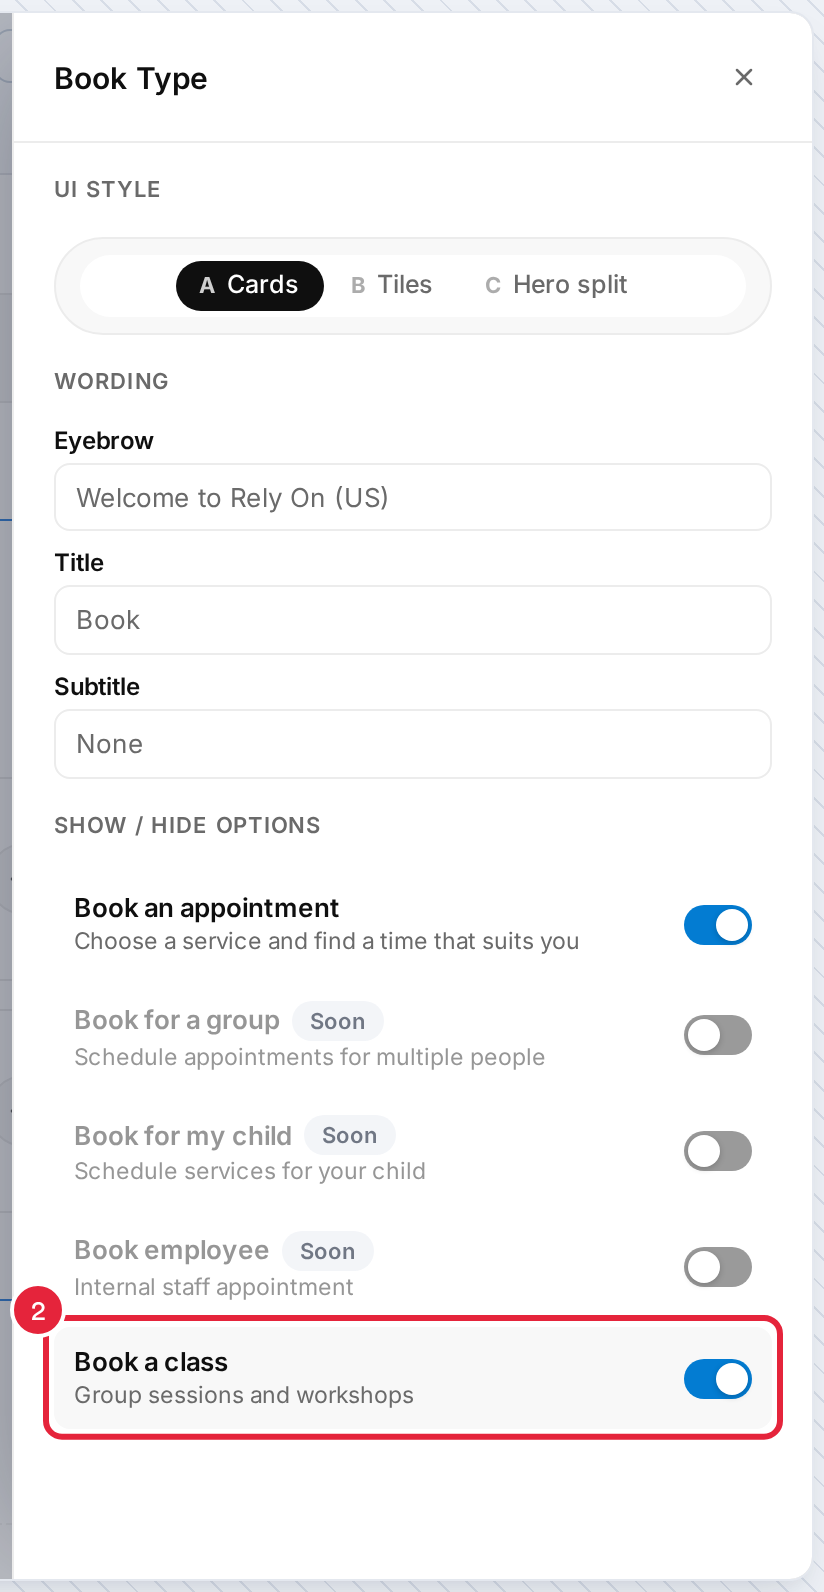
Switch on Book a class
Your booking page now offers Book a class next to Book an appointment, and a Classes page appears in the Booking pages strip in Studio.
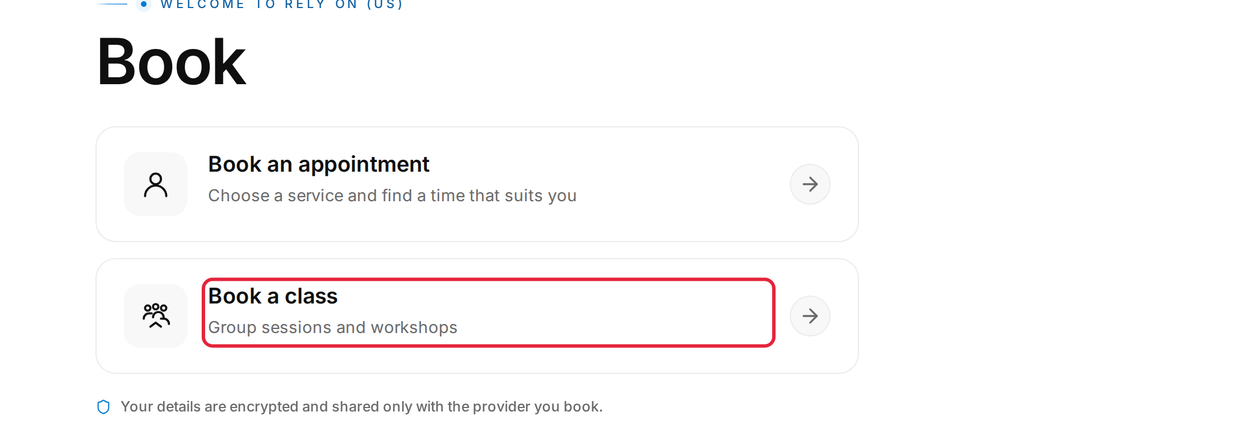
Clients see Book a class on the first page
NOTE: In the classic version, classes were shown unless you ticked Hide class appointments. On the new booking page, classes are hidden until you switch on Book a class.
Step 2: Know What Clients See
When a client clicks Book a class, they see a week of your scheduled classes. They can move between weeks with the arrows and filter by Classes or Staff members.
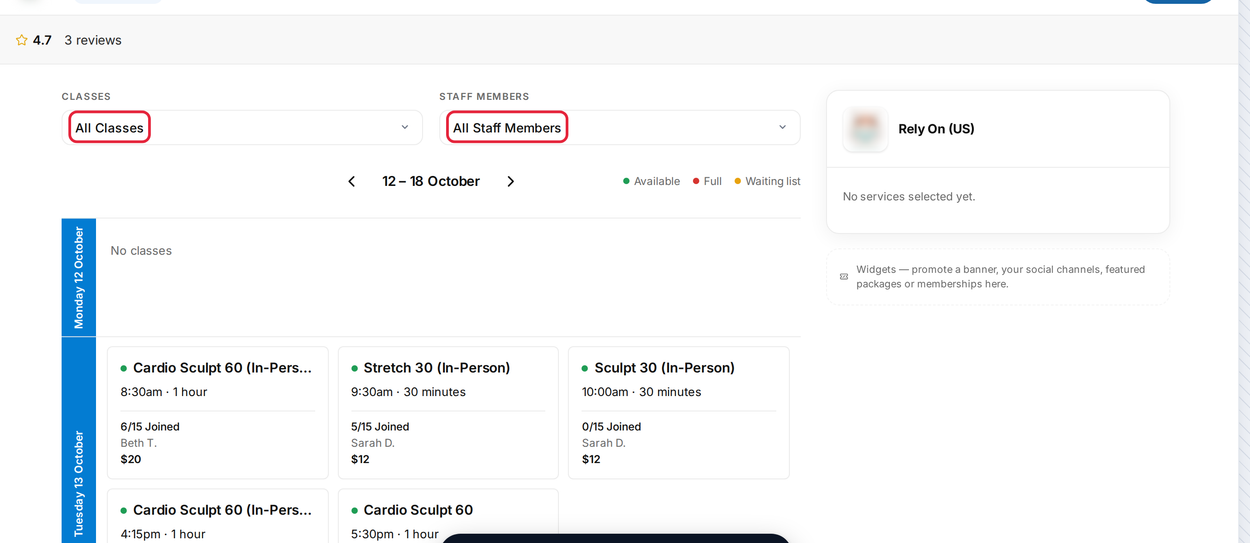
The Classes page (Studio preview with sample classes)
Each class shows its time, length, instructor, price and how many places are taken — for example 6/15 Joined. Full classes are marked FULL and cannot be chosen.
- The client clicks the class they want, then Continue.
- If they are not signed in, they are asked to sign in first — a class place is always booked to a client account.
- The place is booked straight away and the client sees their confirmation.
- If the class fills up while they are choosing, they see This class just filled up — pick another.
- If they already have a place, they see You're already booked into this class.
IMPORTANT: Class places booked on the new booking page are not paid for online — the client pays at the clinic. To take payment for a class, see How to Process a Class Payment from the Calendar.
Step 3: See Who Has Booked
Each place booked online is added to that class in your calendar, alongside places your team books. To remove someone or update their status, see How to Remove Participants From a Class and How to Update Appointment Statuses for Class Participants.
TIP: In Studio, open the Classes page and click its Classes label to choose how the schedule looks on a phone.
What's next?
To choose the other booking steps and rules, see Part 3: Set Booking Steps and Availability Rules.
Questions? Reach us any time via the in-app chat — we’re happy to help.
Was this guide helpful? Let us know by voting below - your feedback helps us write clearer articles.
For more guides, browse the related articles below or use the search bar at the top of the page. You can also watch our video learning series, the Pabau Academy, or visit the Support page for additional help.