
Almost every payer accepts electronic claims through Claim.MD, and that is always the fastest route - statuses, rejections and remittances flow back into Pabau automatically. But some payers still require a mailed paper claim, and some plans only take submissions keyed into their own provider portal. This guide covers that manual path end to end: exporting the CMS-1500, sending it yourself, and keeping the claim tracked in Pabau so your dashboard stays truthful.
Before you start:
The export builds the form from your validated claim, so the same Setup prerequisites apply as for electronic billing - a completed billing profile, an NPI for the rendering provider, and the insurer linked to a payer (Setup → Claims → Claim.MD). See Insurance Guide Part 1.
1. Export a CMS-1500 form
- Open the claim from Money → Insurance claims.
- Fix anything the claim screen flags - the export validates the claim first, and only a clean claim prints. What lands on paper is exactly what would go over the wire.
- Click Export in the claim header and choose Print CMS-1500 form.
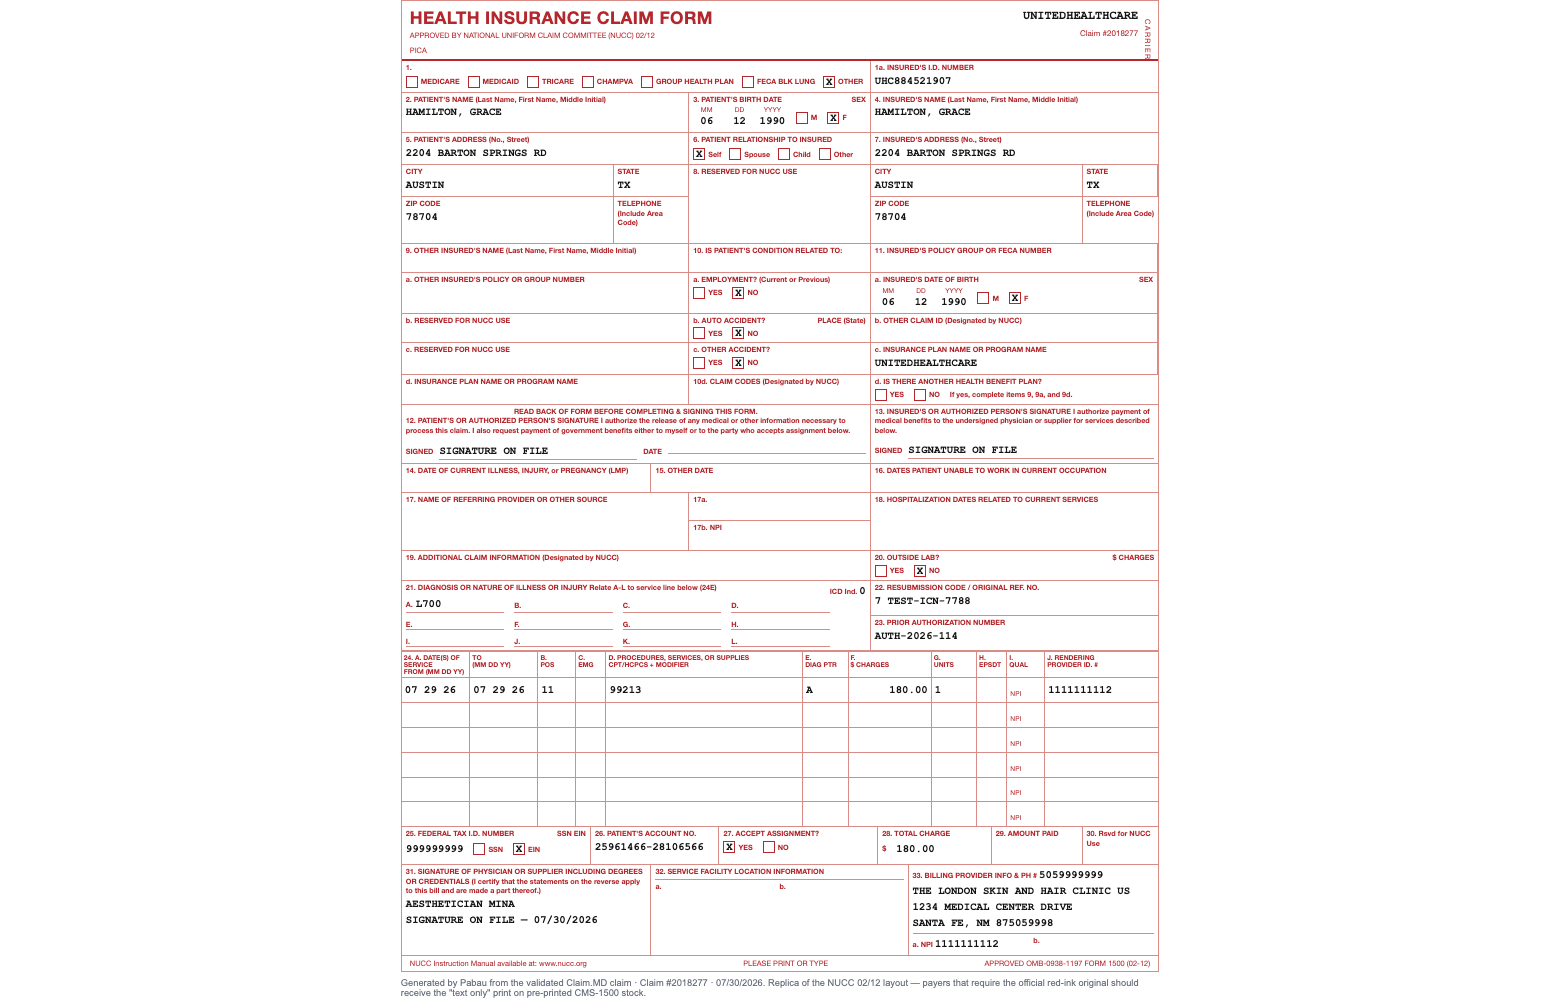
- A print window opens with the completed NUCC 02/12 form. Print it, or choose Save as PDF in the print dialog to export a PDF for a portal upload.
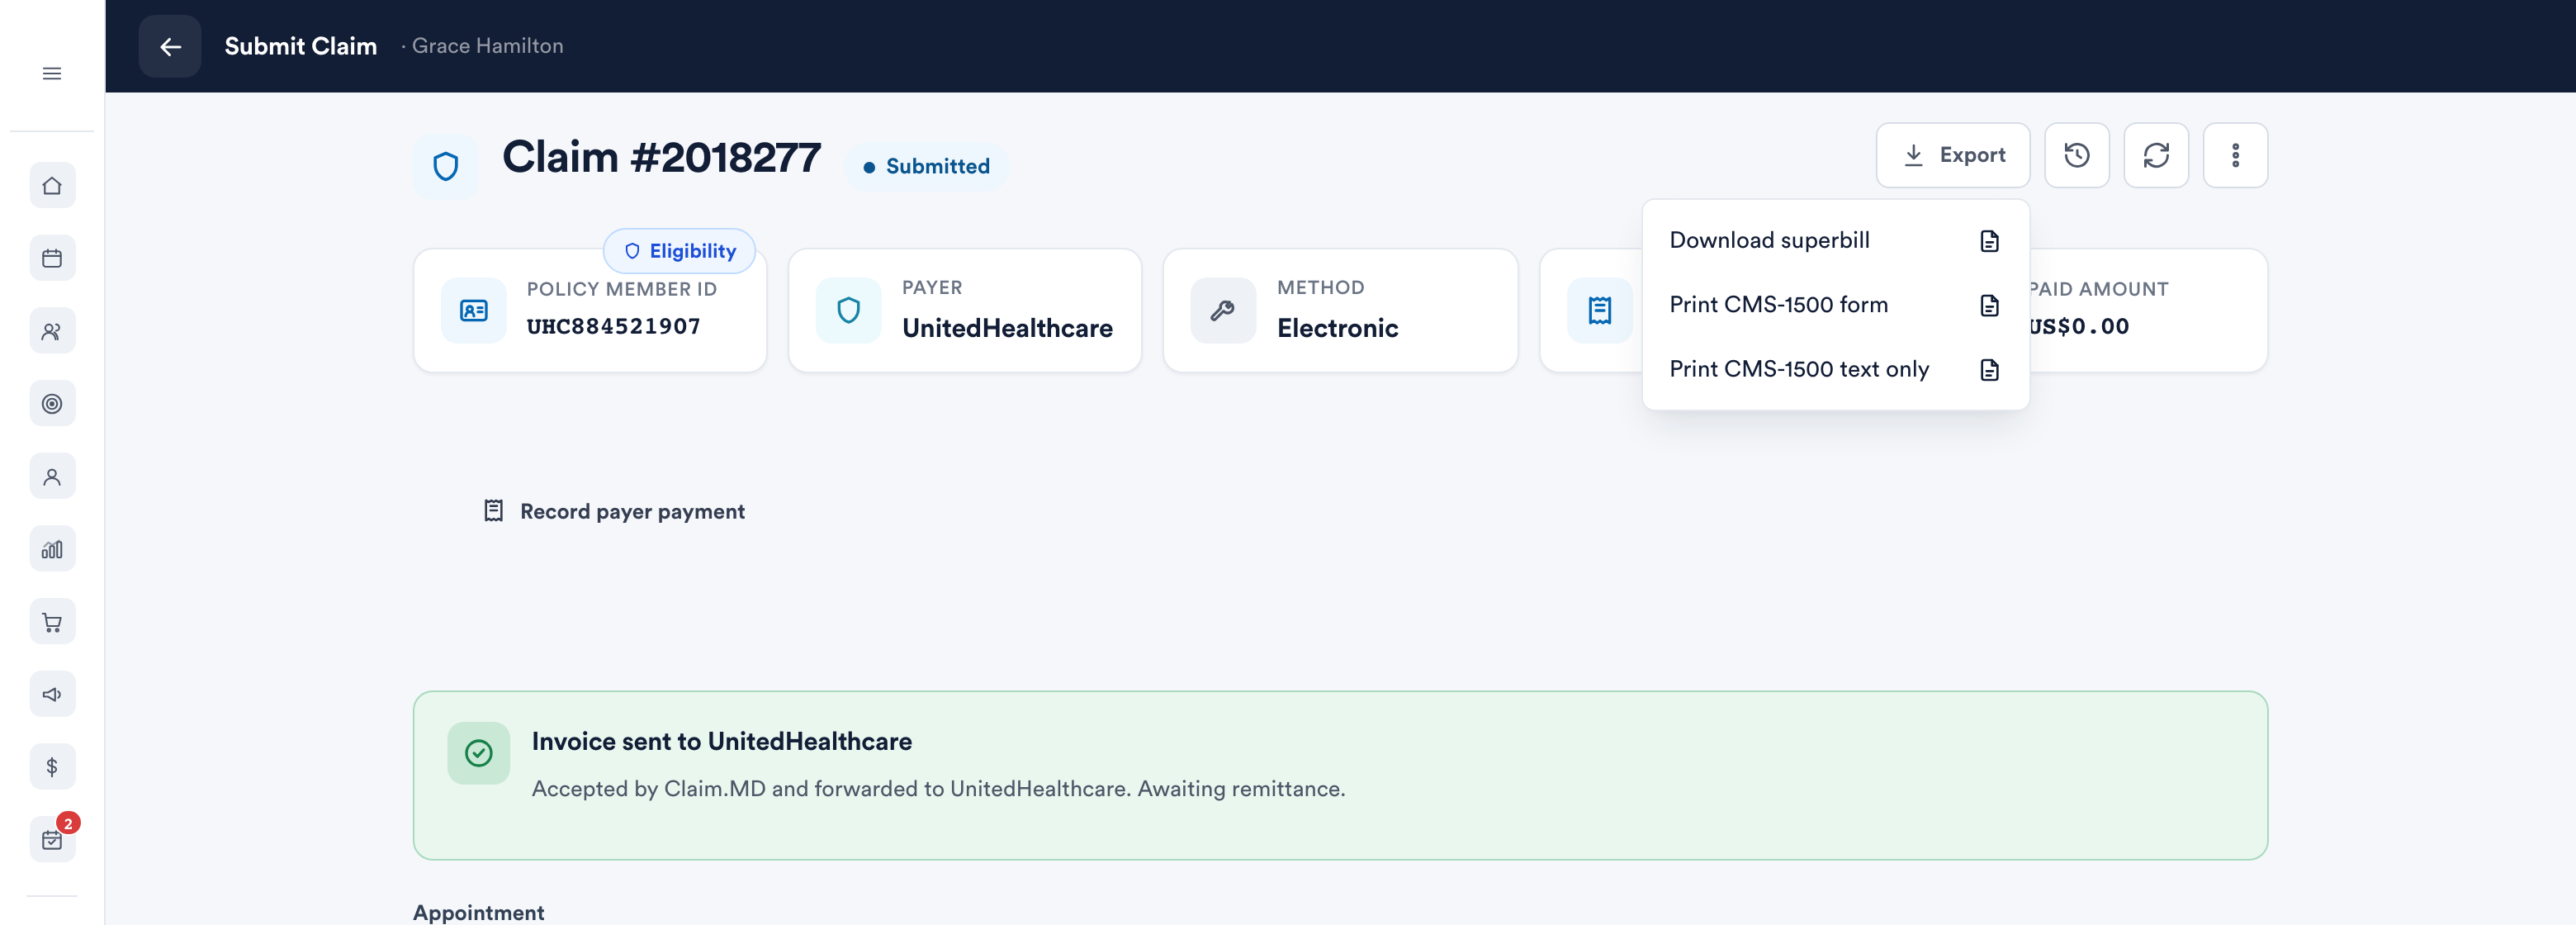
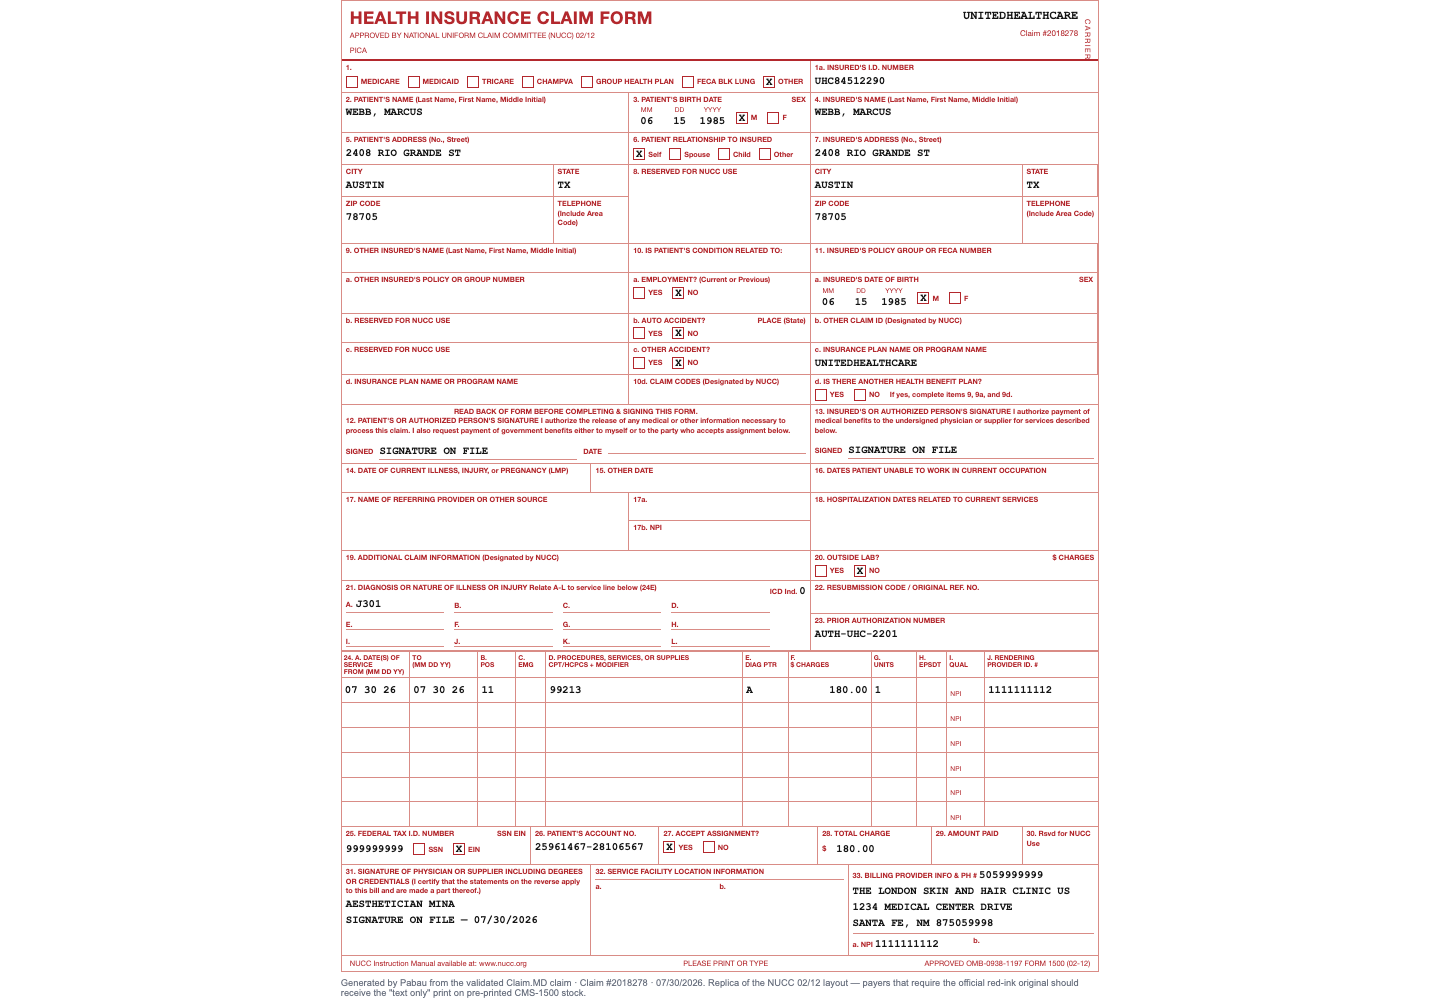
The same menu also offers Download superbill — a patient-facing statement for out-of-network reimbursement, which is a different document from the CMS-1500 you send to a payer.
2. Print onto pre-printed CMS-1500 forms
Payers that require the official red-ink original will reject a plain-paper replica. For those, load your pre-printed CMS-1500 stock into the printer and use Export → Print CMS-1500 text only - it prints just the claim values, positioned to land in the boxes of the official form.
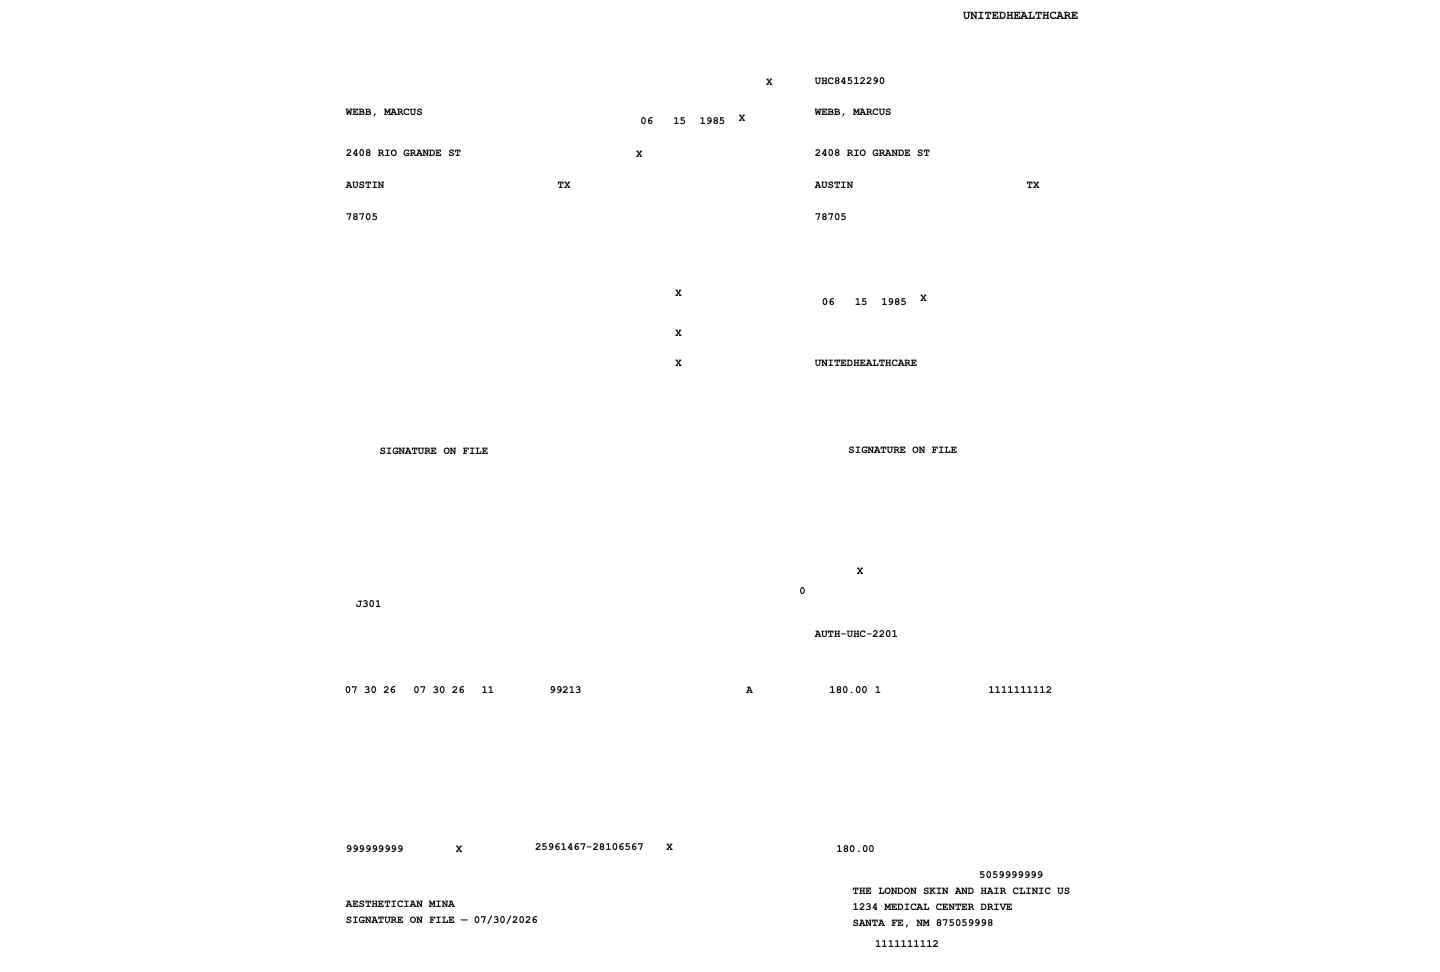
Tip: Alignment can take a test page or two. Print the text-only version on plain paper first and hold it against the pre-printed form to check the registration; adjust your printer margins if the values sit outside the boxes.
3. Mark the claim as submitted
Once you have mailed the form (or keyed the claim into the payer's portal), tell Pabau. Open the ⋮ menu in the claim header and choose Mark as submitted (paper).
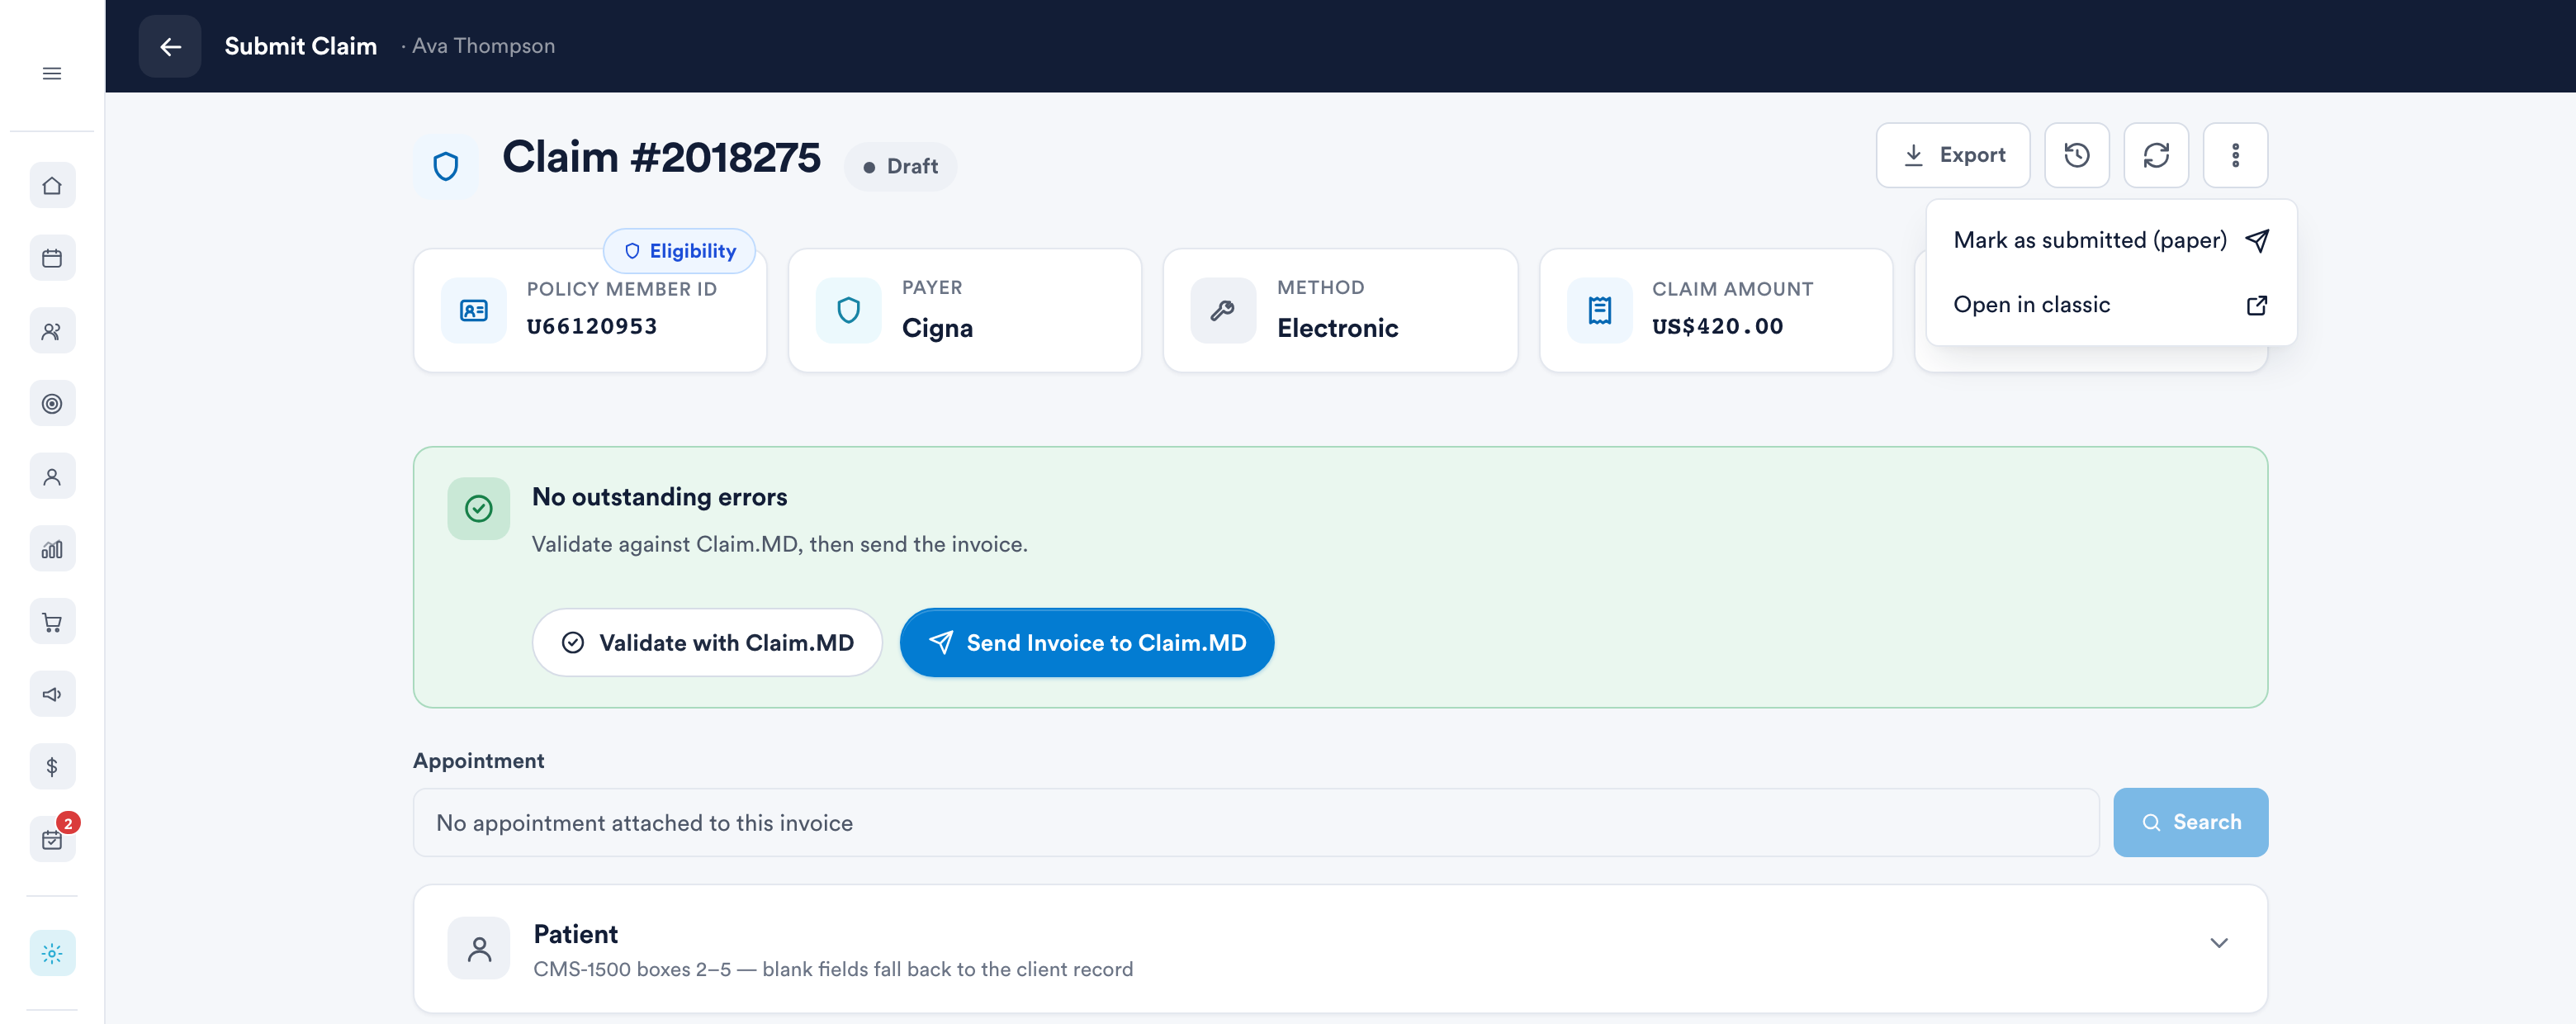
Pabau validates the claim one last time (the same completeness check as the export), then moves it to Submitted. The claim locks against edits, the dashboard counts it with your other submitted claims, and the claim history records that it was submitted manually.
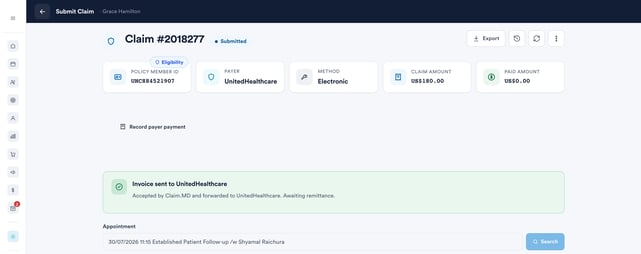
Important: a manually submitted claim will not receive electronic status updates, rejections or ERAs - the payer has no electronic link back to this claim. Record the outcome yourself using the steps below.
4. When the payer pays
Paper claims are usually answered with a mailed EOB and a check. Record it on the claim with Record payer payment - enter the paid amount (and any adjustments) per charge line, and the claim settles as Paid, exactly as an electronic remittance would. This also stores the adjudication, so you can still bill a secondary payer afterwards.
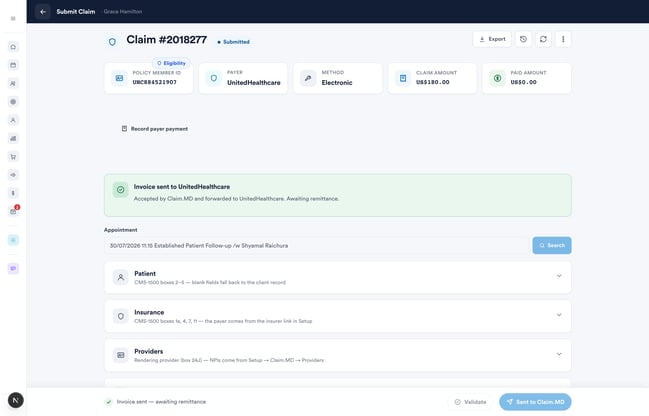
Recording the money on the invoice itself stays the normal insurance-payment flow at the point of sale - see Insurance Guide Part 4.
5. When the payer denies
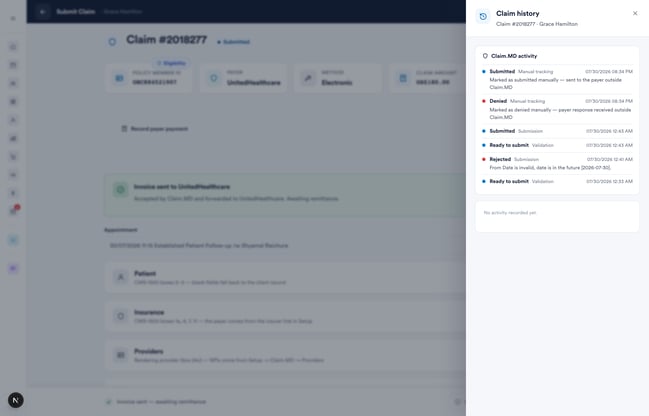
If the EOB comes back as a denial, open the ⋮ menu and choose Mark as denied. The claim moves to Denied and unlocks, so you can correct it and resubmit, or start an appeal with the payer. Every manual transition is stamped into the claim's history alongside the electronic events.
6. Correct and resubmit on paper - box 22
When you resubmit a corrected claim on paper, the payer needs box 22 filled in: the resubmission code (7 = replacement, 8 = void) and the original reference number - the payer's claim number (ICN) from the EOB or denial letter.
- If the claim is locked, open the ⋮ menu and choose Revert to draft. (This is available for validated, rejected, denied and manually submitted claims - an electronically submitted claim that is still with the payer can't be reverted; void it instead.)
- Make your corrections, then open the Claim details section and set Resubmission code (box 22) and Original reference no. (payer ICN). The two fields go together - Pabau won't validate one without the other.
- Export the CMS-1500 again - box 22 now carries the code and reference - mail it, and Mark as submitted (paper) once more.
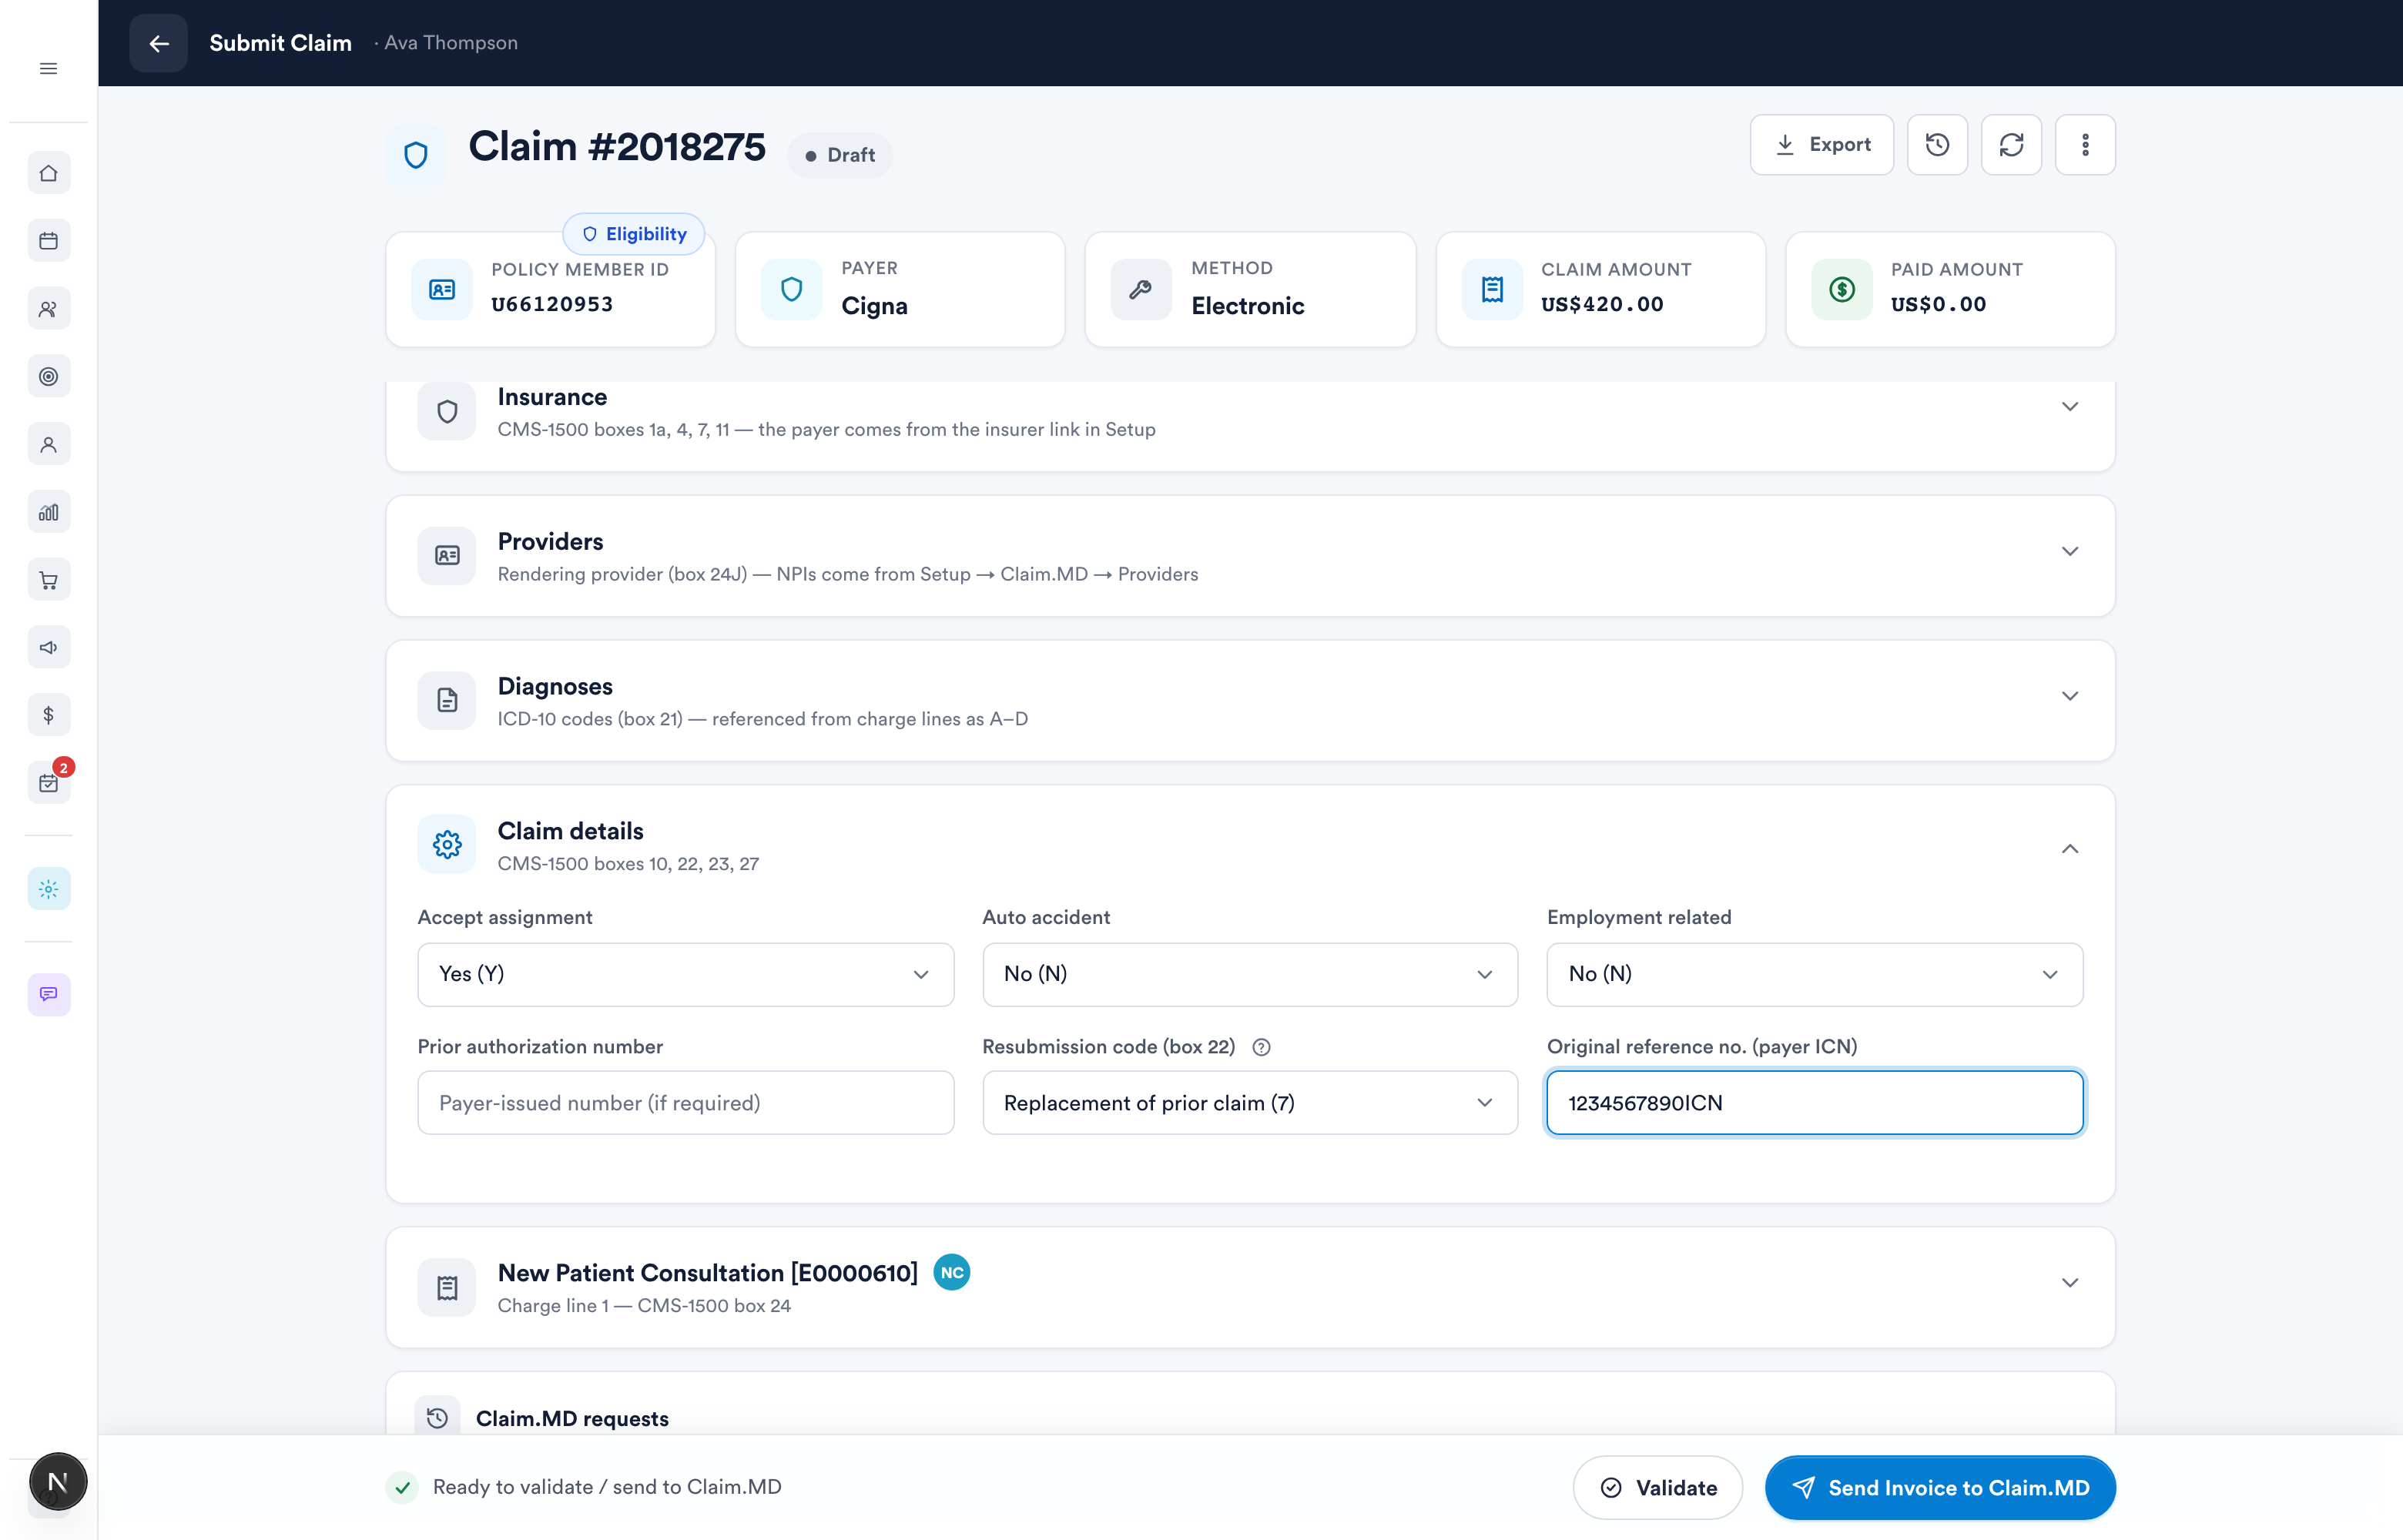
NOTE: box 22 only applies to paper resubmissions. When you resubmit electronically, Pabau sets the frequency code and payer claim number automatically - a denied claim re-sends as a correction on its own, and these fields are ignored on the wire.
Frequently asked questions
-
Do I need a connected Claim.MD account to export a CMS-1500?
No. Validation for the export runs inside Pabau, so printing and manual tracking work before (or without) connecting an account. You do need the Setup essentials - billing profile, provider NPIs, and the insurer linked to a payer.
-
Will Pabau chase the payer for updates on a paper claim?
No - there's no electronic trail to poll. The claim stays Submitted until you record the payer's decision with Record payer payment or Mark as denied.
-
Why can't I revert my claim to draft?
Only validated, rejected, denied and manually submitted claims can be reverted. A claim submitted electronically is genuinely in the payer's queue - correct it through a resubmission (Pabau sends it as a frequency-7 correction) or void it, rather than editing history. Paid claims never revert.
-
Which resubmission code do I pick?
7 replaces a previously adjudicated claim with corrected data; 8 voids it entirely. Both require the payer's original claim number from the EOB.
-
Should I prefer paper or electronic?
Electronic, whenever the payer supports it - it's faster, tracked automatically, and Claim.MD even drops to paper on your behalf for many mail-only payers. Use this manual flow for the exceptions.
What's next?
New to insurance billing in Pabau? Start with Part 1: set up the essentials, then Part 2: client insurance setup, Part 3: connect appointments to insurance, and Part 4: submit and track claims electronically.
Was this guide helpful? Let us know by voting below - your feedback helps us write clearer articles.
For more guides, browse the related articles below or use the search bar at the top of the page. You can also watch our video learning series, the Pabau Academy, or visit the Support page for additional help.