
The Feedback Survey is what your clients receive after their appointment to rate their experience. The Builder is the first step of a three-step configuration - Builder, Questions and Share - where you control how the survey looks and behaves.
Step 1: Access the Feedback Survey Settings
Log in to your Pabau account and in the left sidebar menu, click on Marketing, then click on "Reviews." Click the Settings button in the top right corner of the Reviews page to open the Feedback Survey configuration.
Alternatively, navigate to Setup and click on "Feedback Survey" under Marketing and Communication.
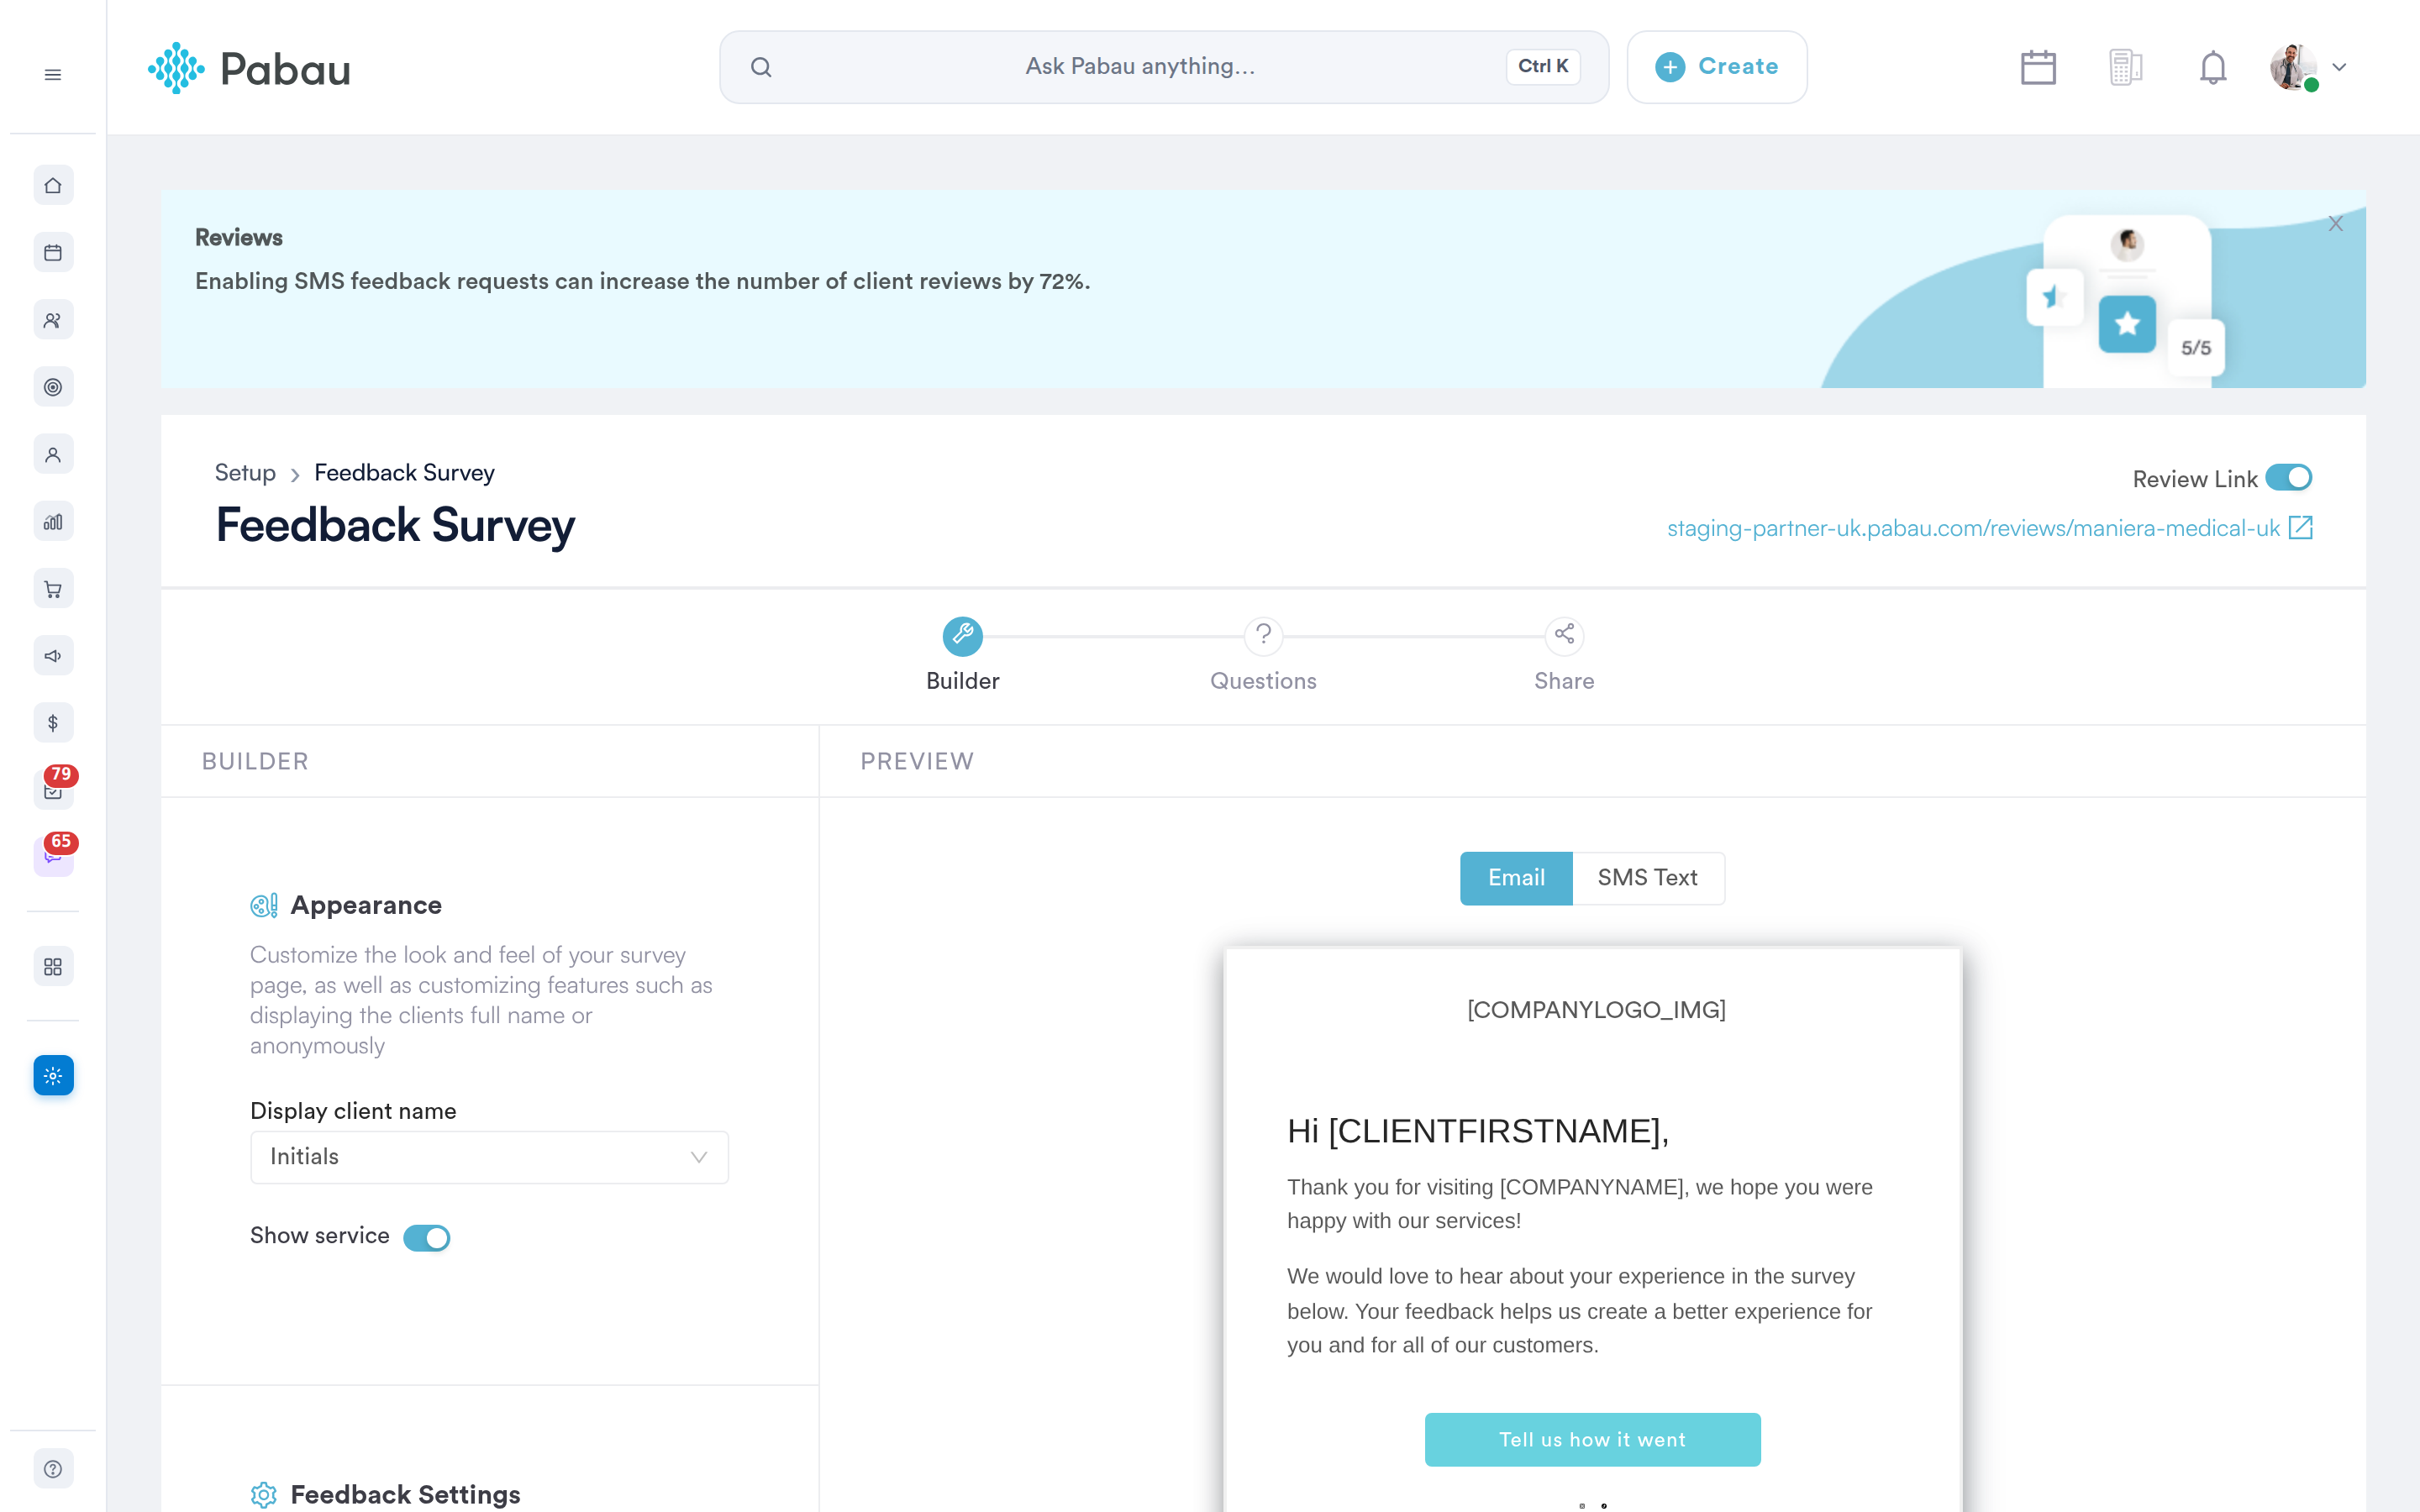
The Feedback Survey Builder step
Step 2: Toggle Your Public Review Link
At the top of the page is the Review Link toggle. When it is on, the URL shown beside it is your clinic's own hosted review page, where clients can leave and read reviews. You can share that link directly with clients.
Step 3: Customize the Survey Appearance
The Appearance section controls how your survey and its published reviews look:
-
Display client name - how client names appear on published reviews. Choose Full Name, First Name, Initials or Anonymous.
-
Show service - when on, the service the client booked is shown alongside their review. When off, the service name is hidden.
Step 4: Configure Feedback Settings
Feedback Settings controls how long clients can rate an appointment after it has happened. Use the Allow clients to rate appointments for: dropdown to set the window. For a full explanation of each option, read How to Configure Your Feedback Visibility Settings.
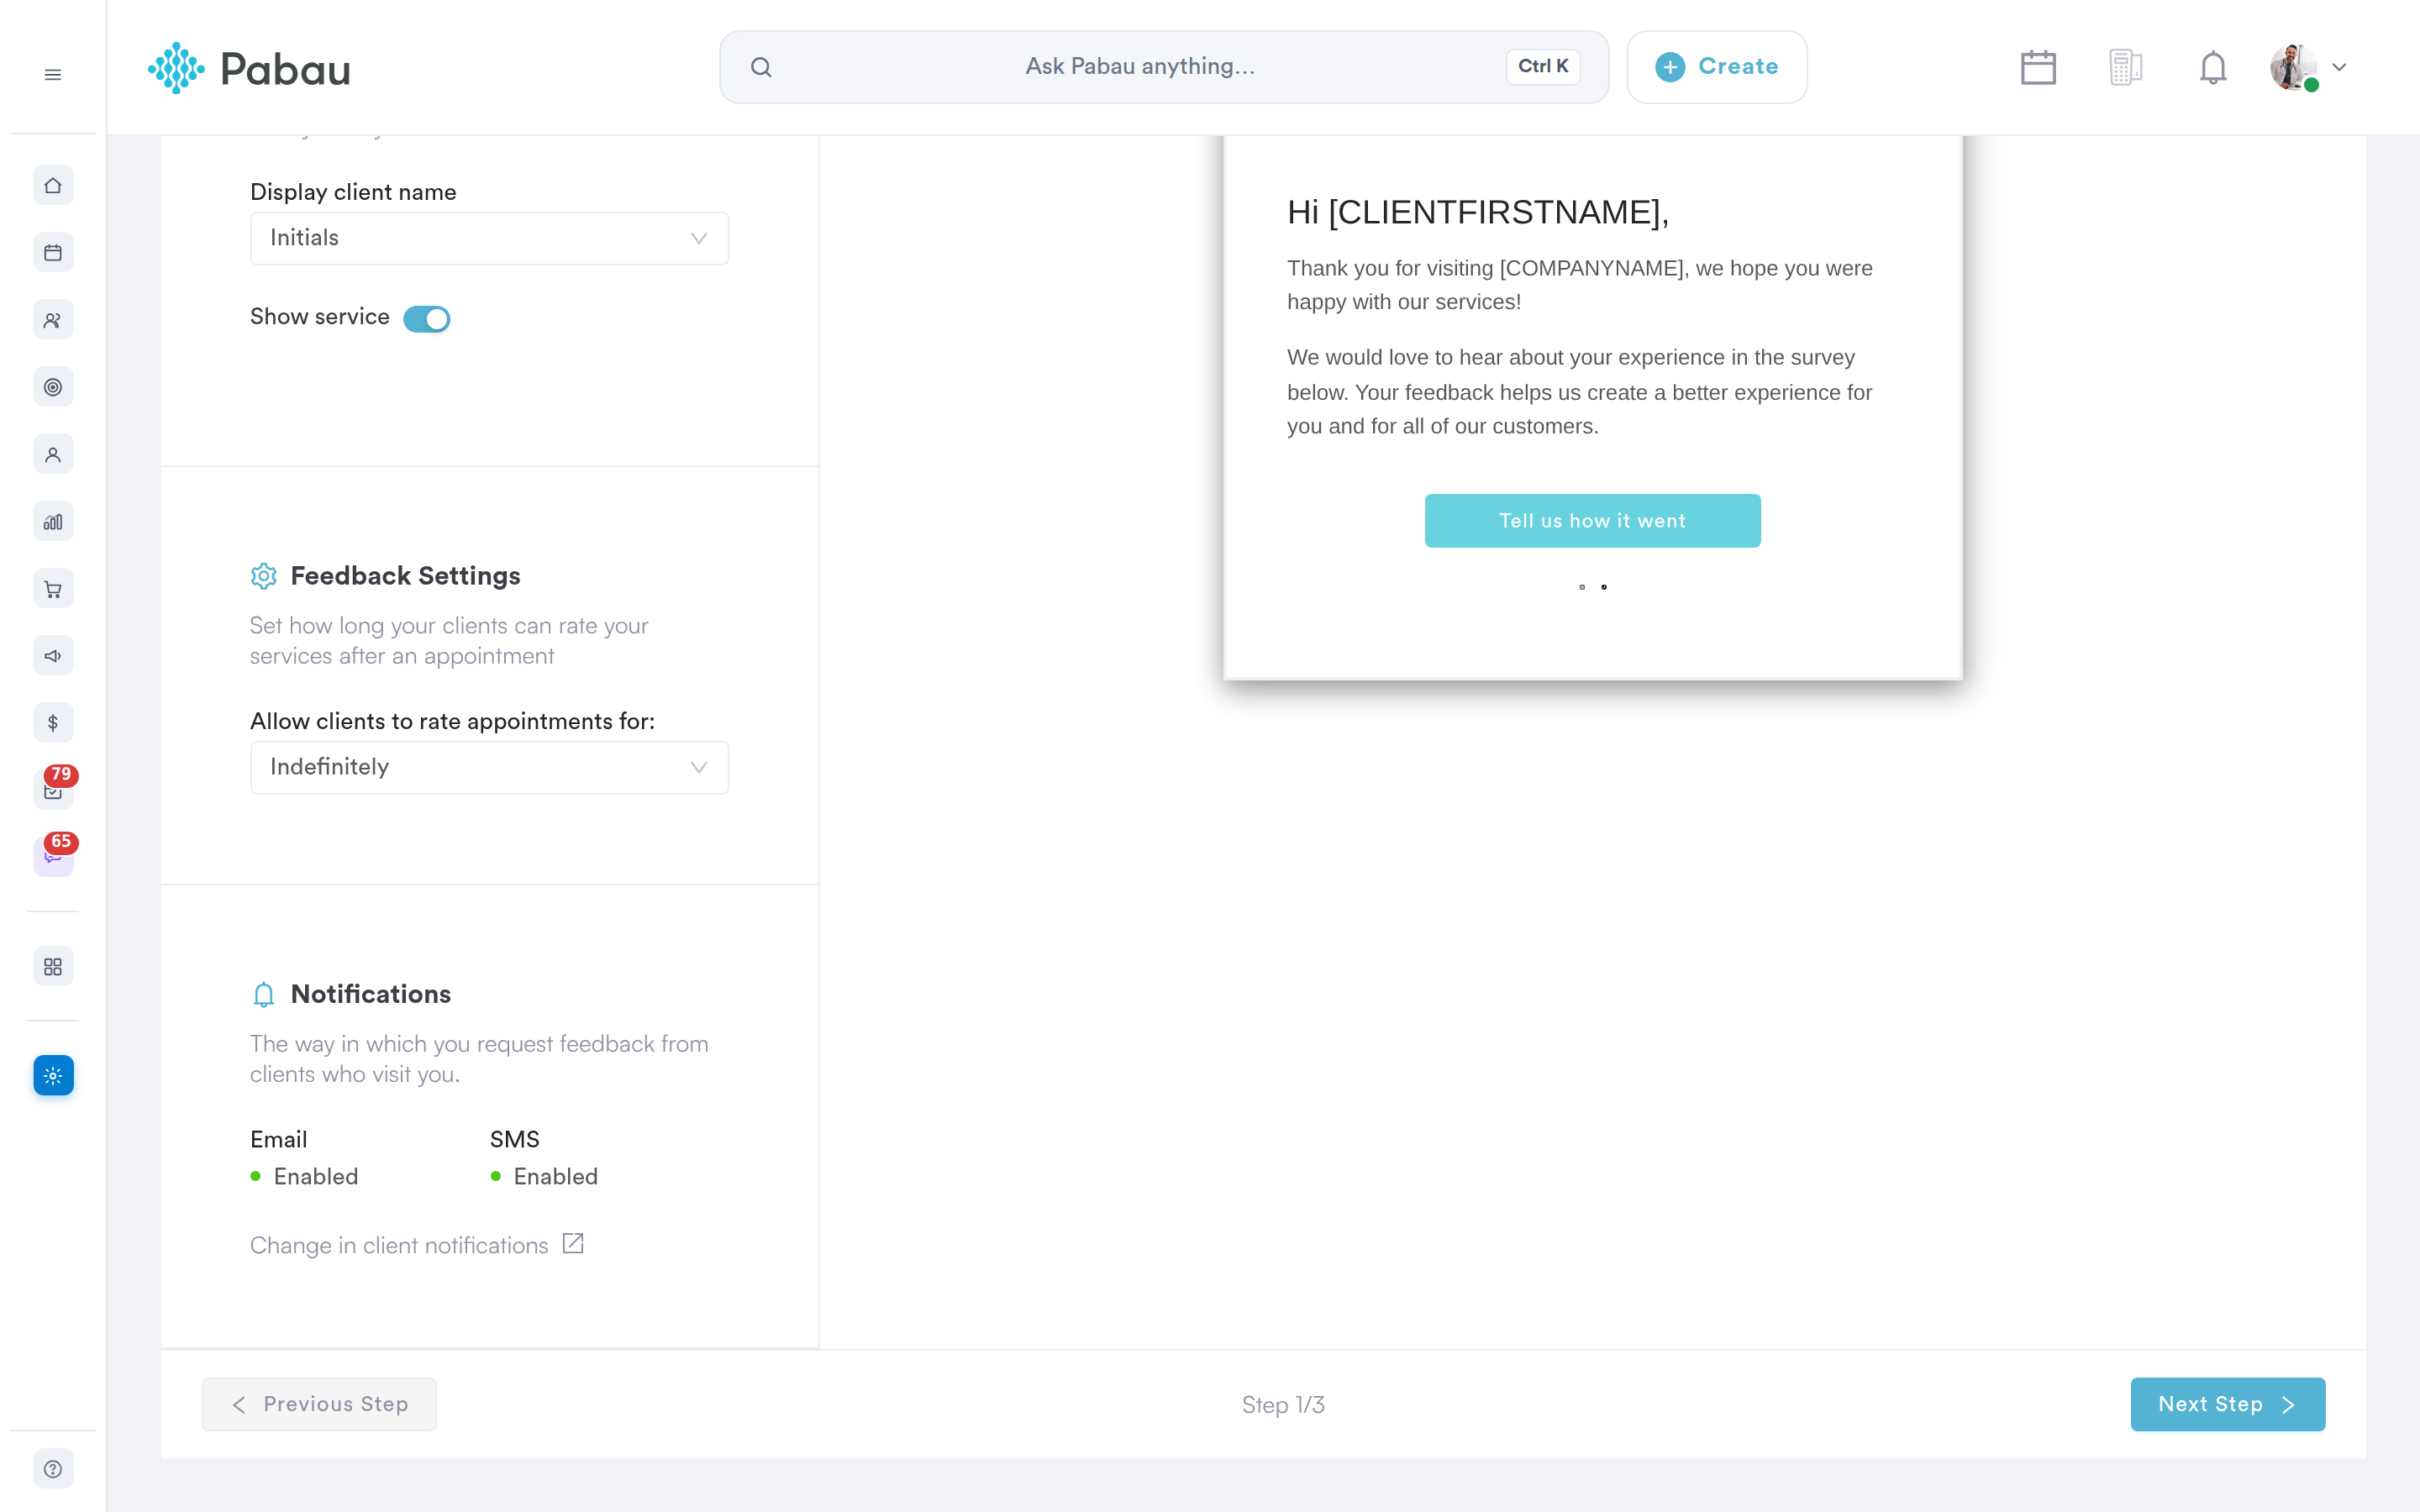
Feedback Settings and Notifications on the Builder step
Step 5: Check Your Notification Settings
The Notifications section shows whether your Email and SMS feedback requests are currently Enabled or Disabled. These are read-only here - click Change in client notifications to open the settings page where you can switch them on or off.
Step 6: Continue to Questions
Use the Preview panel on the right to check the email and SMS your clients will receive. When you are happy with the Builder, click Next Step in the bottom right to move to the Questions step.
IMPORTANT: Your changes are saved with the Save Settings button, which sits on the Questions step. Clicking Next Step here moves you on to it - make sure you save there before leaving the page.
With the appearance and settings configured, your clients get a consistent, branded experience when their feedback survey arrives.
What's next?
Was this guide helpful? Let us know by voting below - your feedback helps us write clearer articles.
For more guides, browse the related articles below or use the search bar at the top of the page. You can also watch our video learning series, the Pabau Academy, or visit the Support page for additional help.