
The Payments page lists every payment recorded in your clinic, so you can track what’s been paid, how and by whom. Its filters let you narrow the list to, for example, last month’s card payments taken through Stripe, or everything paid by insurers.
Step 1: Open the Payments Page
- In the left sidebar, click Money.
- Click the Payments tab.
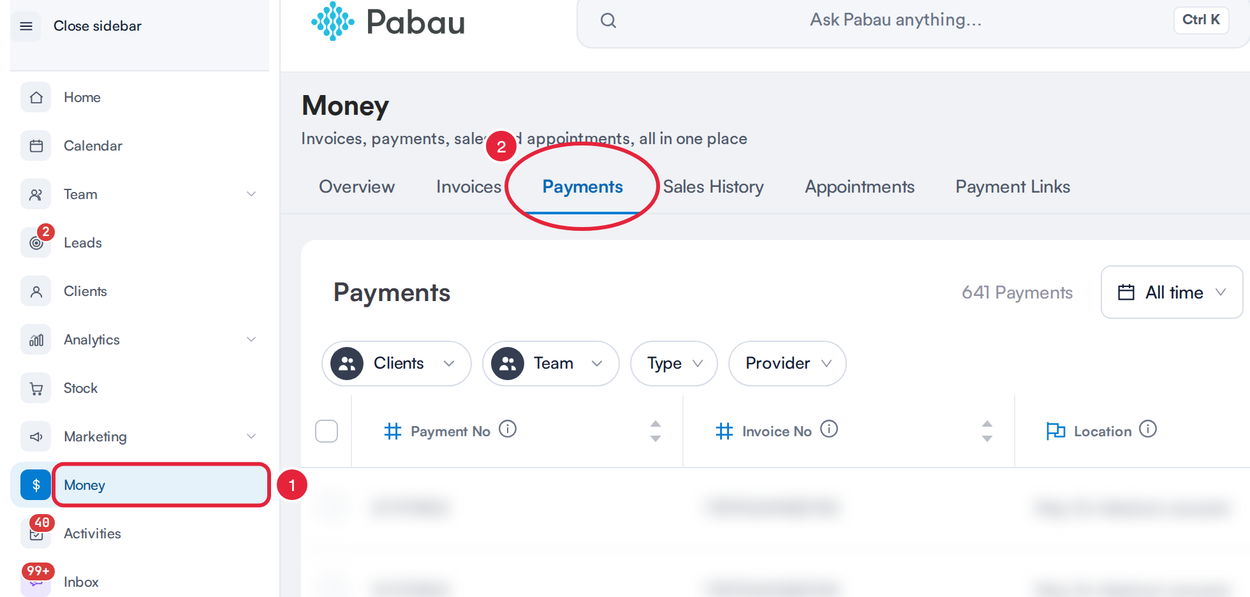
Money → Payments
Step 2: Get to Know the Toolbar
The table lists your payments, newest first. Above it, the toolbar holds the tools to organise, filter and customise the list:
- Date filter (shows All time to start with): narrow the list by payment date.
- Views (shows All payments): switch to a saved view, or add a new one.
- Search by payment name: find a payment by its payment number or the client’s name.
- Quick filters: Clients, Team, Type and Provider.
- Sort: choose the column the list is ordered by.
- Edit Columns: show or hide columns in the table.

The Payments toolbar
Views
Use the All payments menu to switch between existing views or create a new custom view. From here, you can apply specific filters to focus on relevant payments, assign owners to a view, and save views for quick access in the future.
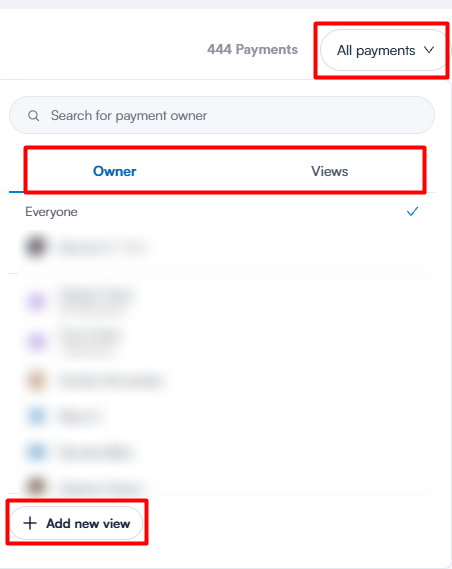
Switch views or add a new one
NOTE: To learn more about creating a custom view, see How to Create Custom Views in Invoices, Payments, Appointments, and Quotes Page.
Search
Type a payment number or a client’s name in the search box to find a payment quickly without applying filters.
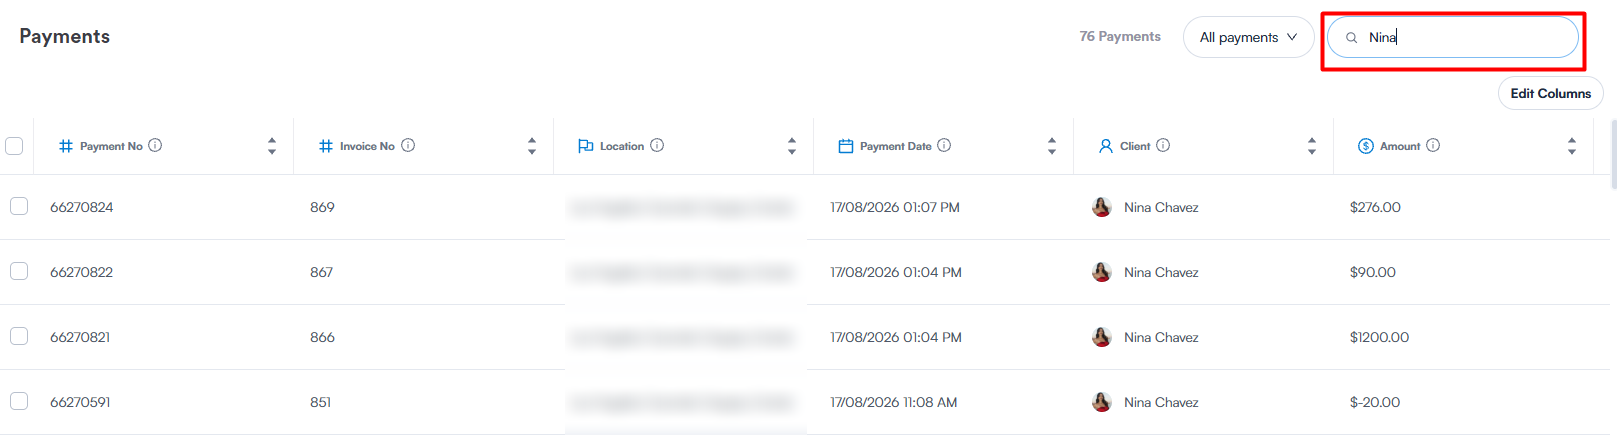
Search by payment number or client name
Edit Columns
Click Edit Columns to choose which columns are shown in the payments table.
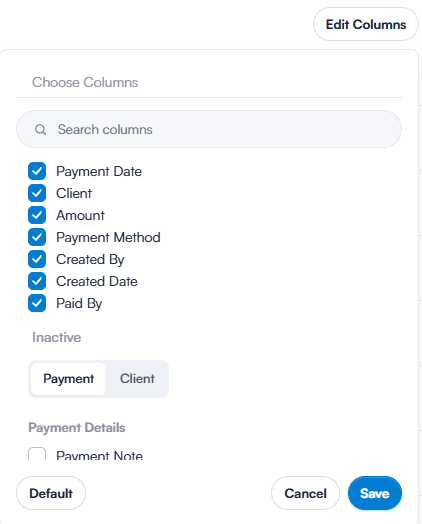
Choose the columns to show
Step 3: Filter With the Quick Filters
Each quick filter is a button above the table:
- Clients: type at least 3 characters of a client’s name, select the clients you want, then click Apply.
- Team: pick All team members, or select individual staff members or whole teams, then click Apply. This filters by the staff member who recorded the payment.
- Type: tick one or more payment methods, such as Card, Cash or Bank Transfer. The list shows the payment methods your clinic uses.
- Provider: tick Stripe for card payments taken through Pabau’s Stripe integration, or Insurance for payments from insurers.
- Click the quick filter, for example Provider.
- Tick what you want to see. Type and Provider apply as soon as you tick; Clients and Team apply when you click Apply.
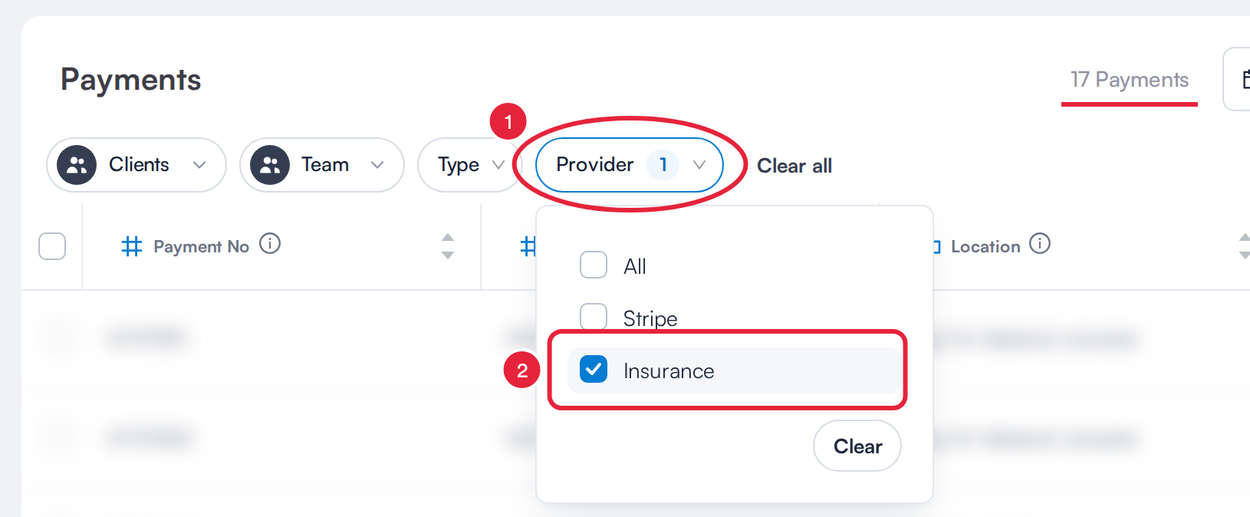
Only insurer payments are listed, and the count updates
A filter in use shows a count on its button. Click Clear inside a filter to reset just that one, or Clear all next to the buttons to remove every quick filter. You can combine quick filters, for example Type and Team.
Step 4: Filter by Date and Sort
- Click the date filter (it shows All time until you change it) and choose Today, Last 14 days, This month, Last month, Last 3 months or Custom range. The range applies to the payment date.
- Click Sort (for example Sort: Created Date), choose a column under Sort by, then pick Ascending or Descending. Click Clear to go back to the default order.
TIP: Quick filters and the date filter aren’t saved. They reset when you leave the page or refresh it. The sort is kept: Pabau saves it to the view you’re using, or as your own default order. To keep a set of filters, save it as a view. The date filter and sort work the same way as on the Invoices page; see Understanding the Invoices Page for screenshots.
What Each Column Means
Each row in the table represents a single payment. The available columns include:
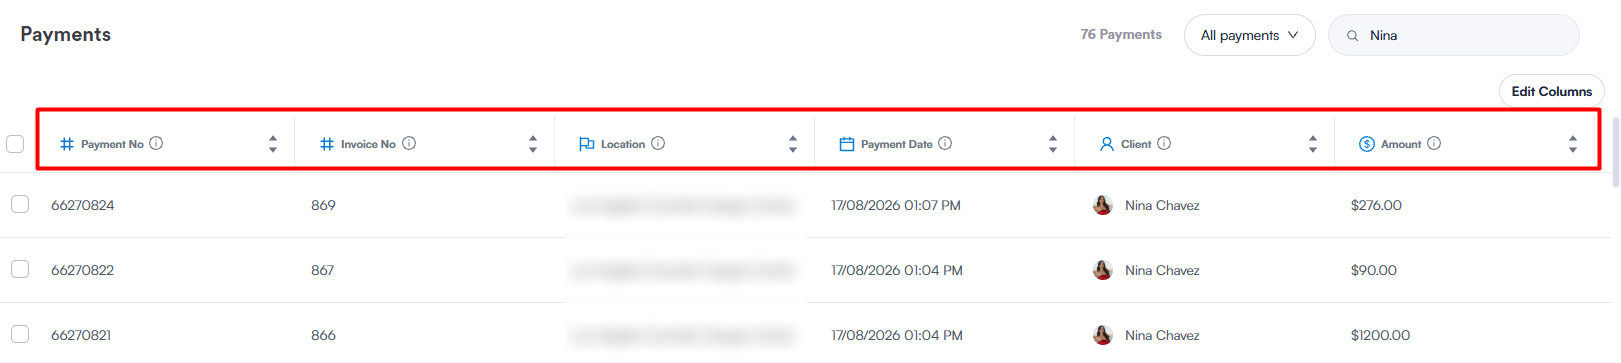
The payment table’s column headers
- Payment No.: the unique reference number assigned to each payment.
- Invoice No.: the invoice the payment relates to.
- Location: the clinic location where the payment was processed.
- Payment Date: the date and time the payment was recorded.
- Client: the client associated with the payment, shown with their name and avatar or initials.
- Paid By: the person who made the payment. This is usually the client, but may differ if someone else (such as a family member or company) paid on their behalf.
- Payment Method: how the payment was made, for example cash, card or package.
- Created By: the staff member who recorded the payment in Pabau.
You can also reorder the columns by hovering over a column header, clicking and holding the three-line icon, then dragging the column to your preferred position.
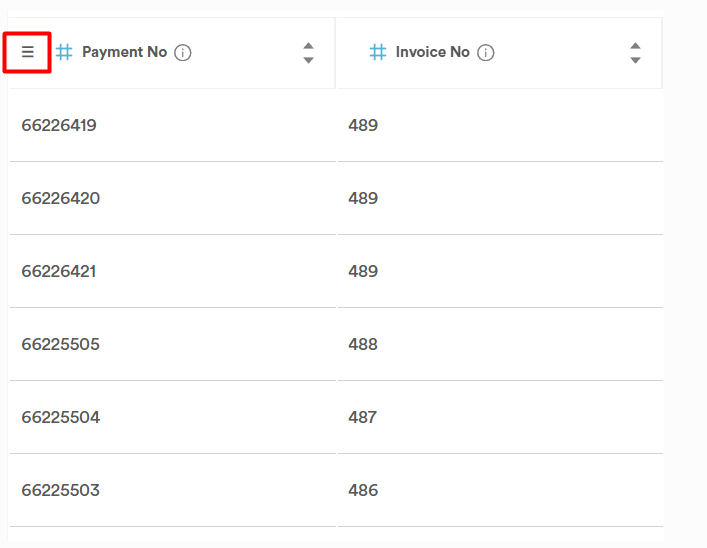
Drag a column by its three-line icon
Bulk Editing Payments
You can add or replace the note on several payments at once, which is useful for tagging a batch of reconciled or disputed payments without opening each one.
Step 5: Select the Payments You Want to Change
- Tick the checkbox at the start of each row you want to include. To take every row on the current page, use the checkbox in the table header.
- A toolbar appears above the table showing N Selected with a pencil icon.
NOTE: Bulk editing applies only to the rows you tick. If you use Select all N records to take everything matching your filters, the pencil is greyed out. Clear that selection and tick rows instead.
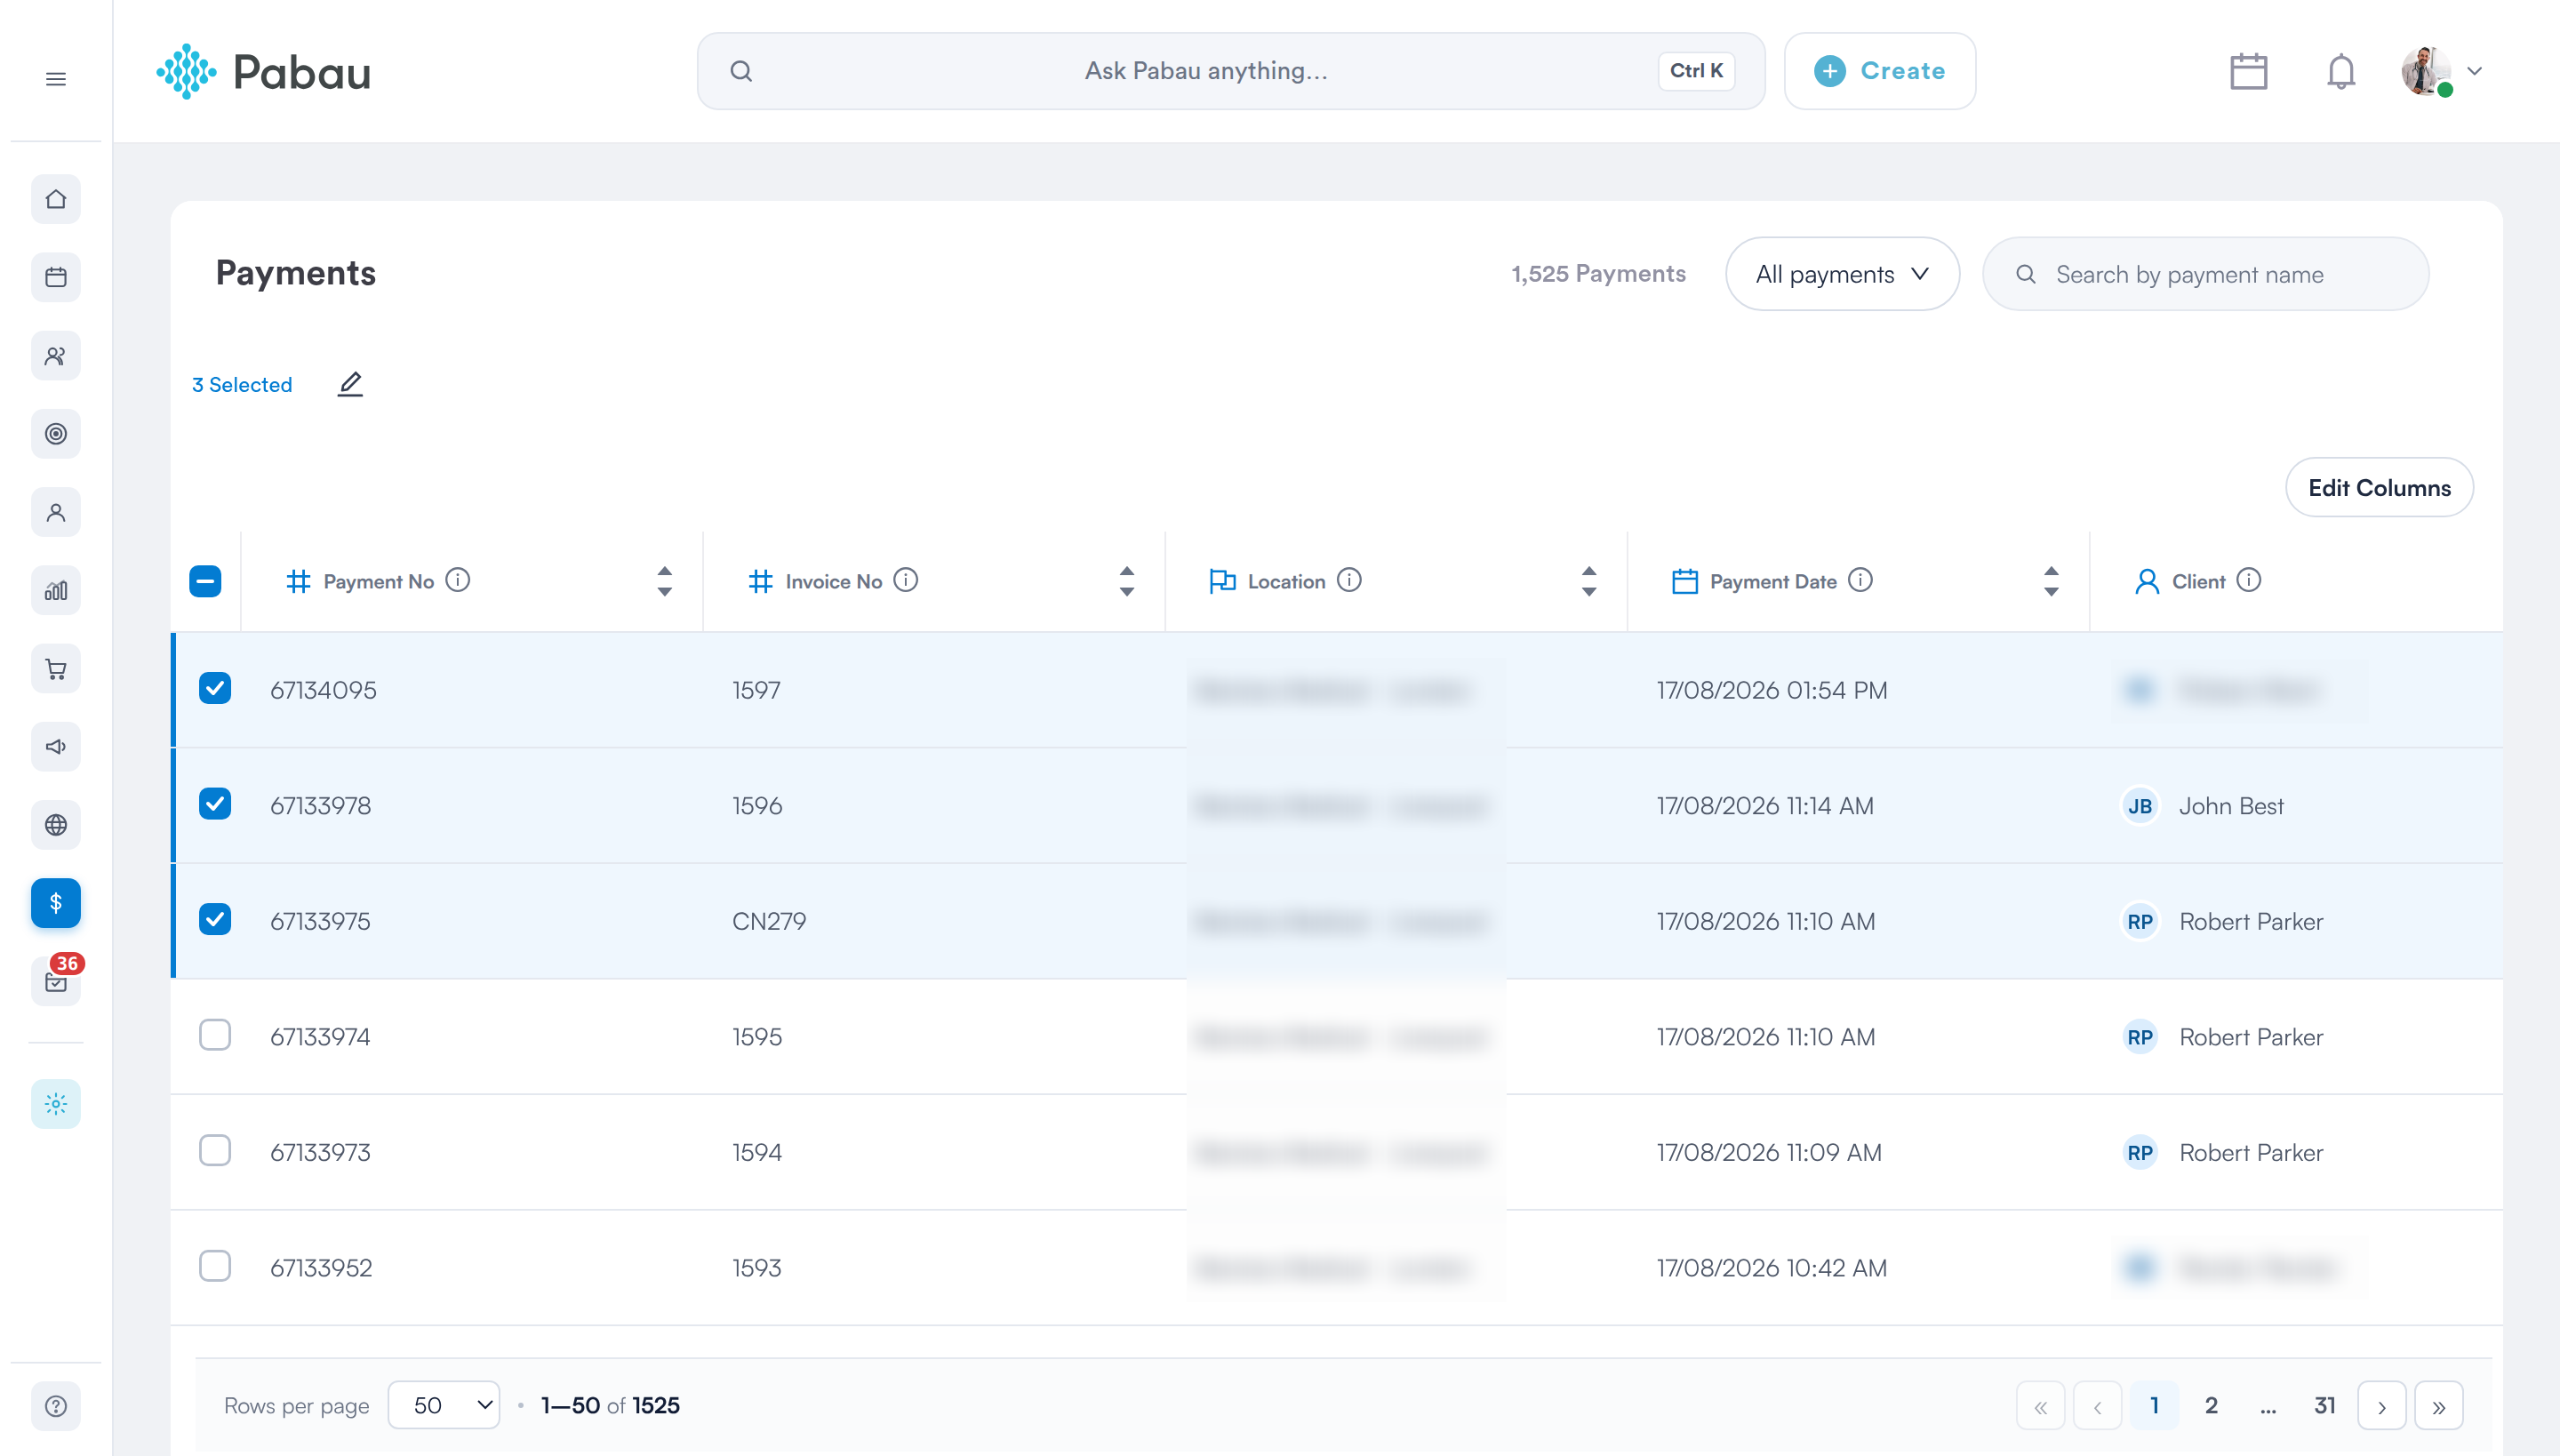
Rows ticked: the toolbar shows the count and the Bulk Edit pencil
Step 6: Choose What to Change
Click the pencil icon to open the Bulk Edit panel on the right. Each field you can change is listed with a dropdown:
- Keep current value: leave the field untouched. This is the default for every field.
- Edit current value: set the same new value on every selected record.
- Clear value: empty the field on every selected record.
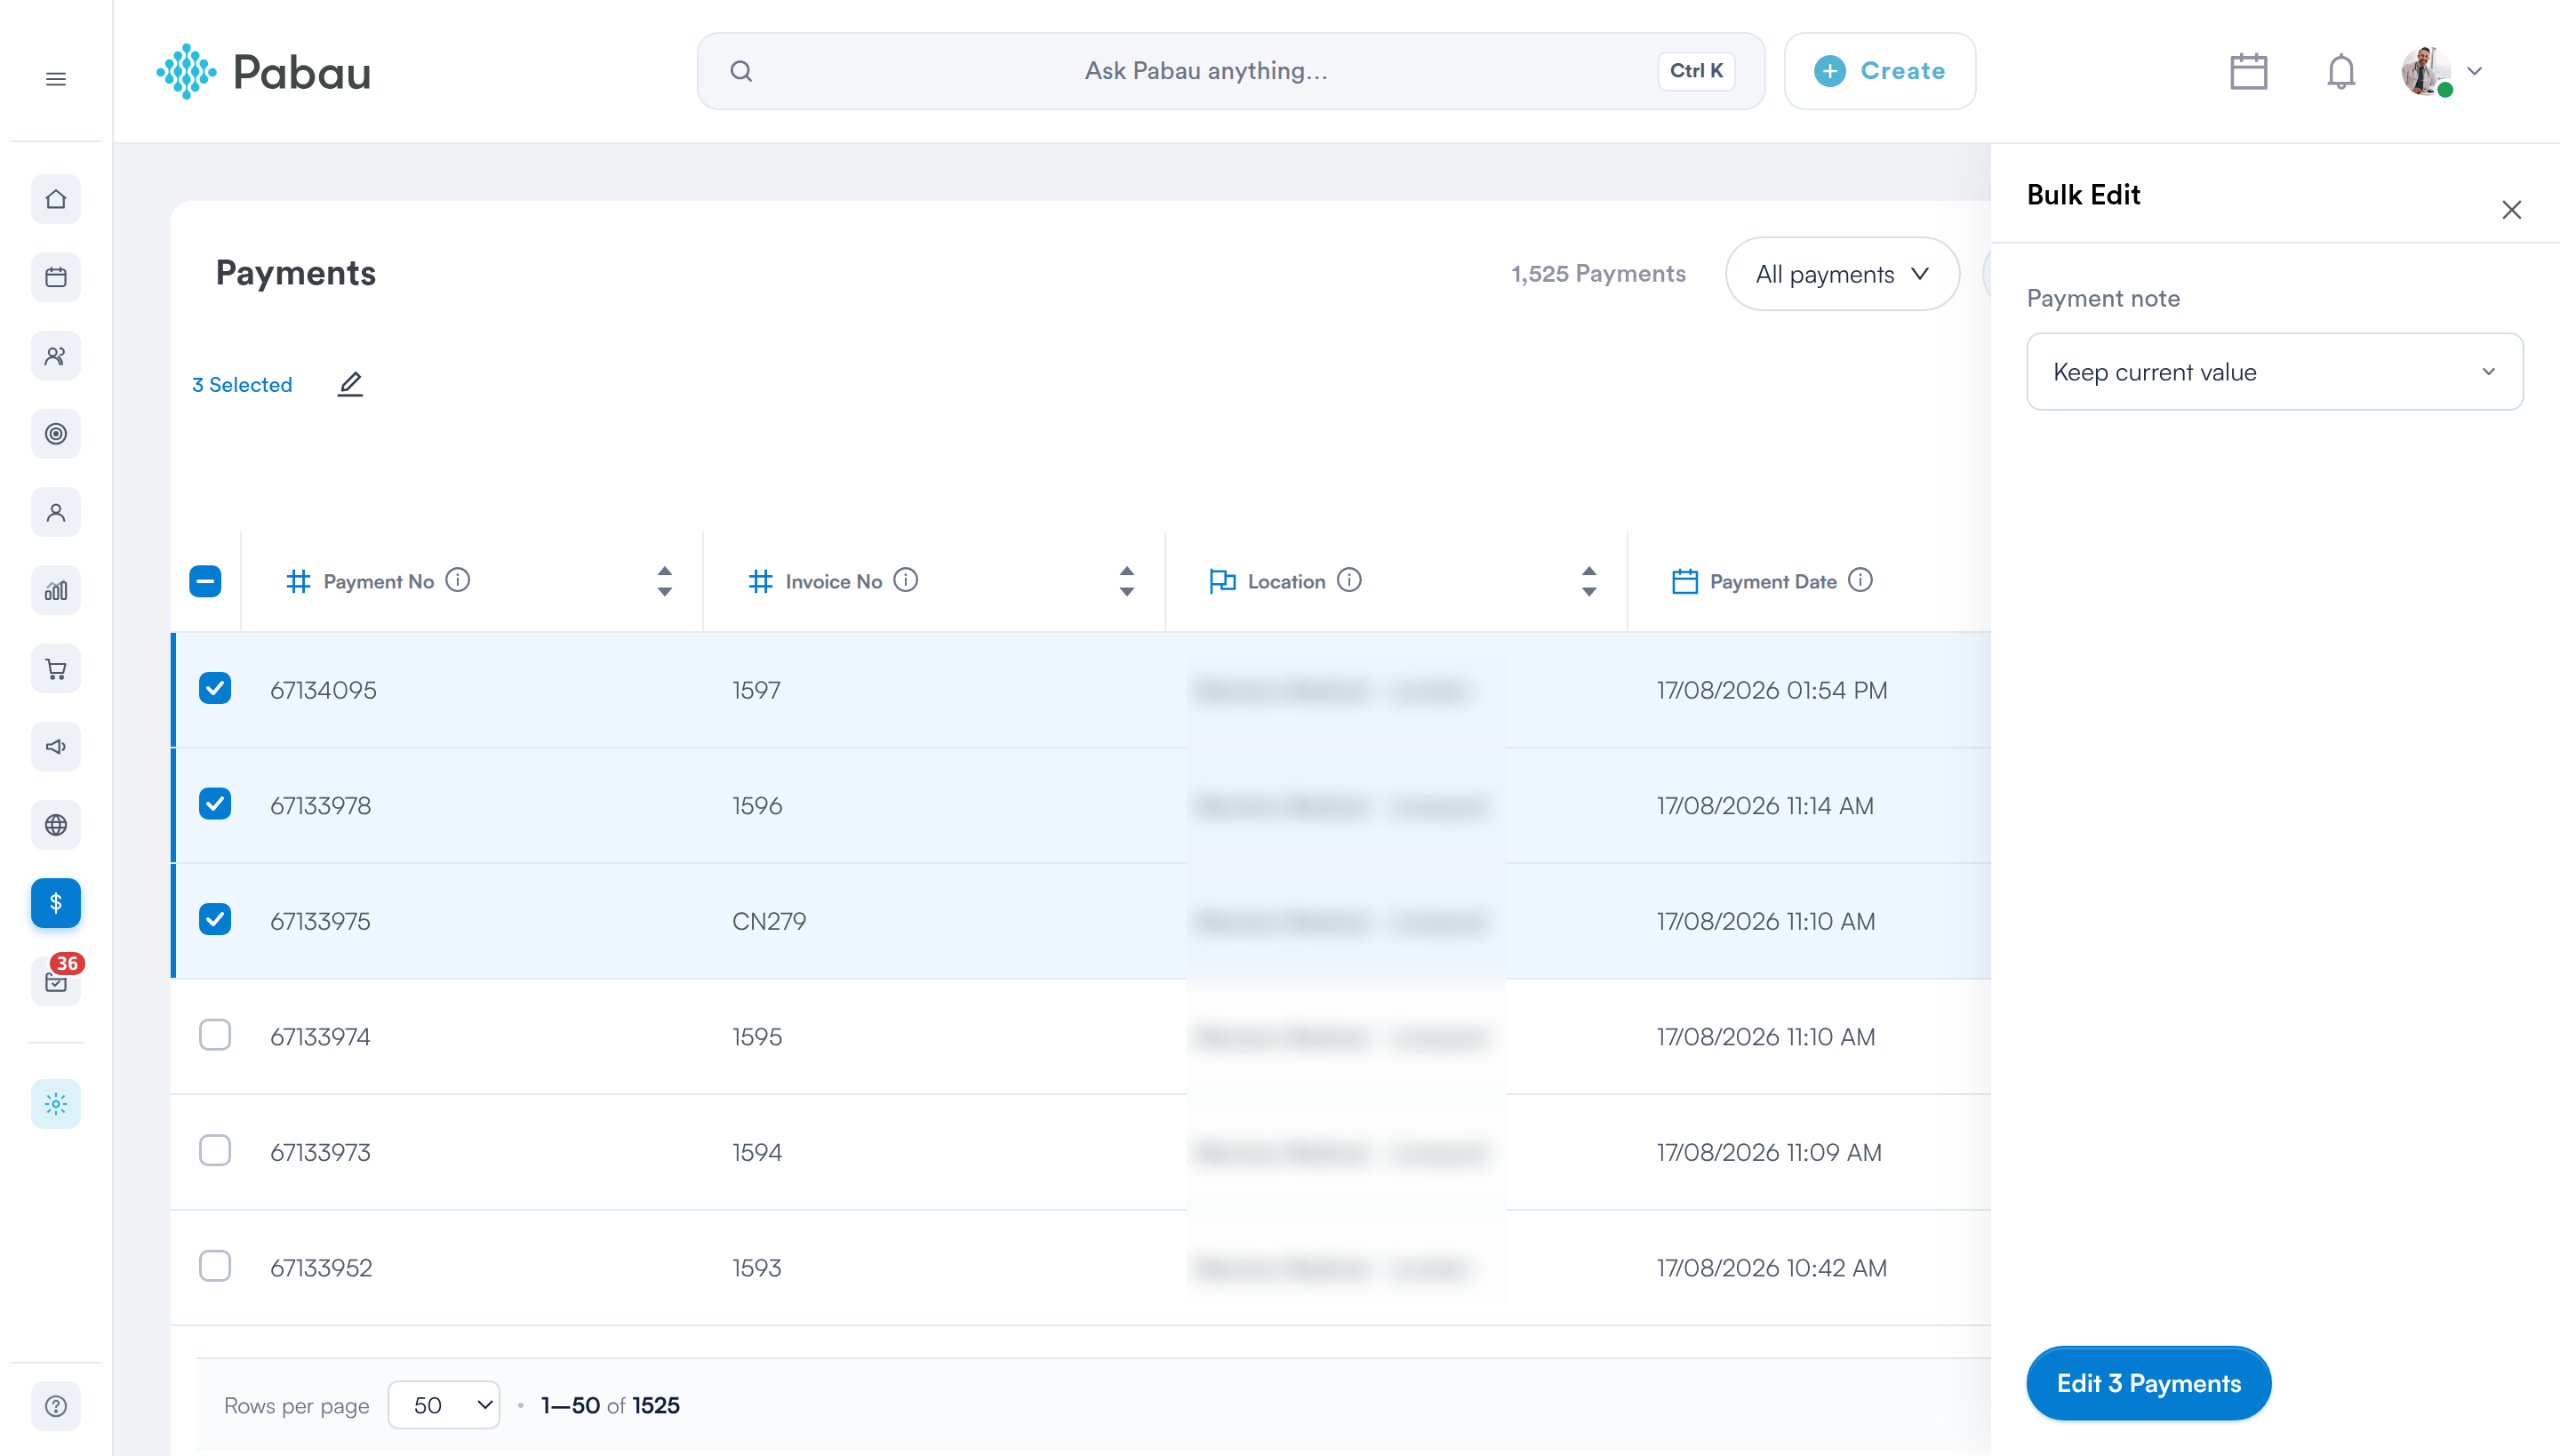
Every field starts on Keep current value, and the button names how many records will change
For payments, the panel offers Payment note: free text, written to every selected payment.
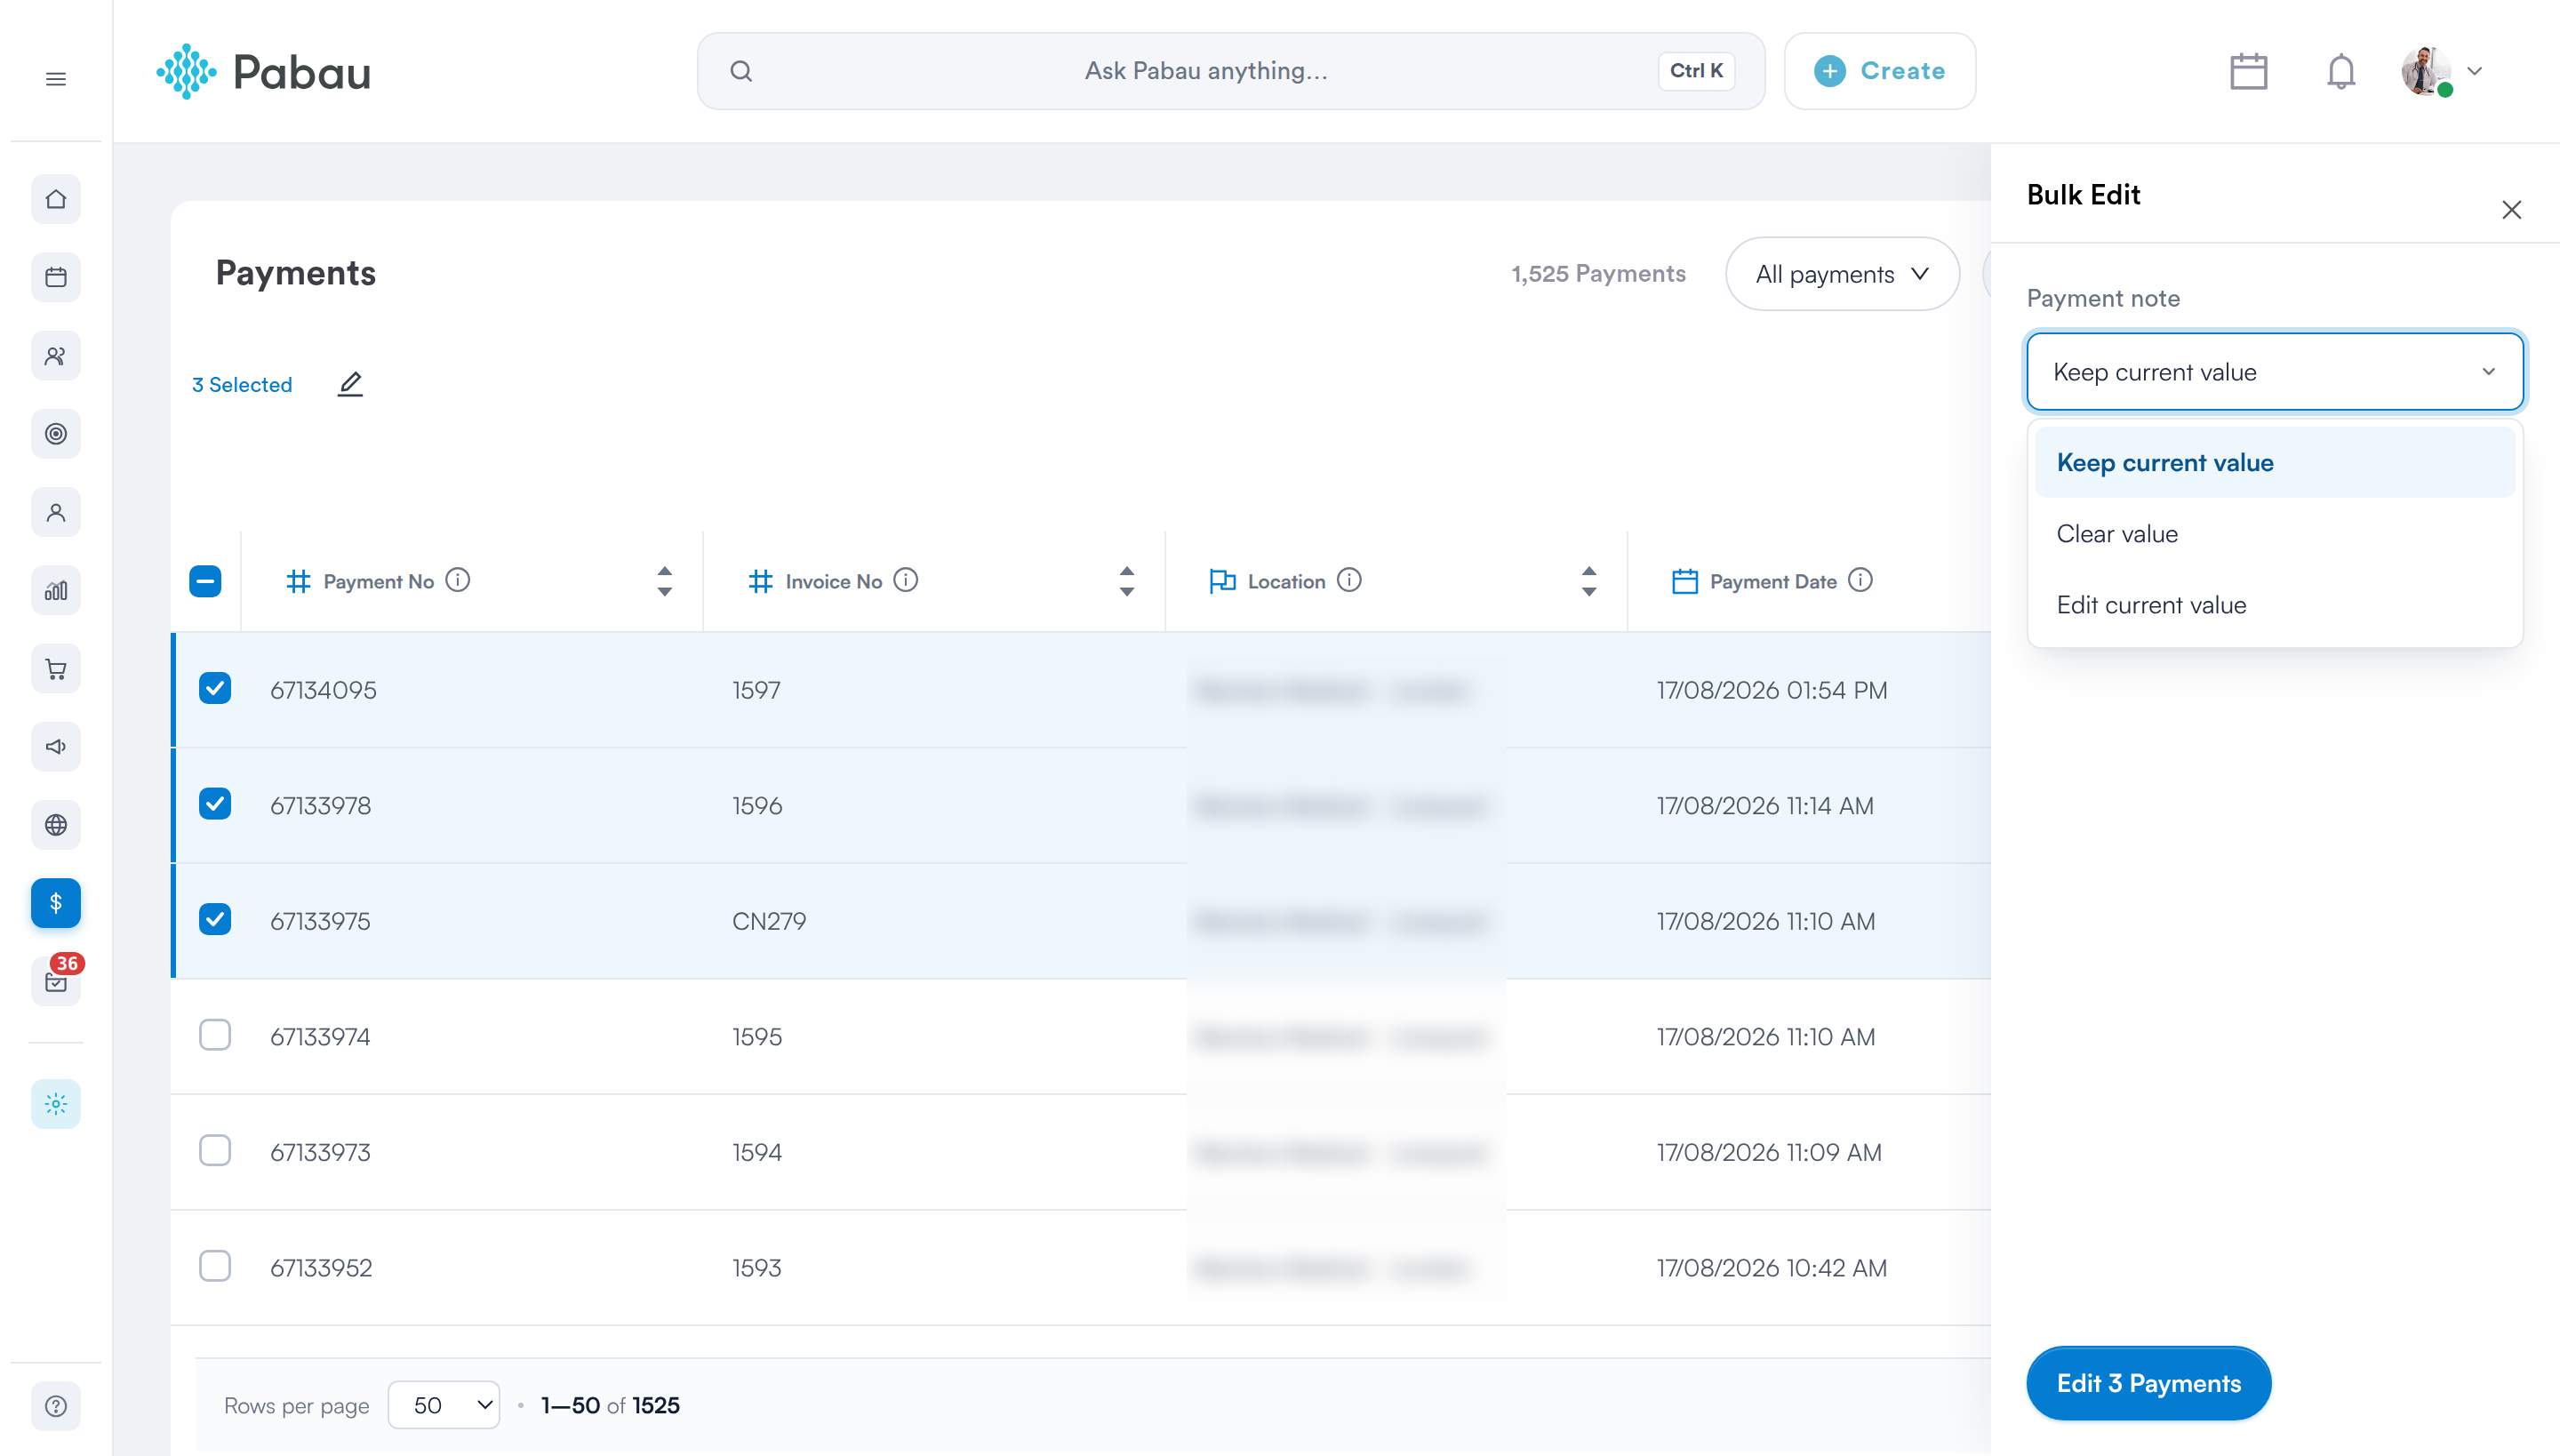
Each field offers Keep current value, Clear value and Edit current value
NOTE: Only the note can be bulk edited on this page. Amounts, payment methods and dates are deliberately not editable in bulk. Change those on the individual payment.
Step 7: Apply the Changes
- Click Edit 3 Payments at the foot of the panel. The button names the exact number of records it will change.
- The table refreshes and a confirmation message names how many records were updated.
IMPORTANT: You can change up to 100 payments in one go. Selecting more returns an error and nothing is changed, so work in batches of 100 or fewer.
WARNING: Bulk changes cannot be undone. Check the panel before you apply it. The values you set replace what is currently on every selected record.
The pencil only appears for staff members whose permissions include access to the Payments page. See How to Set Money Permission for a Staff Member.
What's next?
- Understanding the Invoices Page
- How to Create Custom Views in Invoices, Payments, Appointments, and Quotes Page
- How to Set Money Permission for a Staff Member
Was this guide helpful? Let us know by voting below - your feedback helps us write clearer articles.
For more guides, browse the related articles below or use the search bar at the top of the page. You can also watch our video learning series, the Pabau Academy, or visit the Support page for additional help.