Table of Contents:
Invoices
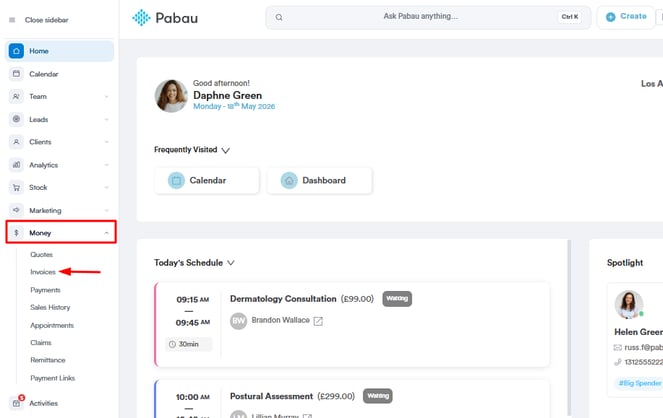
Step 1: Navigate to Invoices
Log in to your Pabau account, and from the left sidebar menu, click on ''Money'', then select ''Invoices'' to open the Invoices page.
Step 2: Access the ''Add New View'' Panel
Once you're on the Invoices page, click the “Filter by” button and select “Add New View” to create a custom view.

Step 3: Create a New View
Once the ''View panel'' opens, you can start defining the filters that will control what appears in your custom view. These conditions let you narrow down the invoice list to show only the records that match your criteria - helping you focus on the data that matters most to your clinic.
How the Conditions Work
The panel gives you two main filtering sections:
-
“Show invoices that match ALL of these conditions”
Use this section to apply strict filters. Invoices must meet every condition added here to appear in the view. -
“And match ANY of these conditions”
This section is for more flexible filters. Invoices only need to meet one or more of the conditions here to be included.
Each condition consists of a few parts:
-
First, select whether you want to filter by Invoice or Client data.
-
Next, choose the specific field you want to filter (e.g., invoice date, payment status, client source, location, etc.).
-
Depending on the field, you’ll then choose how to match it — for example, selecting a date range, entering a keyword, or picking from a dropdown list of values.

You can add multiple filters in either section and combine invoice and client conditions together for more advanced filtering.
Setup Options
At the bottom of the panel:
-
View Name - Give your view a clear, descriptive name so it's easy to recognize later.
-
Visibility - Choose if the view should be:
private - visible only to you
public - visible to your team
-
Preview - Click this to see how many invoices currently match your filters.
-
Save - Once you're happy with your setup, click ''Save'' to make your view available for reuse at any time.

Custom View Examples You Can Use
Here are some practical views you can create and save, along with the exact conditions to set in the ''Add View'' panel. These will help you quickly access key information without repeatedly applying filters.
1. Unpaid Invoices – Last 30 Days
Purpose: Monitor all invoices that remain unpaid within the last month.
Conditions:
-
Invoice → Payment Status → Unpaid
-
Invoice → Invoice Date → Last 30 days

2. Invoices by Location – This Month
Purpose: Track invoices for a specific branch or clinic location.
Conditions:
-
Invoice → Location → [Select location name]
-
Invoice → Invoice Date → This month

3. High-Value Clients – Last Quarter
Purpose: Identify clients who have spent above a certain amount in the last three months.
Conditions:
-
Client → Total Sales → is more than [amount]
-
Invoice → Invoice Date → Last quarter

4. Clients with Outstanding Balances
Purpose: See all clients who owe money, regardless of when the invoice was issued.
Conditions:
-
Client → Client Balance → Greater than 0

5. Membership Clients with Upcoming Renewals
Purpose: Keep track of clients whose memberships are about to expire.
Conditions:
-
Client → Membership Expiration Date → In 30 days

By following these steps, you can create and save custom invoice views that make it easier to track payments, monitor performance, and quickly access the information that matters most.
Payments
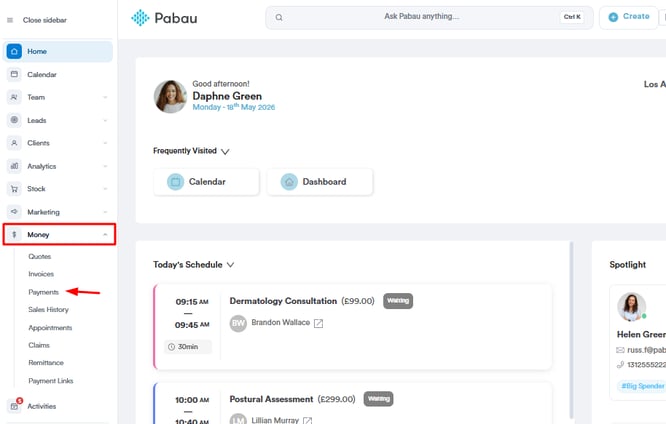
Step 1: Navigate to Payments
Log in to your Pabau account, and from the left sidebar menu, click on ''Money'', then select ''Payments'' to open the Payments page.
Step 2: Access the ''Add New View'' Panel
Once you're on the Payments page, click the “Filter by” button and select “Add New View” to create a custom view.

Step 3: Create a New View
When the ''View panel'' opens, you can start defining the filters that will control what appears in your custom view. These conditions let you narrow down the payment list to show only the records that match your criteria — helping you focus on the transactions that matter most to your clinic.
How the Conditions Work
The panel gives you two main filtering sections:
-
Show payments that match ALL of these conditions
Use this section to apply strict filters. Payments must meet every condition added here to appear in the view. -
And match ANY of these conditions
This section is for more flexible filters. Payments only need to meet one or more of the conditions here to be included.
Each condition consists of a few parts:
-
First, select whether you want to filter by Payment or Client data.
-
Next, choose the specific field you want to filter (e.g., payment date, amount, payment method, location, etc.).
-
Depending on the field, choose how to match it - for example, selecting a date range, entering a keyword, or picking from a dropdown list of values.

You can add multiple filters in either section and combine payment and client conditions together for more advanced filtering.
Setup Options
At the bottom of the panel:
-
View Name – Give your view a clear, descriptive name so it's easy to recognize later.
-
Visibility – Choose if the view should be:
private – visible only to you
public – visible to your team
-
Preview – Click this to see how many payments currently match your filters.
-
Save – Once you're happy with your setup, click ''Save'' to make your view available for reuse at any time.

Custom View Examples You Can Use
Here are some practical views you can create and save, along with the exact conditions to set in the ''Add View'' panel. These will help you quickly access key payment information without repeatedly applying filters.
1. Payments Received – This Month
Purpose: Monitor all payments processed within the current month.
Conditions:
-
Payment → Payment Date → This month

NOTE: You can make the conditions match your clinic’s specific needs - for example, adjusting the date range, payment method, or amount thresholds to suit your reporting preferences.
2. Payments by Method – Last 30 Days
Purpose: Track payments received via a specific method (e.g., Cash, Card, Bank Transfer) in the last month.
Conditions:
-
Payment → Payment Method → [Select method]
-
Payment → Payment Date → Last quarter

3. High-Value Payments – Last Quarter
Purpose: Identify large payments made in the last three months.
Conditions:
-
Payment → Amount → is more than [amount]
-
Payment → Payment Date → Last quarter

4. Overdue Account Payments
Purpose: Track payments made on overdue accounts to monitor collections.
Conditions:
-
Payment → Payment Method → Account
-
Payment → Payment Date → Last 60 days

By following these steps, you can create and save custom payment views that make it easier to monitor transactions, identify trends, and quickly access the information your clinic needs.
Appointments
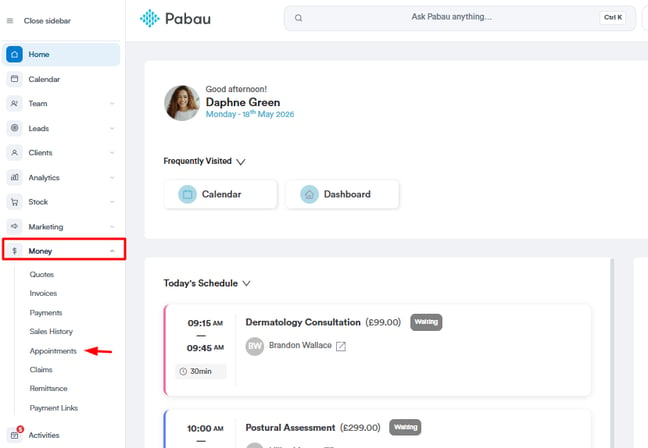
Step 1: Navigate to Appointments
Log in to your Pabau account, and from the left sidebar menu, click on ''Money'', then select ''Appointments'' to open the Payments page.
Step 2: Access the ''Add New View'' Panel
Once you're on the Appointments page, click the “Filter by” button and select “Add New View” to create a custom view.

Step 3: Create a New View
When the ''View panel'' opens, you can begin setting filters that will control which appointments appear in your custom view. These filters let you narrow down the list so you only see appointments that meet your criteria.
How the Conditions Work
The panel has two main sections for filters:
-
Show appointments that match ALL of these conditions
Use this for strict filters. Appointments must meet every condition listed here to appear in your view. -
And match ANY of these conditions
Use this for flexible filters. Appointments only need to meet one or more of the conditions here to be included.
Each condition has three parts:
-
First, select whether you want to filter by Appointment, Client, Invoice, or Service information.
-
Next, choose the specific field you want to filter (e.g., appointment date, service type, payment status, location, practitioner, etc.).
-
Finally, set how you want to match it — for example, choosing a date range, selecting from a dropdown, or entering a keyword.
You can add as many conditions as you need in either section, and you can combine Appointment, Client, Invoice, and Service filters for more advanced searches.

Setup Options
At the bottom of the panel, you’ll see:
-
View Name – Give your view a descriptive name so it’s easy to find later.
-
Visibility – Choose if the view should be:
private – only visible to you
public – visible to the whole team
-
Preview – See how many appointments currently match your filters before saving.
-
Save – Once you’re happy, click ''Save'' to keep this view for future use.

Custom View Examples You Can Use
Here are some examples you can create and save in the Appointments page, along with the exact conditions to set in the Add View panel:
1. Today’s Appointments
Purpose: Quickly see all appointments scheduled for the current day.
Conditions:
-
Appointment → Appointment Date → Today

2. Appointments by Practitioner – This Week
Purpose: View all upcoming appointments for a specific team member in the current week.
Conditions:
-
Appointment → App With → [Select name]
-
Appointment → Appointment Date → This week

3. No-Show Clients – Last Month
Purpose: Track clients who missed appointments in the last month.
Conditions:
-
Appointment → Status → No Show
-
Appointment → Appointment Date → Last month

4. Consultations – This Month
Purpose: List all consultation-type appointments in the current month.
Conditions:
-
Appointment → Service → Consultation
-
Appointment → Appointment Date → This month

By following these steps, you can create custom appointment views that make it easier to monitor schedules, manage resources, and identify trends all without repeatedly setting filters.
Quotes
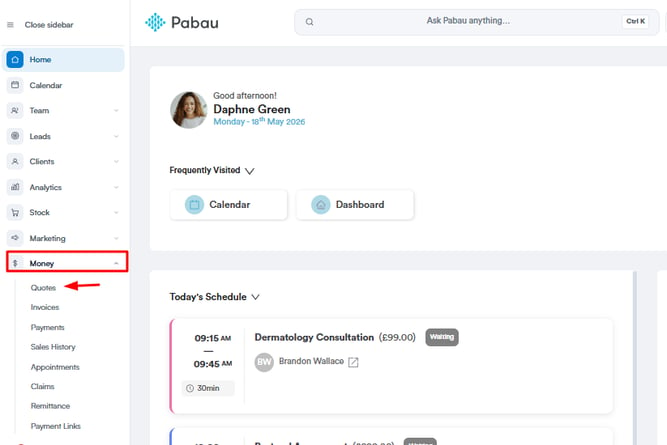
Step 1: Navigate to Quotes
Log in to your Pabau account, and from the left sidebar menu, click on ''Money'', then select ''Quotes'' to open the Quotes page.
Step 2: Access the ''Add New View'' Panel
Once you're on the Quotes page, click the “Filter by” button and select “Add New View” to create a custom view.

Step 3: Create a New View
When the View panel opens, you can start setting the filters that determine which quotes will appear in your custom view. These conditions help you narrow down the list to only the records that match your criteria — making it easier to focus on the most relevant quotes.
How the Conditions Work
The panel includes two main filtering sections:
“Show quotes that match ALL of these conditions”
Use this section to apply strict filters. A quote must meet every condition in this section to appear in your view.
“And match ANY of these conditions”
Use this section for more flexible filters. A quote only needs to meet one or more of the conditions here to be included.
Each condition has a few parts:
-
Select whether you want to filter by Quote, Invoice, Appointment or Client data.
-
Choose the specific field to filter (e.g., quote date, status, location, expiry date, client name, etc.).
-
Depending on the field, choose the matching method — such as selecting a date range, entering a keyword, or picking from a dropdown list.
You can add multiple filters in either section, and you can combine quote and other conditions for advanced filtering.

Setup Options
At the bottom of the panel, you’ll see:
-
View Name – Give your view a clear, descriptive name so you can identify it easily later.
-
Visibility – Choose whether the view is:
-
private – visible only to you
-
public – visible to your team
-
-
Preview – See how many quotes currently match your conditions.
-
Save – Once satisfied, click "Save" to make your view available anytime.

Custom View Examples You Can Use
Here are some useful examples of custom views you might create for the Quotes page, with the exact conditions to set:
1. Expiring Quotes – Next 7 Days
Purpose: Track quotes that will expire soon so you can follow up.
Conditions:
-
Quote → Expiry Date → In 7 days

2. Pending Signature Quotes
Purpose: Monitor all quotes that are awaiting client signature.
Conditions:
-
Quote → Status → Pending Signature

3. Quotes by Location – This Month
Purpose: Review all quotes issued from a specific location in the current month.
Conditions:
-
Quote → Location → [Select location name]
-
Quote → Issue Date → This month

4. High-Value Quotes – Last Quarter
Purpose: Identify large quotes sent out in the past three months.
Conditions:
-
Quote → Email Sent Date → Last Quarter
-
Quote → Quote Amount → Is more than [amount]

5. Unconverted Quotes – Last 30 Days
Purpose: See quotes issued in the last month that have not been converted to invoices.
Conditions:
-
Quote → Status → Draft, Published, Pending Signature
-
Quote → Issue Date → Last 30 Days

By following these steps, you can create and save custom quote views that make it easier to track proposals, monitor performance, and quickly access the most relevant data for your business.
For more guides, refer to related articles below, select additional guides, or use the search bar at the top of the page. These guides will help you get the most out of your Pabau account.
Additionally, to help you fully utilize and understand your Pabau account, we recommend exploring additional guides and resources offered at the Pabau Academy. It offers in-depth video tutorials and lessons, offering a holistic learning experience that can equip you with the essential skills for achieving success with Pabau.