
The Prescriptions page lists every prescription written in your clinic, one row per prescription. Use it to check that prescriptions are complete, approve them, send them to a pharmacy and follow each one until it is dispensed.
NOTE: The page is available when Prescriptions is turned on for your clinic and your role has the Can access the Prescriptions page permission. Anyone who can open the page can view and export prescriptions, but only prescribers can approve them and send them to a pharmacy.
Step 1: Open the Prescriptions Page
- In the left sidebar, click More.
- Click Prescriptions. If you have pinned Prescriptions to your sidebar, you can click it there instead.
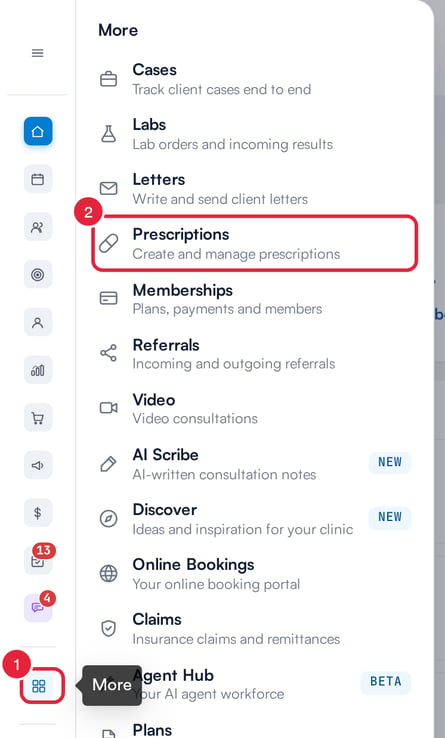
Prescriptions sits in the More menu
Step 2: Filter by Status
The tiles at the top count the prescriptions in the date range you are looking at, and the line under the title shows the total and how many are approved.
- Click a tile to show only those prescriptions: All prescriptions, Approved (approved and ready to send), Sent or Dispensed. Click All prescriptions to see everything again.
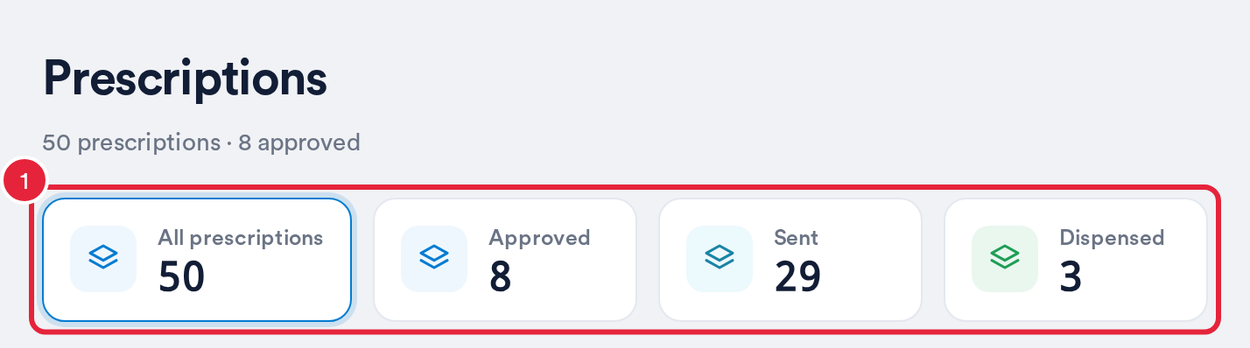
Click a tile to filter the list
Step 3: Read a Prescription's Status
Each row shows the date, client, Rx number, prescriber, the first medication (with +1 more when there are several), its dosage and frequency, and two labels:
- Valid or Invalid: whether the prescription passes the checks a pharmacy needs. Hover over Invalid to see exactly what is missing, such as the patient's date of birth or address.
- The status:
- Draft: created and waiting for a prescriber to approve it.
- Needs action: not approved yet, and something is missing. Fix what the Invalid label lists.
- Approved: approved by a prescriber and ready to send.
- Sent: sent to a pharmacy.
- Dispensed: the pharmacy has confirmed it was dispensed.
- Once a prescription has been sent, the pharmacy it went to shows under the status, for example via Parchment.
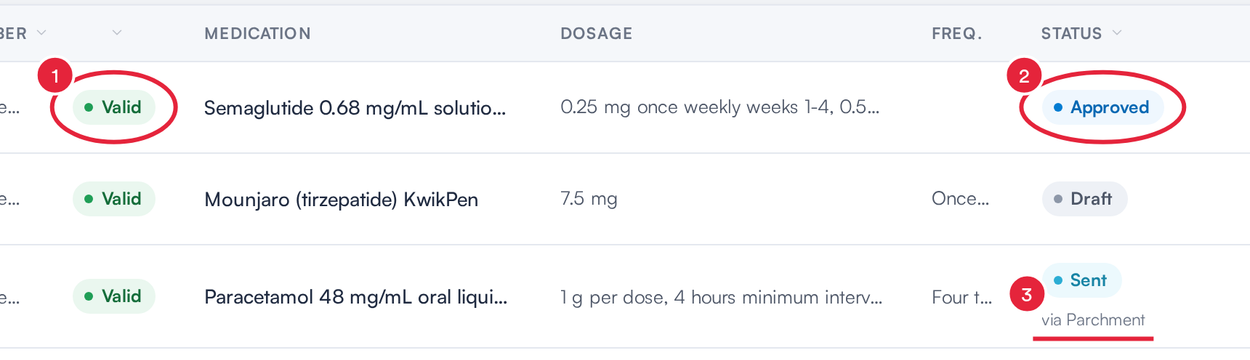
Validity, status and the pharmacy a prescription went to
Step 4: Find Prescriptions and Export Them
- Click the date range to change it. Two date fields appear for the start and end dates. The page opens on the last 30 days.
- Turn on My prescriptions to see only the prescriptions where you are the prescriber. Turning it on also clears any other prescribers' rows you had ticked.
- Type in the search box to find a prescription by client name, Rx number or medication.
- Click Export to download a CSV file with one line per prescription: date, client, Rx number, prescriber, medications, dosage, frequency and status. The file covers the whole date range you have chosen, whichever tile or search you are using.

Narrow the list, then export it
TIP: Click the Date, Client, Prescriber or Status column heading to sort by it. Click a client's name to open their record in a side panel without leaving the page.
Step 5: Approve, Send or Review a Prescription
The buttons at the end of each row depend on its status:
- The clock icon opens the prescription's history (see below).
- The eye icon opens the printable prescription in a new tab.
- Approve appears on prescriptions that are still in Draft or Needs action. Approving is a prescriber's sign-off: the status changes to Approved and the prescription can now be sent.
- Send appears once a prescription is approved. It opens the Send prescription window, where you pick the pharmacy and then confirm and send. After it has been sent, the button reads Sent and can't be clicked again.
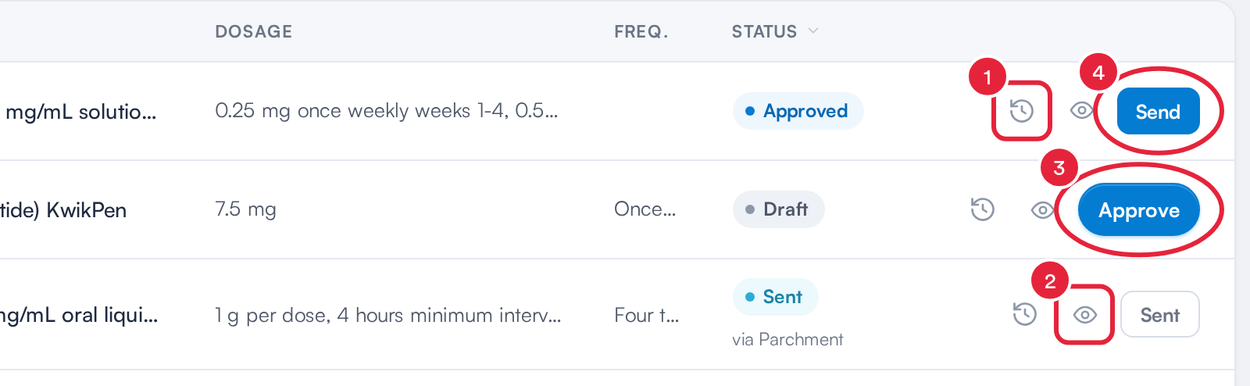
Row buttons change as the prescription moves along
The Prescription history panel lists each event with its date, time and who did it: Prescription created, Approved and Sent to pharmacy, including which pharmacy it went to.
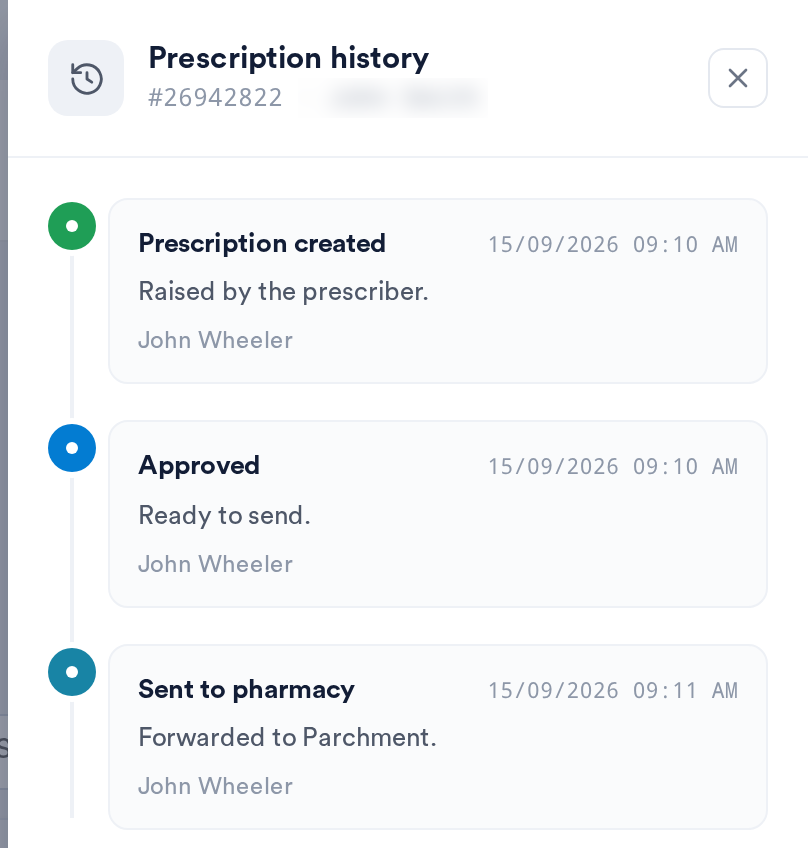
Every step of a prescription, with who did it
NOTE: If you are not a prescriber, Approve, Send and Bulk send are greyed out. Hover over them to see why. For the full sending steps, see How to Submit a Prescription to a Pharmacy.
Step 6: Send Several Prescriptions at Once
- Tick the prescriptions you want to send. The checkbox in the column heading ticks every prescription on the current page.
- A bar shows how many you have selected. Click Bulk send.
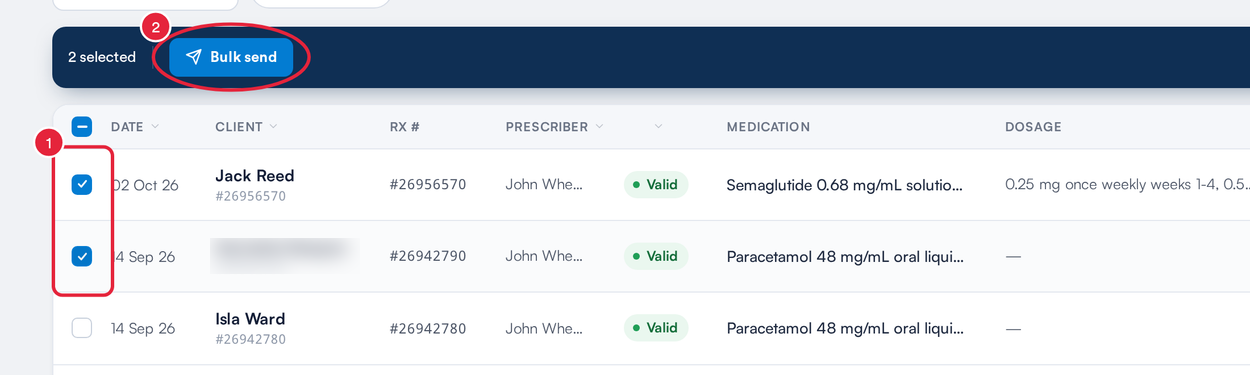
Send a batch of approved prescriptions
Pabau opens the Send prescription window for the first prescription. Review it and send it, and the next one opens straight away, with a message such as Sending 2 of 3 so you know where you are. When the batch is finished, Pabau tells you how many were sent and lists any that need attention.
IMPORTANT: Bulk send only includes prescriptions that are approved, valid and have a prescriber. Prescriptions that are only missing patient details are left out, and Pabau tells you how many. Send those one at a time so you can fill the details in. If none of your selection is ready, you'll see Nothing to send: approve the prescriptions first.
Step 7: Use the Other Tools on the Page
- CS Report opens the Controlled Substance Dispensing (ASAP) report, which US clinics use to report controlled-substance prescriptions to their state Prescription Monitoring Program.
- Configure has two options:
- E-prescribing setup opens Setup → ePrescriptions in a new tab, where you connect a pharmacy and manage your prescribers.
- Orders form lets you choose the form your clients use to request prescriptions, such as repeat requests. Once a form is chosen, an Order requests button appears on the page and opens that form's submissions in a new tab.
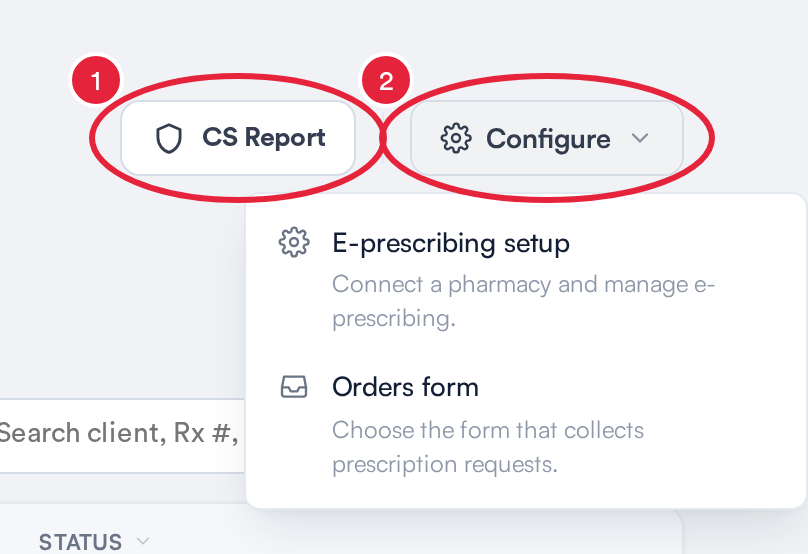
Reports and setup shortcuts
NOTE: Configure only appears for team members who can access Setup.
DoseSpot Notifications (US Clinics)
In US clinics with the DoseSpot integration connected, team members who are approved DoseSpot prescribers also see a DoseSpot button at the top of the page. The number on it is the total of DoseSpot items waiting for your clinic, added up across all of your DoseSpot prescribers. It turns red when at least one prescription has a transmission error, and shows no number when nothing is waiting.
- Click DoseSpot to see how many of each item are waiting: Pending Prescriptions, Refill Requests, Transaction Errors and Rx Change Requests.
- Click View to open DoseSpot's own notifications screen in a new tab, already signed in, and deal with each item there. View stays greyed out for a moment while Pabau prepares your DoseSpot sign-in.
DoseSpot clinics send prescriptions from DoseSpot itself, so the Send and Bulk send buttons don't appear on their Prescriptions page.
What's next?
- How to Create a Prescription (New Client Card)
- How to Submit a Prescription to a Pharmacy
- How to Set Up a Prescriber
- How to Set Up the DoseSpot Integration
- How to Set Up the Parchment Integration
Was this guide helpful? Let us know by voting below - your feedback helps us write clearer articles.
For more guides, browse the related articles below or use the search bar at the top of the page. You can also watch our video learning series, the Pabau Academy, or visit the Support page for additional help.