
Snapshots are AI-written tiles on the client card’s Summary tab. Each tile answers one question your clinic has chosen, such as Clinical overview, Safety & allergies or Recent treatments, using the client’s records. They help you get up to speed with a client in seconds before a consultation.
IMPORTANT: Snapshots use credits: 0.5 credits for each tile the AI writes. Tiles that have no records to read cost nothing. Snapshots use credits even if your clinic has Care Plus.
NOTE: Snapshots are written by AI from the records on file. Always check them against the client’s records before making a clinical decision.
Step 1: Open Snapshots
Open the client’s card. It opens on the Summary tab.
- Click Snapshots next to Fact Sheet and Timeline.
Each tile shows its question, the types of record it reads (along the bottom) and Not generated yet until you generate it for this client.
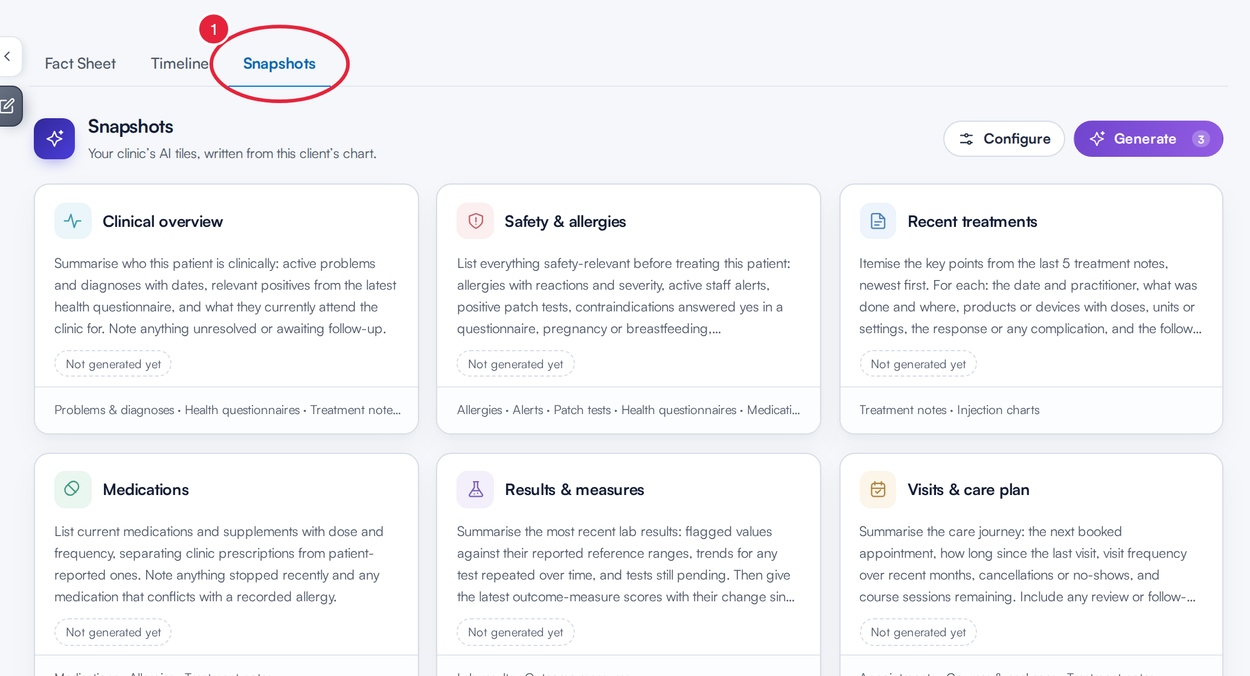
Snapshots sits next to Fact Sheet and Timeline
Step 2: Generate the Tiles
- Hover over Generate to see the cost, for example Up to 3 credits (0.5 per tile), and how many credits your clinic has left.
- Click Generate. You see Reading the chart and writing and the number of tiles while the AI works.
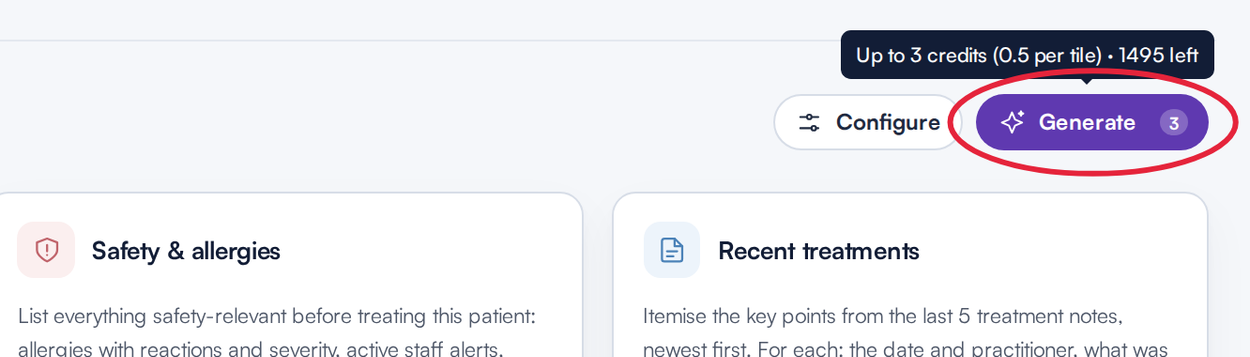
Hover over Generate to see what it will cost
- If some tiles have nothing to read for this client, a window titled Some tiles have nothing to read lists them. Those tiles will say Nothing recorded at no cost. Click Generate and the number of tiles (for example Generate 4 tiles) to write the others, or Close to stop. If none of the tiles have records to read, you see Nothing to summarise yet and no credit is used.
- If your clinic has run out of credits, Generate is greyed out: You have no credits. Top up to generate snapshots.
- If you generate several times in quick succession you may see Snapshots were generated a moment ago. Please wait a minute and try again.
Step 3: Read, Correct and Refresh the Tiles
- Each tile shows the AI’s answer. Long answers have Show more and Show less. The bottom of the tile shows the records it read and when it was written.
- To correct a tile, click Edit at the bottom of it, change the text (start a line with a dash and a space for a bullet point) and click Save. The tile is marked Edited, with who changed it and when.
- Click Regenerate at the top of Snapshots to write the tiles again with the latest records. This uses credits again. Your edits are kept and anything new is added; the tile is then marked Your edits kept.
- To drop your changes, click Edit and then Use the AI version (or Stop keeping my edits after a regenerate).
- A tile marked Prompt changed was written before an admin changed its question. Click Regenerate to apply the new question.
Step 4: Choose Your Clinic’s Tiles (Admins and Owners)
The tiles are a clinic-wide setting: every client card shows the same ones. Only admins and owners see Configure. Click Configure at the top of Snapshots to open Configure snapshots. Until you save your own, it shows Pabau’s starter tiles.
- Click a tile in the list to change it: its Tile name, Icon and Colour, the question in What should this tile tell you? and the Records it can read. Write the question as you would ask a colleague; buttons such as Include dates or Newest first add common instructions to it. Use the arrows to reorder tiles and the bin to remove one.
- Click Add tile to add a new one (up to 16 tiles).
- Click Suggest for me to let Pabau draft tiles for your clinic from your services, form names and website. Review each suggestion before you save. Restore defaults brings back Pabau’s starter tiles.
- Click Save tiles.
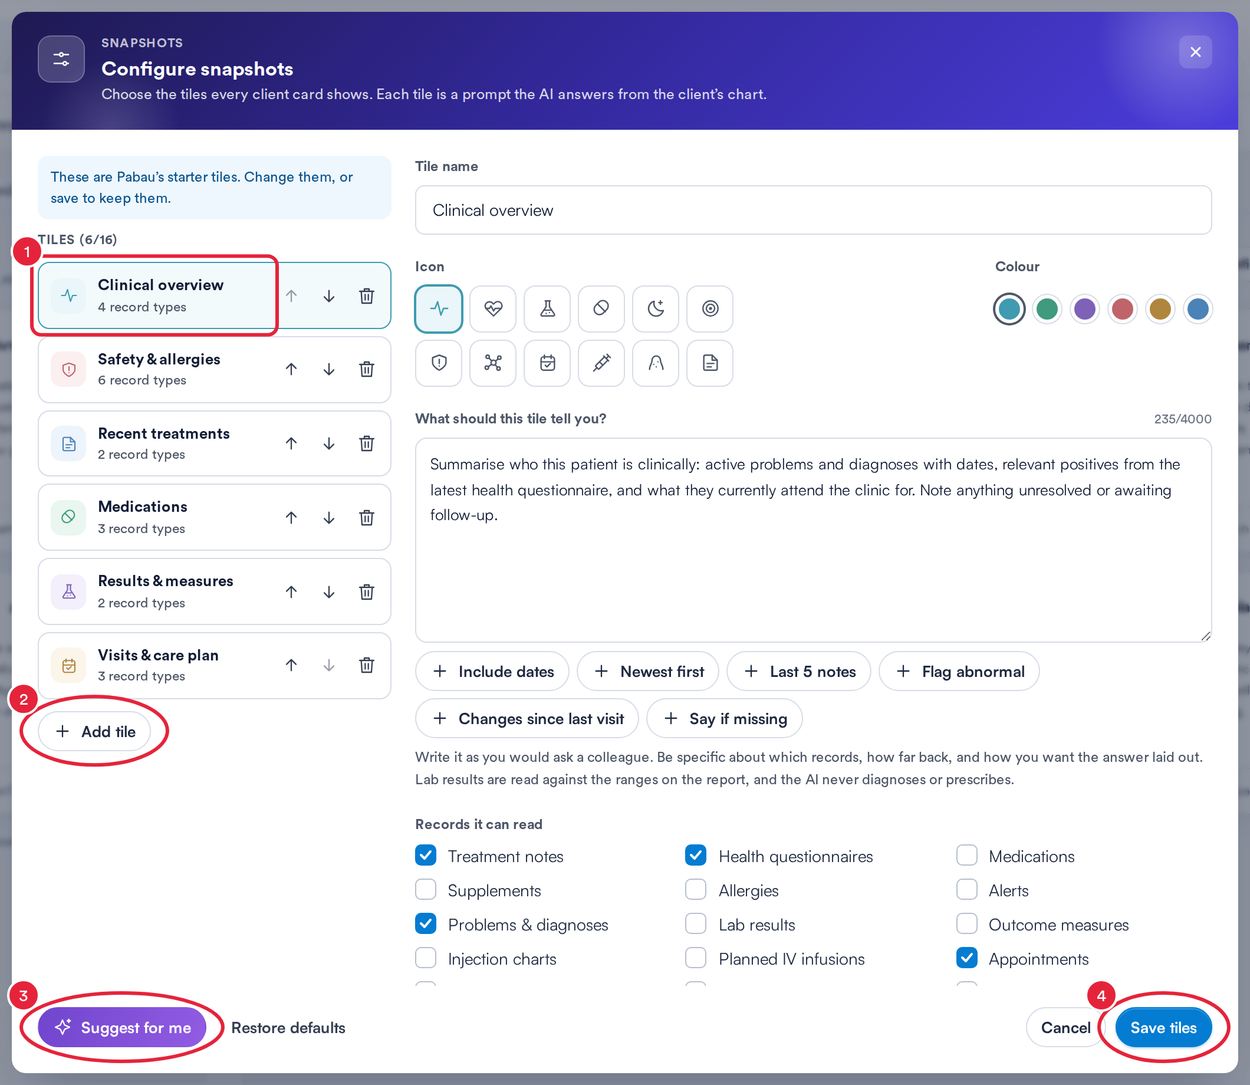
Admins and owners choose the tiles every client card shows
TIP: More tiles means a higher cost each time someone clicks Generate, so keep to the questions your team really needs.
What's next?
- How to Use the AI Patient Summary (New Client Card)
- Care Plus (New Client Card)
- Clients (New Client Card)
Was this guide helpful? Let us know by voting below - your feedback helps us write clearer articles.
For more guides, browse the related articles below or use the search bar at the top of the page. You can also watch our video learning series, the Pabau Academy, or visit the Support page for additional help.