
NOTE: This guide covers e-prescribing for UK clinics using a connected pharmacy such as SignatureRx or CloudRx. If you are a US clinic, please see how to send a prescription to a pharmacy (US clinics).
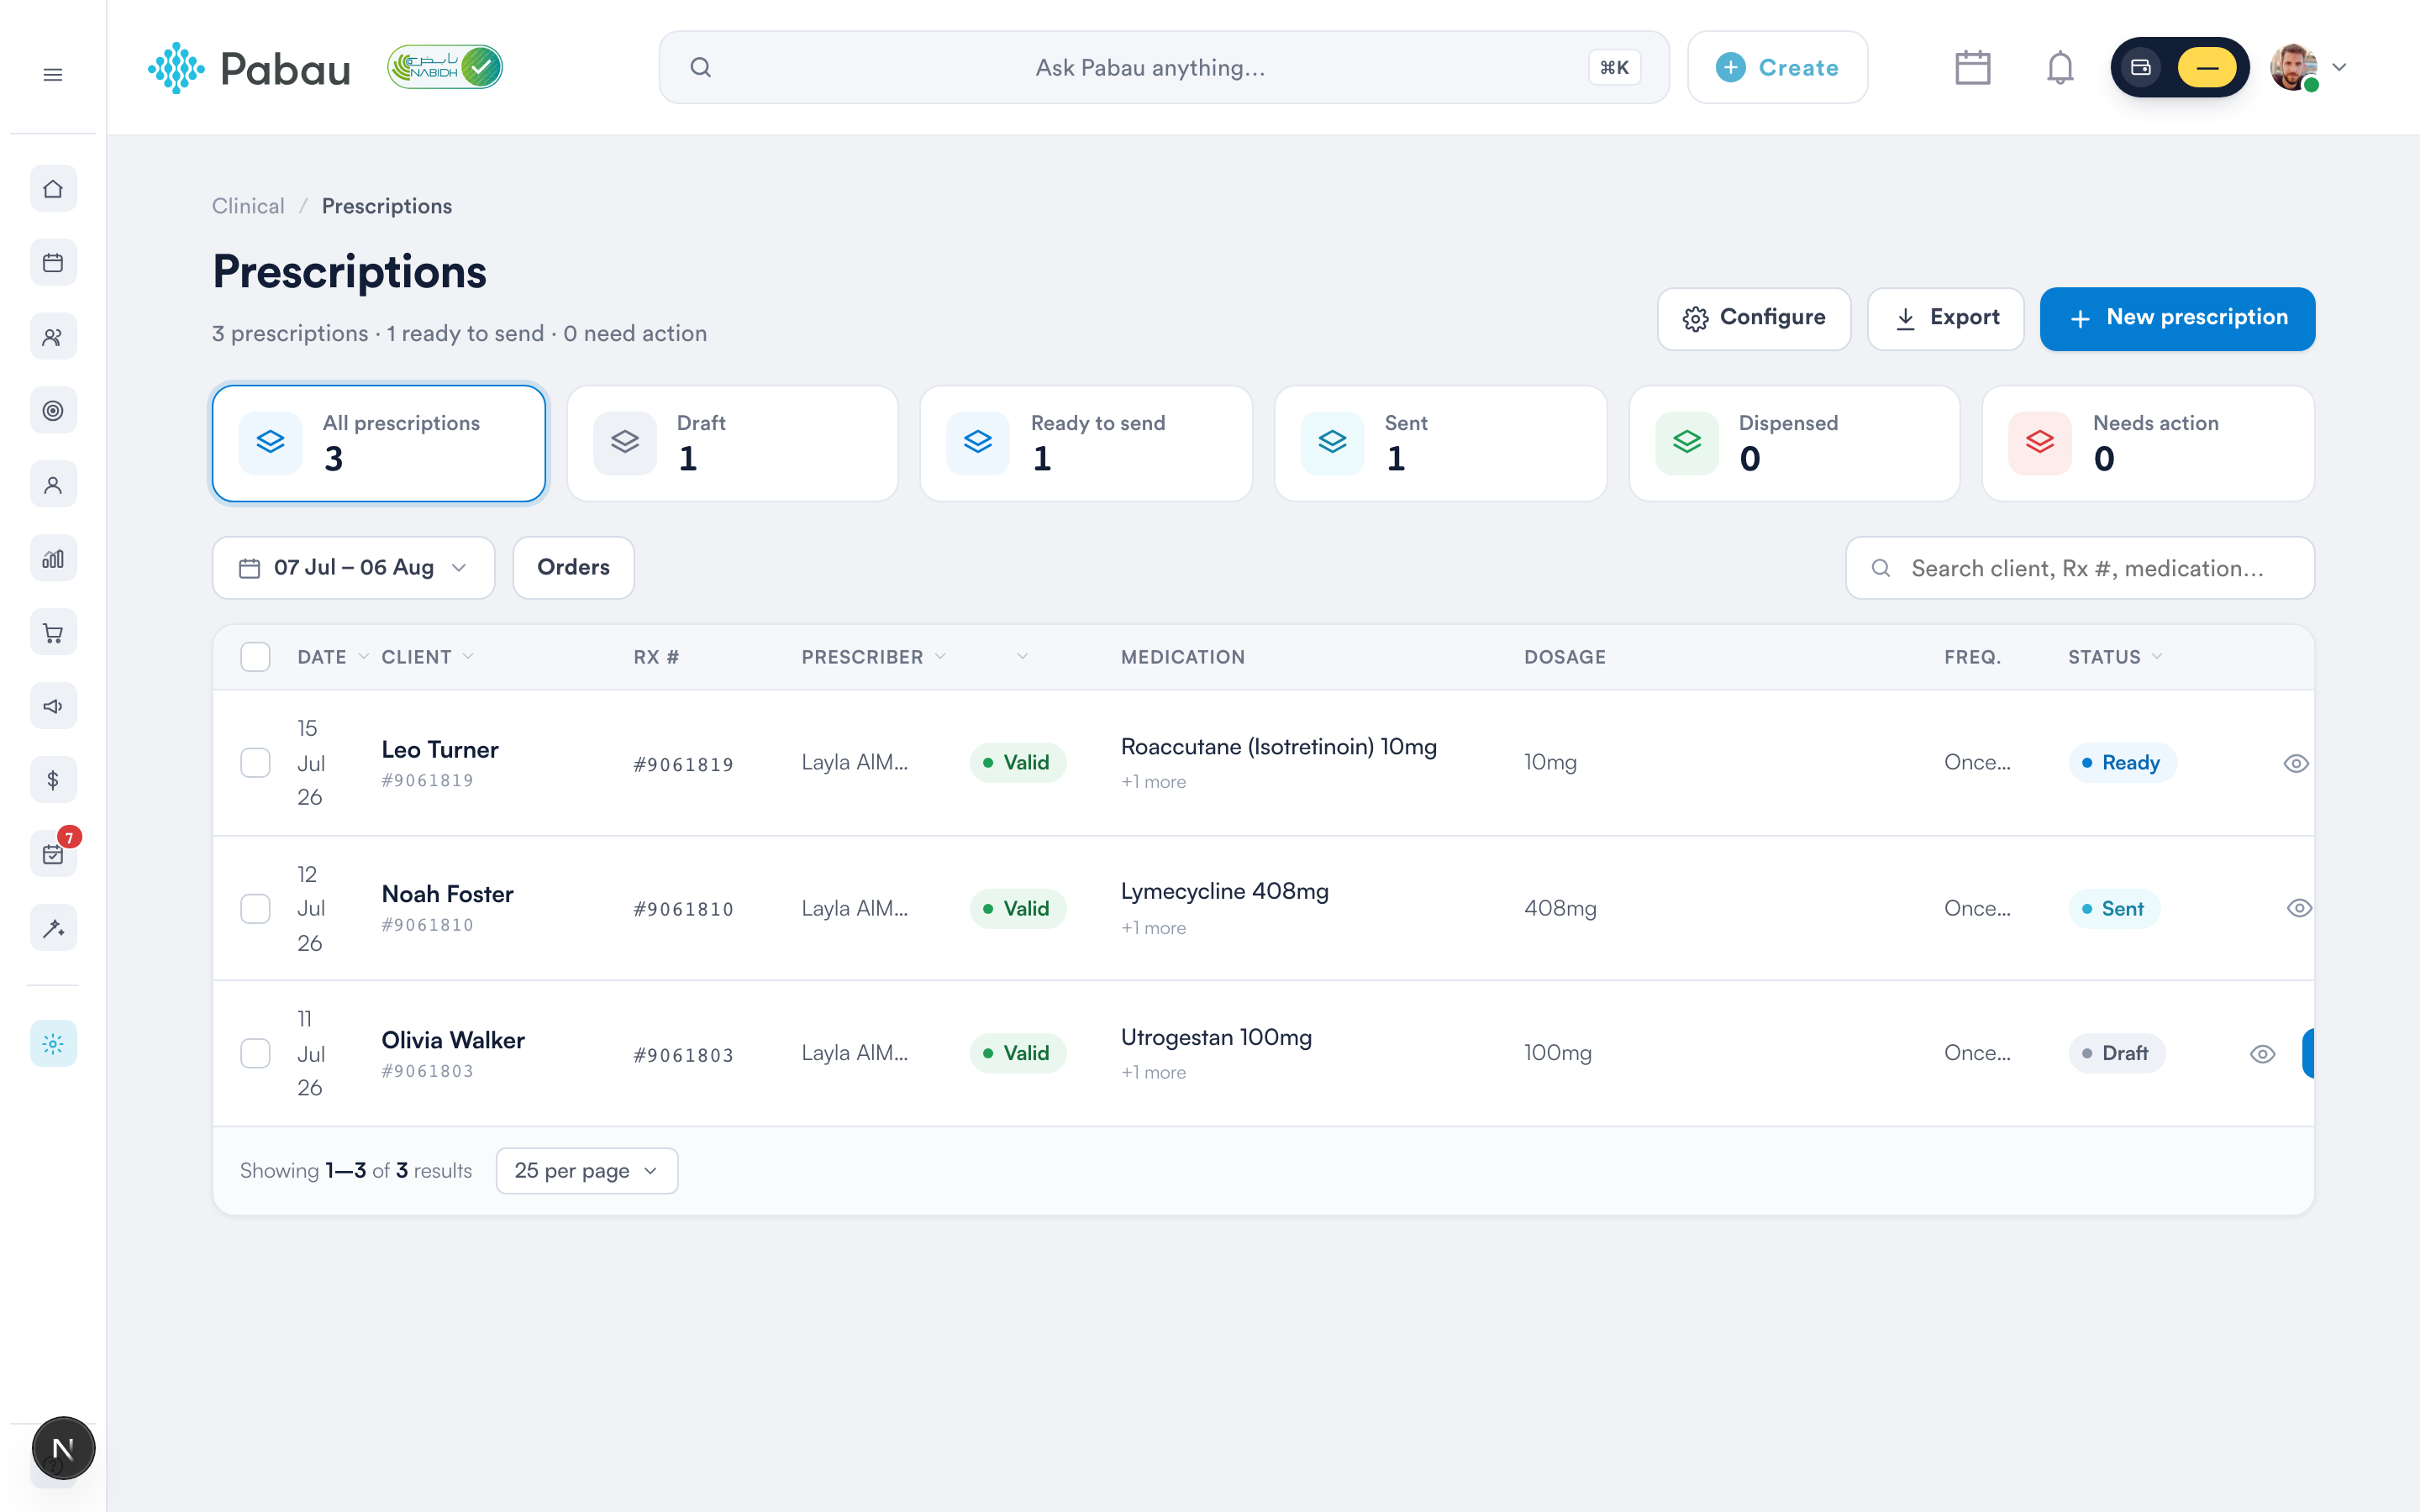
The Prescriptions page is Pabau's prescription workspace. It lists every prescription in your clinic and tracks each one through a clear status flow, so you always know what still needs attention:
- Draft — created and awaiting prescriber approval.
- Needs action — something required is missing (for example, no prescriber assigned or incomplete patient details).
- Ready to send — approved by a prescriber and ready to submit to a pharmacy.
- Sent — transmitted to the pharmacy.
- Dispensed — the pharmacy has confirmed the dispense.
Step 1: Create and Sign the Prescription
Open the client's card, click the Create (+) button, and select "Prescription". Add the medications, complete the prescription form, and sign to issue it. For the full prescribing flow, see How to Create a Prescription.
Step 2: Open the Prescriptions Page
Navigate to the Prescriptions page to see all of your clinic's prescriptions. The tiles at the top let you filter by status, and you can search by client, Rx number, or medication. You can also jump straight to a single prescription's send screen using the "Send as eRx" action on the client card.
Step 3: Approve the Prescription
A prescription must be approved by a prescriber before it can be sent. Prescriptions awaiting approval show an "Approve" button directly on their row — click it to approve, and the status changes to "Ready". If a prescription shows "Needs action", open it to review what's missing before it can be approved.
Step 4: Open the Send Screen and Choose the Pharmacy
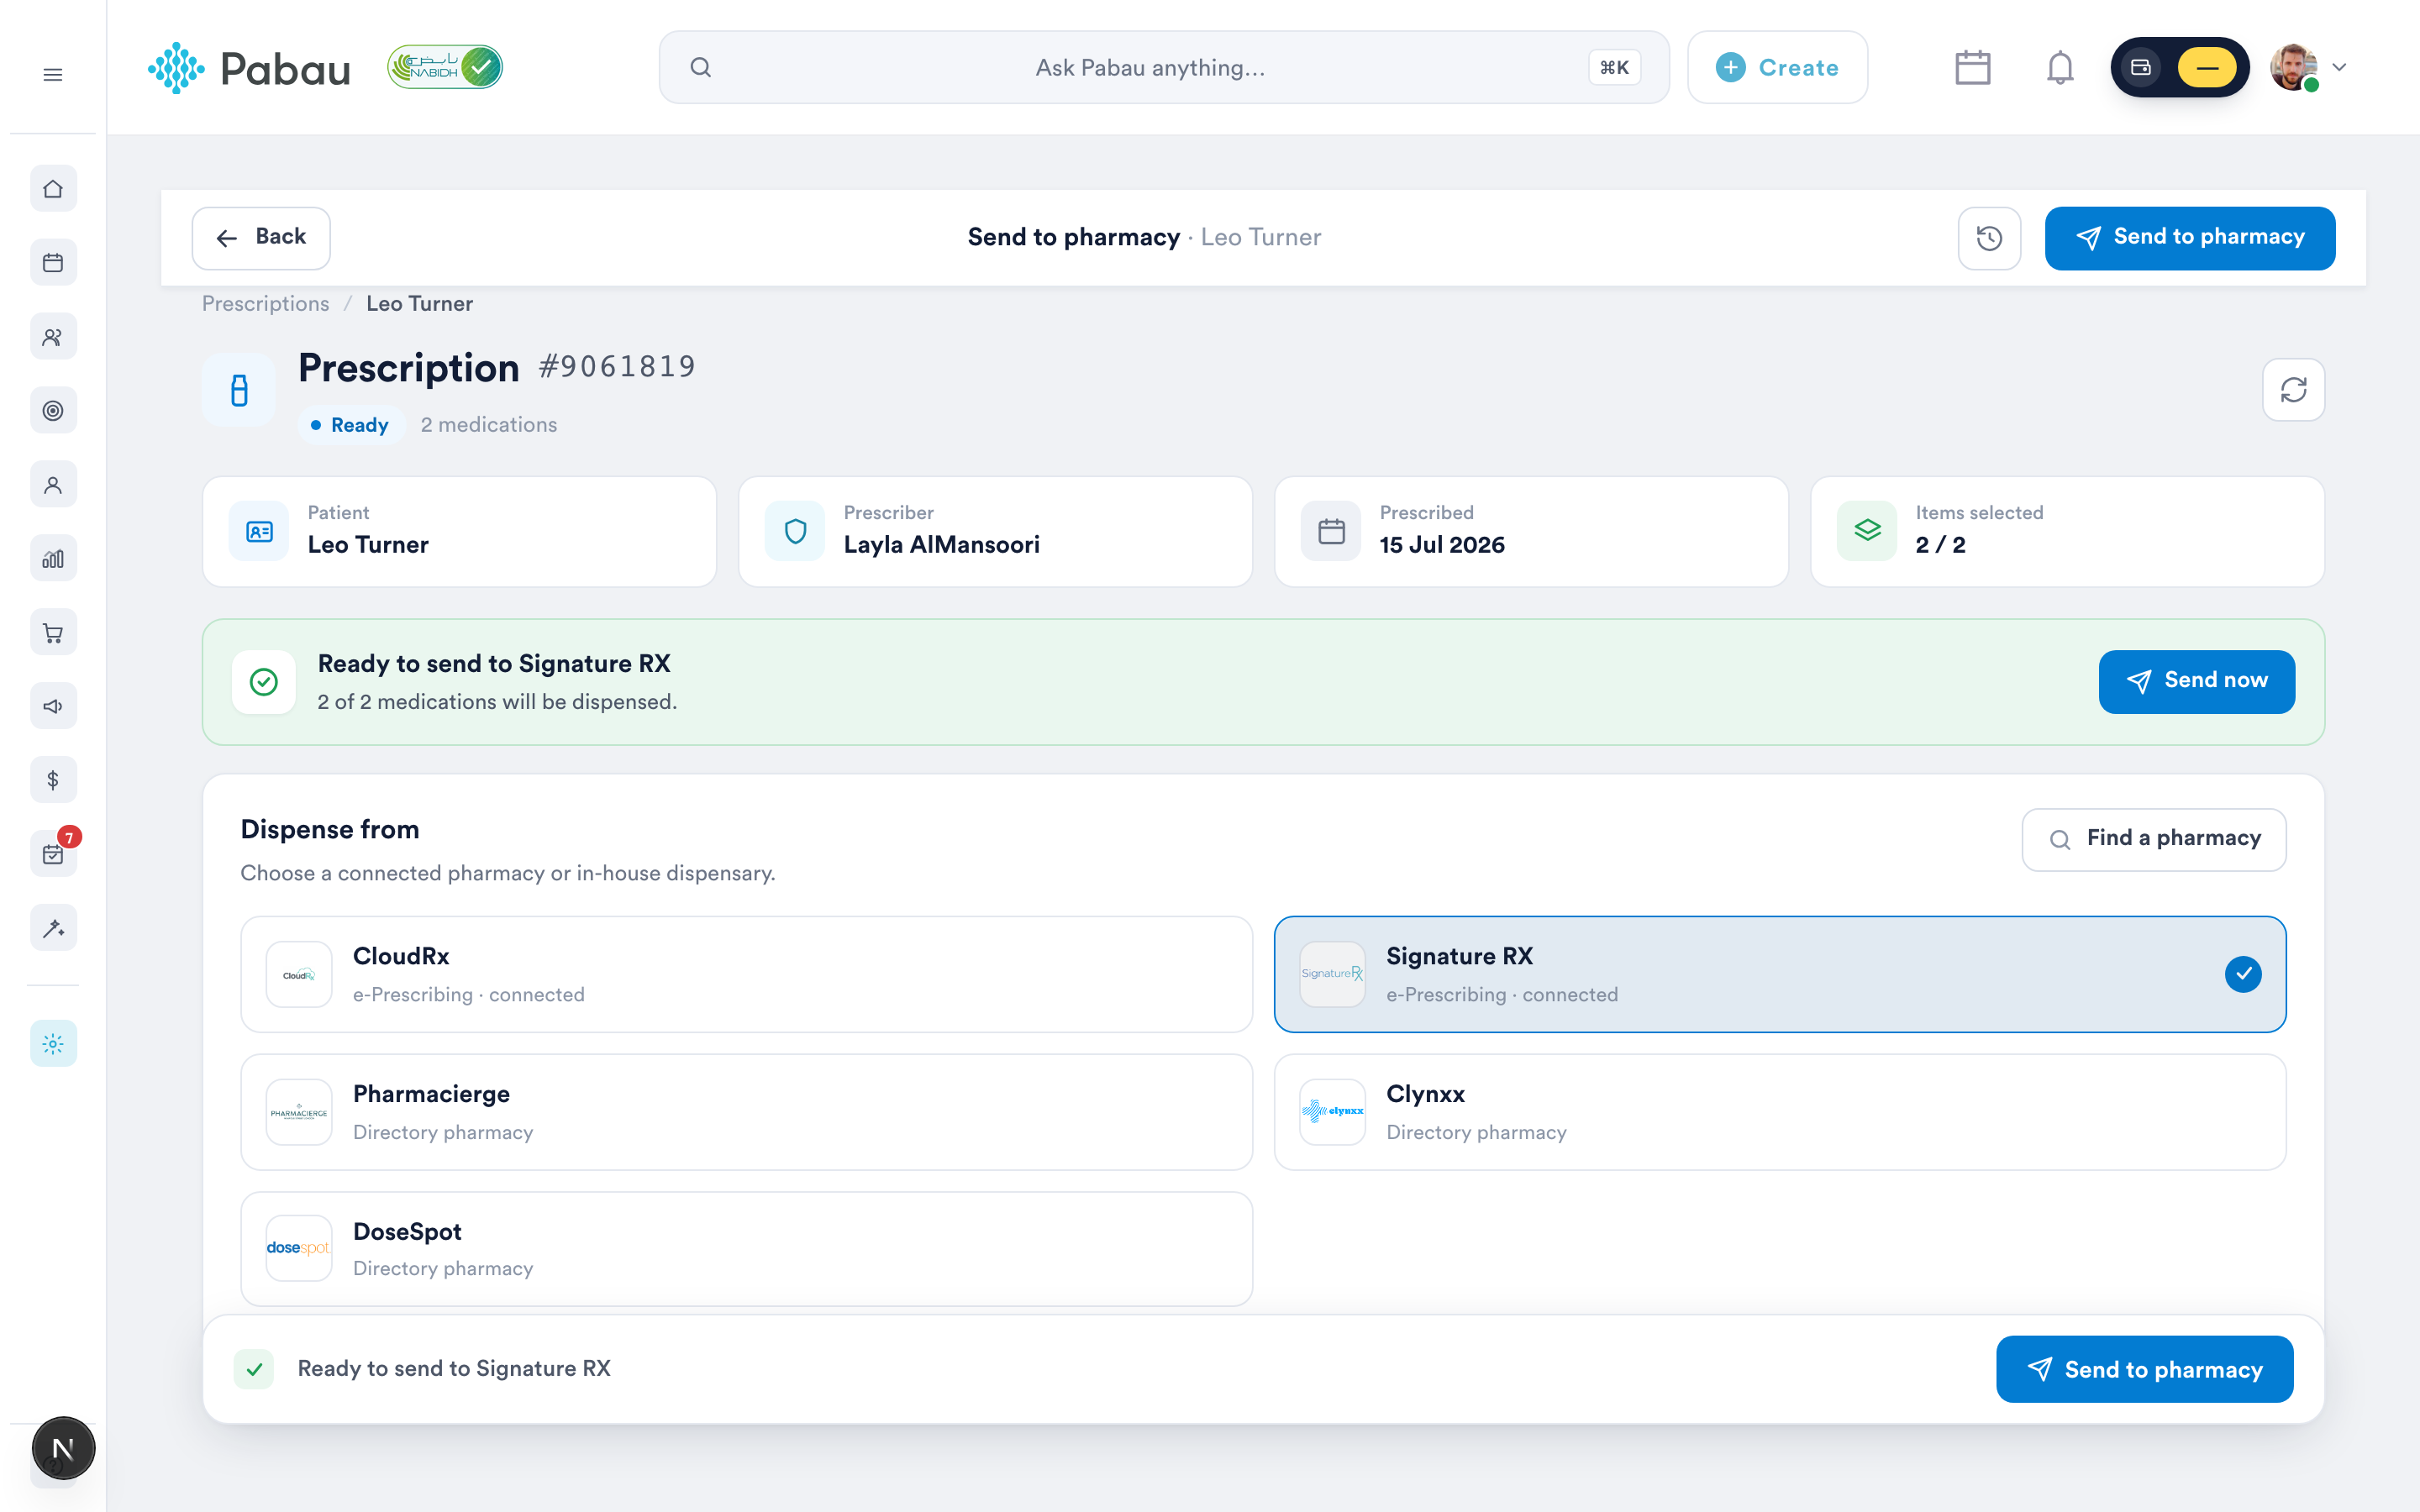
Click "Send" on the prescription's row to open the "Send to pharmacy" screen. Under "Dispense from", select the pharmacy that should dispense the prescription — in this example, Signature RX. Pharmacies you have integrated show as "e-Prescribing · connected"; use "Find a pharmacy" to search the full list. Once everything checks out, the green banner confirms the prescription is ready to send.
Step 5: Review Medications and Choose Fulfilment
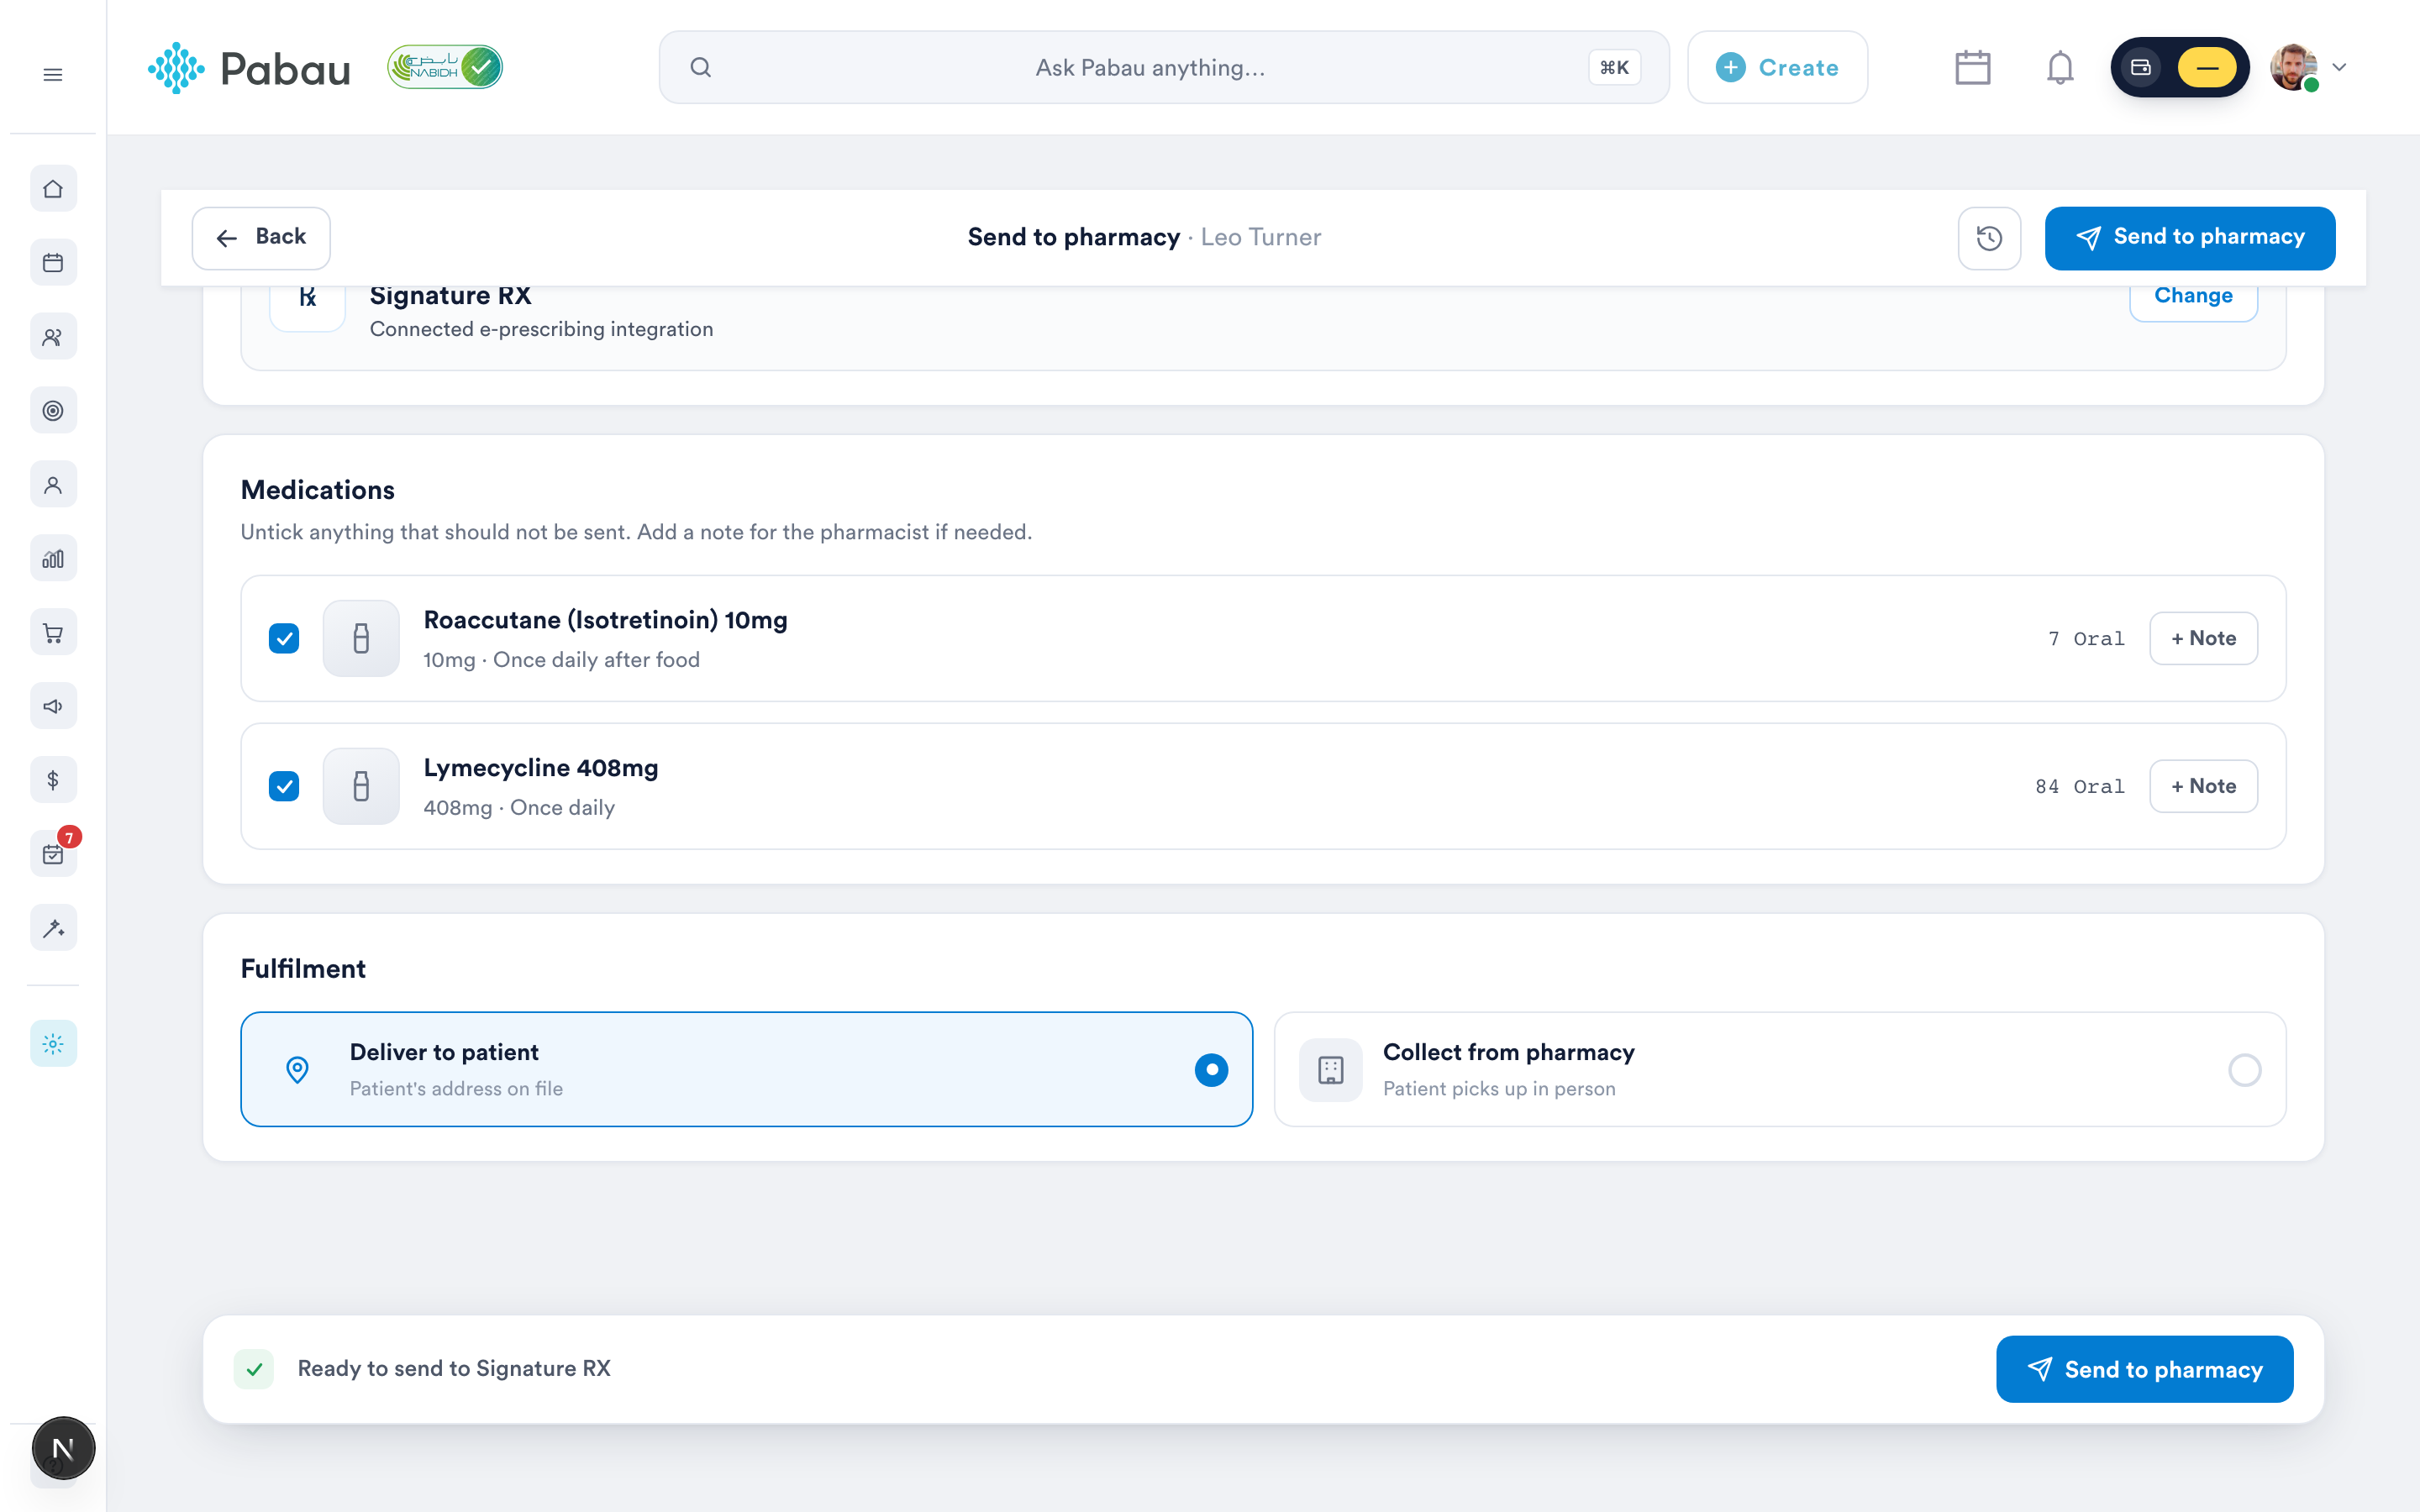
Scroll down to fine-tune the order before it goes out:
- Under "Medications", untick any medication that should not be sent, and use "+ Note" to add an optional note to the pharmacist (e.g. brand preference, packaging, urgency).
- Under "Fulfilment", choose "Deliver to patient" (the patient's address on file) or "Collect from pharmacy" (the patient picks up in person).
Step 6: Send the Prescription
Click "Send to pharmacy" (or "Send now" in the banner). The prescription is transmitted securely to the pharmacy and its status changes to "Sent". Once the pharmacy confirms the dispense, the status updates to "Dispensed". You can review the full timeline of any prescription (created → approved → sent) via its History panel.
NOTE: Each prescription can only be sent once — duplicate sends are blocked. A failed send is never recorded as sent, so once you've resolved the cause you can simply send again. If the pharmacy rejects the prescription, the reason is shown on screen — see the troubleshooting table in the SignatureRx integration guide for the common messages and fixes.
For more guides, refer to related articles below, select additional guides, or use the search bar at the top of the page. These guides will help you get the most out of your Pabau account.
Additionally, to help you fully utilize and understand your Pabau account, we recommend exploring additional guides and resources offered at the Pabau Academy. It offers in-depth video tutorials and lessons, offering a holistic learning experience that can equip you with the essential skills for achieving success with Pabau.