
NOTE: The Offers page shows deals you create in Marketing → Promotions. Flash sales and code-based promotions can only appear on it when your account can redeem promotions in online bookings; where it cannot, Show on offers page is greyed out for those deals. Last-minute offers do not need this.
Step 1: Turn the Offers Page On
Go to Marketing → Promotions. Next to View offers, a badge shows whether your Offers page is Page on or Page off.

The page status and View offers on the Promotions page
- Page off — View offers opens a preview of the page in a new tab, with the banner "Your offers page is off". Click Turn on in the banner to switch the page on.
- Page on — View offers opens your live Offers page.
While the page is off, it is not shown in your booking page menu, and anyone who opens its address is taken to your online bookings instead. You can also switch the page on in Studio (Step 3).
Step 2: Choose Which Deals Appear
Every deal type has its own default:
| Deal type | Shown on the Offers page |
|---|---|
| Flash sale | Yes, by default. |
| Last-minute offer | Yes, by default. |
| Promotion (code-based) | Only when you switch on Show on offers page. It also needs Online bookings as a redemption channel. The code is carried into checkout for the client. |
To change a deal, open it from Marketing → Promotions (or click Create promotion) and go to the Review step. In the Offers page section:
- Show on offers page — publishes or hides the deal on the page.
- Public headline (optional) — the title clients see. Leave it blank to use the deal’s name.
- Cover image URL (optional) — a public HTTPS image. Leave it blank to use treatment or product imagery.
- Feature this offer at the top — places the deal at the top of the page.
The preview’s Offers tab shows the deal’s card as clients will see it, as you edit.
NOTE: "Only online deals for all, new or returning clients can be published. Private segment offers stay private." A deal is also left off the page while it is paused, archived or Point of Sale only, outside its dates, or once it has reached its total redemption limit, and only items available online are listed. Prices on the page are a preview — the deal’s rules are checked again when the client books or pays.
How Do Last-Minute Offers Work?
A last-minute offer advertises real, free appointment times at a discount. When you create one, set Show appointments starting within — anything from 1 minute up to 7 days ahead. Only available appointments that fall inside that rolling window and match the offer’s dates, days and times are shown. Last-minute offers apply to treatments (appointments) only.
On the Offers page, clients click View last-minute offers, choose an offer and then a time. Each time shows a Starts in countdown and disappears once the appointment time is reached. Clicking Book this time takes the client into your online booking with the treatment, practitioner, location, date and time already chosen. Availability and the discount are checked again during booking.
Step 3: Design the Offers Page in Studio
Open Online Bookings, click Customise page and then Edit (see Part 2). Choose Offers from the Storefront strip — it is listed even while the page is off or has no offers yet. The Offers page settings open on the right:
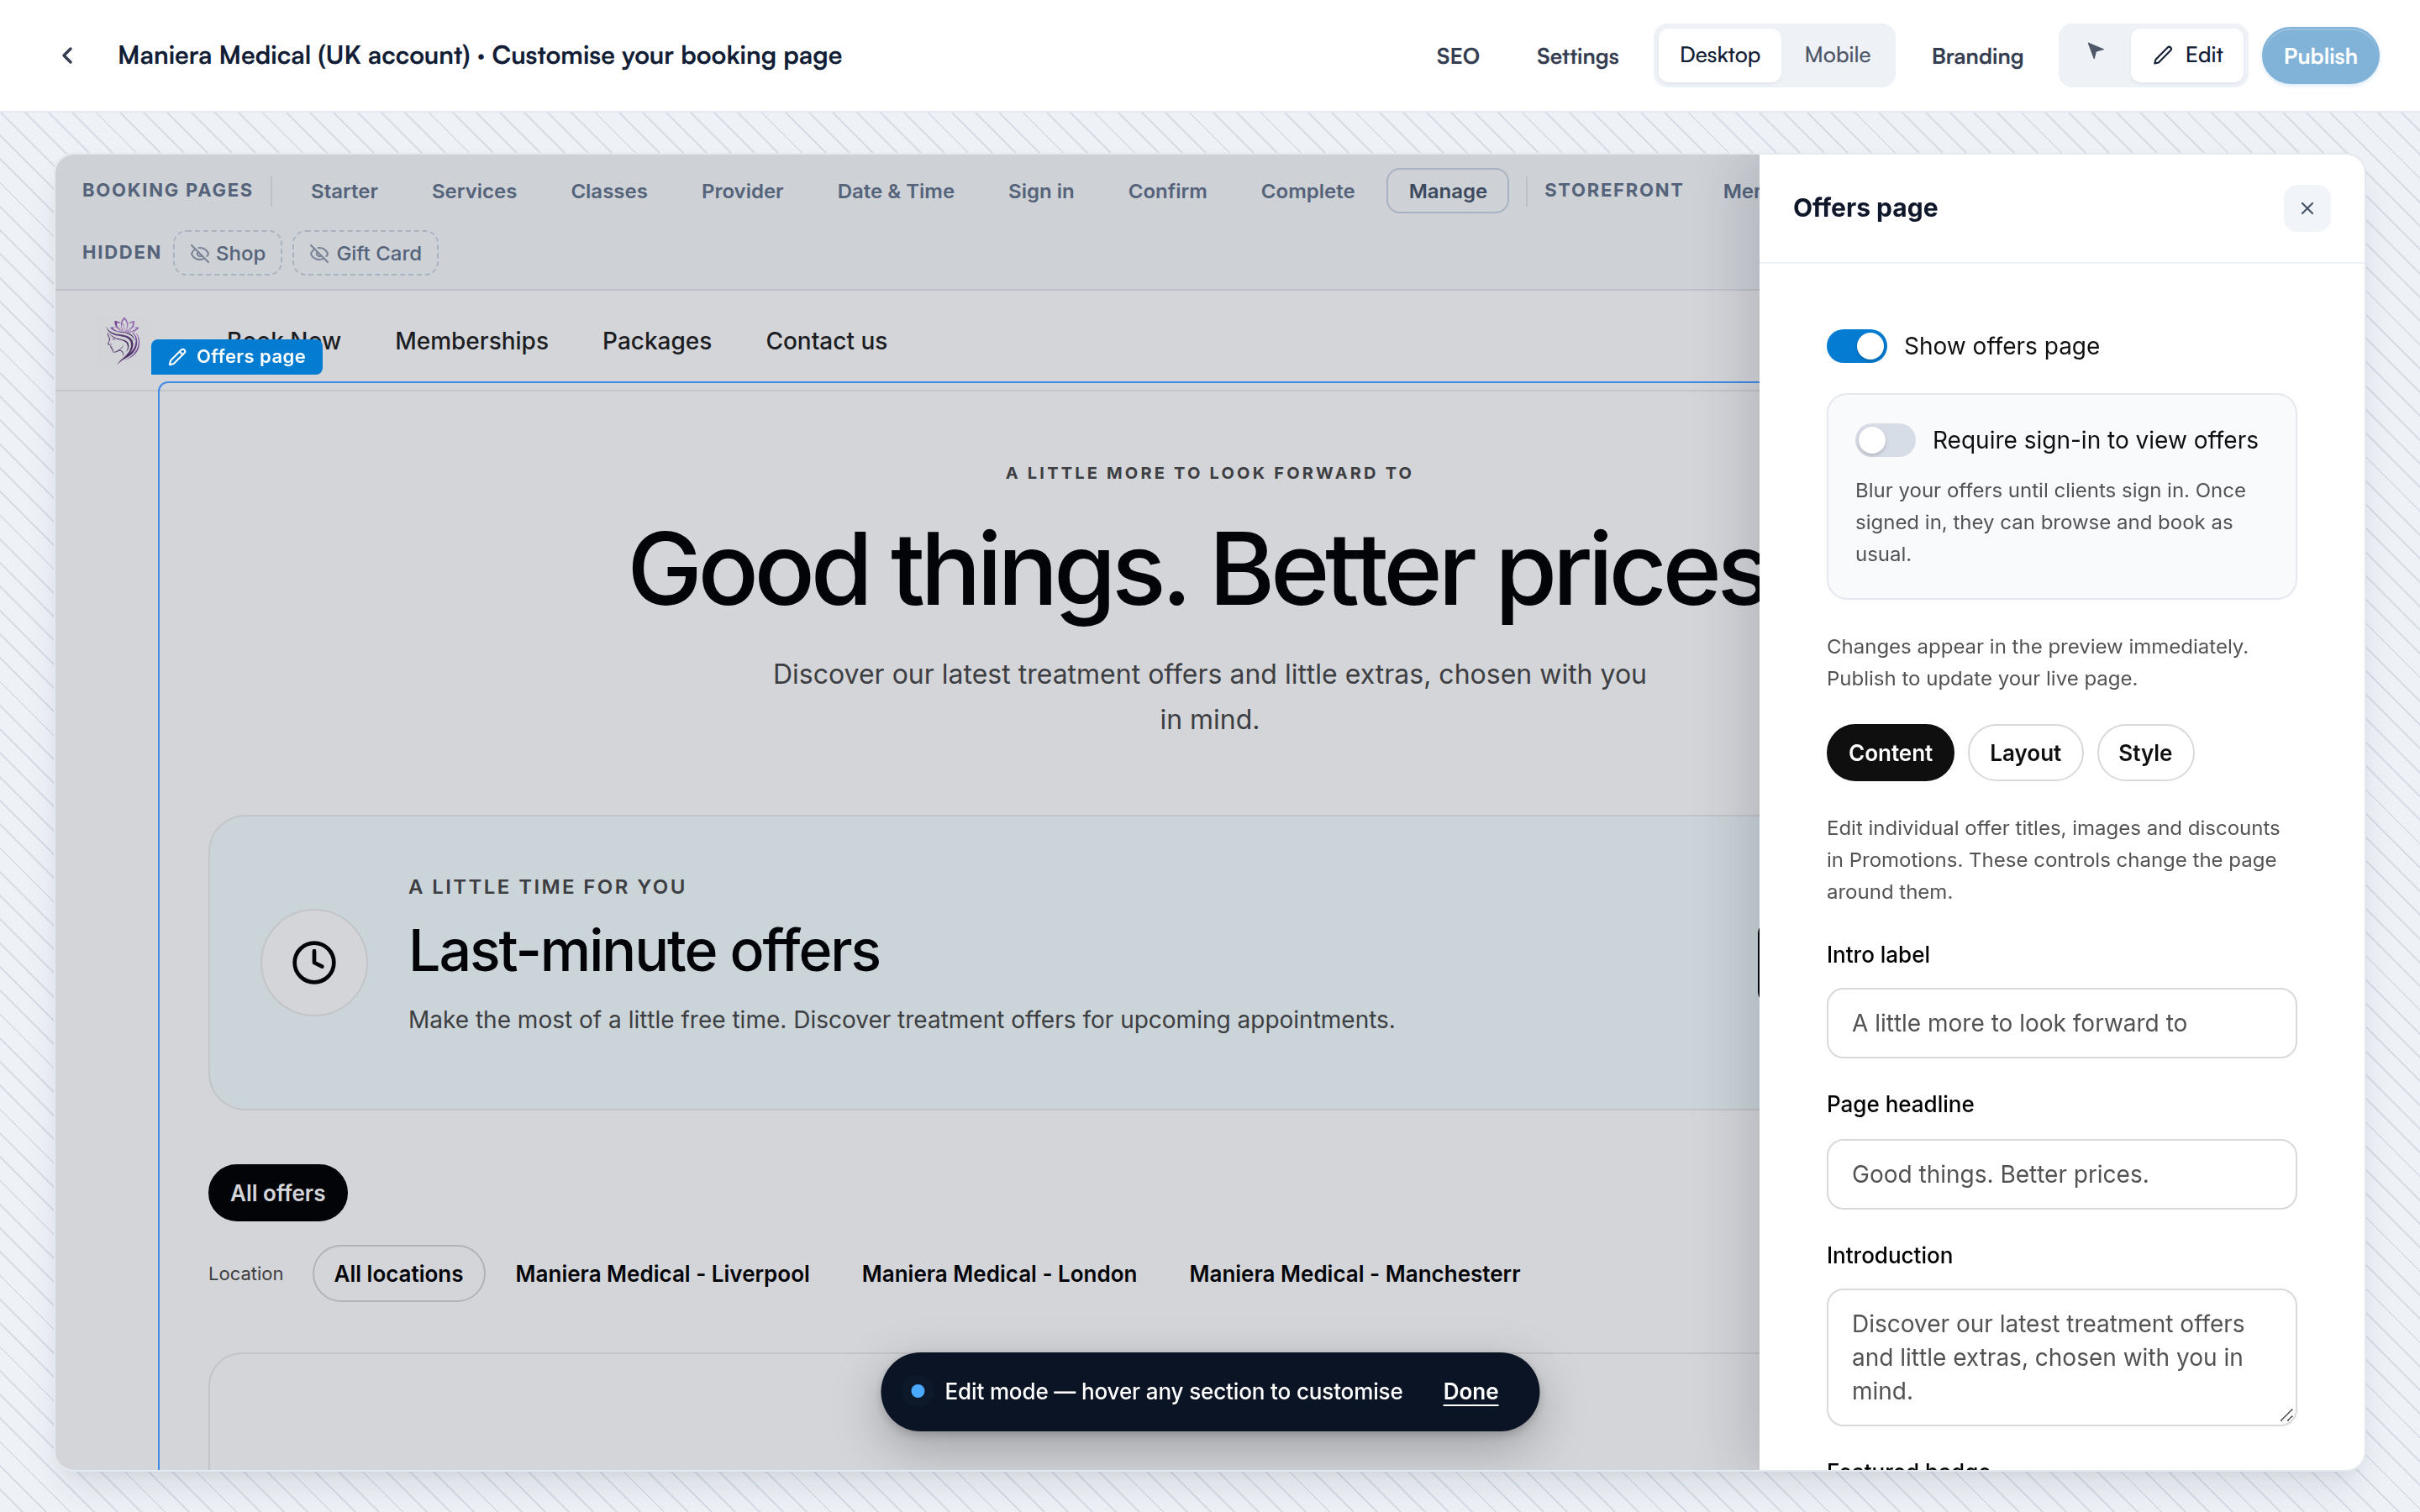
The Offers page settings in Studio
- Show offers page — switches the page on or off.
- Content — the wording (Intro label, Page headline, Introduction, Featured badge, Book button, View offer button; leave any blank to use the default text) and what to show, such as offer images, savings badges, prices, promotion code information and the category and location filters.
- Layout — heading alignment, page width, Cards per row on desktop, image shape and position, card style, spacing and corner radius.
- Style — Choose a look (Clinic theme, Soft blush, Sage or Minimal) and the page colours. Colours follow your clinic theme until you change them; Use clinic theme sets one back.
Changes appear in the preview straight away. Click Publish to update your live page.
TIP: Each offer’s title, image and discount are edited in Marketing → Promotions. Studio changes the page around them.
NOTE: If the page is off, Studio shows "Your offers page is off". You can still design it: click Turn on, then Publish to make it visible to clients. Show offers page is the same switch as Page on/Page off in Promotions.
Can I Make Clients Sign In to See the Offers?
Yes. In the Offers page settings in Studio, switch on Require sign-in to view offers (it is off by default) and click Publish. Clients then see your offers blurred, with a prompt to sign in or create an account. Once signed in, they can browse and book as usual. In Studio the locked view is a preview only.
NOTE: This controls who can see the page, not who can use a deal. To limit a deal to new or existing clients, set its eligibility in Promotions — it is checked again at checkout.
Where Do Clients Find the Offers Page?
When the page is on and has at least one offer, Offers appears in the menu at the top of your booking page. Its address is your booking page address followed by /offers, so you can also link to it from your website, emails or social posts.
What's next?
To create the deals themselves, see Promotions Explained: Deal Types and When to Use Each, How to Create a Flash Sale and How to Create a Promotion (code-based). To sell memberships, packages, products and gift cards alongside your offers, see How to Sell Memberships, Packages, Products and Gift Cards in Your Online Store.
Was this guide helpful? Let us know by voting below - your feedback helps us write clearer articles.
For more guides, browse the related articles below or use the search bar at the top of the page. You can also watch our video learning series, the Pabau Academy, or visit the Support page for additional help.