
NOTE: This feature is being rolled out to clinics gradually. If you don't see it in your account yet, message us via the in-app chat.
IMPORTANT: Date quick-jumps apply to everyone in your clinic, so only admins and owners can change them. Other staff can open Calendar Settings and see the current choices, but the options are locked, with the message "Only an admin can change workspace calendar settings."
Step 1: Open Calendar Settings
In the calendar, click the gear icon (Calendar settings) in the bar at the top, just left of Day, Week and Month. The Calendar Settings window opens on the General tab. Scroll to Date quick-jumps.

The gear icon opens Calendar Settings
If you don't see Date quick-jumps, this option isn't turned on for your clinic yet.
Step 2: Set the Week Jumps
- In Week jumps, click in the box (it says Add weeks…), type a number of weeks and press Enter or a comma. Clicking away from the box also adds it.
- To remove a number, click the cross on it.
You can have up to six week buttons, each from 1 to 52 weeks. Numbers are sorted for you and duplicates are ignored. Leave the box empty to use the default, 1 to 5 weeks.
Step 3: Set the Month Jumps
In Month jumps (More menu), add or remove numbers of months the same way. You can have up to four, each from 1 to 36 months. Leave it empty to use the default: 3, 6 and 12 months.
The Preview on the right shows the buttons your team will see.
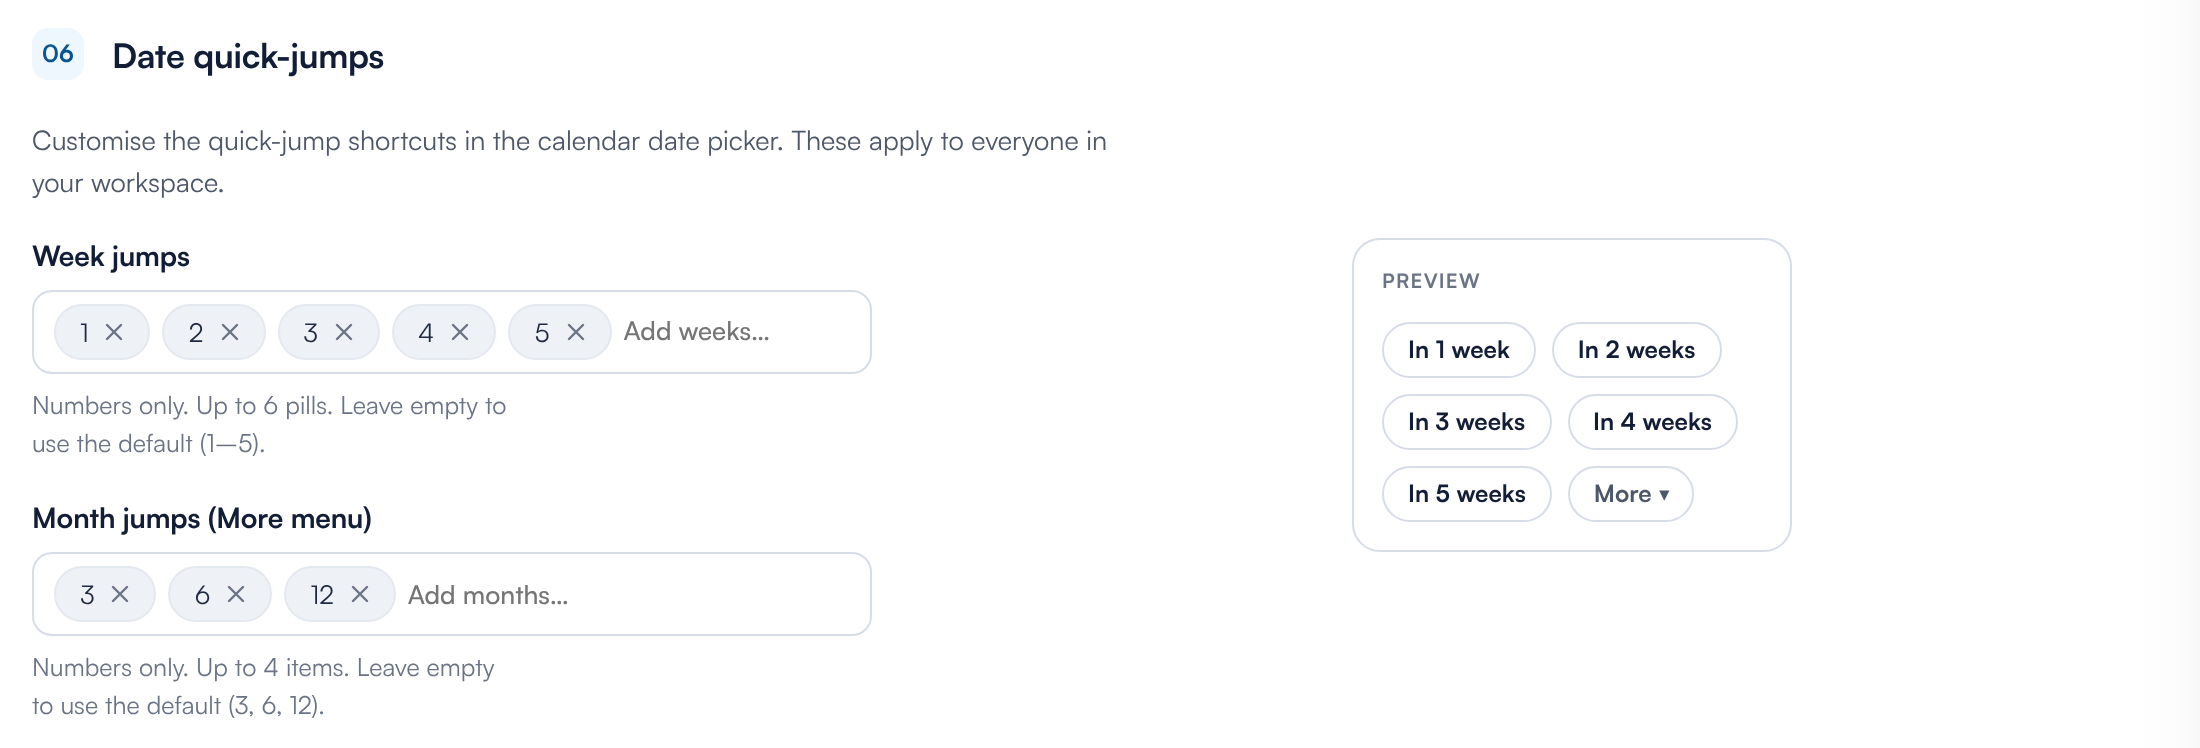
Week and month jumps with the preview
Step 4: Save Your Changes
Click Save changes at the bottom right. You'll see Settings saved. To close without saving, click Cancel. You only need to save once, even if you changed several tabs.
Step 5: Use the Quick-Jumps
- In the calendar, click the date at the top, between the arrows, to open the date picker.
- Click a week button, for example In 2 weeks, or click More and choose a month jump such as In 6 months.
The calendar moves forward that many weeks or months from the date you are looking at, not from today. This makes rebooking a follow-up quick: open the appointment's day, then jump ahead.
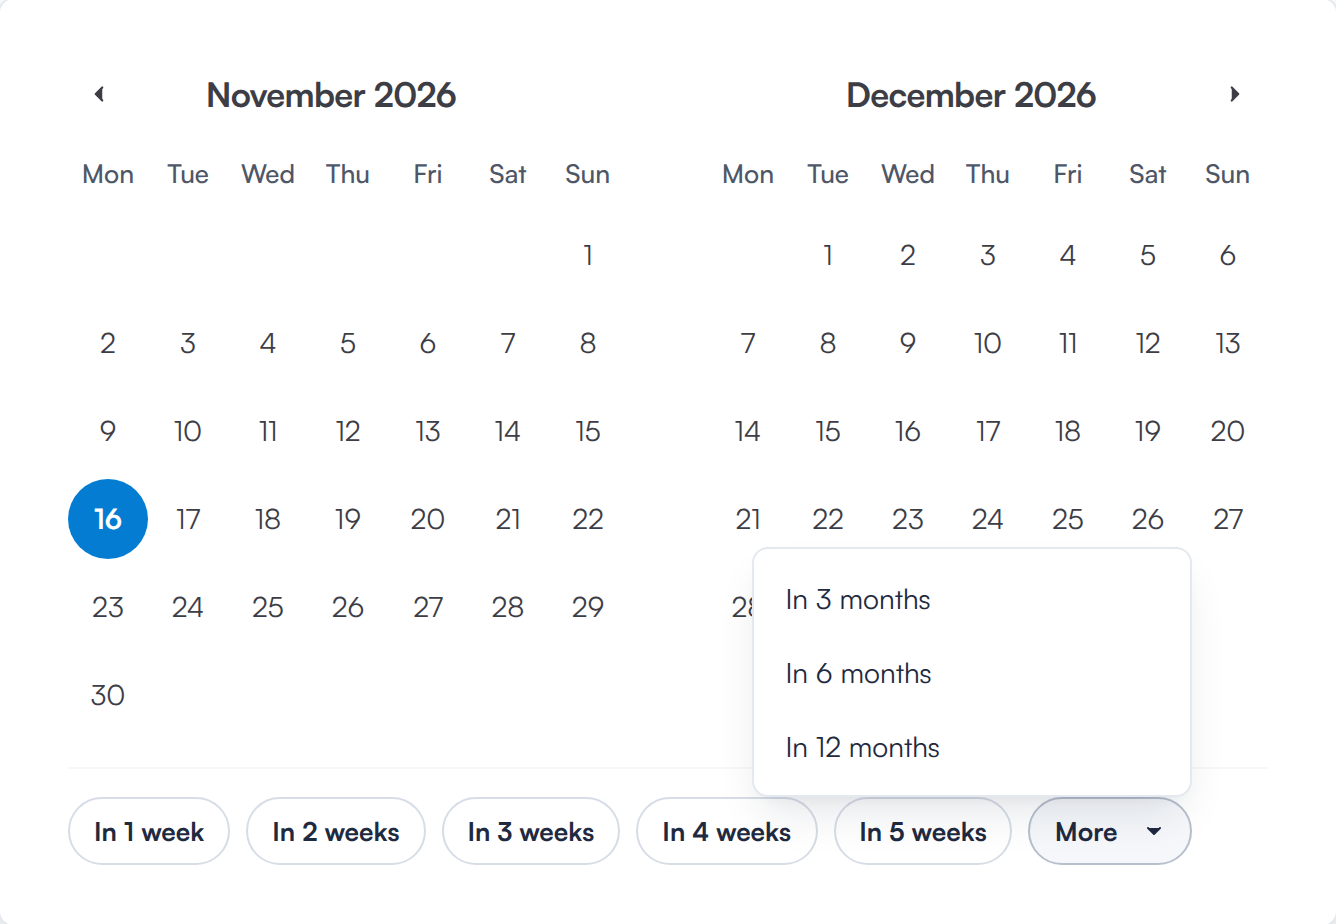
The quick-jumps at the bottom of the date picker
Who do these settings apply to?
The quick-jumps are shared by everyone at your clinic. Only admins and owners can change them.
What's next?
The complete set of Calendar Settings guides starts at How to Configure the New Calendar Settings. Related guides:
- How to Change Your Calendar Zoom and Month Layout
- How to Customise Staff Column Headers and the Capacity Indicator
- How to Set Calendar Hours, Slot Size, Week Start and Auto-Lock
- How to Find Your Way Around the New Calendar
Was this guide helpful? Let us know by voting below - your feedback helps us write clearer articles.
For more guides, browse the related articles below or use the search bar at the top of the page. You can also watch our video learning series, the Pabau Academy, or visit the Support page for additional help.