
NOTE: Looking for patient referrals between healthcare providers? Head to this article instead. This guide covers Refer a Friend, Pabau's client referral marketing feature.
Refer a Friend lets you turn happy clients into a growth channel by rewarding them for referring friends to your clinic.
You can define what counts as a successful referral, what advocates and referred friends are rewarded with, the emails sent when a reward is earned, and where the campaign is hosted.
Once published, performance is tracked on the Referrals dashboard. For a full breakdown of the dashboard, read our How to Use the Referrals Dashboard article.
Step 1: Navigate to Referral Marketing
Log in to your Pabau account, and in the left sidebar menu, click on Marketing, then click on "Referral"
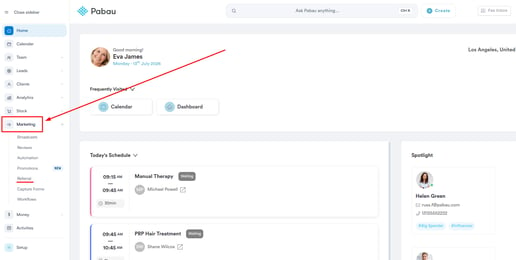
NOTE: If you can't see Referral Marketing in your sidebar, this may be due to your user permissions. Contact your admin to ensure you have the correct permissions to access this feature.
Step 2: Start a New Campaign
Click on "Create your first Campaign" from the Referrals dashboard.
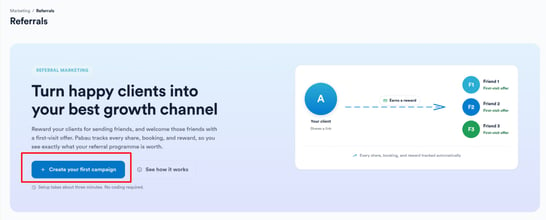
This opens a five-step setup wizard, with a step indicator at the top showing Goals, Rewards, Referred User, Communication, and Installation. You can move between steps using the "Back" and "Next" buttons.
NOTE: If you're trying to edit your existing campaign, navigate to the ''Configure Campaign'' button in the top right corner.
Step 3: Set Your Campaign Goal
In the Goals step, choose when a referral counts as successful. There are three models to choose from:
- Client Created (Recommended): The reward is given as soon as a new client is created with the referral field filled in. This is the default option.
- First Booking (High intent): The reward is given once the referred client's appointment is marked as completed.
- First Purchase (Revenue): The reward is given once the invoice for a product or appointment is fully paid.
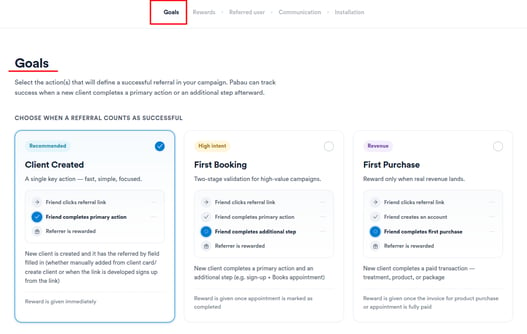
NOTE: A referral is currently registered by selecting "Client Referral" in the "How did you hear about us" field, either when creating a new client or from an existing client's Client Card, and then choosing the referring client from your client base. This is what links the advocate to the referred client and triggers the reward logic.
Step 4: Configure Rewards
In the Rewards step, set up what advocates and referred friends receive. This step is split into two sections: Referrer rewards and Referred friend reward.
Referrer rewards
Toggle on "Referrer reward" to set up what advocates receive for each successful referral.
Enter a reward name, select a reward type (Voucher or Custom), and if you've selected Voucher, choose the applicable voucher from the drop-down listing all active vouchers.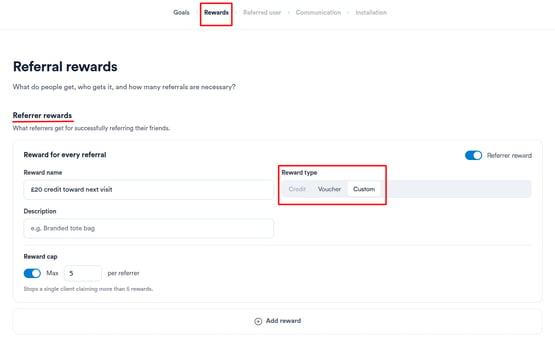
To prevent a single client from claiming an unlimited number of rewards, set an optional reward cap in the "Max per referrer" field.
In addition to the standard per-referral reward, you can set up a Reward milestone, an extra reward given when an advocate reaches a certain number of successful referrals. For example, a $100 voucher after 10 referrals, on top of the regular $15 per referral they receive.
Toggle on a milestone, set the threshold using the "After [n] successful referrals" field and fill in the reward details.
Click "Add reward" if you'd like to add further milestones. Each milestone can be enabled or removed individually.
NOTE: Vouchers used as rewards are managed under Marketing > Gift Vouchers.
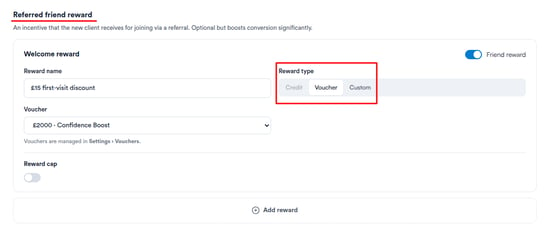
Referred friend reward
Toggle on "Friend reward" to offer new clients a welcome incentive for joining through a referral. Giving the referred friend a reward on arrival - such as a voucher toward their first visit - increases the likelihood that they'll follow through and book, making it a worthwhile addition to your campaign even though it's optional.
The setup follows the same structure as the referrer reward: enter a reward name, select a reward type (Voucher or Custom), and if you've selected Voucher, choose the applicable voucher from the drop-down.
You can also set a reward cap to control how many times this welcome reward is issued.
Step 5: Configure Communications
In the Communication step, set up the two automated emails sent during the referral journey.
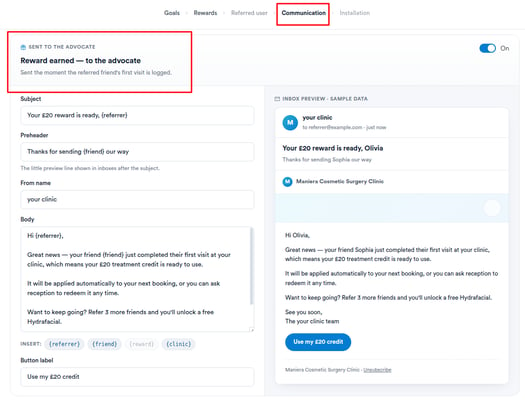
Each one can be toggled on or off, and includes a Subject, Preheader, From name, Body, and Button label. You can view a live preview with sample data on the right side.
- Reward earned: Sent to the referrer once the referred friend's first visit is logged. Confirms the reward and can include a nudge toward the next milestone.
- Welcome and voucher: Sent to the referred friend once they create an account through the referral link. Welcomes them and states their first-visit offer.
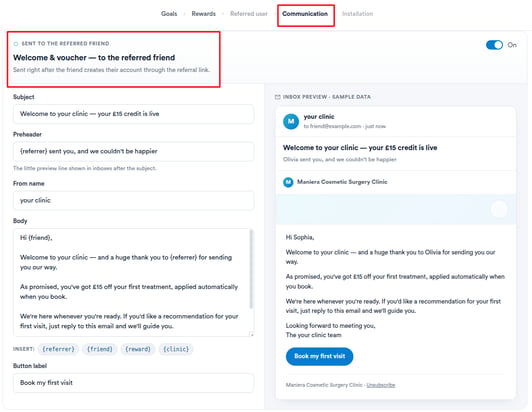
NOTE: You can personalize each email using merge tags, including {referrer}, {friend}, {reward}, and {clinic}. Click on a merge tag to insert it into the email body.
Step 6: Publish the Campaign
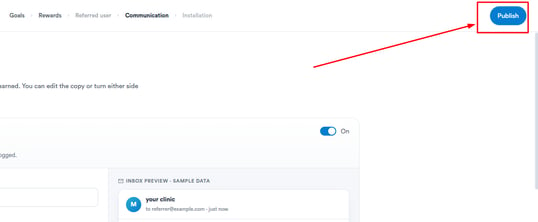
Once you've completed all the steps, click "Publish" in the top right corner of the screen to activate your campaign. You can monitor its performance from the Referrals dashboard. (add link for referrals dashboard)
With your referral campaign set up, your clients can start bringing in new business on your behalf, with rewards automatically applied based on the goal and structure you've defined.
Was this guide helpful? Let us know by voting below - your feedback helps us write clearer articles.
For more guides, browse the related articles below or use the search bar at the top of the page. You can also watch our video learning series, the Pabau Academy, or visit the Support page for additional help.