
NOTE: This feature is being rolled out to clinics gradually. If you don't see it in your account yet, message us via the in-app chat.
IMPORTANT: Configuration settings apply to everyone in your clinic, so only admins and owners can change them. Other staff can open Calendar Settings and see the current choices, but the options are locked, with the message "Only an admin can change workspace calendar settings."
Step 1: Open the Configuration Tab
In the calendar, click the gear icon (Calendar settings) in the bar at the top, just left of Day, Week and Month. The Calendar Settings window opens on the General tab. Click Configuration in the list on the left. A schedule preview below the settings shows the result as you go.

The gear icon opens Calendar Settings
Step 2: Set the Starting Day and Time Slot Size
- Starting day: choose the first day shown in the week view.
- Time slot size: choose 5, 10, 15, 20 or 30 minutes. This is your clinic's basic unit of time: booking start times and the Working hours options move in steps of this size.
Where this comes from: Starting day is the same setting as the week start in your clinic's business details, so changing it in either place changes both.
Step 3: Set the Working Hours
Under Working hours, choose a Start time and an End time. These decide when the calendar grid starts and ends each day. The lists follow your time slot size, and the start must be before the end. If your clinic has never set them, the calendar shows 08:00 to 18:00.
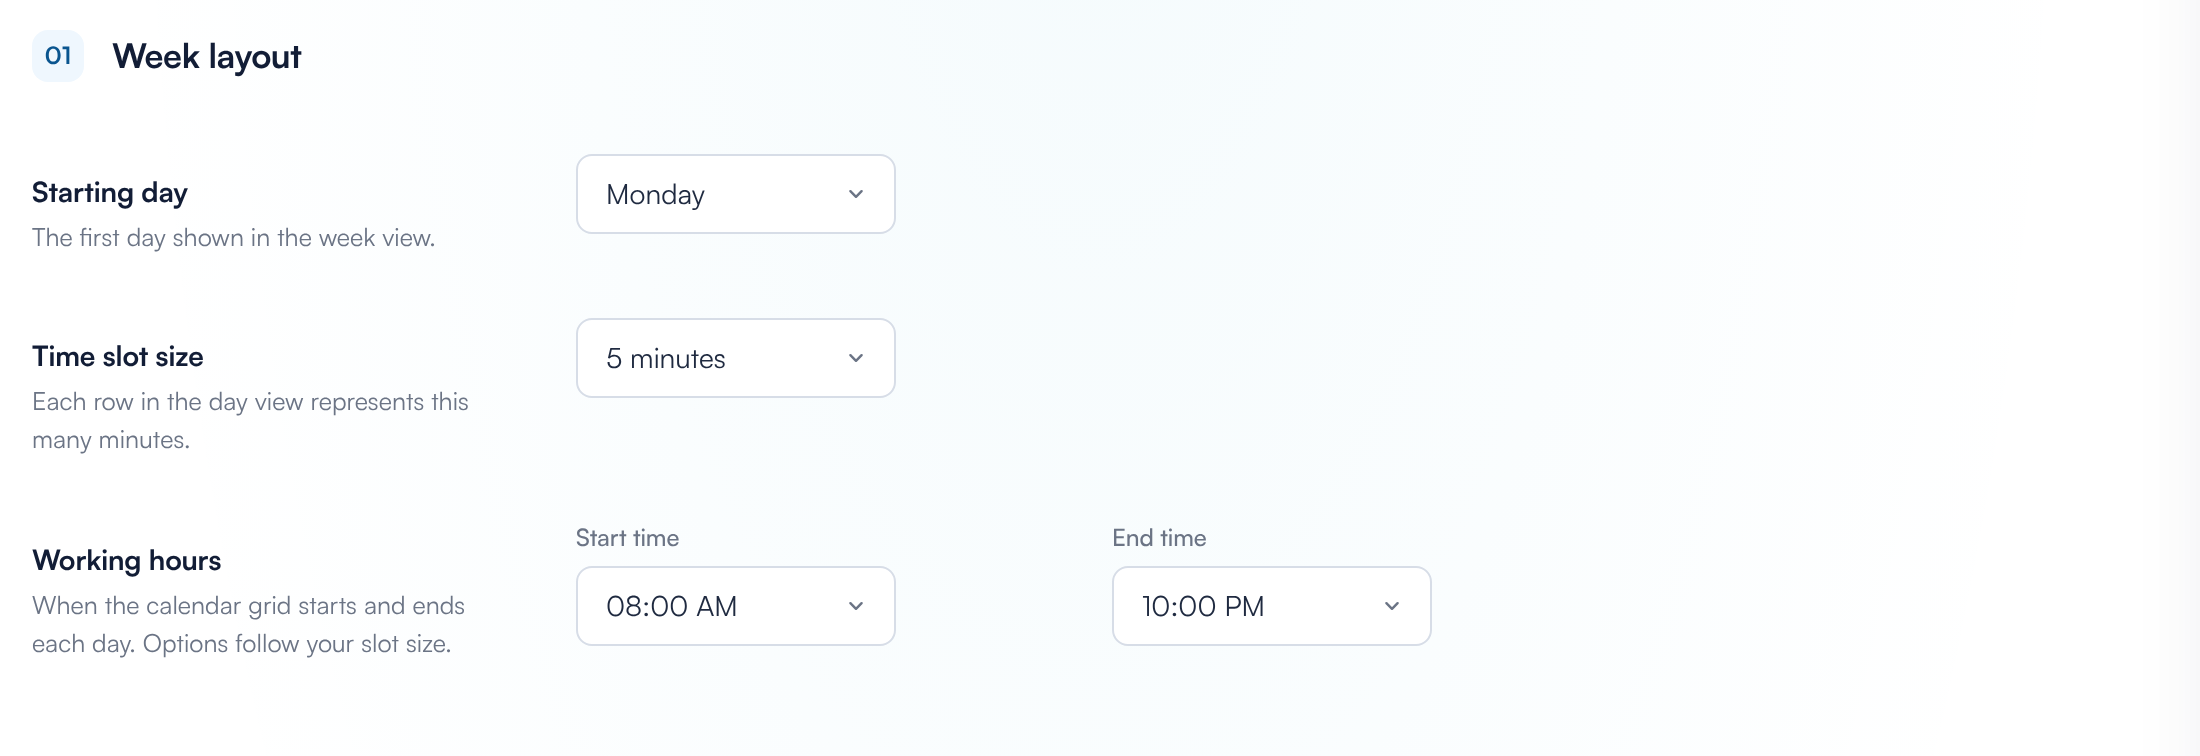
Week layout settings on the Configuration tab
Why won't my working hours save ("These hours would hide part of the rota")?
Pabau refuses hours that would hide a future shift or appointment, because staff would never see it. The message says which end is wrong, for example "These hours would hide part of the rota — the rota starts at 07:30. Widen the window to cover it." Move Start time earlier if it names when the rota starts, and End time later if it names when the rota runs until. The check only runs when you change the hours, so saving other settings is never blocked by it. More detail is in How to Configure the New Calendar Settings.
Step 4: Set Up Auto-Lock
Under Locking & automation, choose how long the calendar can sit unused before it locks itself: 1 minute, 2 minutes, 5 minutes, 10 minutes or 2 hours. Choose Disabled to turn auto-lock off.
When the time runs out with no activity, the calendar screen locks and the person unlocks it with their passcode. Auto-lock only applies to staff who have set a passcode, so nobody is locked out without a way back in. Staff with a passcode can also lock the screen straight away with Shift + Alt + L.
NOTE: The text under Auto-lock mentions locking past appointments. What the setting actually does is lock the calendar screen after the time you choose with no activity, as described above.
Step 5: Choose Who Can Unlock the Calendar
Under Behaviour, Accept last user's passcode only is ticked by default. While it is ticked, only the passcode of the last person who was logged in unlocks the calendar. Untick it to let any member of staff unlock it with their own passcode.
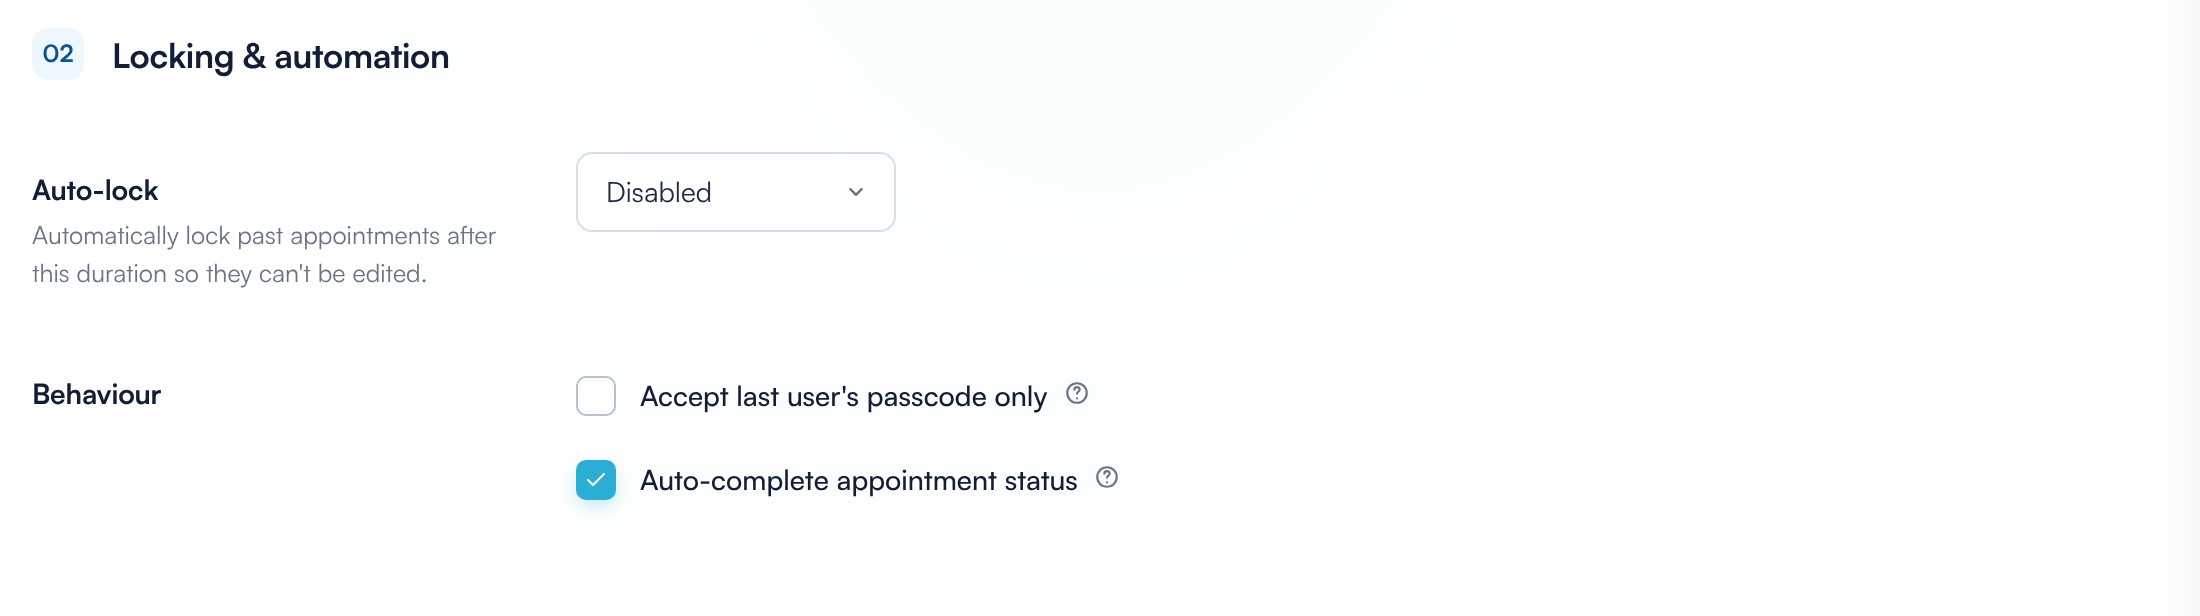
Auto-lock and unlocking options
For how locking works day to day, see How to Lock and Unlock Your Calendar Screen and How to Set Up Passcode Rules for Calendar Locking. Auto-complete appointment status, in the same section, is covered in How to Set Scheduling Rules: Overlap, Group Appointments and Auto-Complete.
Step 6: Save Your Changes
Click Save changes at the bottom right. You'll see Settings saved. To close without saving, click Cancel. You only need to save once, even if you changed several tabs.
What's next?
The complete set of Calendar Settings guides starts at How to Configure the New Calendar Settings. Related guides:
- How to Set Scheduling Rules: Overlap, Group Appointments and Auto-Complete
- How to Change Your Calendar Zoom and Month Layout
- How to Set Up Date Quick-Jumps
- How to Lock and Unlock Your Calendar Screen
- How to Set Up Passcode Rules for Calendar Locking
- How to Find Your Way Around the New Calendar
Was this guide helpful? Let us know by voting below - your feedback helps us write clearer articles.
For more guides, browse the related articles below or use the search bar at the top of the page. You can also watch our video learning series, the Pabau Academy, or visit the Support page for additional help.