
Whether you're following country-specific protocols or adding custom vaccinations, the vaccine scheduler makes it easy to select diseases, pick vaccine schedules, and log upcoming doses with accuracy.
Step 1: Access Client Card
Start by logging into your Pabau account using your login credentials. Then, navigate to the search bar located at the top of the screen and type in your client's name. Their profile will appear on the search results, click to access their client card.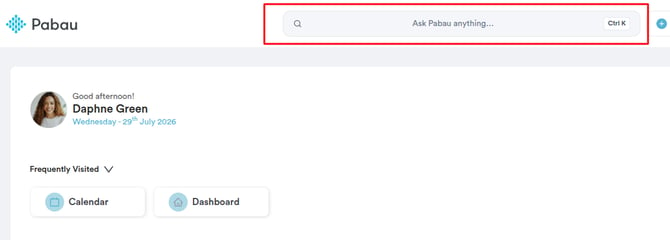
Step 2: Open the Vaccines Dashboard
In the client card, click on the "EMR" tab in the navigation menu at the top (labelled "Chart" for US accounts). This opens the clinical overview grid. Click on the "Vaccines" card to open the client's Vaccine Dashboard. If you don’t see the "Vaccines" card, the Vaccines feature needs to be enabled for your account first — see How to Enable Vaccines.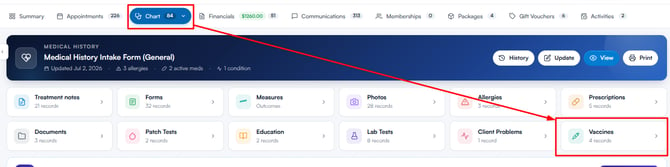
Step 3: Schedule a Vaccine
From the Vaccine Dashboard, click the "Schedule a vaccine" button in the top right corner. This opens the scheduling wizard, which guides you through four steps: Country, Disease, Vaccine and Schedule.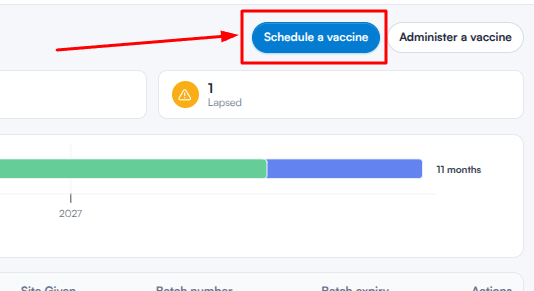
Start From Anywhere on the Client Card
You don't have to open the Vaccine Dashboard first. From any page of the client card:
- Click the blue + button in the bottom right corner.
- Choose Schedule vaccine (Plan a vaccination course with dose dates). The same four-step wizard opens.
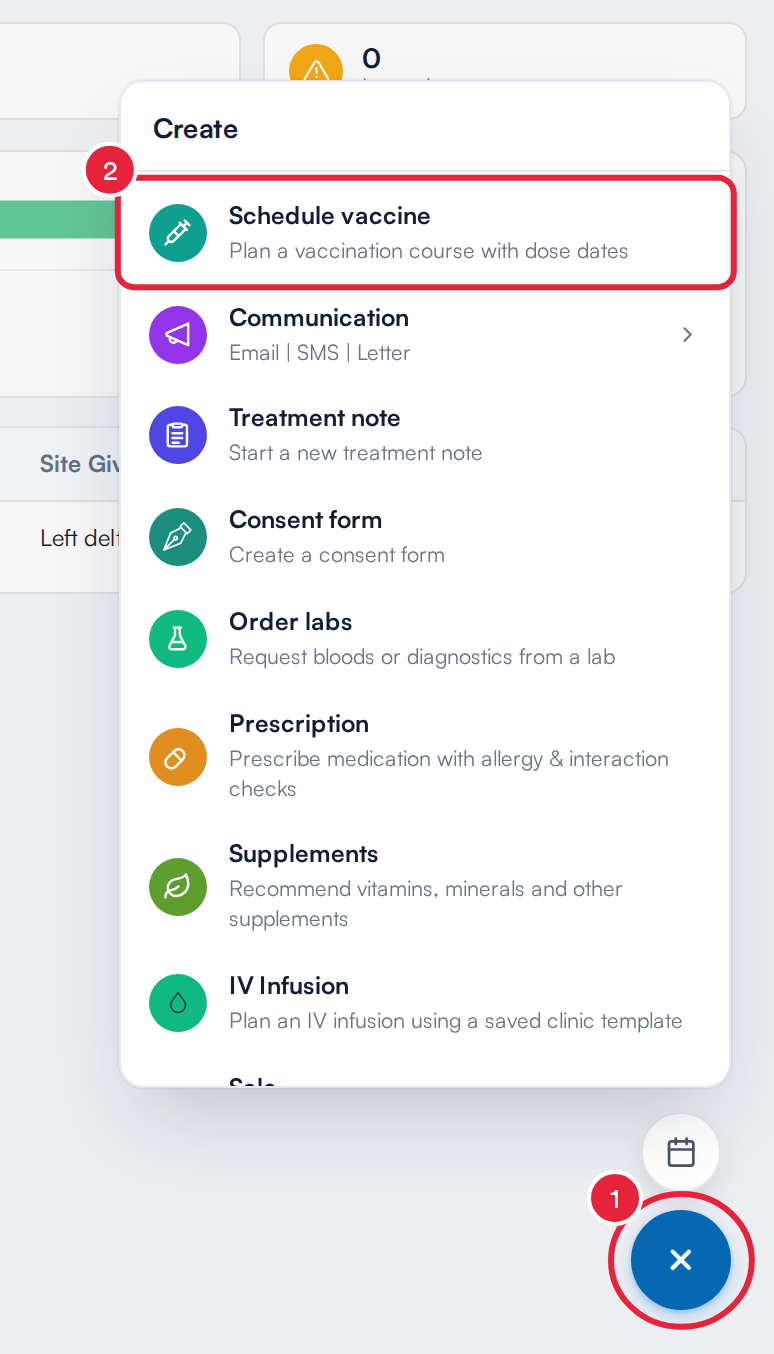
Schedule vaccine in the client card's Create menu
NOTE: If the client has an appointment today, the wizard links the vaccines you schedule to it automatically, and Appointment · auto-linked shows at the top of the wizard. Click it to pick a different appointment or remove the link.
Step 4: Select the Country
Use the search field to find the country related to the vaccine requirement, then click its card to select it. You can select more than one country — your choices appear under "Selected countries", and clicking a selected country removes it again. Click "Next" to continue.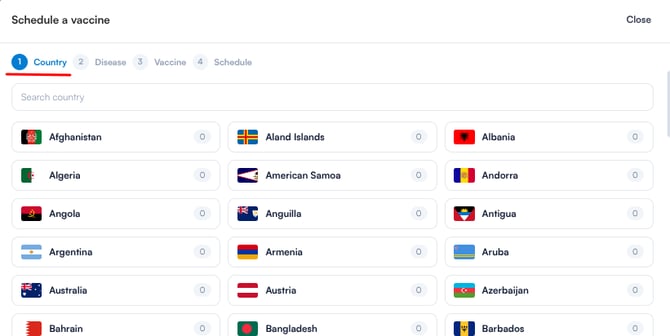
Step 5: Select Disease(s)
You’ll now see the diseases associated with the selected countries, grouped by risk level. Click one or more diseases to select them — selected diseases are highlighted. Click "Next" to continue.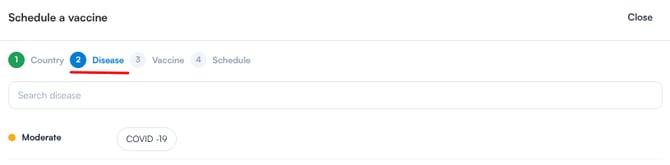
NOTE: Use the search field to filter the list. Diseases that aren’t linked to your selected countries appear under "Other diseases", so you can schedule beyond the country recommendations.
Step 6: Add Vaccine Schedule(s)
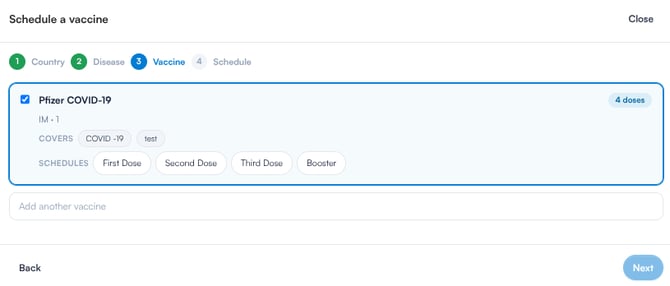
A list of vaccine options will appear based on the selected disease(s). Recommended vaccines are selected by default — untick any you don’t want to schedule. For each vaccine, you’ll see:
- Vaccine name, with the number of doses in its schedule
- Route and dosage (e.g. IM · 0.5 ml)
- Covers — the diseases the vaccine protects against (e.g. Covid-19, Rabies)
If a vaccine offers more than one schedule, a "Schedules" row appears once it’s selected — click the schedule type(s) you want to include. A warning appears if the client’s age falls outside the vaccine’s recommended range.
To add a vaccine that isn’t in the recommended list, use the "Add another vaccine" search field below and click a vaccine to add it. Click "Next" to proceed.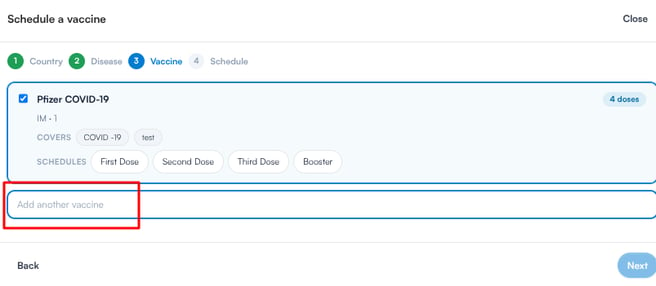
Step 7: Review and Adjust the Schedule
The final step shows the planned schedule for each selected vaccine. A timeline is displayed at the top of each vaccine’s section, with Day 0 representing today’s date. Below it, each dose is listed with an automatically calculated date based on the schedule configuration.
You can edit any date directly in the date field. To add an extra dose date, click "+ Add date". To remove a dose date, click the minus button on the right of that row. To remove the vaccine entirely from the schedule, click "Remove" in the top right corner of the vaccine section. New dose dates must fall after the last scheduled dose and within the next two years.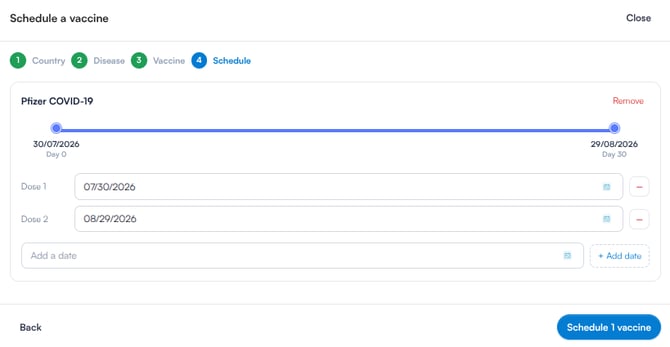
Step 8: Save the Schedule
Once all doses and dates are confirmed, click "Schedule [X] vaccines" in the bottom right corner — the button shows how many vaccines you’re scheduling. The wizard closes and the Vaccine Dashboard updates automatically to reflect the newly scheduled doses.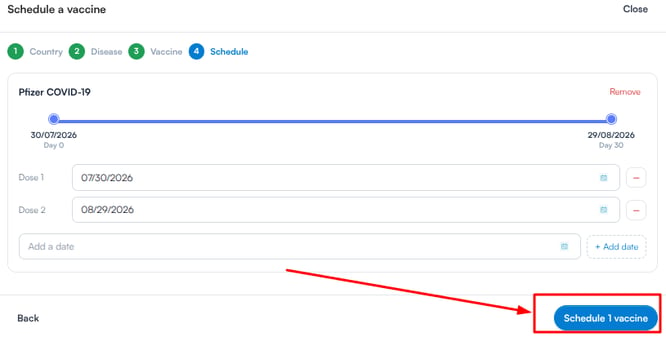
The scheduled doses also appear on the clinic-wide Vaccines page (More → Vaccines in the sidebar), so your team can chase them when they fall due.
What's next?
- How to Administer a Vaccine for a Client (New Client Card)
- Vaccine Dashboard Overview (New Client Card)
- How to Manage Vaccines (New Client Card)
Was this guide helpful? Let us know by voting below - your feedback helps us write clearer articles.
For more guides, browse the related articles below or use the search bar at the top of the page. You can also watch our video learning series, the Pabau Academy, or visit the Support page for additional help.