
When you monitor a mole or lesion, its size matters. The chart editor in a treatment note has a measure tool that records length and width in millimetres. Measure on a client photo that includes a ruler or measuring sticker, or type the values in on a body diagram. Each measurement is kept on the chart with the note.
NOTE: The measure tool is on charts that allow drawing. It's called Measurements, or Mole measurements when the form's name or the linked appointment's service mentions moles.
Step 1: Open the Chart
Open a treatment note that has a chart (for example, from the client card's Create button, choose Treatment note and pick the template).
- Click Edit chart under the chart. The chart editor opens.
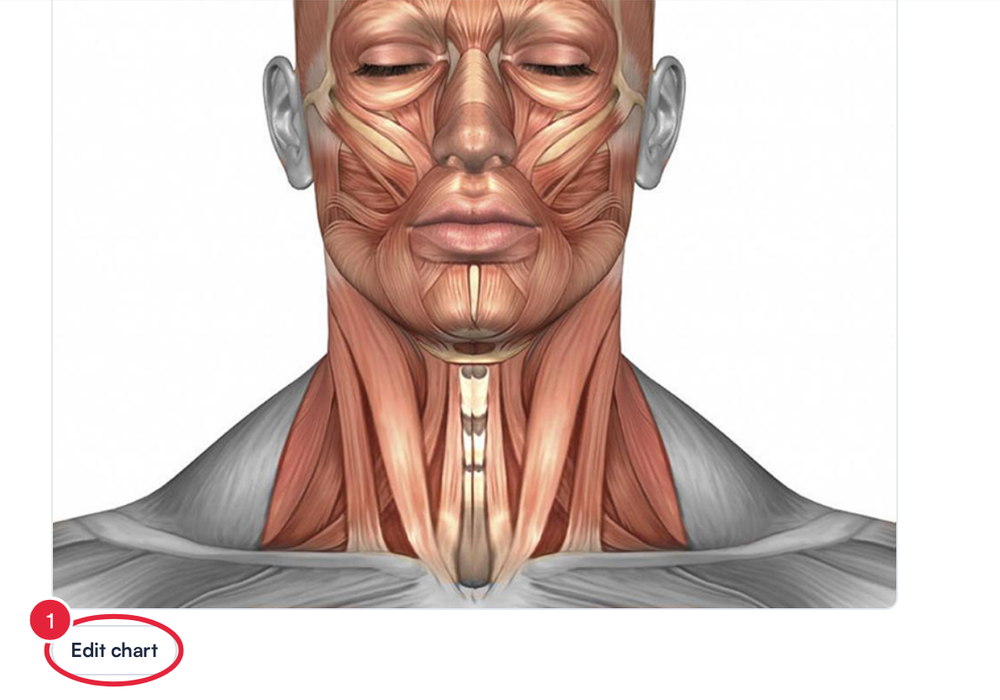
Open the chart editor from the chart field
Step 2: Choose the Measure Tool
- Click the ruler icon in the toolbar at the bottom of the chart.
- The Measurements panel on the right tells you how to measure on this chart and lists every measurement you take.
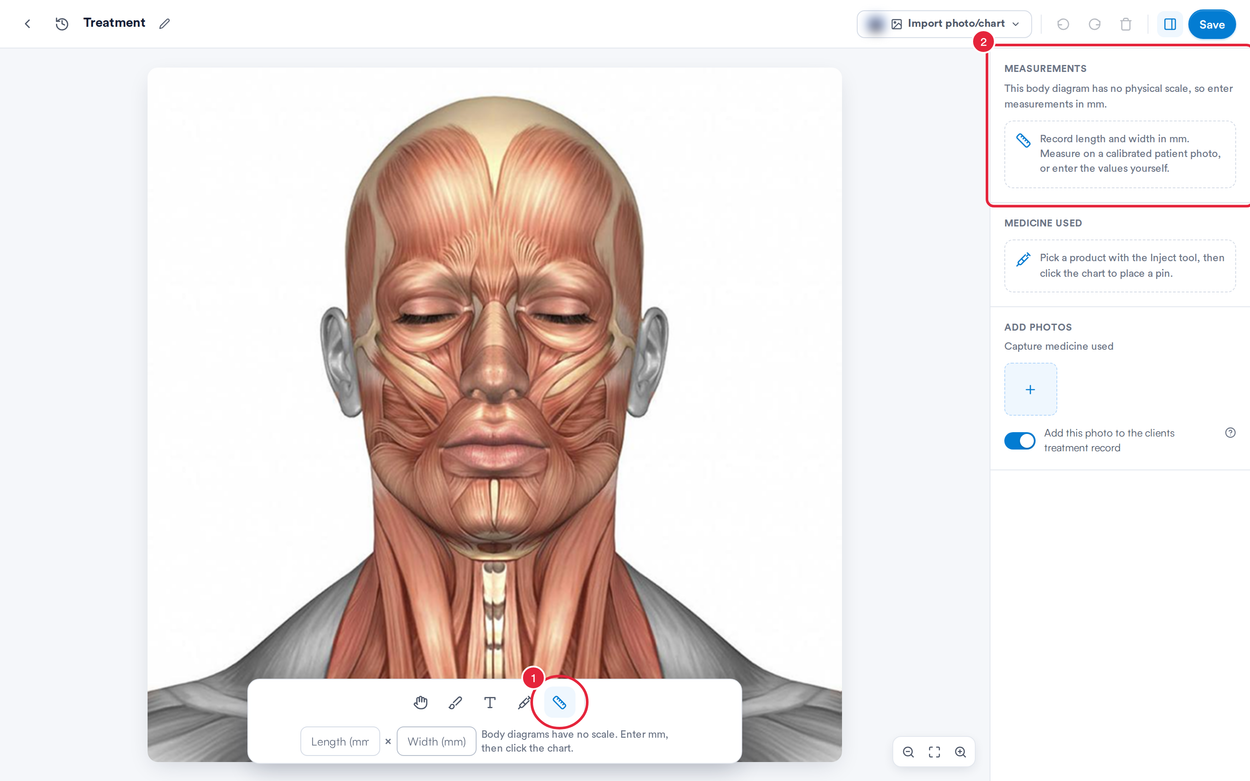
The ruler tool and the Measurements panel
Step 3: Enter a Measurement on a Body Diagram
Body diagrams have no real-world scale, so you type the size yourself.
- Type the Length (mm) and Width (mm).
- Click the spot on the chart. A numbered pin with the size appears there.
- The measurement is added to the list, marked Entered.
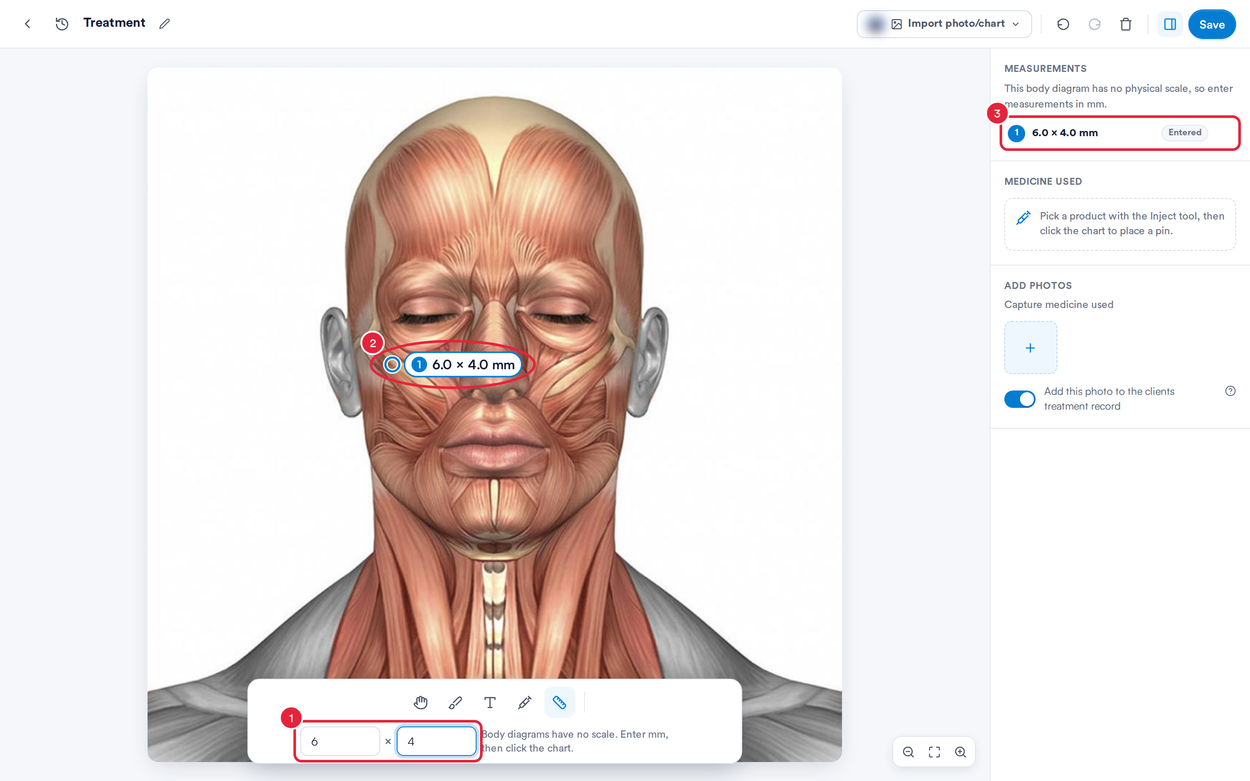
Type the size, then click where it belongs
Step 4: Measure on a Client Photo
For a measurement taken from the lesion itself, put a photo of it on the chart. The photo needs a ruler or measuring sticker in the shot.
- Click Import photo/chart at the top of the editor.
- Open the Gallery tab, which shows the client's photos.
- Click the photo you want to measure.
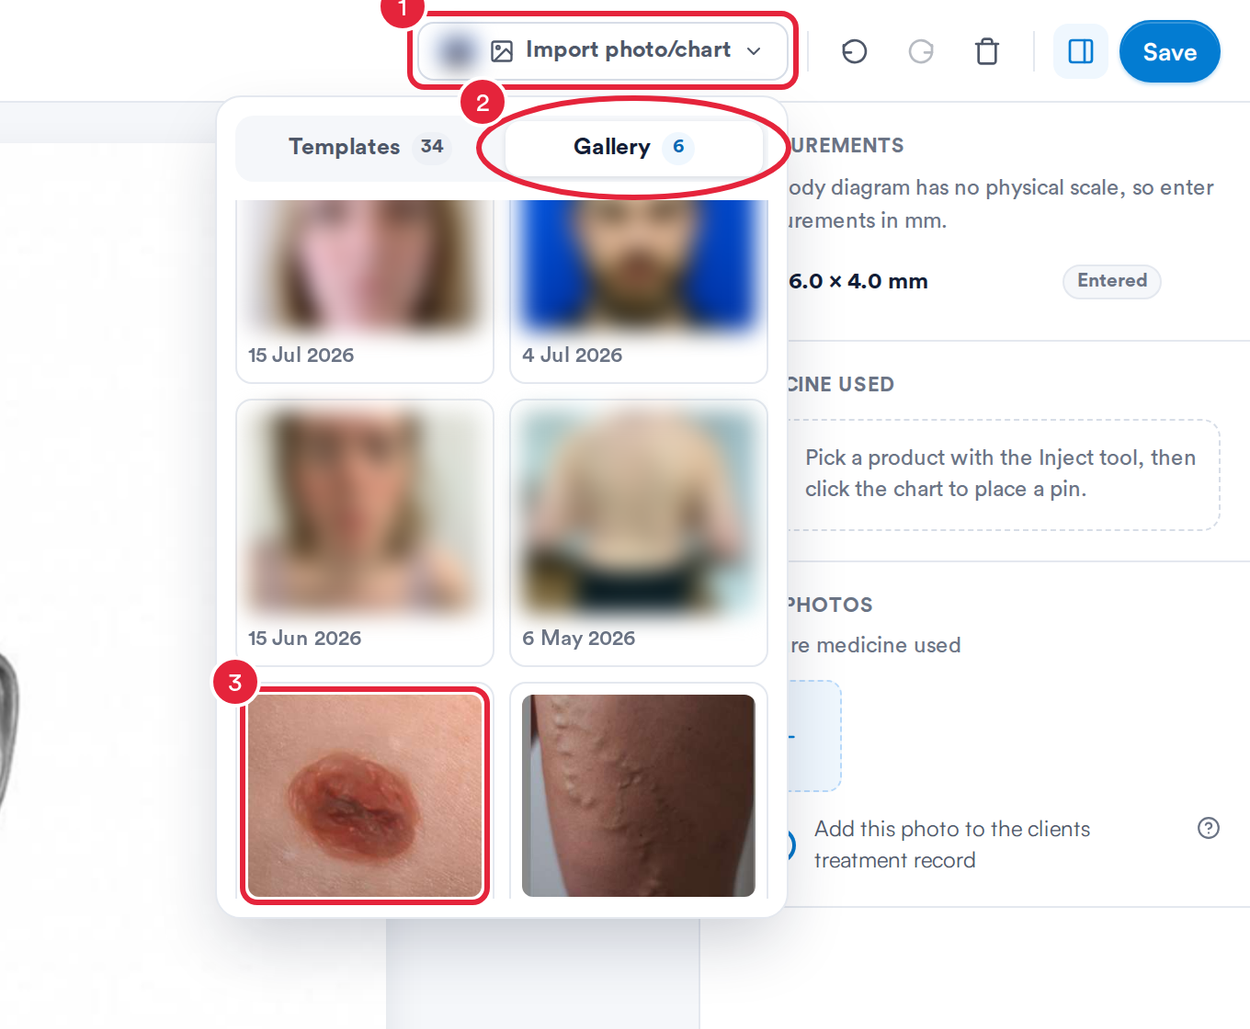
Choose a client photo from the Gallery tab
IMPORTANT: Changing the chart's image clears anything already drawn, pinned or measured on it. Pabau asks you to confirm with Discard changes? first, so choose the photo before you start measuring.
Step 5: Set the Scale
On a photo, Measure from is set to Photo, and the panel reads Not calibrated yet. Pabau needs to know how many millimetres a distance in the photo is.
- Drag along the ruler or sticker in the photo, over a length you know.
- Type that length in Reference (mm).
- Click Set scale. The panel confirms, for example, Scale set from a 10.0 mm reference.
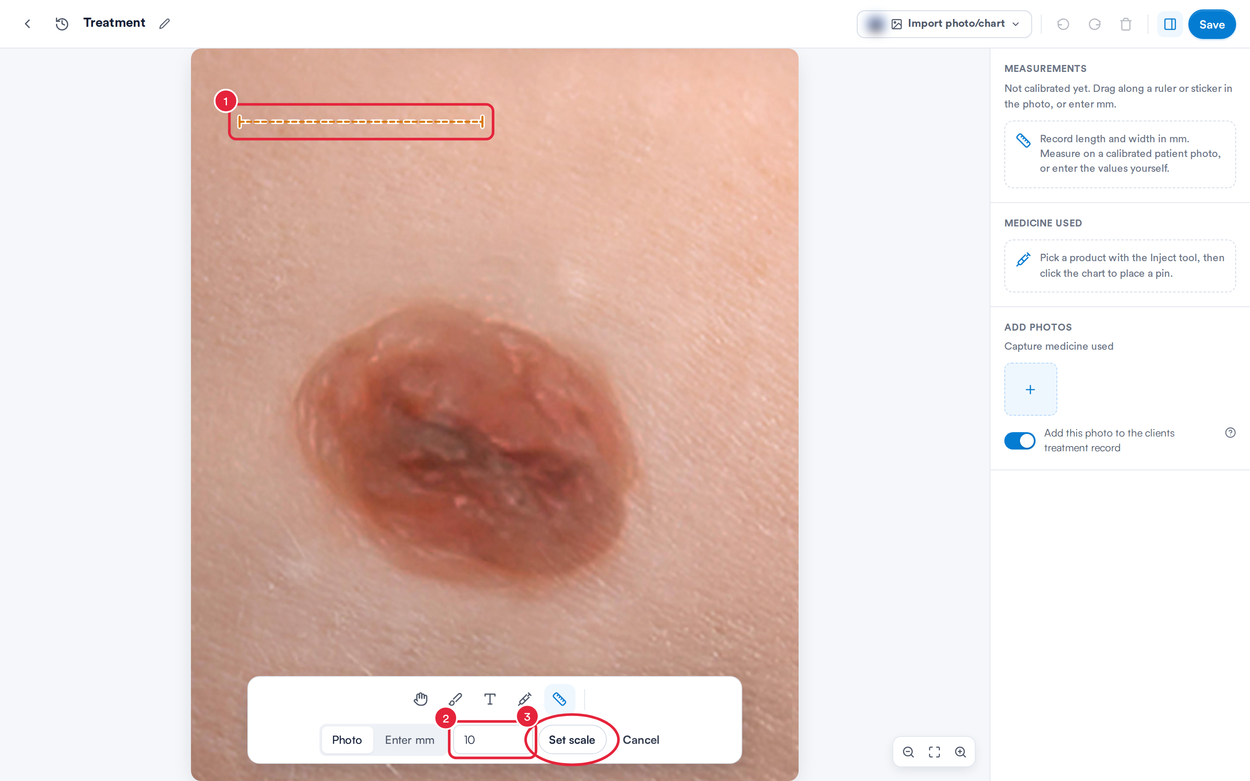
Drag along a known length, enter it in mm and set the scale
Step 6: Measure the Lesion
- Drag along the longest axis of the lesion. When prompted with Now drag across the width, drag across it, or click Skip width to record the length only. The measurement appears on the photo.
- It's added to the list with its size and marked Photo.
- To redo the scale, click the Scale button in the toolbar and drag a new reference.
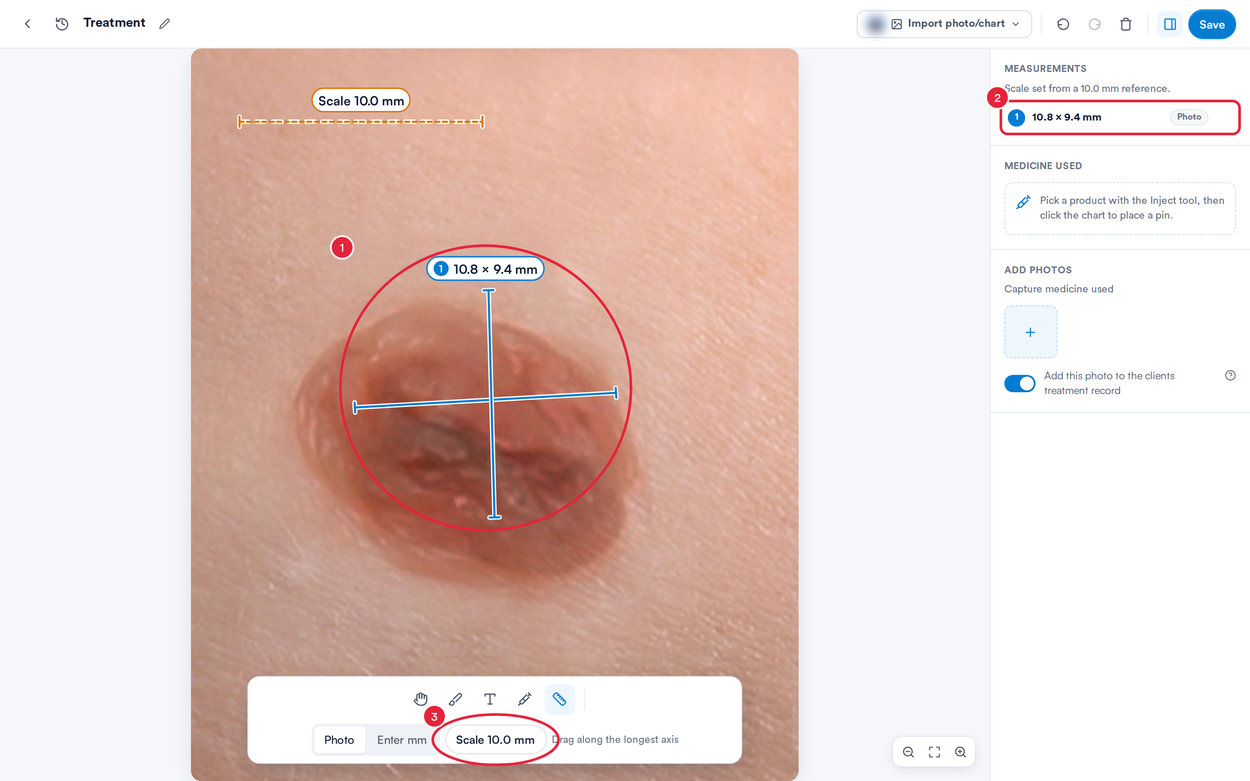
Length and width measured from the calibrated photo
TIP: No ruler in the photo? Switch Measure from to Enter mm and type the size instead, as on a body diagram.
Step 7: Review and Save
To remove a measurement, hover over it in the list and click its X. To correct an entered measurement, click it in the list and change its values in the toolbar. Click Save at the top right of the editor to add the chart to the note, then save the treatment note as usual.
What's next?
- How to Use Medical Components in Pabau
- How to Write a Treatment Note From the Client Card (New Client Card)
- How to Copy Data from a Previous Treatment Note (New Client Card)
Was this guide helpful? Let us know by voting below - your feedback helps us write clearer articles.
For more guides, browse the related articles below or use the search bar at the top of the page. You can also watch our video learning series, the Pabau Academy, or visit the Support page for additional help.