
NOTE: The redesigned Home page and sidebar are being rolled out gradually. If your Pabau looks different from the screenshots below, your clinic has not been moved across yet - your existing Home page and menu continue to work exactly as before.
NOTE: Your sidebar arrangement is personal to you. Changing it affects only your own login - it does not change what your colleagues see, and there is no clinic-wide sidebar layout that an administrator can set on everyone’s behalf.
Step 1: Open the Customize Dialog
In the sidebar, click More, then click Customize at the foot of the panel that opens. The Customize your sidebar dialog appears.
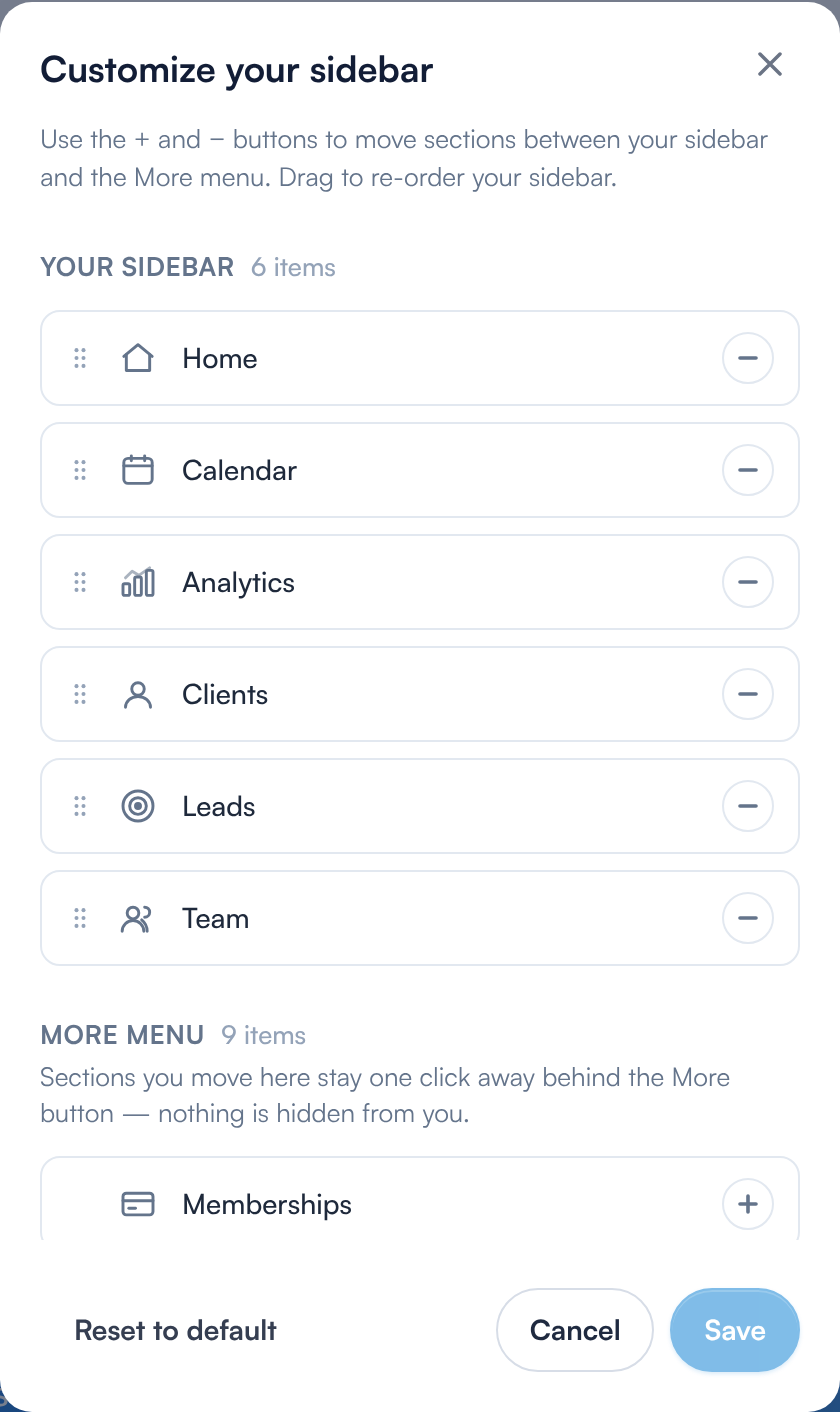
Customize your sidebar: Your sidebar and the More menu
The Customize your sidebar dialog, showing Your sidebar and More menu side by side
The dialog explains its own controls at the top: “Use the + and − buttons to move sections between your sidebar and the More menu. Drag to re-order your sidebar.” It is split into two lists — Your sidebar and More menu — each showing how many items it holds.
Step 2: Reorder Your Sidebar
Drag any section in the Your sidebar list to a new position. The order you set here is the order the sections appear in on the rail, from top to bottom. Put the areas you use every day at the top, where they are quickest to reach.
Step 3: Move a Section into the More Menu
Click the − button next to any section in Your sidebar to move it into the More menu list. This is the right choice for areas you use occasionally rather than daily.
NOTE: Moving a section into the More menu does not switch it off or hide it from you. As the dialog puts it: “Sections you move here stay one click away behind the More button — nothing is hidden from you.” If a section carries a badge count, that count is added to the badge on the More button.
Step 4: Move a Section Back to the Sidebar
Click the + button next to any section in the More menu list to promote it back onto the sidebar. It is added to the bottom of your sidebar list, and you can then drag it wherever you want it.
If you have moved nothing into the More menu, that list shows “Nothing here yet. Use − above to move a section into the More menu.”
Step 5: Save Your Changes
Click Save. Your changes are staged while the dialog is open, which is why the sidebar behind it does not shift as you work — everything is applied together when you save. Click Cancel to discard the lot and leave your sidebar as it was.
Resetting to the default order
Click Reset to default in the dialog to clear your personal arrangement and return the sidebar to the standard order described in Getting Started with the Pabau Sidebar.
IMPORTANT: Reset to default restores the order of your sidebar only. It deliberately leaves your clinic’s enabled features alone, because those are clinic-wide settings and reverting them would affect everyone. See Managing Clinic Features from the Sidebar.
What happens when you gain access to a new section?
If you are given access to an area of Pabau you did not previously have — through a new permission, or because your clinic has switched a feature on — that section is added to your sidebar automatically. You do not need to open this dialog again or re-save your layout to see it.
What’s next?
Questions? Reach us any time via the in-app chat — we’re happy to help.
Was this guide helpful? Let us know by voting below - your feedback helps us write clearer articles.
For more guides, browse the related articles below or use the search bar at the top of the page. You can also watch our video learning series, the Pabau Academy, or visit the Support page for additional help.