
Zapier links Pabau to thousands of other apps without any code. Use it to add leads from a Facebook lead ad straight into Pabau, copy new clients into a Google Sheet, post new bookings to a Slack channel, or anything else you can build as a Zap. This guide shows you how to switch on the integration in Pabau, connect it in Zapier, and what Pabau can do inside a Zap.
NOTE: Zapier is a separate service with its own plans, so you need a Zapier account. To switch on the integration in Pabau, you need access to the Setup page.
Step 1: Open Zapier in the App Marketplace
- Go to Setup ▸ Integrations ▸ App Marketplace and type Zapier in Search for an app.
- Click the Zapier card. The Connect Pabau to Zapier page opens.
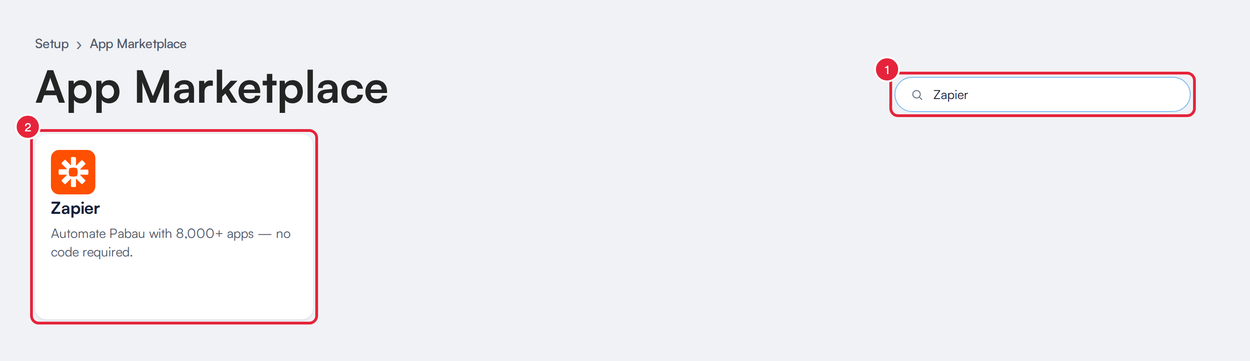
Find Zapier in the App Marketplace
Step 2: Enable the Zapier Integration
- Click Enable Zapier integration.
Pabau creates an API key just for Zapier, named Zapier, and shows its credentials on the same page. You only need to do this once: the next time you open the page, your credentials are already there.
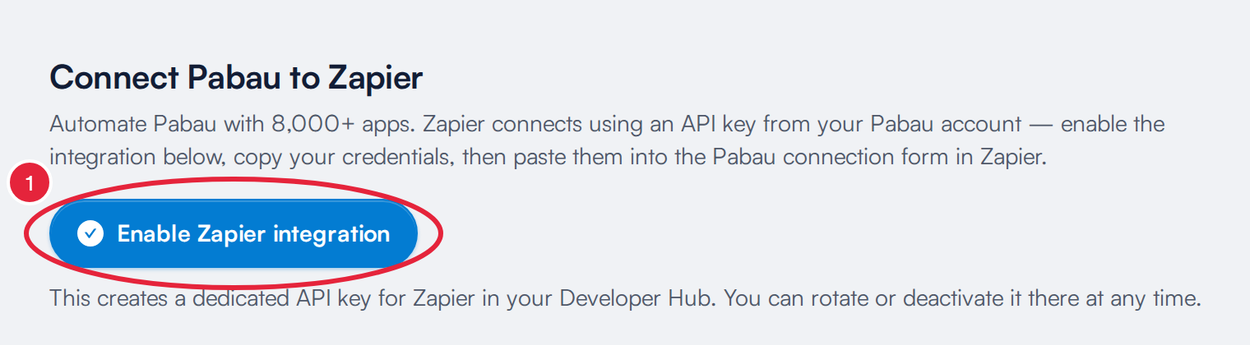
One click creates a dedicated API key for Zapier
Step 3: Copy Your Client ID and Secret Key
Zapier asks for two credentials. Keep this page open while you connect.
- Click Copy next to Client ID.
- The Secret Key is hidden. Click Show if you need to see it.
- Click Copy next to Secret Key.
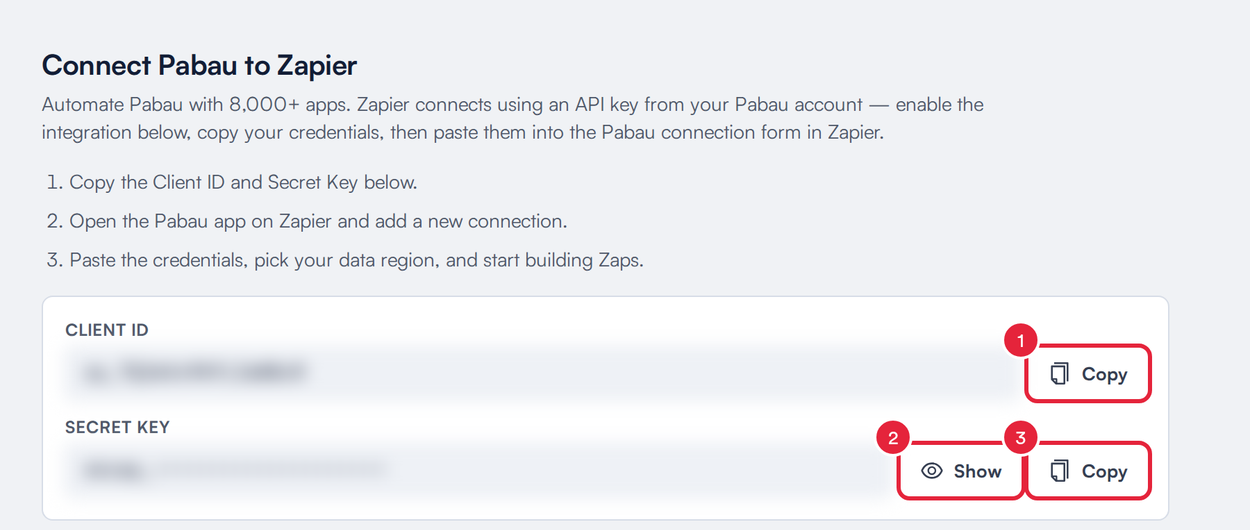
Copy both credentials (values blurred here)
WARNING: The Client ID and Secret Key give Zapier access to your clinic’s data, including client records. Paste them only into Zapier, and never send them by email or chat.
Step 4: Connect Pabau in Zapier
- Click Open Pabau on Zapier. Zapier opens in a new tab, where you can add the Pabau app to your Zapier account. Sign in to Zapier first if it asks you to.
- In Zapier, add a new Pabau connection. Zapier asks for this the first time you choose Pabau in a Zap.
- Paste the Client ID and Secret Key you copied.
- Choose your Data Region: United Kingdom, Europe, United States, Australia or Singapore. Pick the region your Pabau account is hosted in. If you’re not sure, message us via the in-app chat.
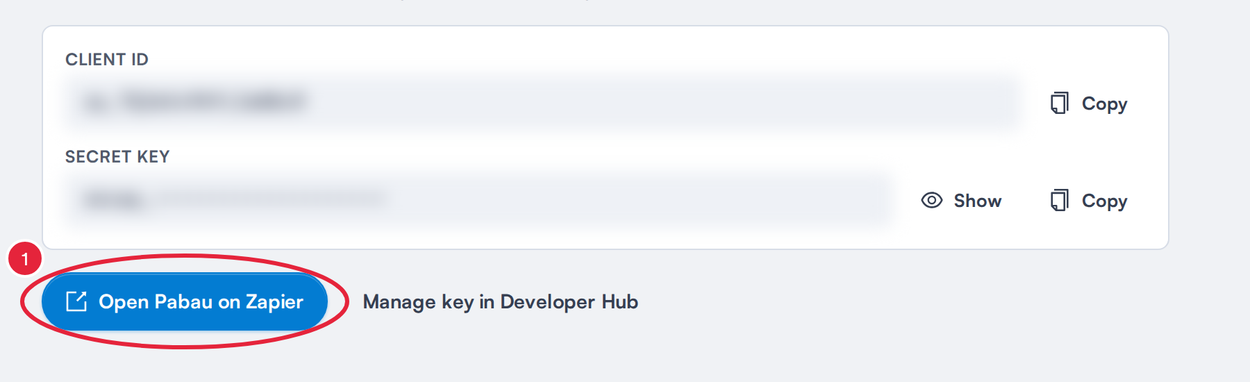
Open the Pabau app on Zapier
Zapier checks the details with Pabau. When they’re right, the connection is saved under your clinic’s name and region, for example “Bright Skin Clinic (uk)”, and you can start building Zaps.
Step 5: Start a Zap From Something That Happens in Pabau
A trigger is the event that starts a Zap. Pick Pabau as the trigger app, then choose one of these events:
| Area | Triggers |
|---|---|
| Clients | New Client, Updated Client |
| Leads | New Lead, Updated Lead, Lead Won, Lead Lost |
| Appointments | New Appointment, Updated Appointment, Canceled Appointment, Rescheduled Appointment |
| Sales and payments | New Sale (with every item, payment, the client and who made the sale), New Payment, Refunded Payment |
| Staff shifts | New Shift, Updated Shift, Deleted Shift |
These are instant triggers: Pabau tells Zapier as soon as the event happens, rather than Zapier checking on a schedule. When you test a trigger in Zapier, it shows a few of your recent records so you can map their fields.
Step 6: Send Data Into Pabau With Actions and Searches
An action is what a Zap does. Pick Pabau as the action app to:
- Create Lead: adds a lead to your leads pipeline. You can set its Lead Source and Pipeline Stage.
- Create or Update Client: adds a client, or updates the existing client when the Email already belongs to one, so you don’t get duplicates.
- Create Appointment: books an appointment for a client with a service, staff member and location. The client gets a confirmation only if you tick Send Confirmation Email or Send Confirmation SMS.
- Add Note to Client and Add Note to Lead.
- Add Alert to Client: adds an alert of up to 150 characters to the client card. Tick Critical to make it pop up before booking or charting.
- Log Communication: records an email, SMS, letter, WhatsApp message or phone call on a client’s or lead’s timeline. It only logs the communication. Nothing is sent.
Two searches, Find Client and Find Lead, look someone up by email (the most reliable match) or by name, so a later step can add a note or book an appointment for them.
TIP: Create Lead, Create or Update Client and Create Appointment also fill your custom fields. In Custom Fields, enter each field’s name exactly as it appears in Pabau, with its value. Leads and clients also take Labels: pick existing labels, or type a new name and Pabau creates the label.
Step 7: Pause or Stop Zapier’s Access
To stop a single Zap, turn it off in Zapier. Pabau stops sending that Zap its trigger events. To cut off Zapier’s access to Pabau altogether, use the API key you created in Step 2:
- On the Zapier page, click Manage key in Developer Hub. This opens APIs & Webhooks, where the key is listed as Zapier.
- Click Edit on the key, open its Auth tab and click Deactivate key. While it’s deactivated, Pabau rejects every request Zapier makes, so Pabau actions and searches in your Zaps fail, and the Zapier page shows a warning. Click Reactivate key when you want them to work again.
- If the Secret Key may have been shared with the wrong person, click Rotate key instead. The old Secret Key stops working straight away. Copy the new one from the Zapier page and update your Pabau connection in Zapier.
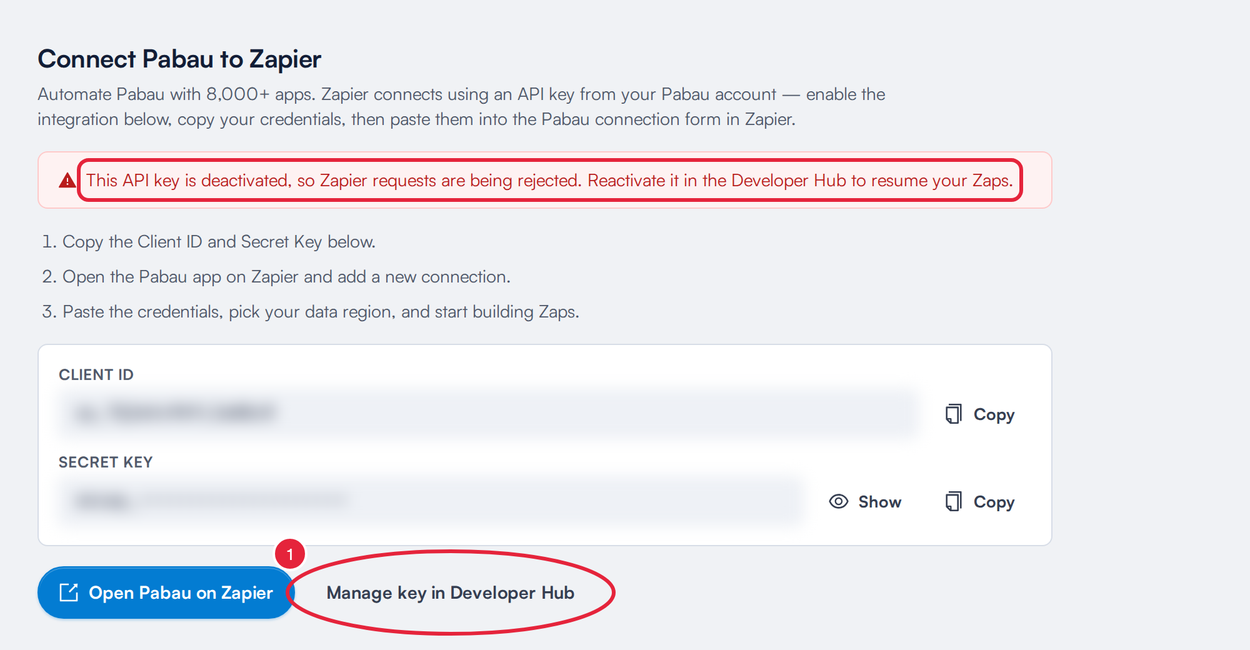
While the key is deactivated, Pabau rejects Zapier’s requests
The key’s Logs tab lists every request Zapier has made to Pabau, which helps when a Zap isn’t doing what you expect. See How to Find Your API Key for deactivating, rotating and reading the logs step by step.
What's next?
Was this guide helpful? Let us know by voting below - your feedback helps us write clearer articles.
For more guides, browse the related articles below or use the search bar at the top of the page. You can also watch our video learning series, the Pabau Academy, or visit the Support page for additional help.