
This article covers the new Client Card, available to selected clinics from August 2026. If your Client Card looks different, see the How to Configure the Summary View in Client Card (Classic) guide instead.
The Summary section highlights the most important information for each client as a grid of widgets. You can rearrange the widgets to suit how you work, and admins can configure which data feeds them.
Step 1: Navigate to the Client Card
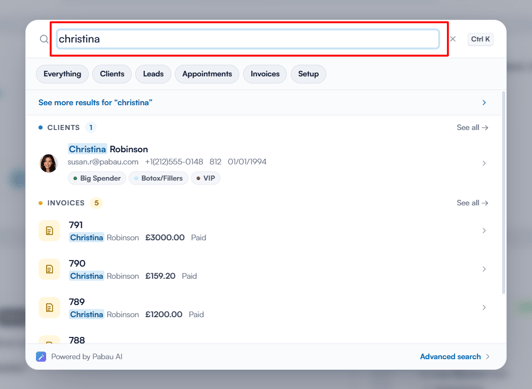
Open any client card by using the search bar at the top of the screen.
Step 2: Access the Summary Controls
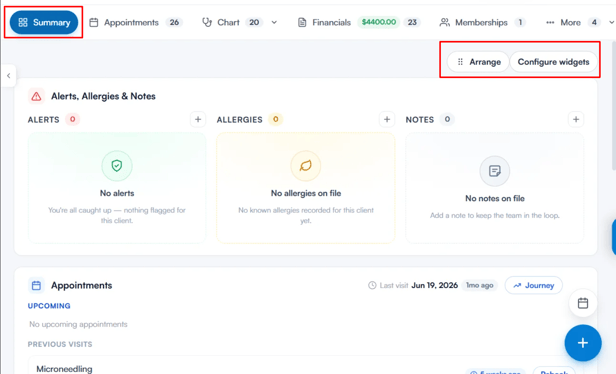
Hover over the Summary to reveal the Arrange and Configure widgets buttons in the top-right corner.
NOTE: Arrange is available to everyone and only changes your own view — your layout follows your login. Configure widgets changes what data the widgets show for your whole clinic, so it’s only available to admin users.
Step 3: Arrange Widgets
Click Arrange to reorder your widgets and choose which ones are visible. In this mode:
- Use the drag handle on each widget to move it to a new position.
- Use the eye icon on each widget to show or hide it. Hidden widgets stay in the grid (dimmed) while you’re arranging, so you can bring them back at any time.
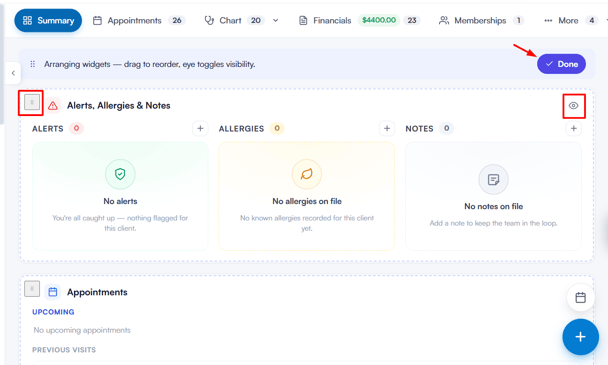
Click Done in the banner at the top of the Summary once you’re finished.
Step 4: Configure Widgets
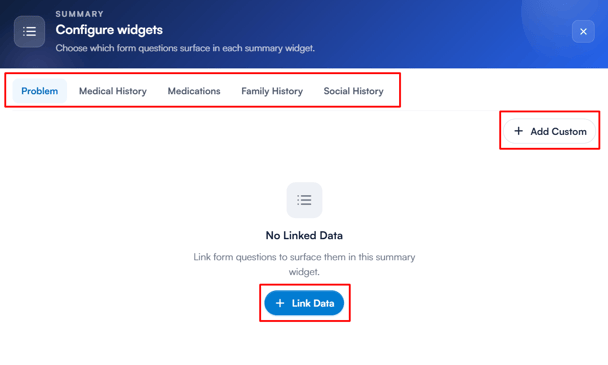
Click Configure widgets to link medical form data to a widget or create a custom one.
- Select a widget tab (Problem, Medical History, Medications, Family History, or Social History).
- Click Link Data (or Add Field if data is already linked) to open the Add Field window. Search for a question, or expand a form to browse its questions, tick the ones you want, then click Add.
- Once questions are linked, drag them into your preferred order, switch on Show question names to display each question’s name alongside its answer, or click Clear to remove the mapping — then click Save.
- Click Add Custom to create a new widget: enter a widget name, click Create, then link data to it in the same way. A custom widget can be removed later with Delete Widget.
NOTE: Custom widgets are a Care Plus feature. Without Care Plus, the Add Custom button prompts you to upgrade.
NOTE: We suggest reading our Clients article for a more in-depth exploration of this topic.
Was this guide helpful? Let us know by voting below - your feedback helps us write clearer articles.
For more guides, browse the related articles below or use the search bar at the top of the page. You can also watch our video learning series, the Pabau Academy, or visit the Support page for additional help.