
NOTE: This feature is being rolled out to clinics gradually. If you don't see it in your account yet, message us via the in-app chat.
IMPORTANT: Card themes apply to everyone in your clinic, so only admins and owners can change them. Other staff can open Calendar Settings and see the current choices, but the options are locked, with the message "Only an admin can change workspace calendar settings."
Step 1: Open Calendar Settings
In the calendar, click the gear icon (Calendar settings) in the bar at the top, just left of Day, Week and Month. The Calendar Settings window opens on the General tab. Scroll to Appointment card theme.

The gear icon opens Calendar Settings
Step 2: Choose a Theme for Appointments
Under Appointment card theme, make sure Appointments is selected in the switch on the right, then click Pastel, Bold or Minimal. Each option shows a small preview of the calendar, and the selected one has a tick.
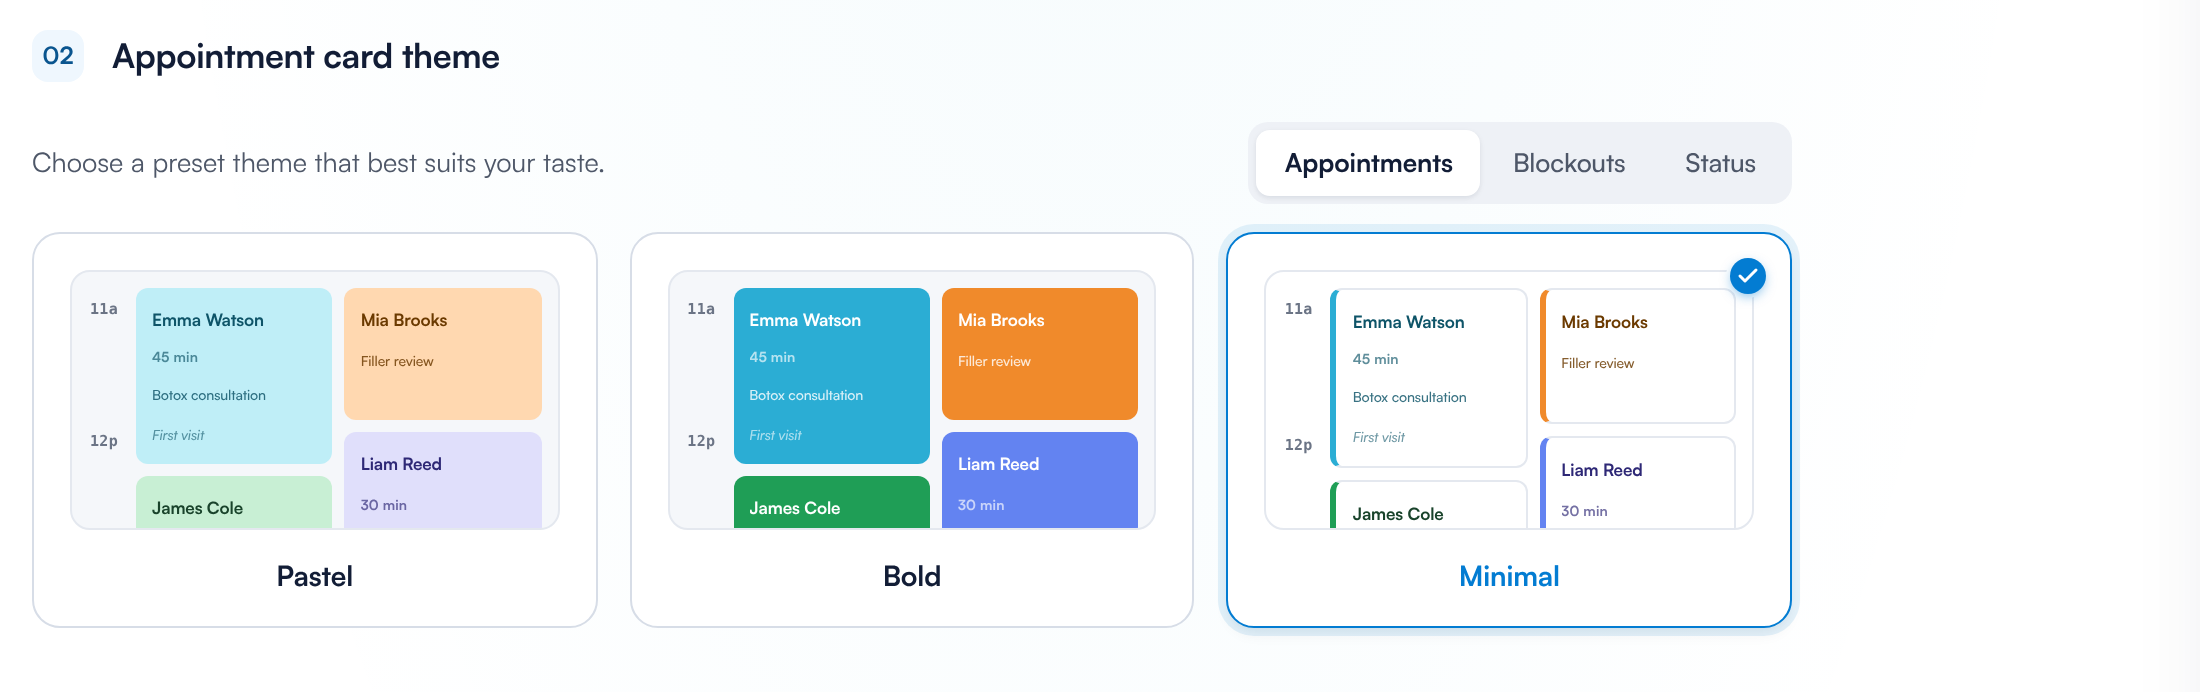
Pastel, Bold and Minimal themes for appointment cards
Step 3: Choose a Theme for Blockouts
Click Blockouts in the switch. The same three themes appear, this time for blockout and unavailable blocks such as lunch, meetings and training. Pick the one you want. Blockouts can use a different theme from appointments.
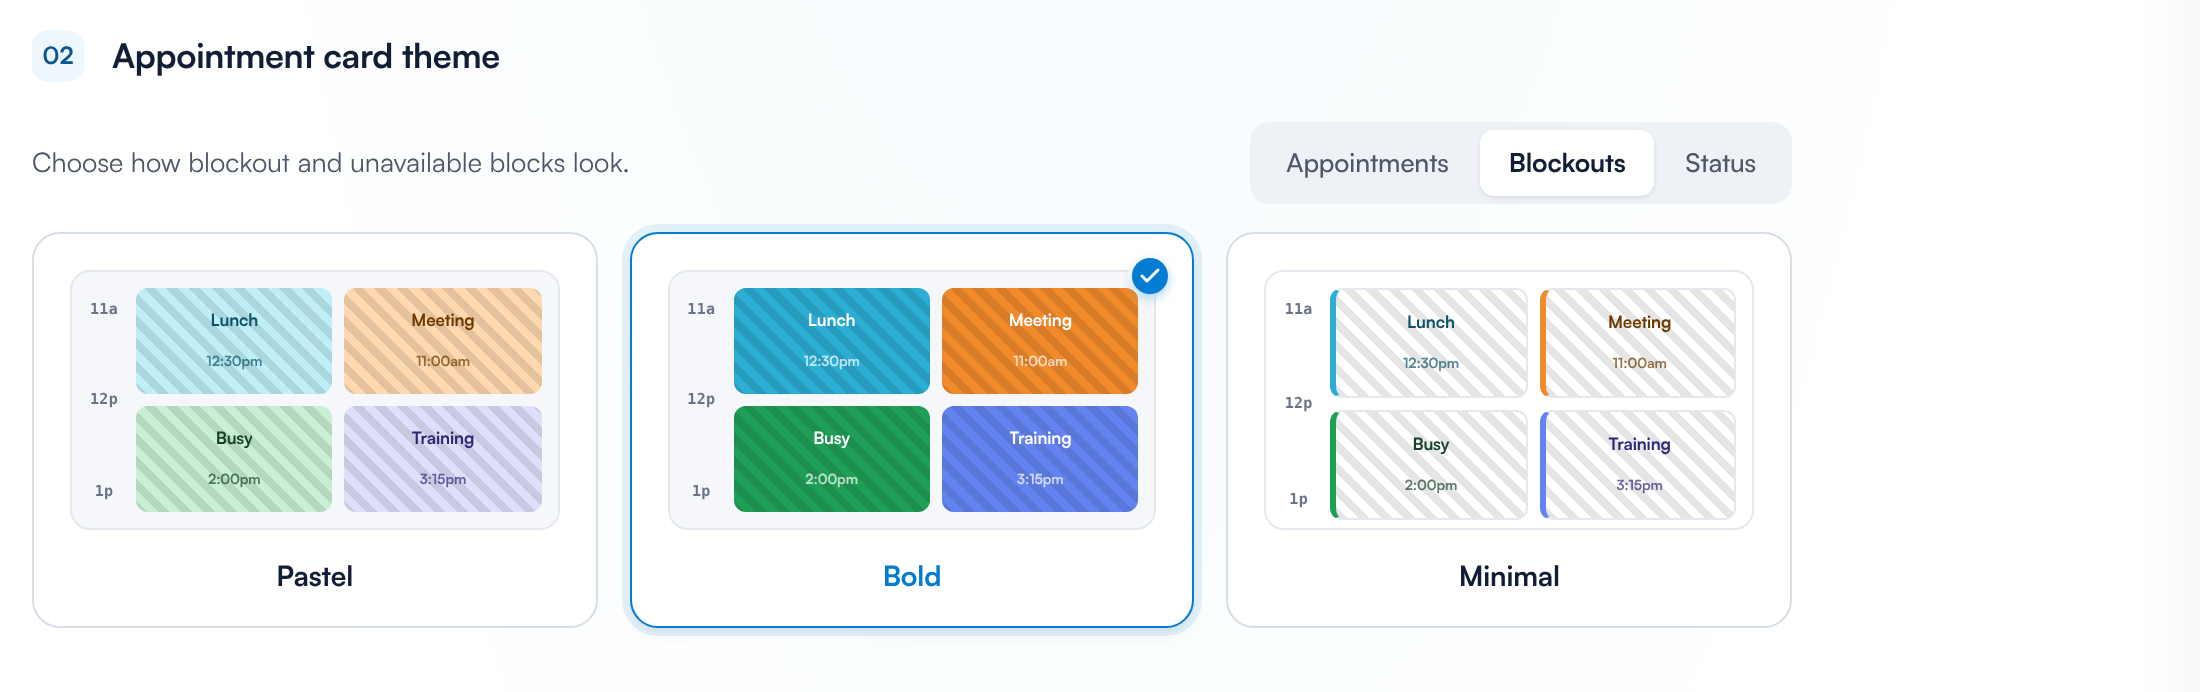
Blockouts have their own theme
Step 4: Choose How Completed and Arrived Appointments Look
- Click Status in the switch.
- Under Complete, choose how a completed appointment looks: Transparent (Card fades to 40%), Strike-through (Diagonal lines) or Grey (Card turns grey).
- If you choose Strike-through, pick a Line colour. Click one of the six colours, or click the rainbow circle at the end to choose any colour you like. Red is the default.
- Under Arrived, choose how an appointment looks once the client has arrived: Green ring (Inset border), Green fill (Card wash) or Accent bar (Left edge).
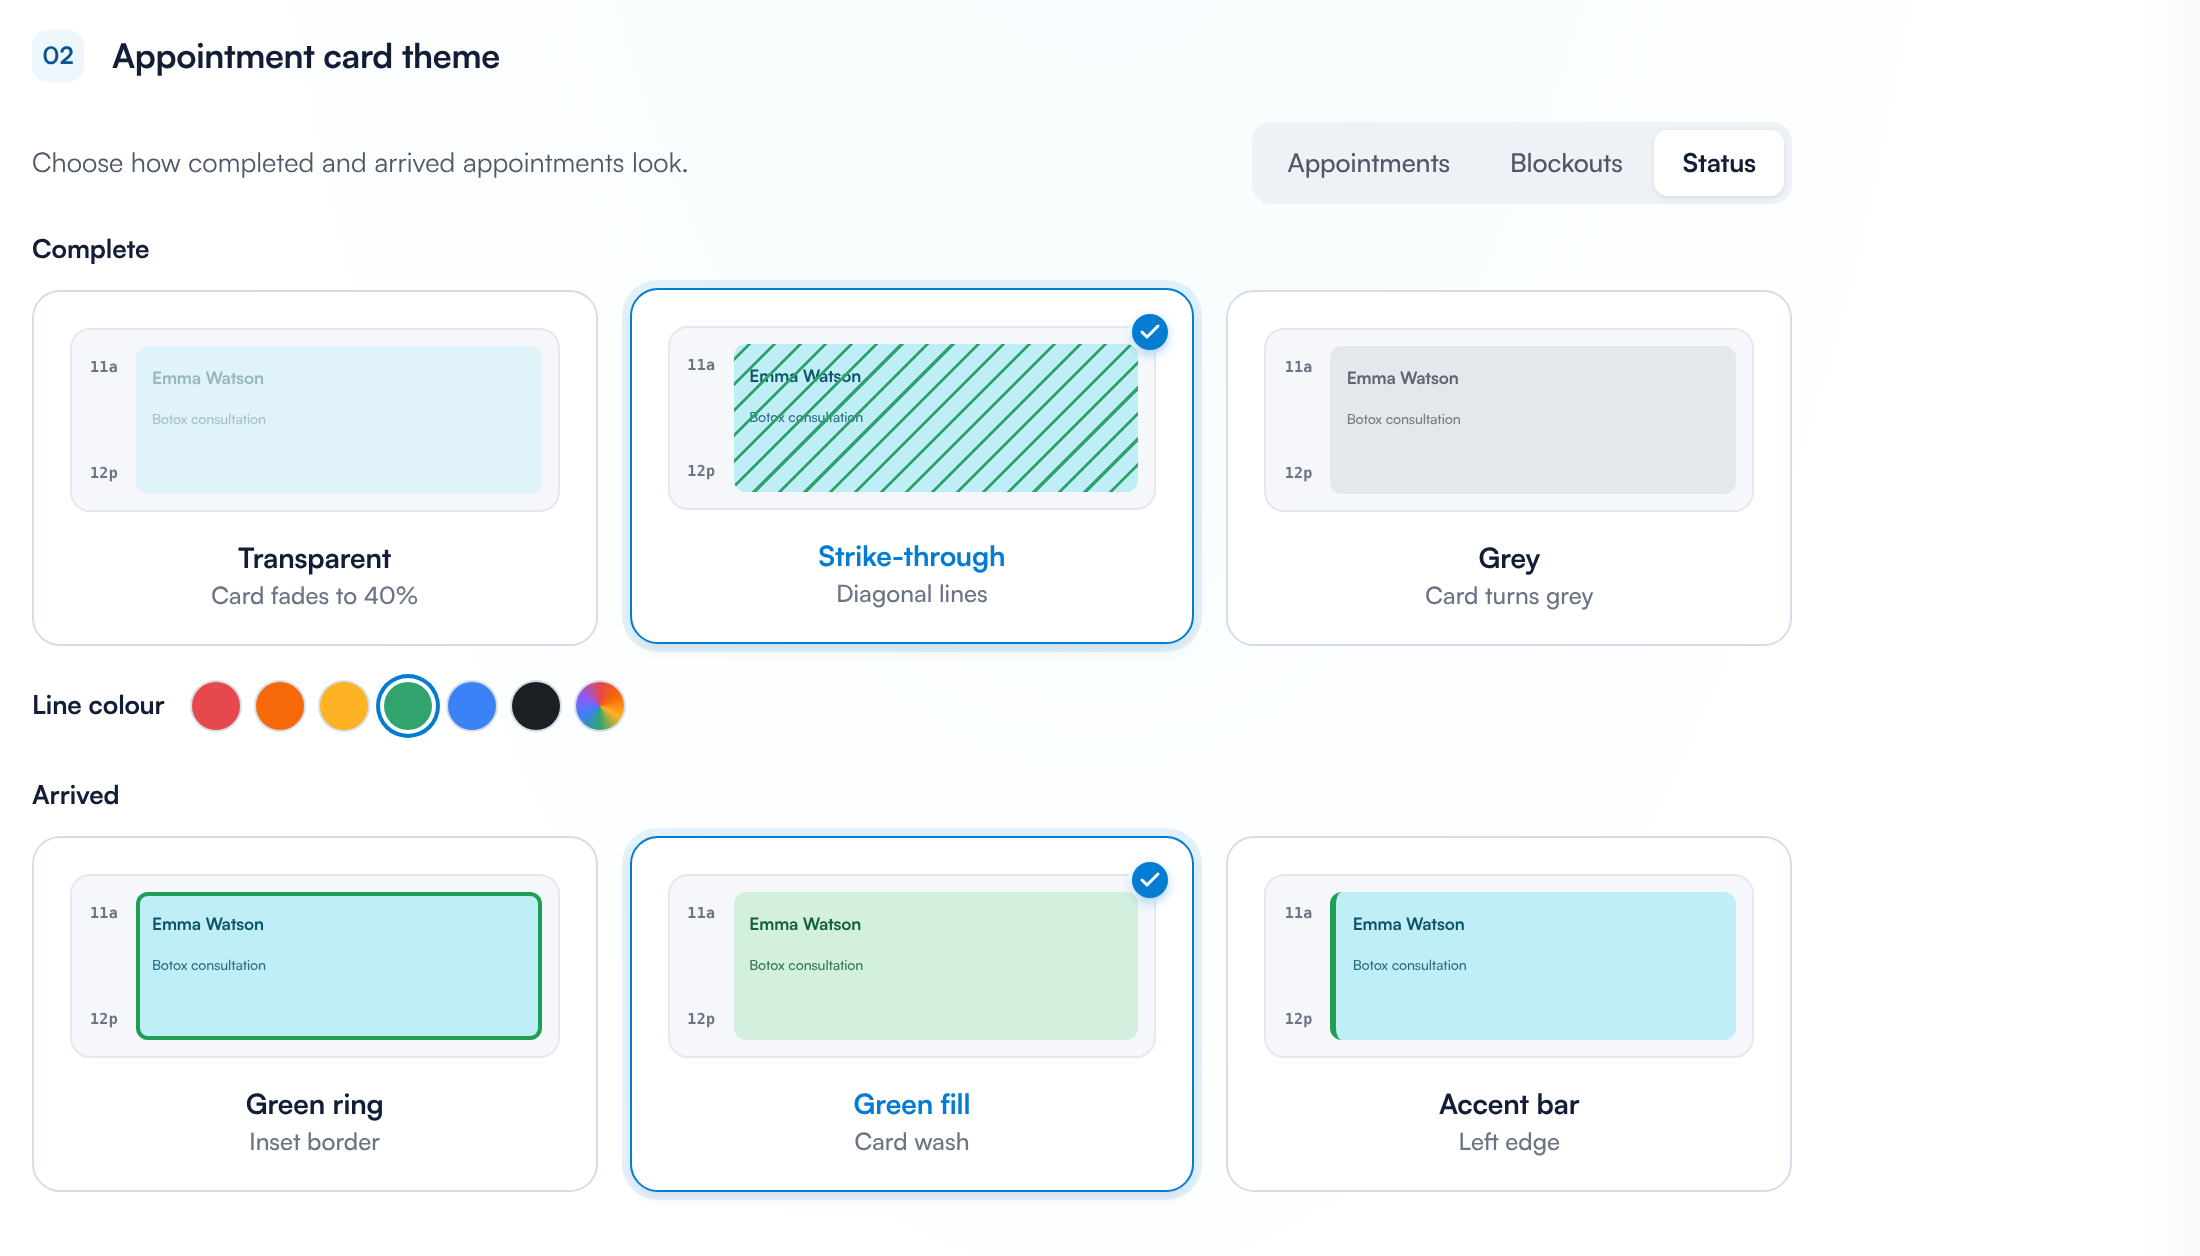
Line colour appears when Strike-through is selected
The defaults are Pastel for appointments and blockouts, Transparent for completed appointments and Green ring for arrived ones.
Step 5: Save Your Changes
Click Save changes at the bottom right. You'll see Settings saved. To close without saving, click Cancel. You only need to save once, even if you changed several tabs.
Who do these settings apply to?
The appointment theme, the blockout theme and the status styles are shared by everyone at your clinic. When an admin changes them, every member of staff sees the new look. The card theme also colours the previews on the Appearance and Configuration tabs.
What's next?
The complete set of Calendar Settings guides starts at How to Configure the New Calendar Settings. Related guides:
- How to Choose What Appointment Cards and Tooltips Show
- How to Customise Staff Column Headers and the Capacity Indicator
- How to Change Your Calendar Zoom and Month Layout
- How to Find Your Way Around the New Calendar
Was this guide helpful? Let us know by voting below - your feedback helps us write clearer articles.
For more guides, browse the related articles below or use the search bar at the top of the page. You can also watch our video learning series, the Pabau Academy, or visit the Support page for additional help.