
NOTE: Before you start, the insurer must be set up and linked to the client, and the insurer's price list must be in place. See Insurance Guide Part 3: Connect appointments to insurance.
Step 1: Open the checkout
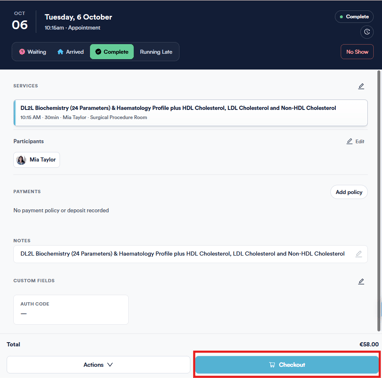
Open the client's appointment and click Checkout, or open the Point of Sale from the client card. The services from the appointment are added to the cart.
Step 2: Choose who is being charged
In the cart, find the Charge row. If the appointment was booked under an insurer, it is selected for you. To change it, click the row and pick the insurer from the Charge to list ("Who is being billed for this sale."). Insurers are shown with their name, and PRIMARY or SECONDARY where a client has more than one.
When an insurer is selected, the cart header shows the insurer's logo and Re: [client name].
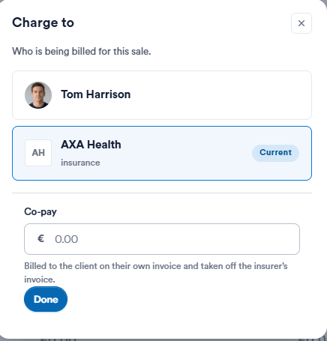
NOTE: Only insurers linked to the client appear in Charge to. To bill the client instead, choose Self-pay, or click Switch to self paid in the header.
Step 3: Check the prices
When you choose an insurer, its Price list is applied to the cart automatically and the service prices update to the insurer's rates. If some services are not covered by the price list, Pabau asks whether to keep those items at their normal price or re-price them.
Where this comes from: the price list is the one mapped to the insurer in your insurance setup. You can pick a different one from the Price list row if needed.
Step 4: Add the client's User Fee (optional)
If the client pays part of the cost, click Add User Fee in the totals and enter the amount. This amount is billed to the client on a separate invoice and deducted from the insurer total. The totals then show Insurer total and Client total.
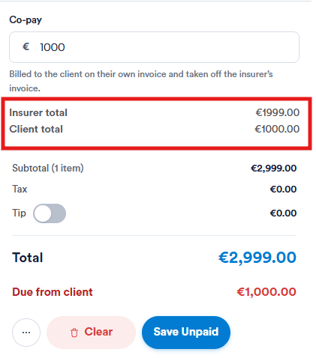
NOTE: If the insurer has a default User Fee in the client’s insurance settings, it is filled in for you. Remove any staged payments before changing the User Fee.
IMPORTANT: Package sessions can’t be used when an insurer is selected, and with a User Fee the client’s share must be paid with a payment method, not prepaid credit.
Step 5: Complete the sale
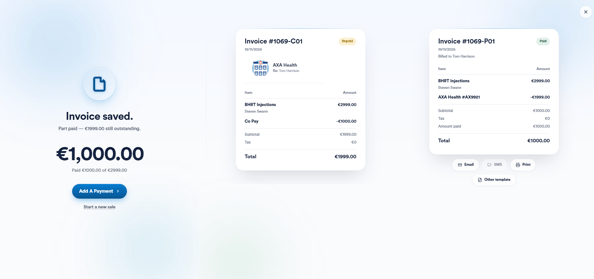
Take the client's User Fee payment, if there is one, and complete the sale. The completion screen shows two invoices: one for the insurer and one for the client.
Step 6: Send the claim to Healthcode
The Healthcode button appears only if your clinic has Healthcode connected (Setup → Claims → Healthcode) and the invoice is charged to an insurer. Insurers that aren't on Healthcode can't be claimed electronically. Email the invoice to the insurer from the claim screen instead.
To follow the claim after it is sent, see Insurance Guide Part 4: Submit and track insurance claims.
Was this guide helpful? Let us know by voting below - your feedback helps us write clearer articles.
For more guides, browse the related articles below or use the search bar at the top of the page. You can also watch our video learning series, the Pabau Academy, or visit the Support page for additional help.