
Table of Contents:
What Is Emirates ID Scanning
The Emirates ID is the national identity card every UAE resident carries. Instead of typing a new client's details by hand, your team can take or upload a photo of the card, and Pabau fills in the New Client form for you. This speeds up registration at the front desk and reduces typing mistakes. For clinics in Dubai, it also helps you capture the Emirates ID number accurately, which NABIDH requires for every resident patient.
NOTE: Emirates ID scanning is only available to clinics whose business country is set to United Arab Emirates. If you don't see the “Emirates ID” button, check your country in Business Details.
What the Scan Fills In:
The scan reads the printed details on the front or back of the card:
| Shown on the card | Where it goes in Pabau |
|---|---|
| First name | First Name (always) |
| Last name | Last Name (always) |
| Sex | Gender (always) |
| Date of birth | Date of Birth (always) |
| ID number (784-YYYY-NNNNNNN-C) | Custom field with "Emirates ID" in its name (only if set up) |
| Nationality | Custom field with "Nationality" in its name (only if set up) |
| Expiry date | Custom field with "Emirates ID expiry" in its name (only if set up) |
NOTE: Pabau has no standard fields for the Emirates ID number, nationality, or expiry date. If the matching custom fields aren't set up, these values are not saved, and no message will warn you. The card's document number is never saved.
How to Set Up the Emirates ID Custom Fields
An admin needs to complete this setup once, before your team starts scanning.
NOTE: If your account was created in the UAE, the Emirates ID and Nationality client custom fields already exist, so you only need to create Emirates ID expiry. If you use NABIDH, you can also create the fields directly from the NABIDH mapping screen, as explained in NABIDH Guide Part 3: Map Your Data for NABIDH.
Step 1: Navigate to Fields
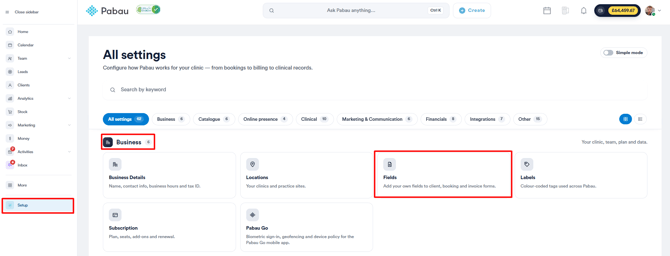
Log in to your Pabau account and click on Setup in the left sidebar menu. Under the Business section, click on Fields.
Step 2: Create the Custom Fields
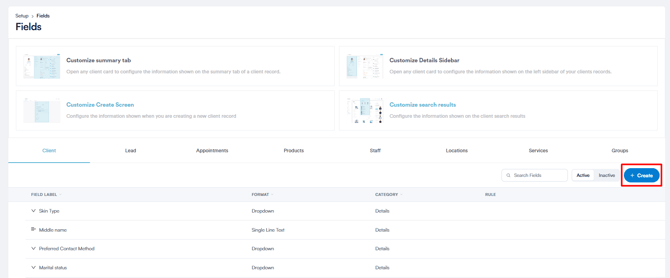
Click on the “Create” button in the top right corner of the screen and choose Client as the category.
Create a field for each value you want to save:
- Emirates ID (Text)
- Nationality (Dropdown)
- Emirates ID expiry (Date)
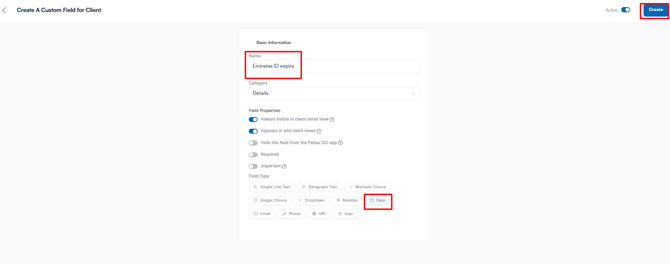
To learn more about the field settings, read this article.
TIP: Pabau matches fields by name and ignores capital letters, so names like "Emirates ID Number" or "Client Nationality" also work. Keep the words "Emirates ID expiry" together in the expiry field's name, and don't use the word "expiry" in the ID number field's name, so each value goes to the right field.
Step 3: Add the Fields to the Client Creation Form
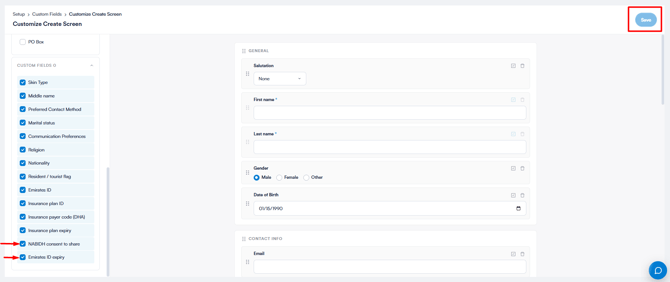
On the Fields page, click on “Customize Create Screen”.
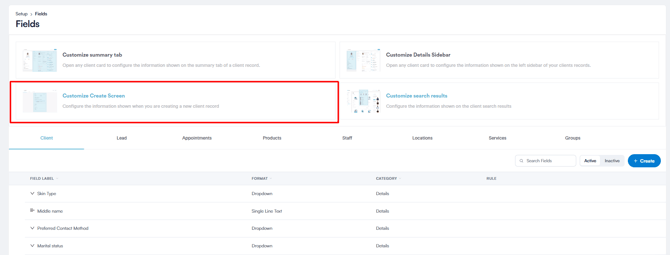
Tick the three fields in the list on the left, check the preview on the right, and click on “Save View” in the top right corner. For more details, read How to Customize the Layout of the Client Creation Form.
How to Scan an Emirates ID to Create a Client
Step 1: Open the New Client Form
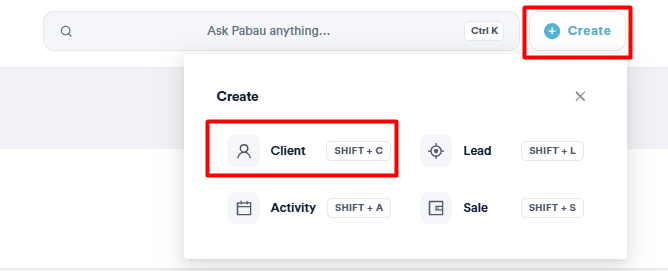
Click on the “+ Create” button and select “Client”.
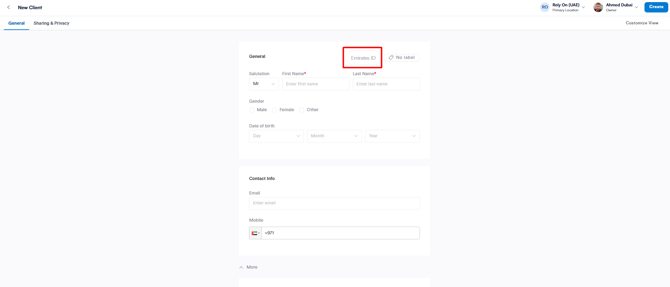
The “Emirates ID” button is at the top of the form.
Step 2: Scan or Upload the Card
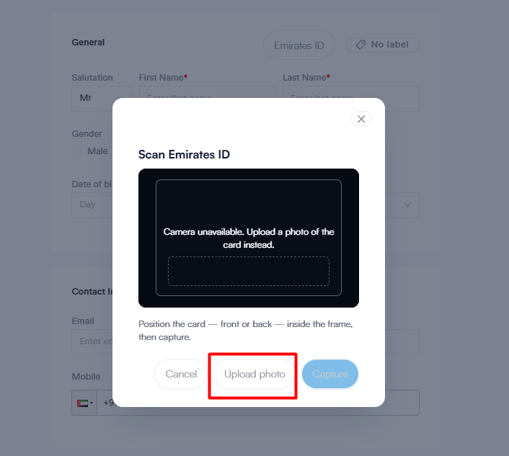
Click on “Emirates ID” to open the Scan Emirates ID window with your camera. Position the front or back of the card inside the frame and click on “Capture”. If you don't have a camera, click on “Upload photo” and choose a JPEG or PNG image of the card under 10 MB.
Pabau reads the card for a few seconds, then closes the window and fills in the form.
Step 3: Check the Details and Save
Compare every filled field with the card before saving. Anything the scan couldn't read clearly is left blank rather than guessed, so type it in yourself. You can also edit any value the scan filled in. When everything is correct, save the client.
Troubleshooting Emirates ID Scanning
| What you see | What to do |
|---|---|
| "Camera unavailable. Upload a photo of the card instead." | Allow camera access in your browser, or click on "Upload photo". |
| "Couldn't read the card…" | Click on "Try again" and use a sharp, well-lit photo with no glare and the whole card inside the frame. |
| "The photo is too large…" | Use an image under 10 MB. |
| Name and date of birth are filled in, but not the ID number, nationality, or expiry date | The custom fields are missing, named differently, or not on the client creation form. See How to Set Up the Emirates ID Custom Fields. |
| No "Emirates ID" button | Your business country isn't set to United Arab Emirates. Check it in Business Details. |
Emirates ID and NABIDH
NABIDH is Dubai's health information exchange, and clinics licensed in Dubai must send patient information to it. NABIDH requires an Emirates ID for every Dubai-resident patient, and patients without one fail validation and are not sent. Scanning the card at registration helps you capture the number accurately from the start.
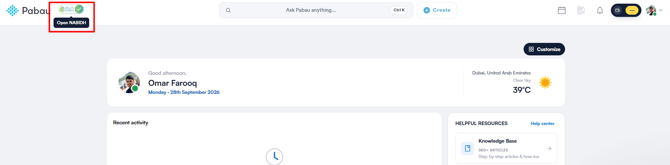
If your clinic is connected to NABIDH, you can access it from the “NABIDH” button at the top of the screen.
NOTE: To learn how Pabau connects to NABIDH, read NABIDH Guide Part 1: What Is NABIDH and How Pabau Connects to It. To map your Emirates ID custom field to NABIDH, read NABIDH Guide Part 3: Map Your Data for NABIDH.
Was this guide helpful? Let us know by voting below - your feedback helps us write clearer articles.
For more guides, browse the related articles below or use the search bar at the top of the page. You can also watch our video learning series, the Pabau Academy, or visit the Support page for additional help.