
Table of Contents:
1. How to Set Up Cancellation/No-Show Policy
1.2. Configure Cancellation Reasons
2. How to Manage Cancellation/No-Show Policy
3. How to Redeem a Package Session when Clients Cancel or No-Show
4. How to Redeem Account Balance when Clients Cancel or No-Show
5. How the Cancellation Policy Applies when Clients Cancel Online
How to Set Up Cancellation/No-Show Policy
The cancellation/no-show policy allows clients to book appointments free of charge. However, they will be charged only if they cancel or don’t show up for an appointment. This helps protect your revenue and reduces last-minute cancellations.
Step 1: Navigate to Setup
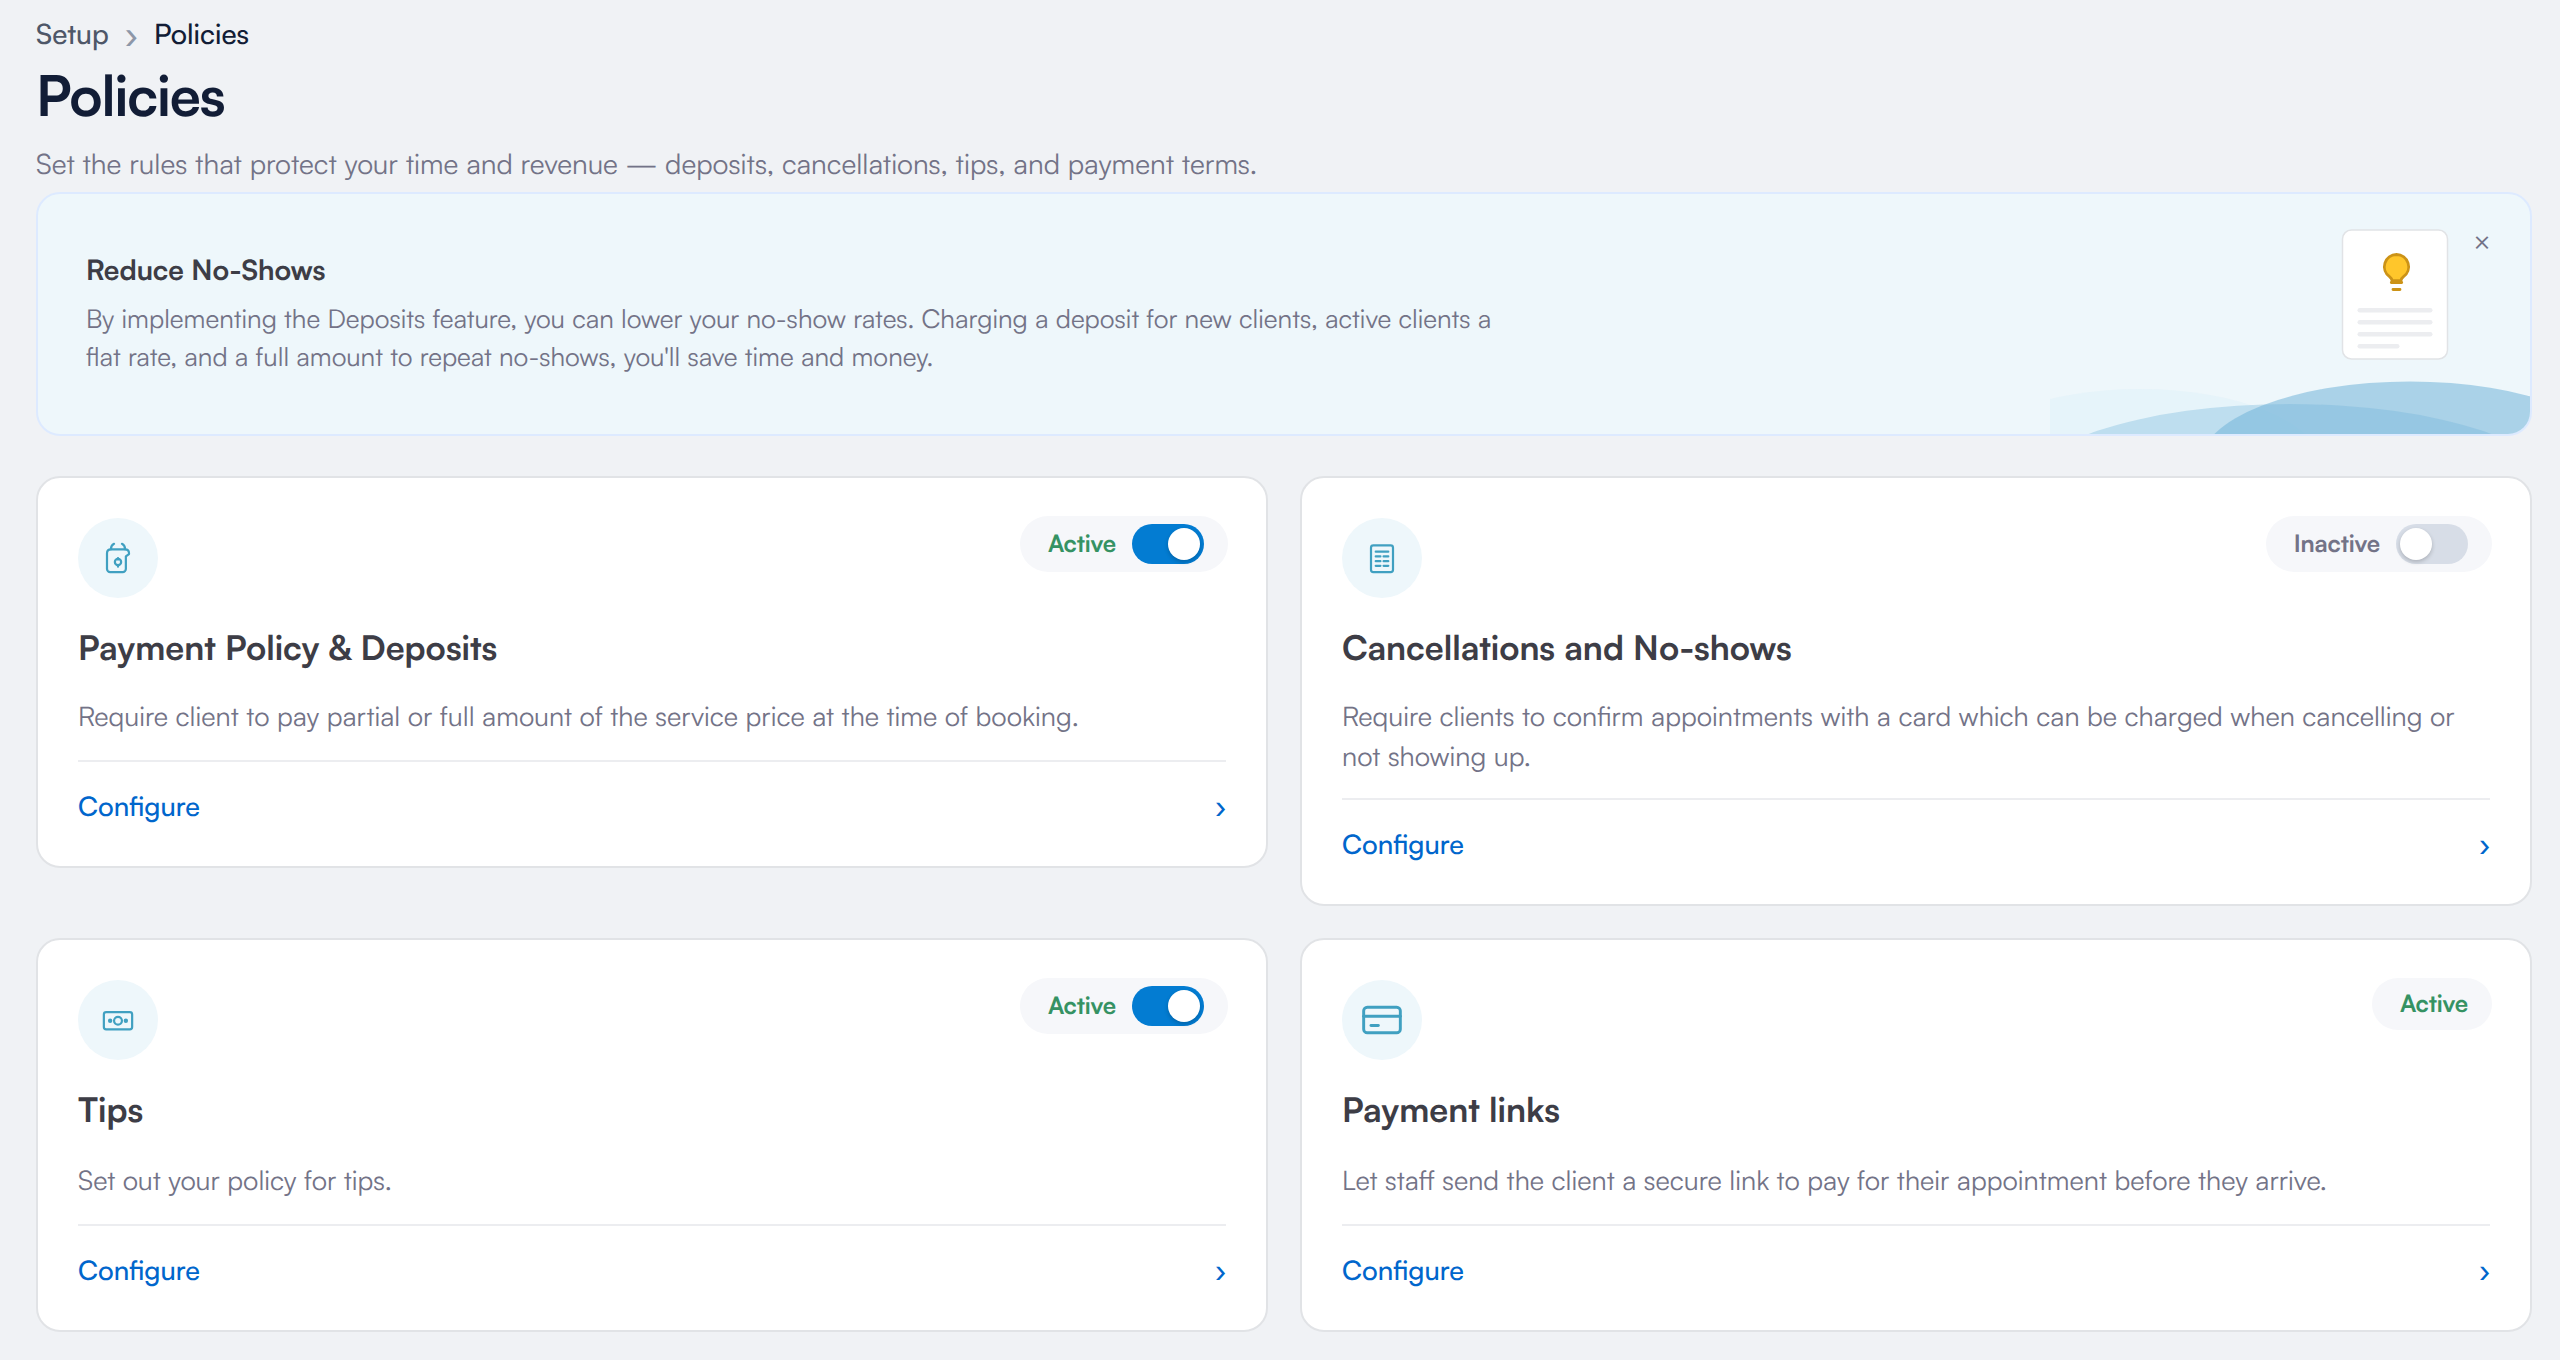
Start by logging in to your Pabau account using your login credentials. Then, navigate to the Setup page. Under the Financials section, you'll find 'Policies.' On that page, click Configure on Cancellations and No-shows to set up your policy.
Step 2: Activate Cancellation/No-show Policy
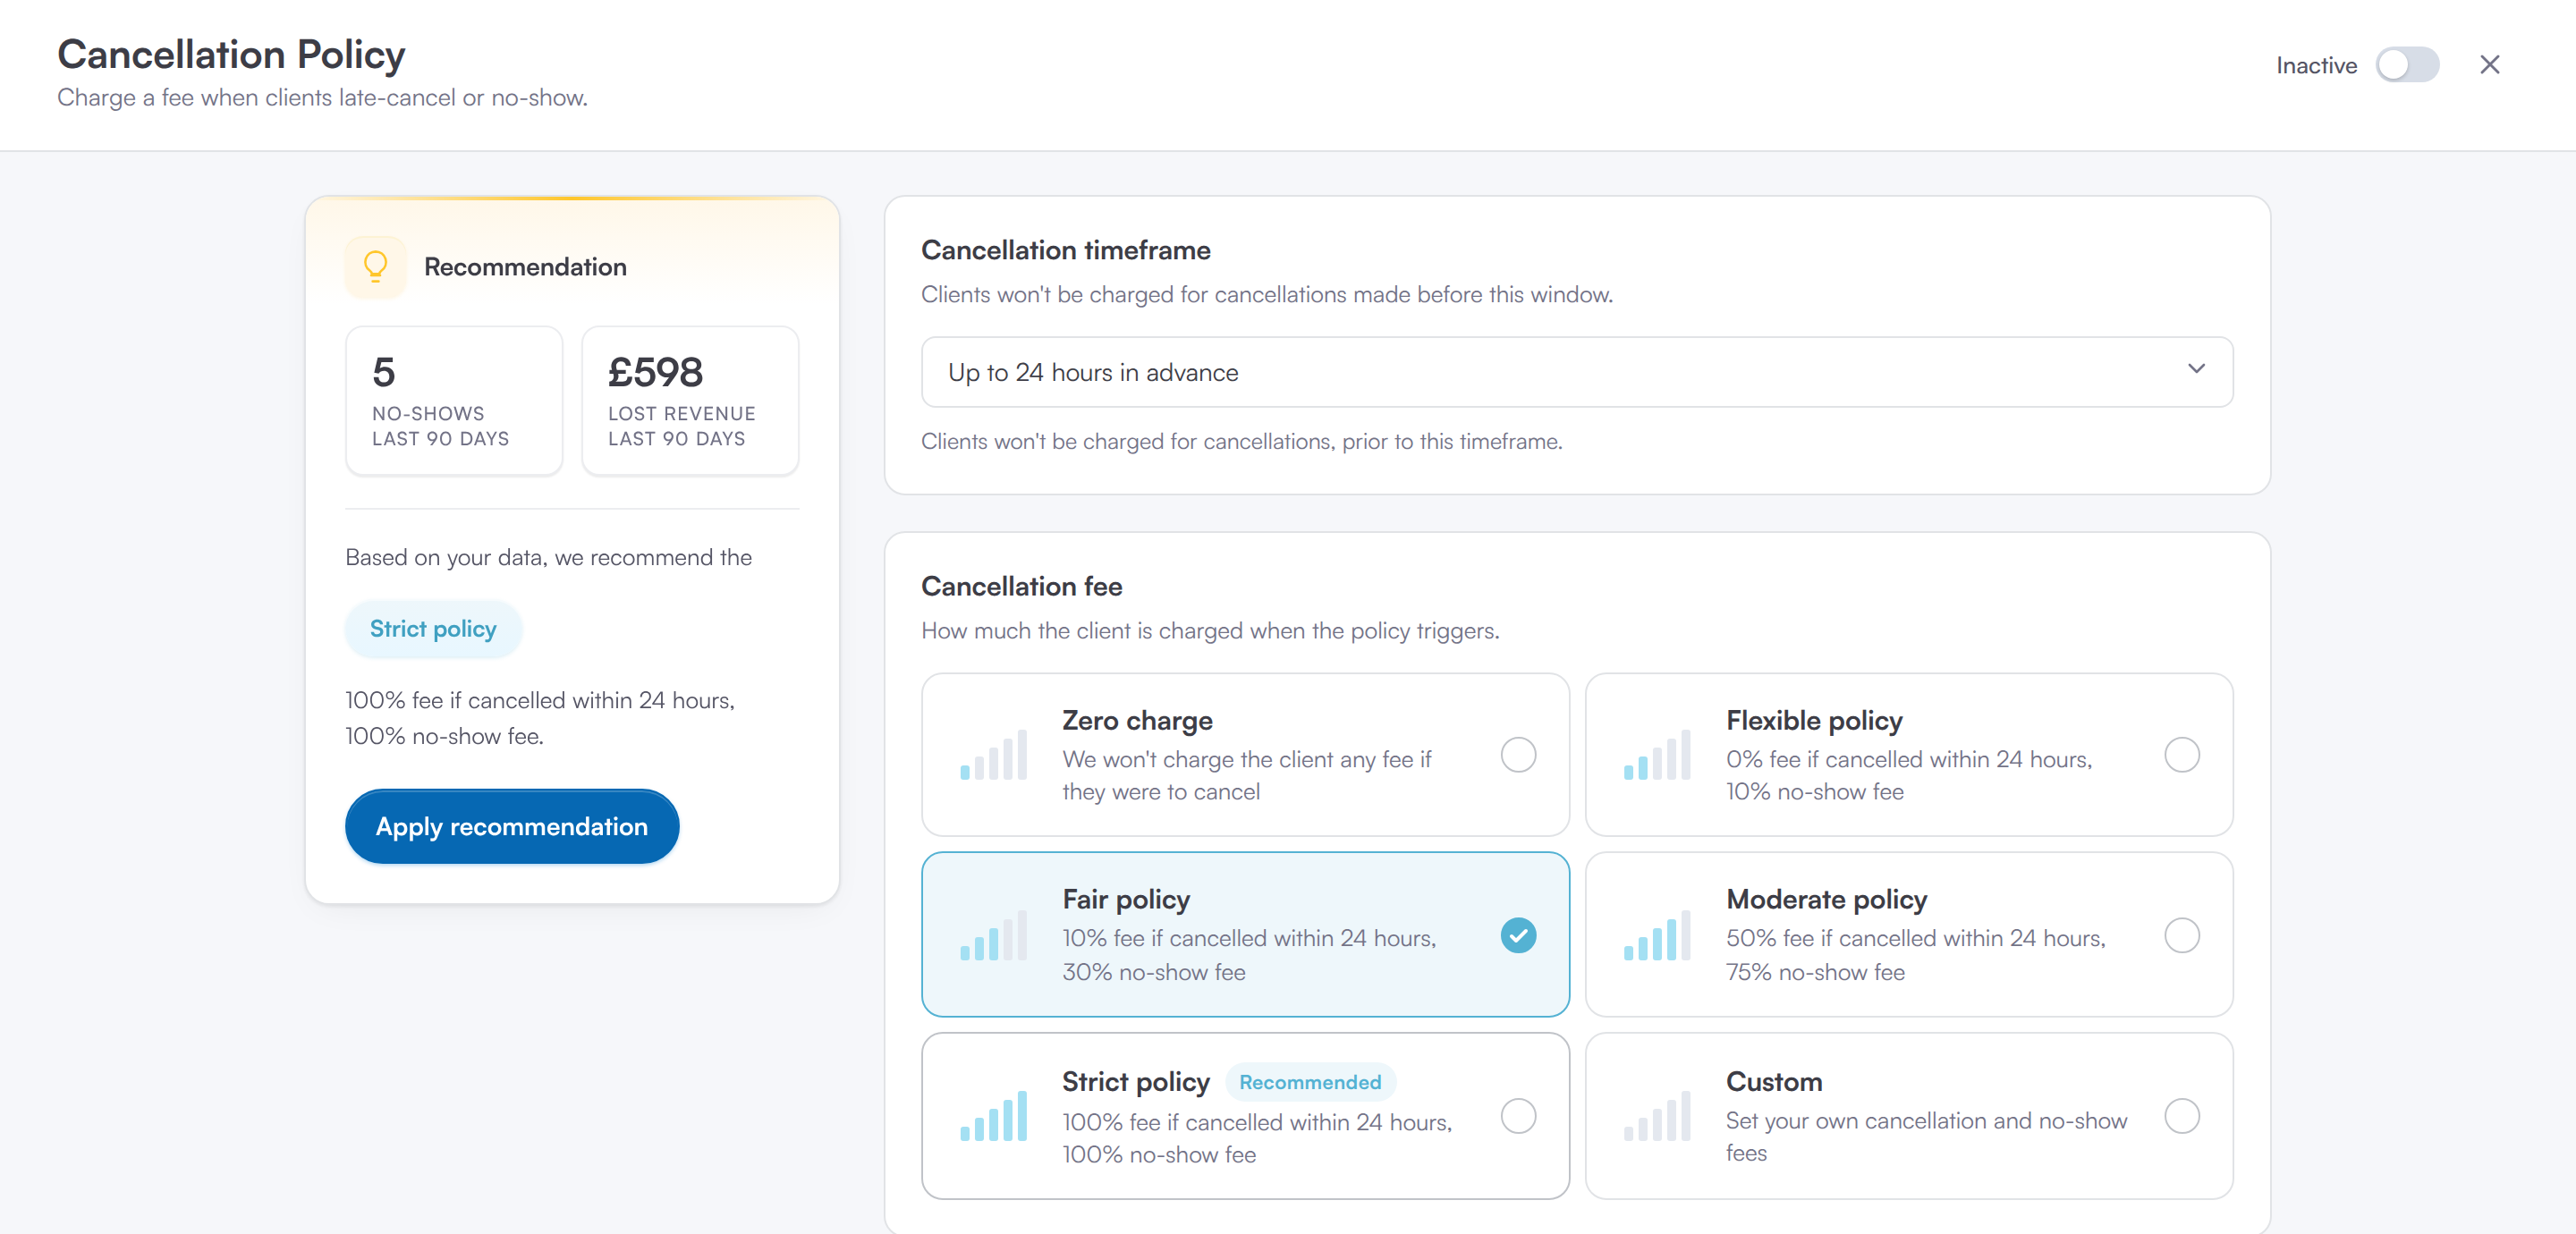
Under Cancellation timeframe, choose the advance notice clients must give to cancel without a fee. Under Cancellation fee, choose how much clients are charged when they cancel late or do not show up: pick one of the ready-made policies, or Custom to set your own cancellation and no-show fees.
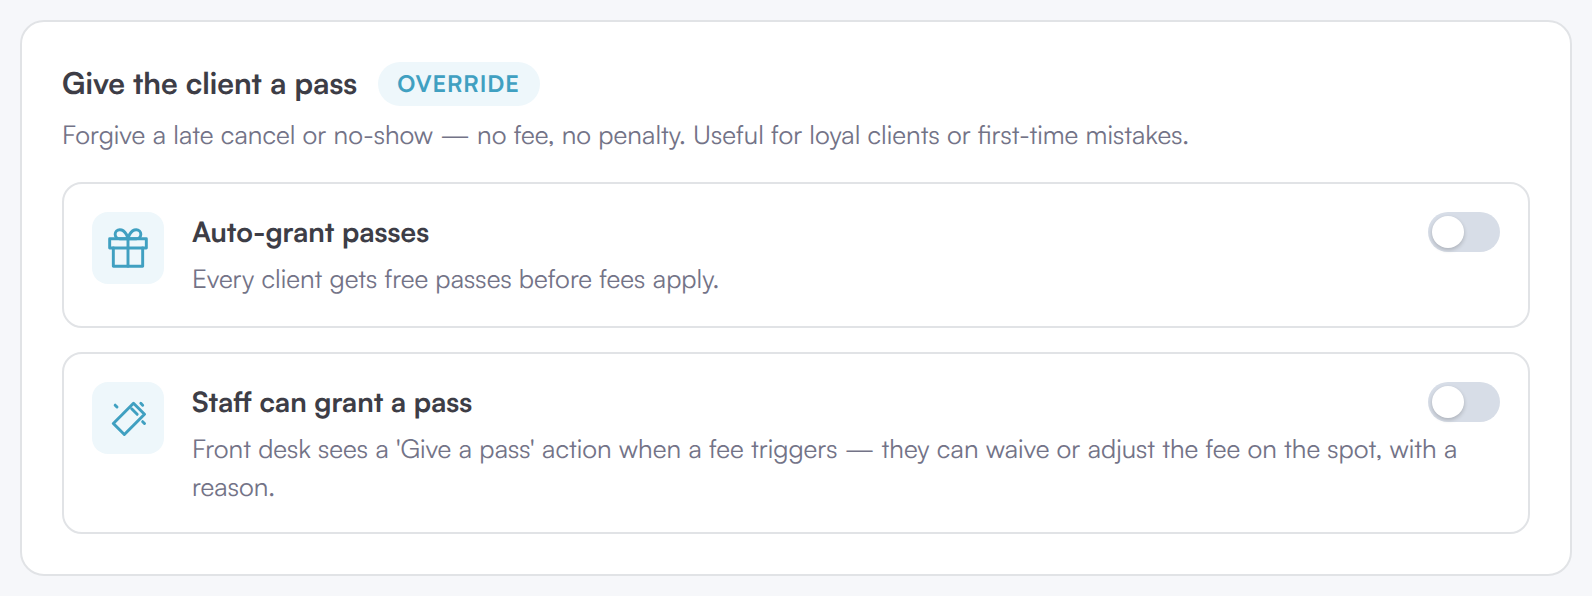
Further down, under Give the client a pass, you can choose whether staff can override the policy:
- Staff can grant a pass: If you switch this on, staff can waive or adjust the fee when it triggers, for example for unavoidable reasons, allowing flexibility in handling cancellations or no-shows.
Step 3: Save Changes
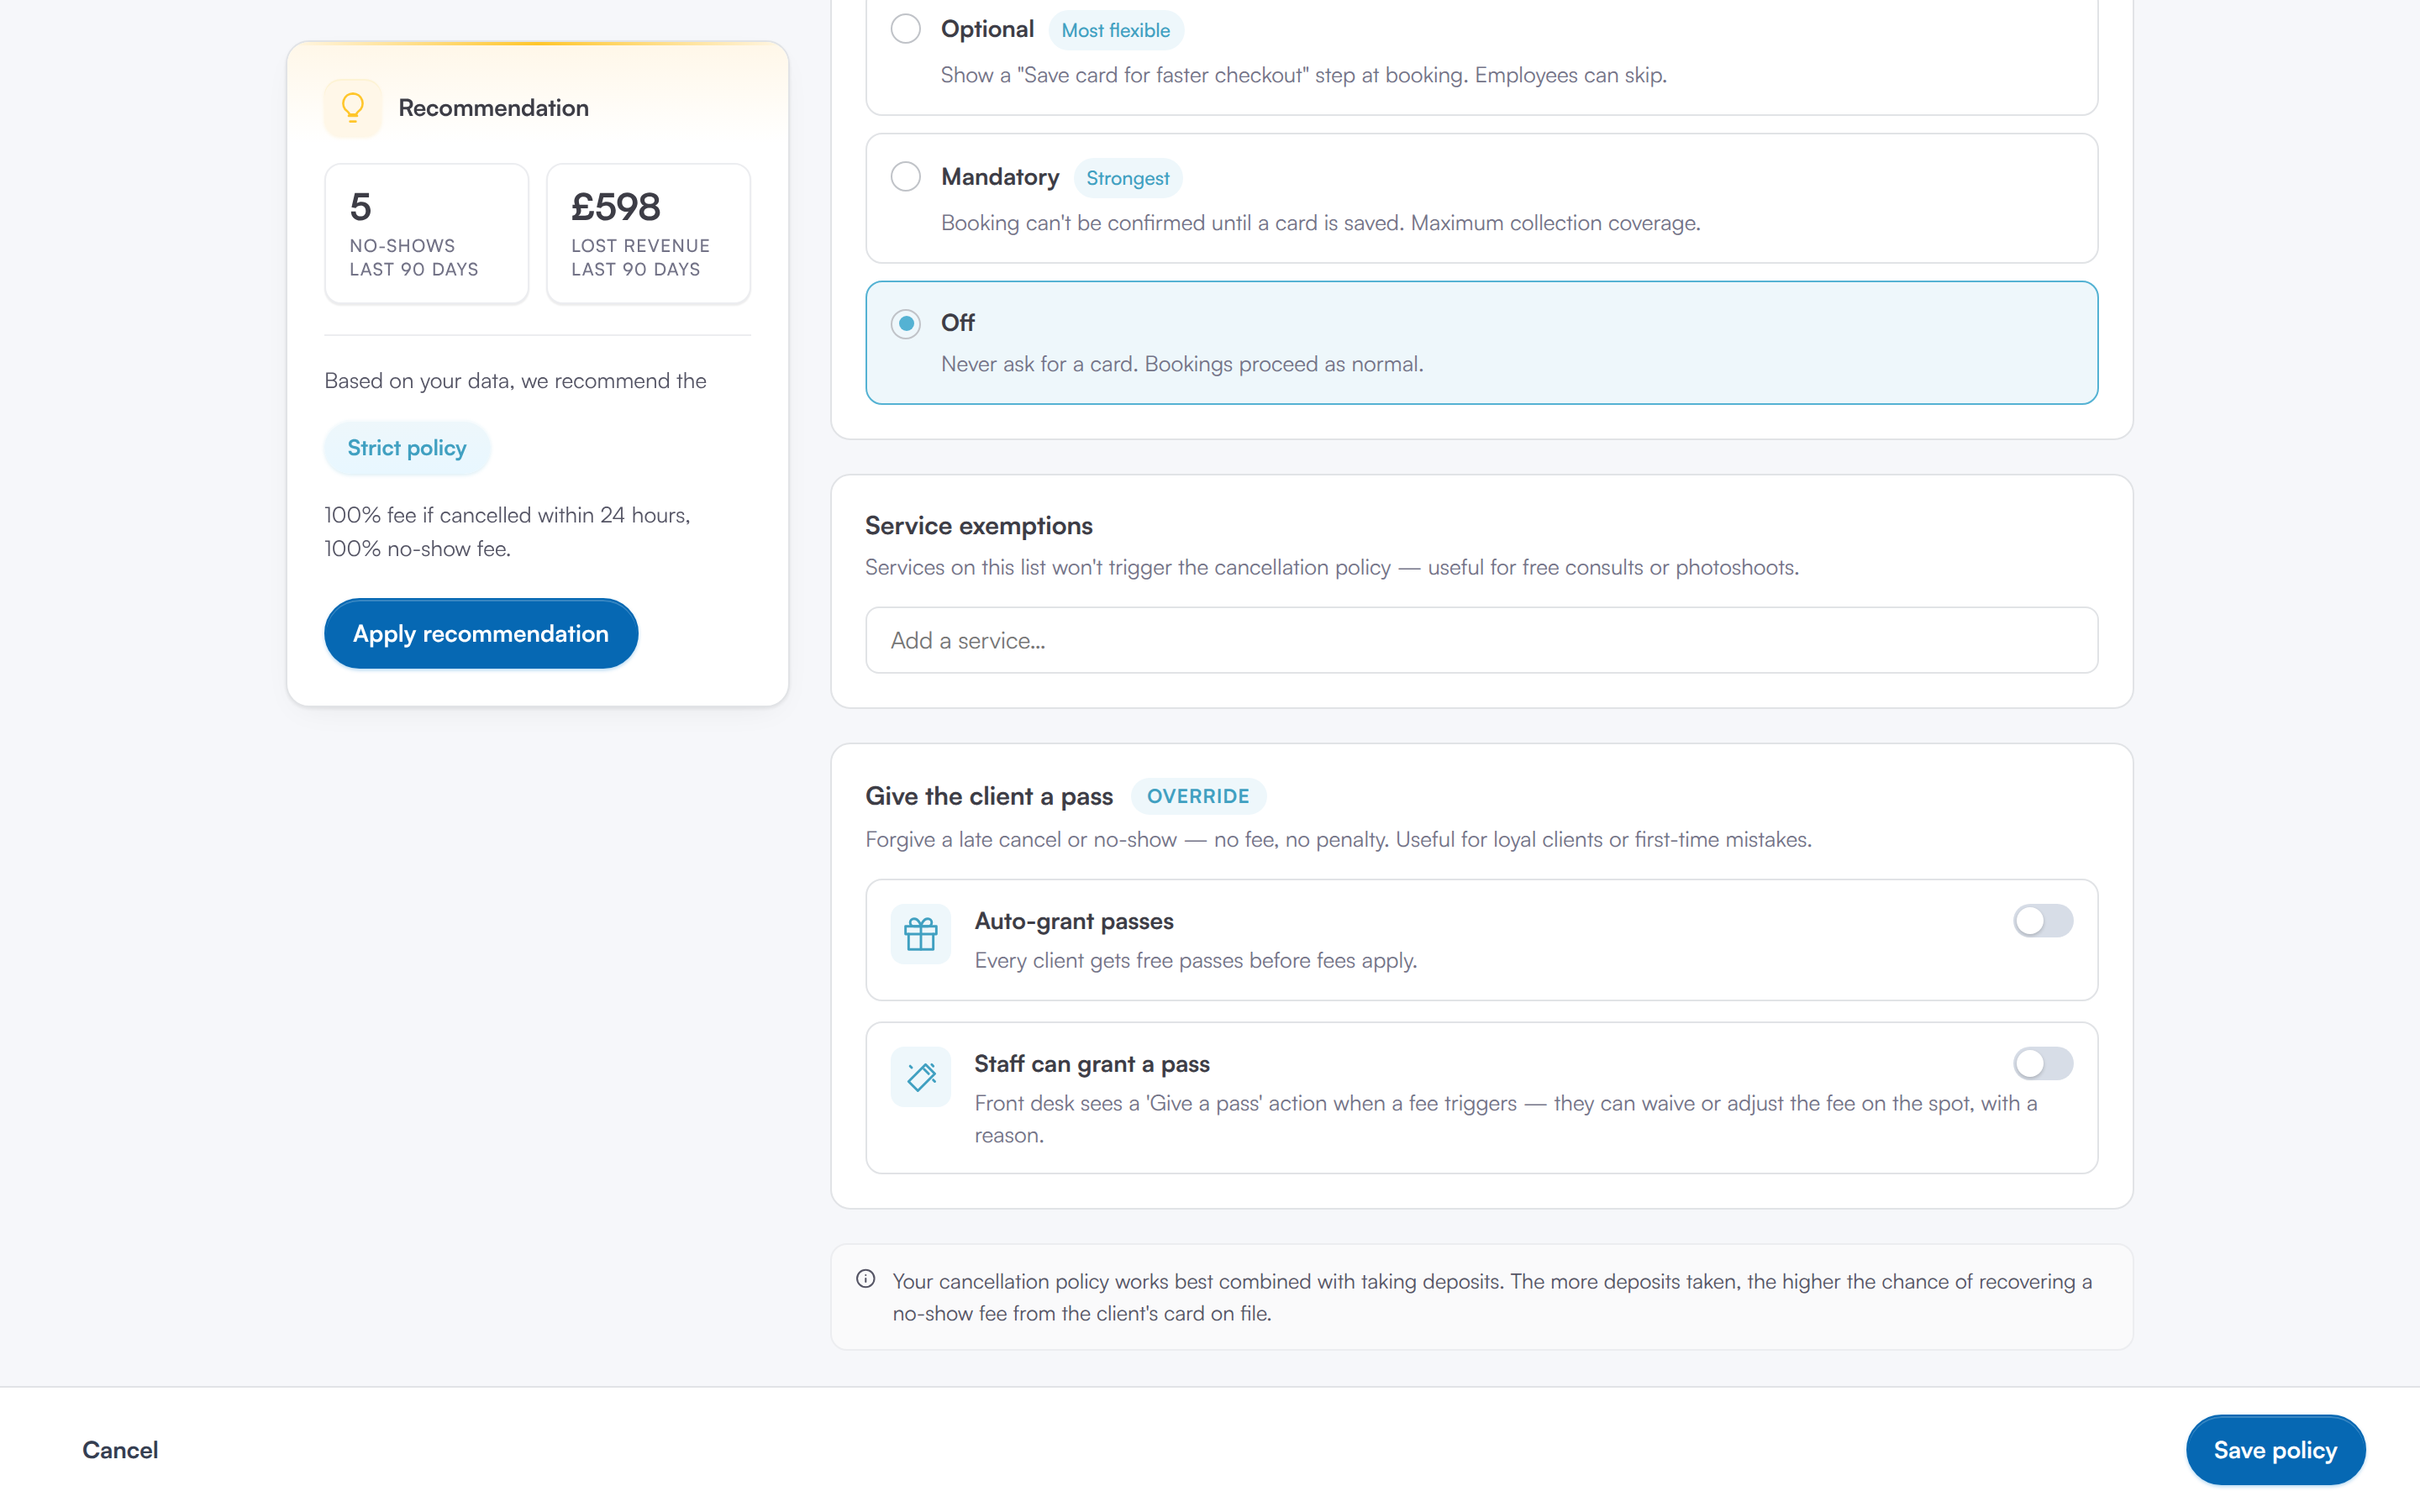
After setting up the cancellation policy, switch the toggle at the top right of the policy to Active and click Save policy at the bottom right.
Configure Cancellation Reasons
The main step when setting up your cancellation/no-show policy is configuring your cancellation reasons to align with your policy.
After activating the cancellation policy in your Pabau account, you can specify whether a cancellation reason requires the policy to be applied.
Step 1: Navigate to Setup
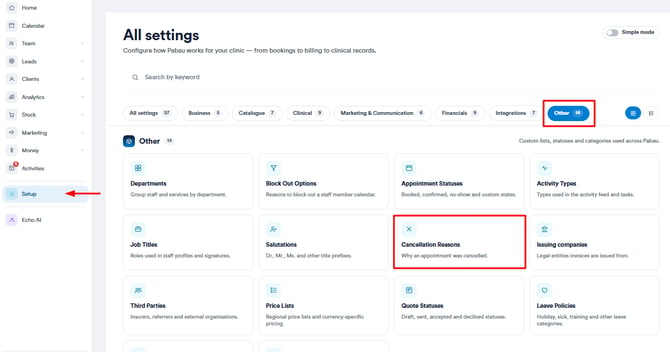
Navigate to Setup and find Cancelation Reasons under the Other section. You can edit the already existing cancellation reasons or create new ones.
Step 2: Apply the corresponding cancellation policy
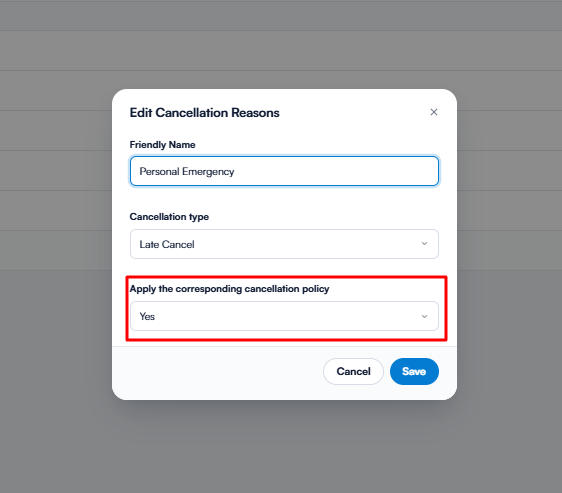
After you've added the cancellation name and selected the cancellation type (Late Cancel or Early Cancel), it's time to apply the corresponding cancellation policy. This ensures that when a specific cancellation reason is chosen, the correct policy is enforced.
- Click Yes: The cancellation charge area will appear for the client if they meet the policy criteria.
- Click No: No cancellation charge will be applied when selecting this reason.
By following these steps, you can configure your cancellation reasons.
How to Manage Cancellation/No-Show Policy in the Calendar
Step 1: Navigate to Calendar
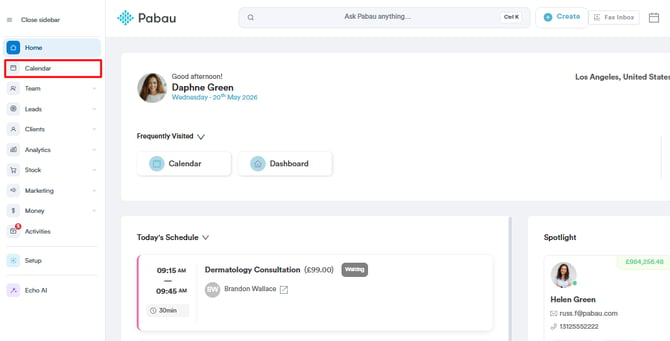
Navigate to the Calendar located on the left sidebar menu and locate the appointment you need to cancel.
Step 2: Cancel the Appointment
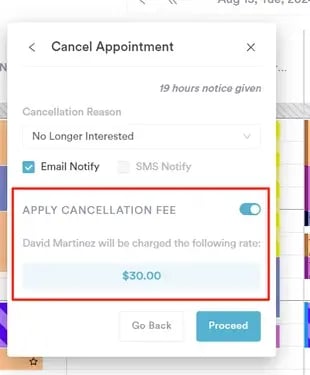
When canceling the appointment, the cancellation charge section will appear if it meets the cancellation policy criteria.
This applies when:
- The selected cancellation reason falls under the policy.
- The appointment is canceled after the allowed time.
If you have switched on Staff can grant a pass in the cancellation policy, the toggle next to the Cancellation Charge will be clickable and staff members can decide whether to charge a cancellation fee when an appointment is canceled. If not, it will be greyed out.
Step 3: Mark an Appointment as a No-Show
When selecting an appointment and clicking the no-show button, the Mark as No Show popup will appear along with the Apply no-show fee section, which:
-
has a toggle that can allow you to disable or enable charging a no-show fee
-
shows the amount that the client will be charged for the appointment, based on the policy
-
a field where a staff member can enter a custom amount if overriding is allowed via the policy page
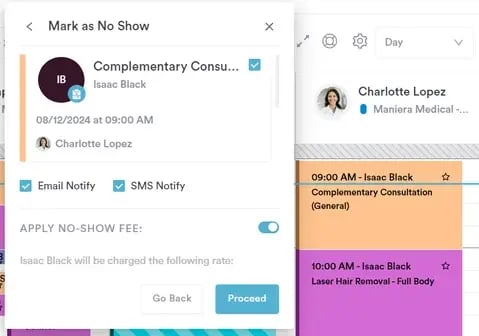
Once you've clicked 'Proceed,' an invoice will be generated.
If the no-show fee charge is successful, a notification will appear in the green success pop-up and will read: We successfully charged [Name]'s card.
If the no-show fee charge is not successful, the following note will appear in red: We couldn’t charge [Name]'s card.
Step 4: Override Policy
If the cancellation policy Staff can grant a pass setting is switched off, then the field Override cancellation charge should be grayed out.
If the cancellation policy, Staff can grant a pass setting is switched on, then you will be able to enter a custom amount in the field Override cancellation charge.
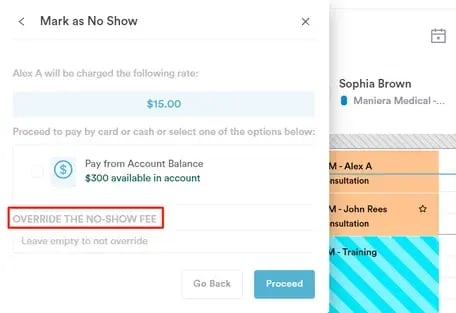
By following these steps, you can manage the cancellation/no-show policy in the calendar.
How to Redeem a Package Session when Clients Cancel or No-show
If your cancellation policy allows clients to redeem a package session, and a client cancels late or no-shows an appointment booked with a package, an option to redeem the session will appear when canceling the appointment.
Step 1: Navigate to the Calendar
Navigate to the Calendar icon located in the left sidebar menu. Then, click on the appointment you want to cancel or mark as a no-show.
Step 2: Select 'Pay from Package'
After clicking on the appointment that meets the policy criteria, depending if you have set your policy permissions to 'Redeem Package Session' or 'Redeem Account Balance,' you will view two options:
- Pay from Package
- Pay from Account Balance
Select 'Pay from Package,' and click 'Redeem.' This action will cancel the appointment and redeem the session from the client's account.
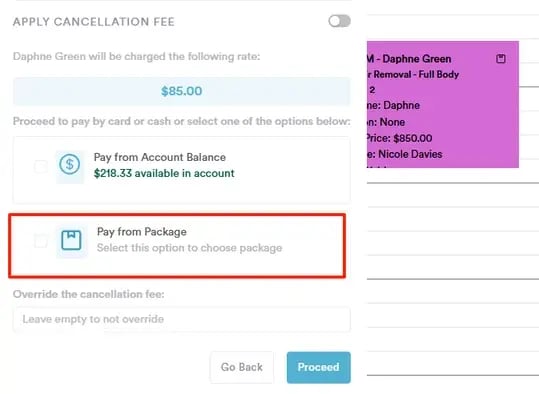
By following these steps, you can redeem an available package session when a client meets the cancellation policy criteria.
How to Redeem Account Balance when Clients Cancel or No-show
If you have set up your cancellation policy to be able to redeem the account balance from a client, the option to redeem any available account balance will be shown if a client cancels the appointment outside the timeframe of your policy or no-shows the appointment.
Step 1: Navigate to the Calendar
Navigate to the Calendar icon located in the left sidebar menu. Then, click on the appointment you want to cancel or mark as a no-show.
Step 2: Select ''Pay from Package''
After clicking on the appointment that meets the policy criteria, depending if you have set your policy permissions to 'Redeem Package Session' or 'Redeem Account Balance,' you will view two options:
- Pay from Package
- Pay from Account Balance
Select 'Pay from Account Balance,' which will show the client's available balance. By clicking 'Proceed,' you can cancel the appointment and redeem the available account balance.
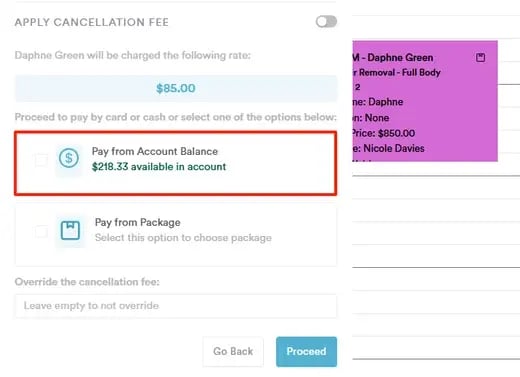
By following these steps, you can redeem a client's available account balance when they meet the cancellation policy criteria.
How the Cancellation Policy Applies when Clients Cancel Online
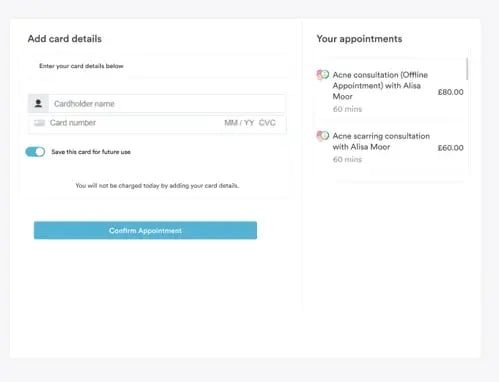
If your cancellation policy asks for a card on file, clients are asked to save a card before the booking is confirmed, so that a late-cancellation or no-show fee can be collected. They are not charged at that point.
Step 1: Book from Your Booking Page
Proceed to book an appointment from a client's perspective on your booking page.
Step 2: Enter Card Details
On the payment step, clients are asked for a card. A message explains that the clinic asks for a card so a late-cancellation or no-show fee can be collected, and that they won't be charged now. If they already have a saved card, they can use it. They then confirm the booking.
Step 3: Cancel Appointment
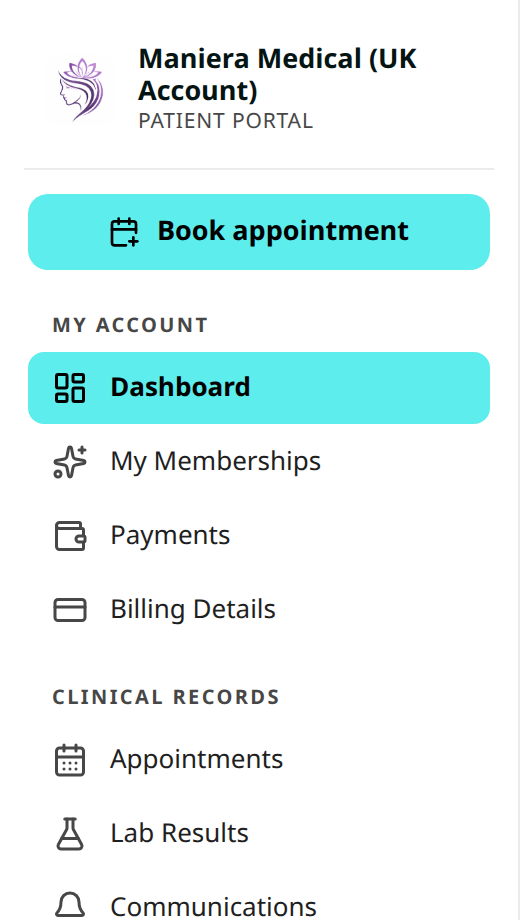
Once the appointment is booked, clients sign in to the client portal, click Appointments in the menu and open the appointment.
Under Need to make a change?, they can click Cancel appointment or Reschedule. Whether they see these, and whether they apply only outside your notice period, is set on the Appointments card in Setup → Online presence → Client Portal — see New Online Bookings Part 4: Take Payments and Deposits Online.

When a client cancels inside your notice period, the portal shows the fee before they confirm, and the fee is charged to the card on file. Inside the notice period they cannot move the appointment online and are asked to contact the clinic.
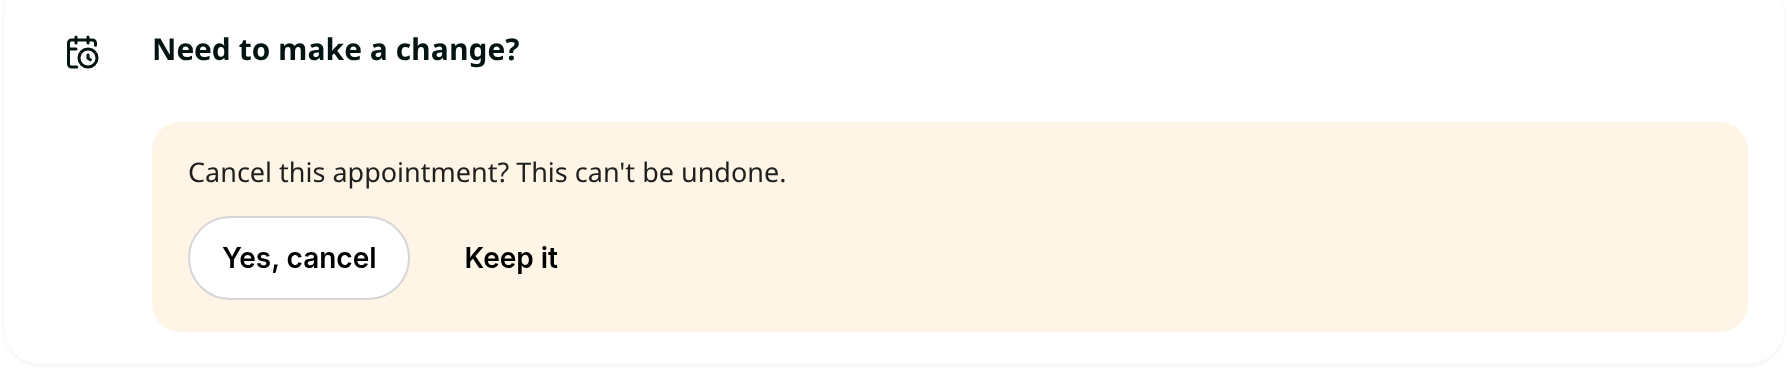
Clicking Yes, cancel cancels the appointment. Keep it leaves it as it is.
Step 4: Navigate to the Client Card
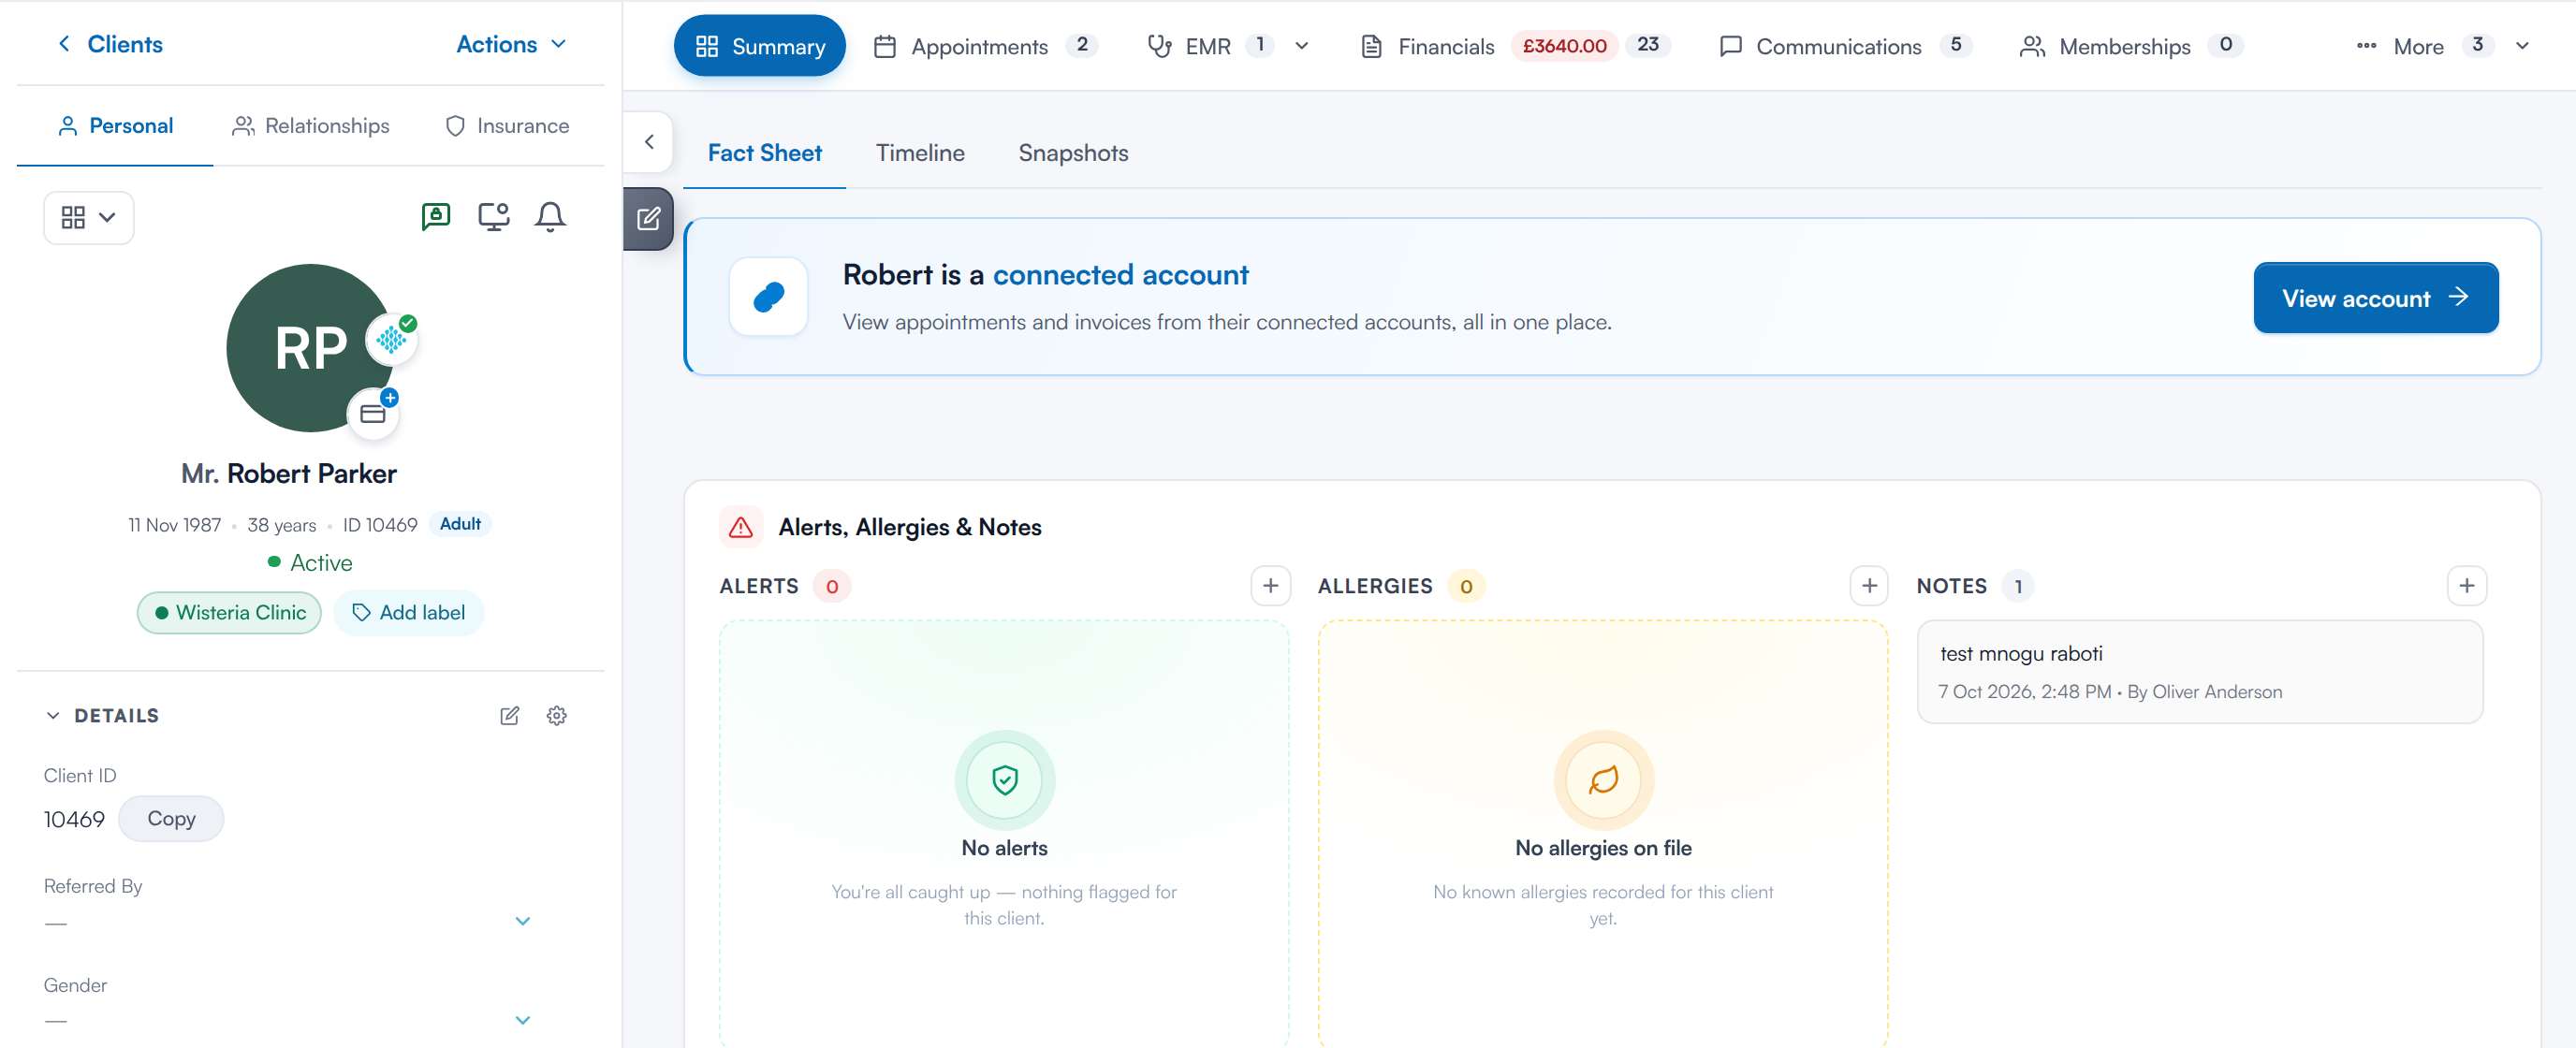
To view the activity of the client in Pabau, you can check their client card under the 'Appointments' and 'Financials' tab.
By following these steps, clients will be charged a cancellation fee when canceling an appointment online.
Was this guide helpful? Let us know by voting below - your feedback helps us write clearer articles.
For more guides, browse the related articles below or use the search bar at the top of the page. You can also watch our video learning series, the Pabau Academy, or visit the Support page for additional help.