
This feature is part of the new client card version and is currently available to select users only, starting August 2026. A wider rollout to all accounts is coming soon.
Step 1: Navigate to the Invoices Tab
Log in to your Pabau account and open the client card of the client whose invoices you want to review.
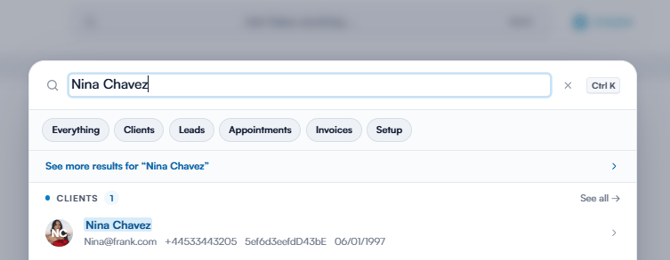
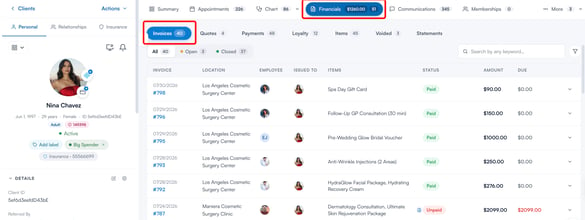
At the top of the client card, click on the "Financials" tab, then make sure the "Invoices" sub-tab is selected. The number next to the tab shows the total number of invoices issued to that client.
Step 2: Understanding the Invoices Overview
The Invoices tab lists all of the client’s invoices, with the most recent at the top. Here’s a breakdown of the key elements on the page:
Invoice Filters and Search
Use the filter tabs at the top of the list to narrow down the invoices displayed. Each tab shows the number of invoices in that category:
- All - Displays every invoice issued to the client.
- Open - Displays only invoices with an outstanding balance.
- Closed - Displays only invoices that have been paid in full.
To find a specific invoice, use the search bar in the top right corner to search by any keyword, or click on the filter icon next to it to filter by employee, by who the invoice is issued to, by status, or by issue date.
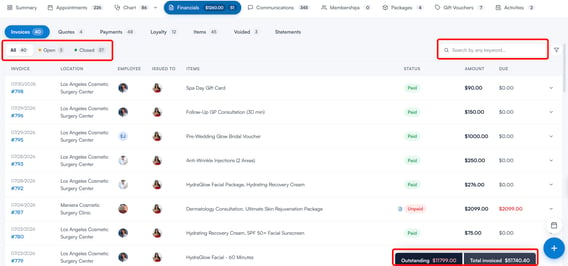
At the bottom of the page, you can also see a summary showing the client’s total outstanding balance and the total amount invoiced.
Invoice Details
Each row displays the invoice date and number, location, employee, who the invoice was issued to, the invoiced items, the status (such as paid or awaiting payment), the invoice amount, and any amount still due.
Click the arrow at the end of a row to expand it and view a full breakdown of the invoice, including each item with its quantity and price, the total tax, the amount paid, any refunded amount, and the grand total. From the expanded view, you can also click on the "Edit Invoice" button to make changes to the invoice.

Managing Individual Invoices
Hover over an invoice row to reveal the available actions. For invoices with an amount still due, a "Quick pay" button appears, taking you straight to payment. Next to it, you will find icons to preview, edit, and share the invoice:
- Preview - Opens a preview of the invoice as the client will see it, including the clinic details, itemised charges, payments, and any outstanding amount.
- Edit - Opens the invoice for editing.
- Share - Opens a list of recipients, including the client and their linked contacts, such as family members or insurance contacts, so you can share the invoice with them by email or SMS.
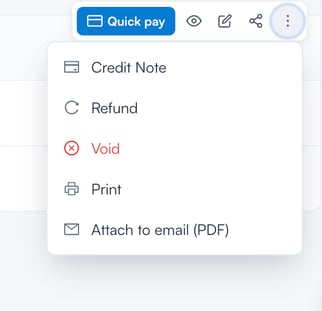
Using the three-dot menu, you can also:
- Credit Note - Issue a credit note against the invoice.
- Refund - Process a refund for the invoice.
- Void - Void the invoice.
- Print - Print the invoice.
- Attach to email (PDF) - Opens a new email to the client with the invoice attached as a PDF. You can personalise the email using templates and merge tags before sending.
NOTE: Voiding an invoice is permanent and cannot be undone. When you void an invoice, it moves to the "Voided" tab and can no longer be edited, the associated payments are reversed and must be re-recorded if needed, the client’s balance is adjusted automatically, and any loyalty points earned from the invoice are removed from the client’s balance. A record of the action is kept in the client’s audit log.
Tips for Getting the Most Out of the Invoices Tab
- Use the "Open" tab to chase outstanding payments - Instantly see every invoice with a balance due instead of scanning the full list.
- Use "Quick pay" at the front desk - Jump straight to taking a payment for an unpaid invoice in a single click.
- Attach invoices to emails instead of printing - Send the invoice as a PDF directly from the tab, and use the follow-up task option so unpaid invoices don’t slip through.
- Preview before sharing - Check how the invoice looks to the client before printing or emailing it.
- Prefer refunds or credit notes over voiding - Voiding is permanent, so reserve it for invoices created in error.
By using these filters and actions, you can stay on top of a client’s billing history and handle any invoice task directly from the client card.
For more guides, refer to related articles below, select additional guides, or use the search bar at the top of the page. These guides will help you get the most out of your Pabau account.
Additionally, to help you fully utilise and understand your Pabau account, we recommend exploring additional guides and resources offered at the Pabau Academy. It offers in-depth video tutorials and lessons, offering a holistic learning experience that can equip you with the essential skills for achieving success with Pabau.