
This is where the setup pays off. Connecting a visit to insurance ties together the client's coverage (Part 2), the appointment details, and your clinical documentation - so the claim you submit in Part 4 is accurate from the start.
In this guide you'll learn how to:
- Book the visit on the calendar
- Confirm coverage before each visit
- Complete the visit and document diagnoses
- Attach the insurer to the appointment
- Bill the visit to the insurer - creating the claim
NOTE: In Pabau, the claim is created from the visit's invoice: the moment an invoice is issued to an insurer, it appears on the Insurance claims dashboard. Linking the invoice to the appointment carries the visit's details onto the claim for you.
1. Book the visit
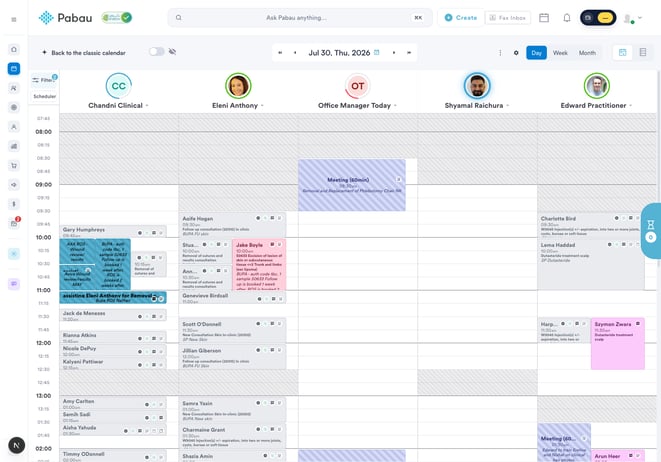
Everything starts on the Calendar, where each practitioner has their own column for the day:
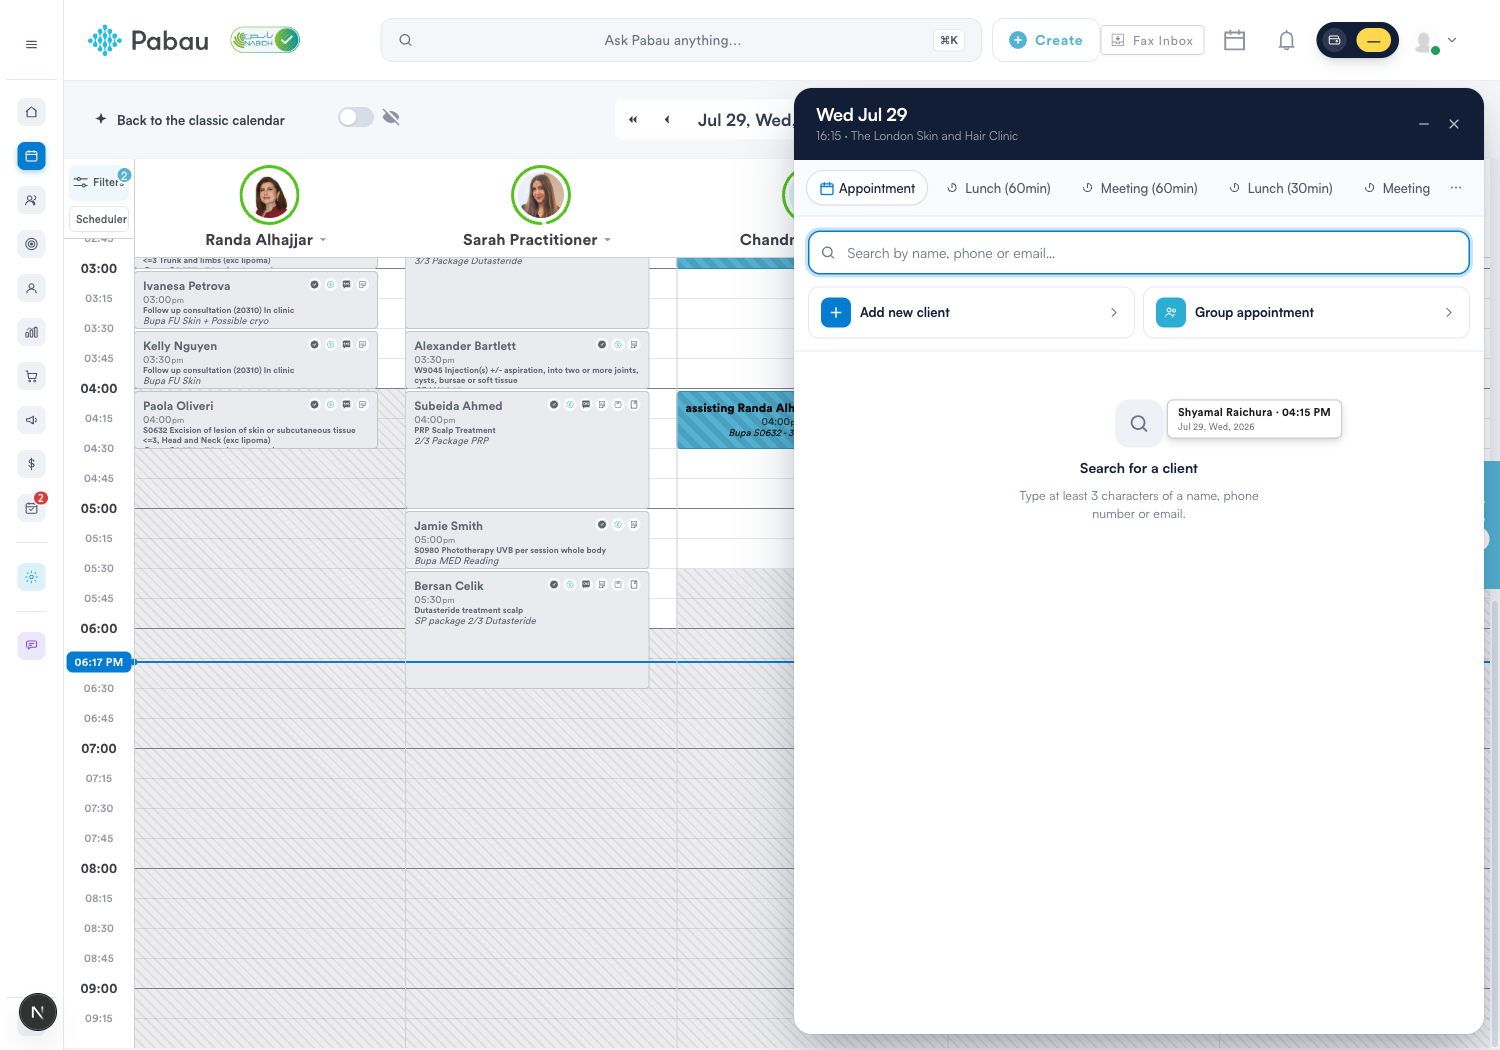
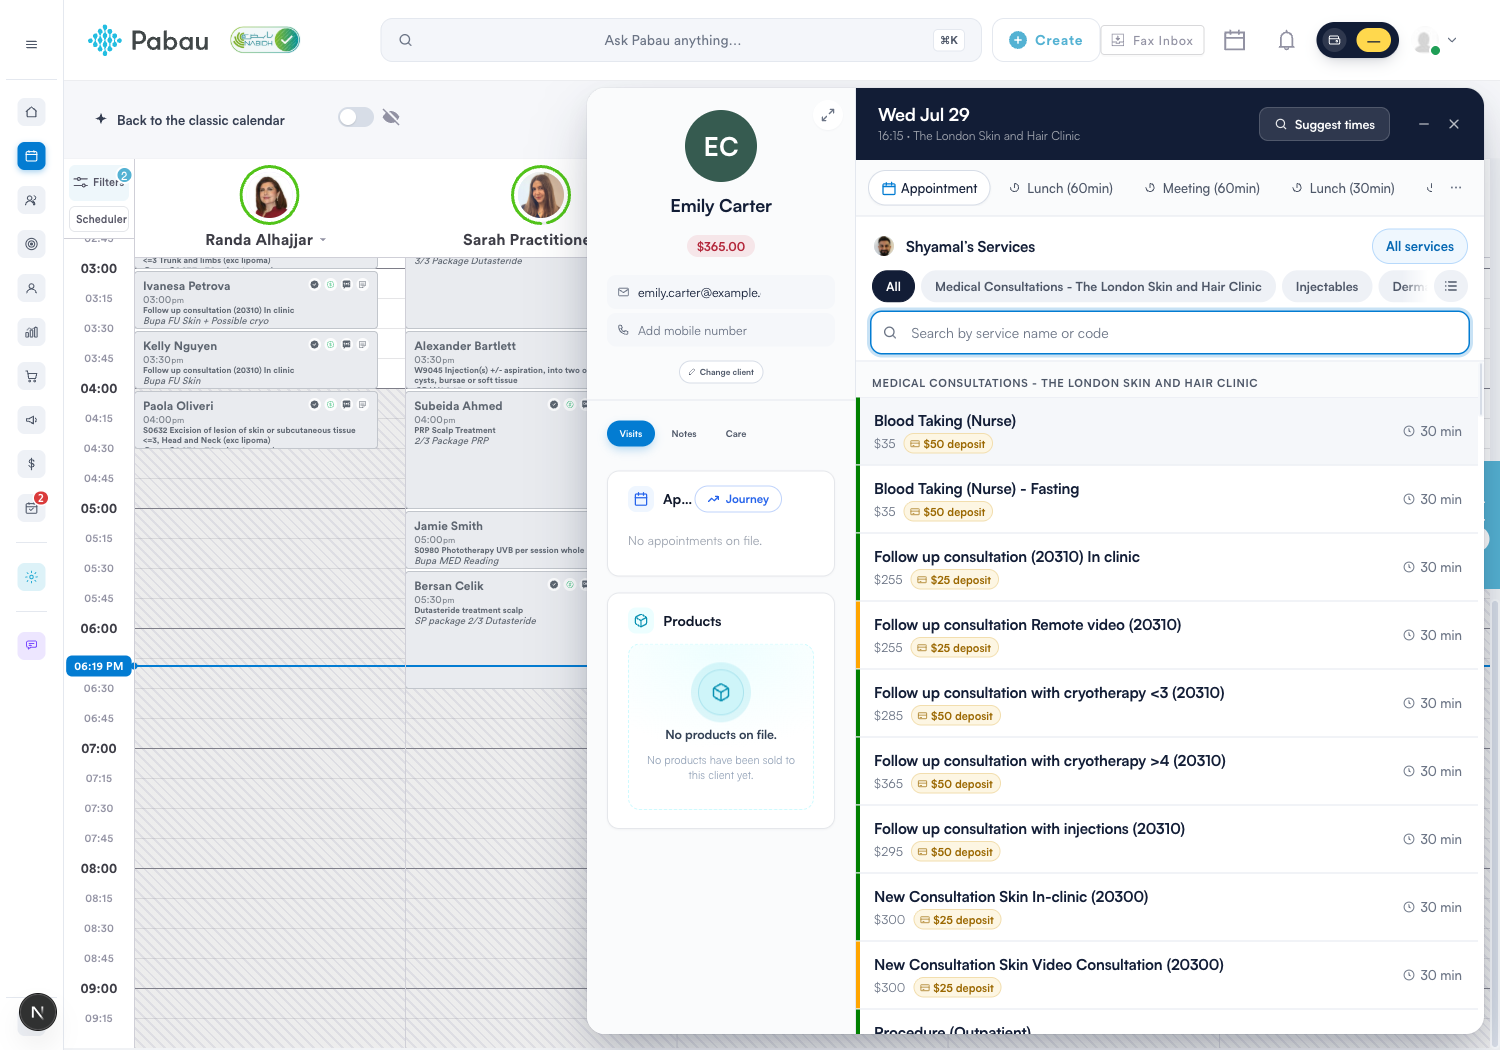
Click any open slot to create the appointment. The create panel opens with the slot, practitioner and location pre-filled:
- Find the client - search by name, phone or email, or add a new client on the spot.
- Pick the service - search by service name or code; prices, durations and deposit requirements show inline.
- Charge the visit to the insurer (optional) - open the service line's edit form. When the client has an insurance policy on file (Part 2), three extra fields appear: Charge to (who pays - the client's insurer, or Client (self)), Price list (the insurer's negotiated fee schedule, picked for you when there's only one), and Auth case (attach a prior authorization - choose an existing case or click + New case to record the payer's auth number on the spot).
- Adjust the time, room or practitioner if needed, add notes, then confirm the booking.
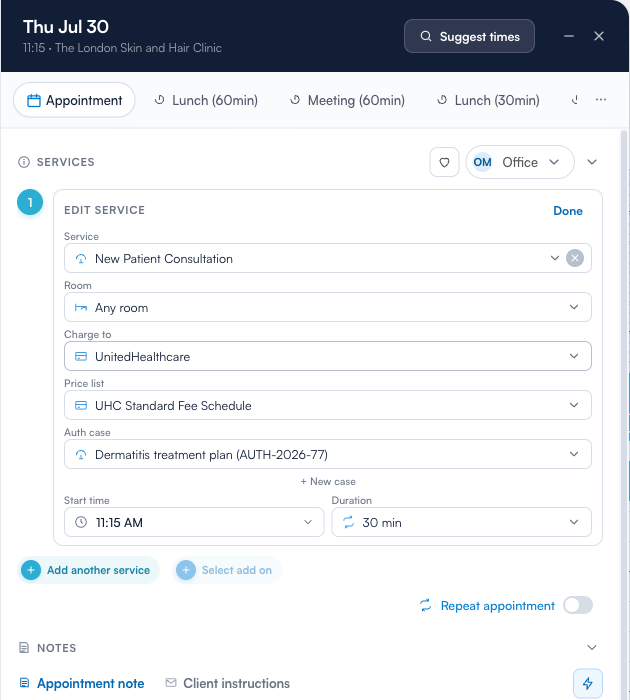
The payer and authorization you set here follow the visit: the invoice comes out issued to the insurer, and the auth number prefills box 23 (prior authorization) on the claim.
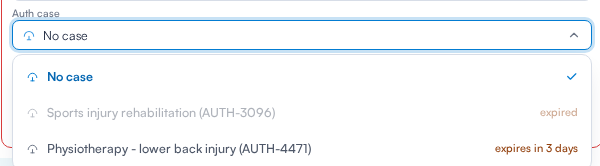
The Auth case picker also tells you where each case stands before you commit the booking. A case close to its limit is annotated in the list - 3 visits left, expires in 4 days, or expires today - and one that has nothing left is shown as no visits left or expired and cannot be picked. Exhausted cases stay visible with their reason rather than quietly disappearing, so you can see that the authorisation is the problem and renew it.
NOTE: Each service line counts against the authorisation separately. A booking with two lines against the same case uses two of its visits, and the picker's count reflects that as you build the appointment.
2. Confirm coverage before each visit
Coverage changes over time - plans terminate, deductibles reset, benefits get used up. Verifying before the visit catches problems while they're still fixable:
- Open the client's policy on their Insurance tab and run Search coverage, or run a full eligibility & benefits report from the claim.
- Re-check when the plan changes, every 30 days for recurring care, at each new episode of care, or right before the appointment.
- Confirm the co-pay and deductible on the policy so the front desk knows what to collect on the day.
3. Complete the visit and document diagnoses
Open the appointment from the calendar to work it through the day - the popout tracks the visit status (Arrived → Being Seen → Complete) and holds the service, participants, notes and forms:
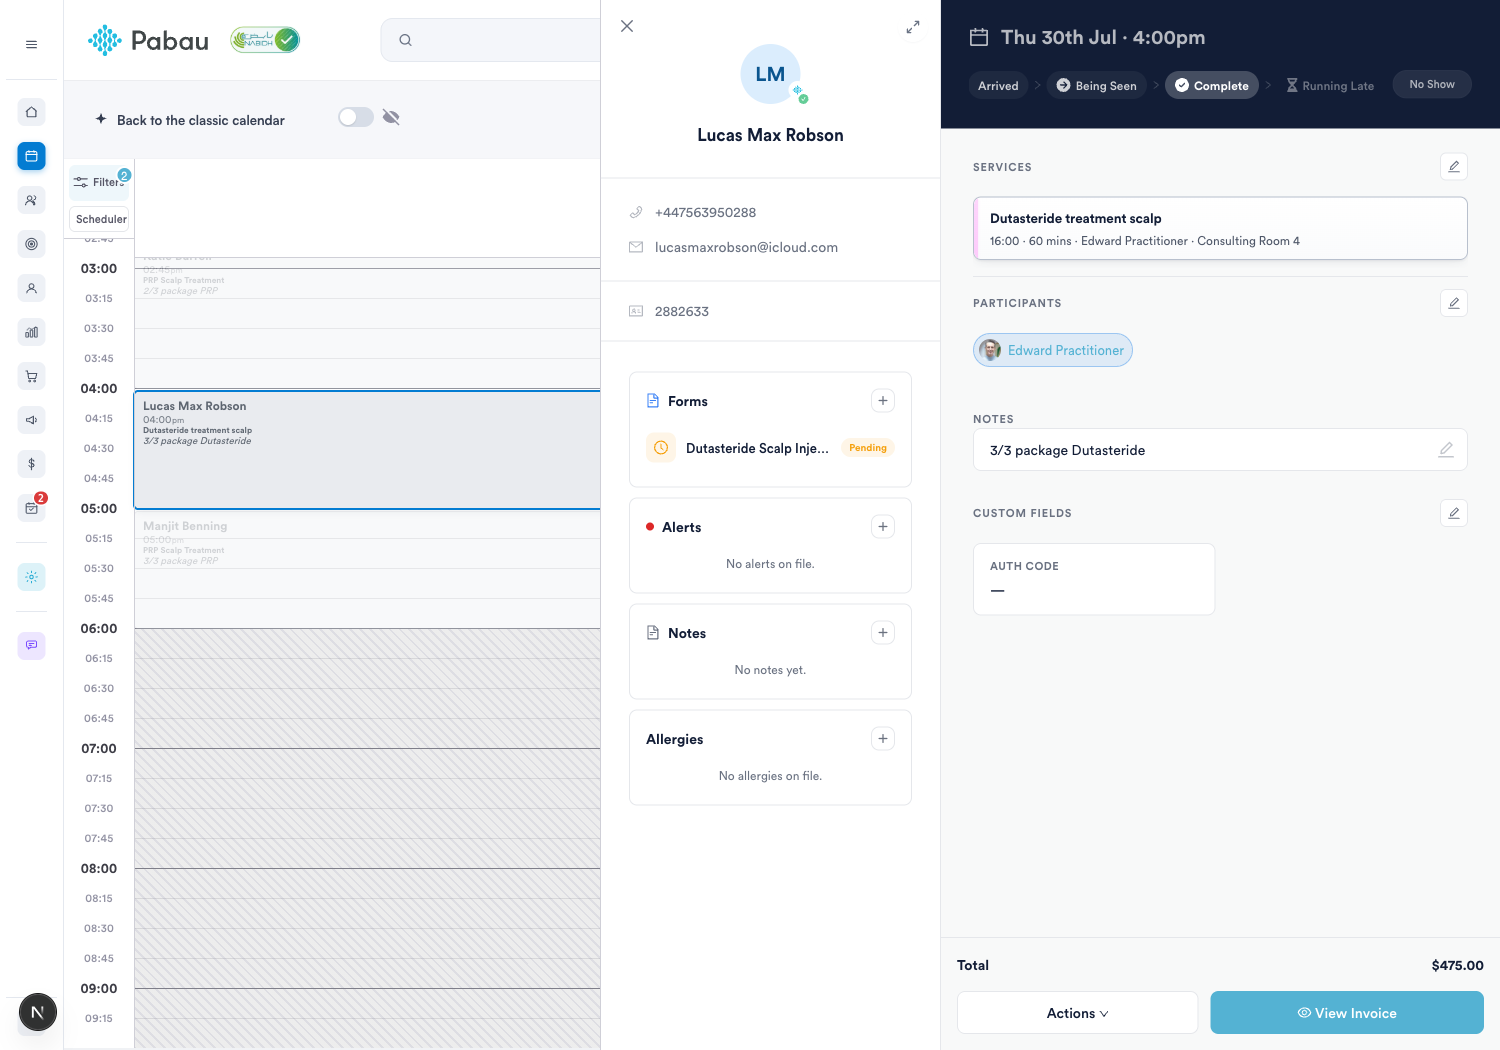
Accurate documentation supports the medical necessity your claim asserts:
- Record the client's conditions as Problems on their EMR - diagnoses linked to the visit are the strongest signal.
- When you open the claim later, Pabau auto-fills the ICD-10 diagnosis slots from the client's active Problems (visit-linked ones first), and you can search the full ICD-10 library for anything else.
- Every charge line on the claim points at a diagnosis (CMS-1500 boxes 21 and 24E) - Pabau wires those pointers for you.
4. Attach the insurer to the appointment
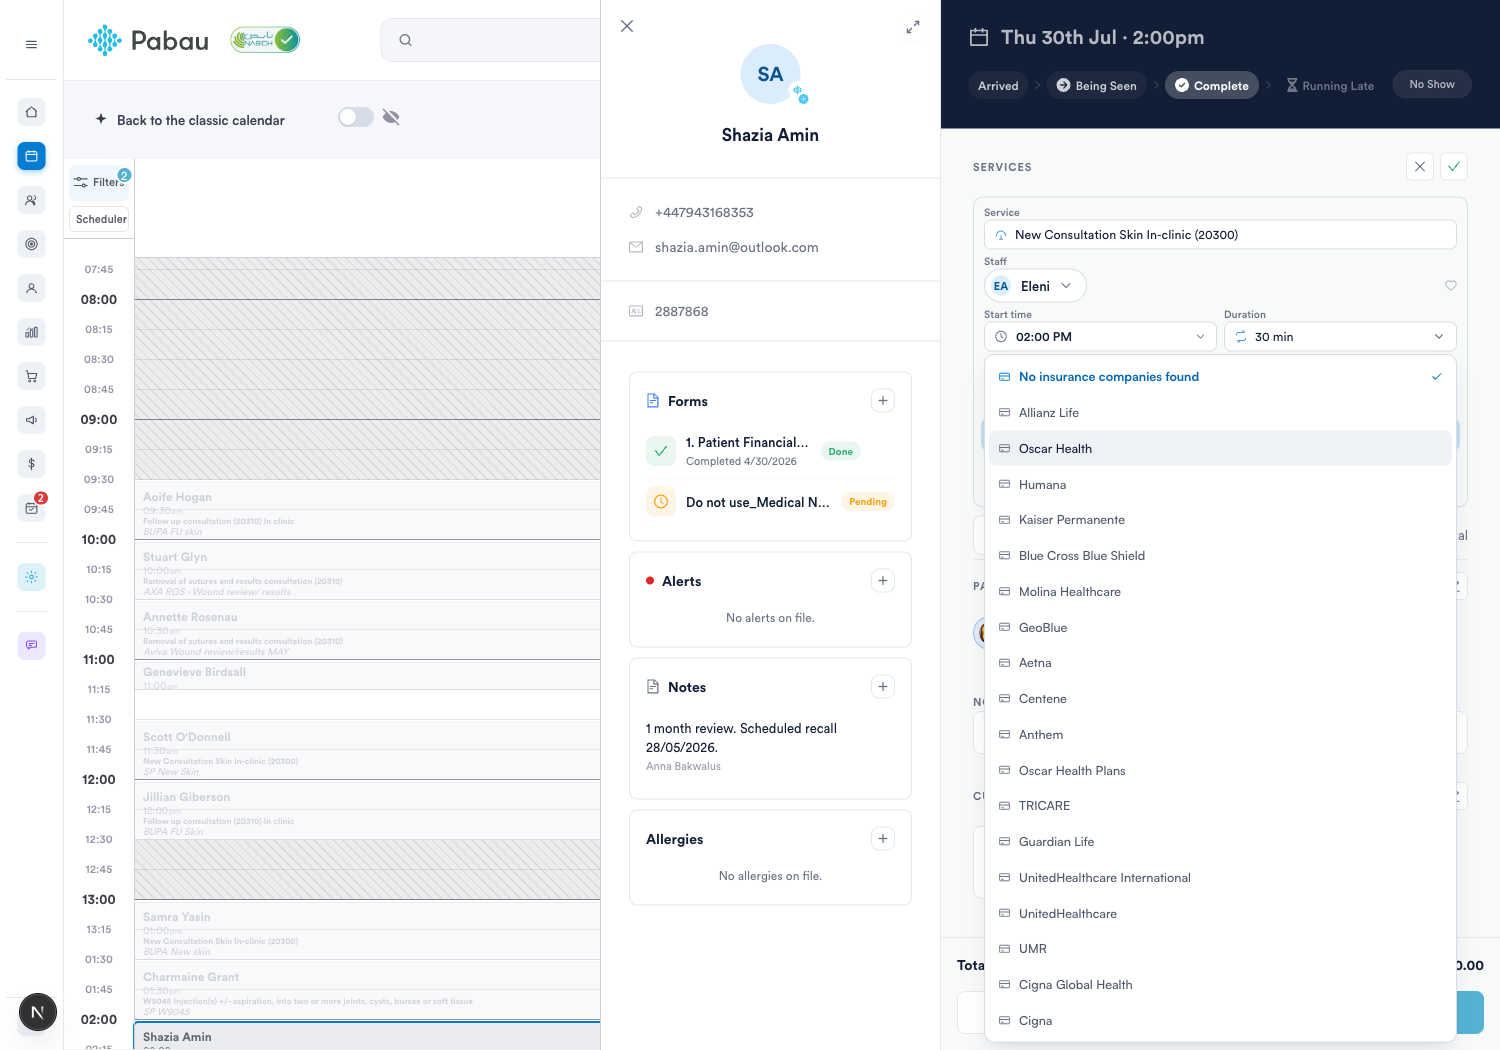
If you didn't charge the visit to the insurer when booking it (step 1), or you need to change the payer afterwards, you can still connect it on the booked appointment - before any invoice exists:
- Open the appointment and click the edit icon on the Services card.
- Under Charge, pick the client's insurance payer (and, if you bill negotiated rates, the matching Price List).
- Confirm with the tick - the visit now carries its payer into invoicing, so the invoice comes out issued to the insurer without any re-keying.
5. Bill the visit to the insurer
When the visit completes, raise the invoice from the appointment popout. On the invoice's Details tab:
- The Appointment field links the invoice to the visit.
- Issued To shows the payer - already set if you attached the insurer to the appointment, or pick from the client and their insurers here.
- Collect the client's co-pay at the point of sale, so only the insurer's share rides on the claim.
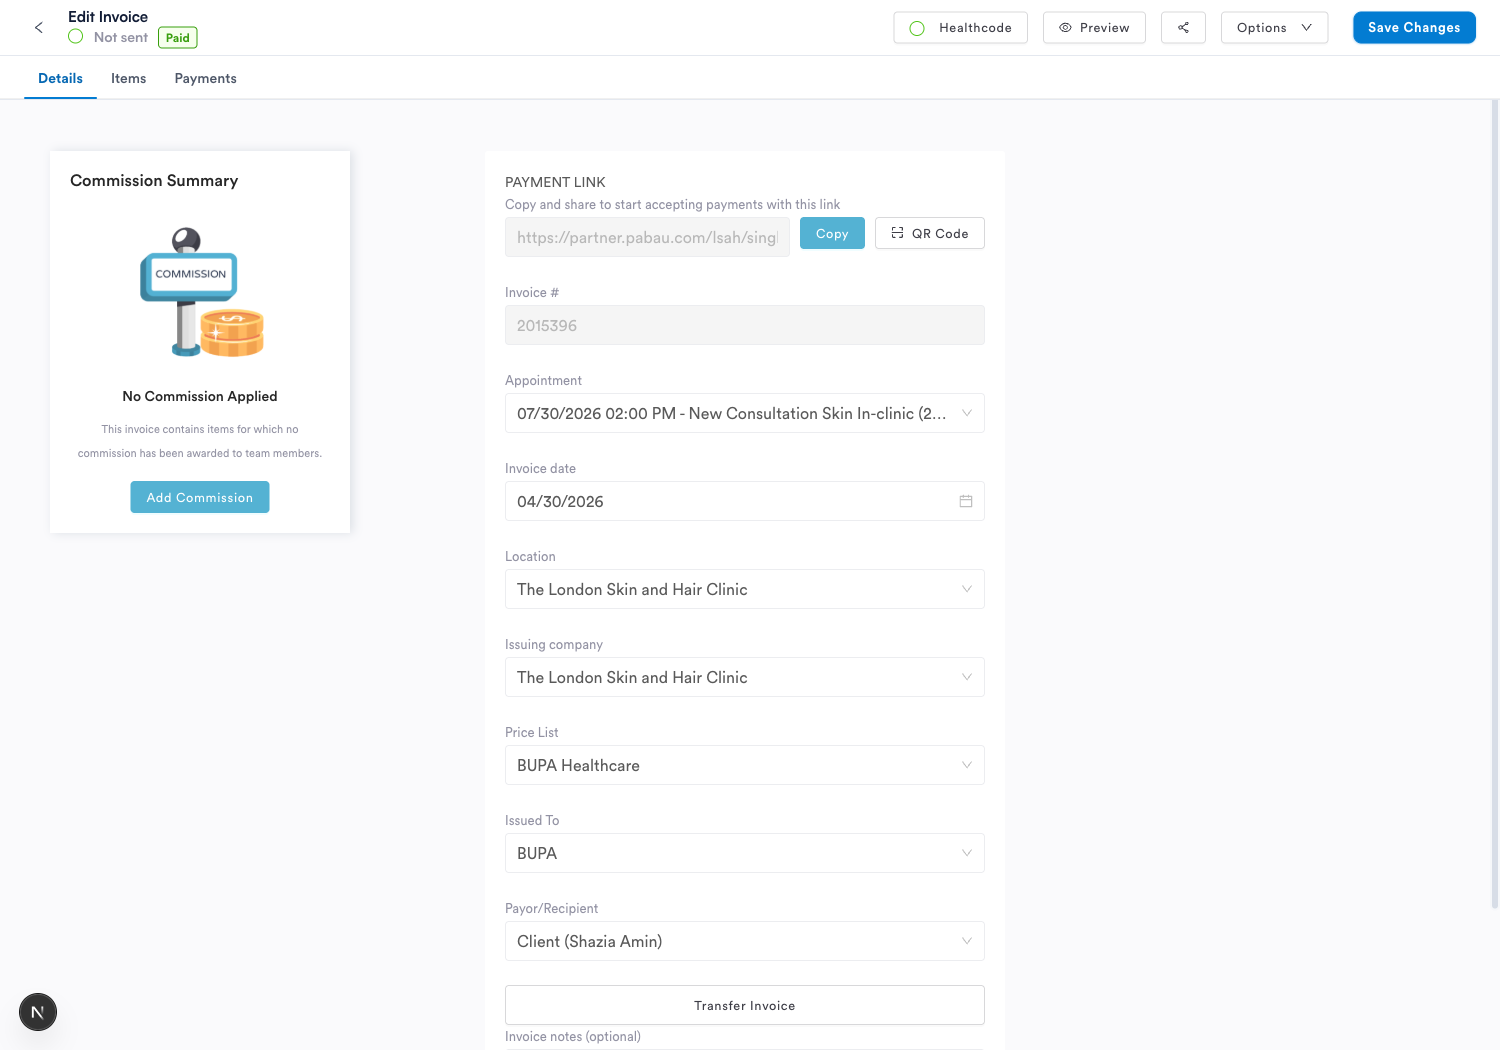
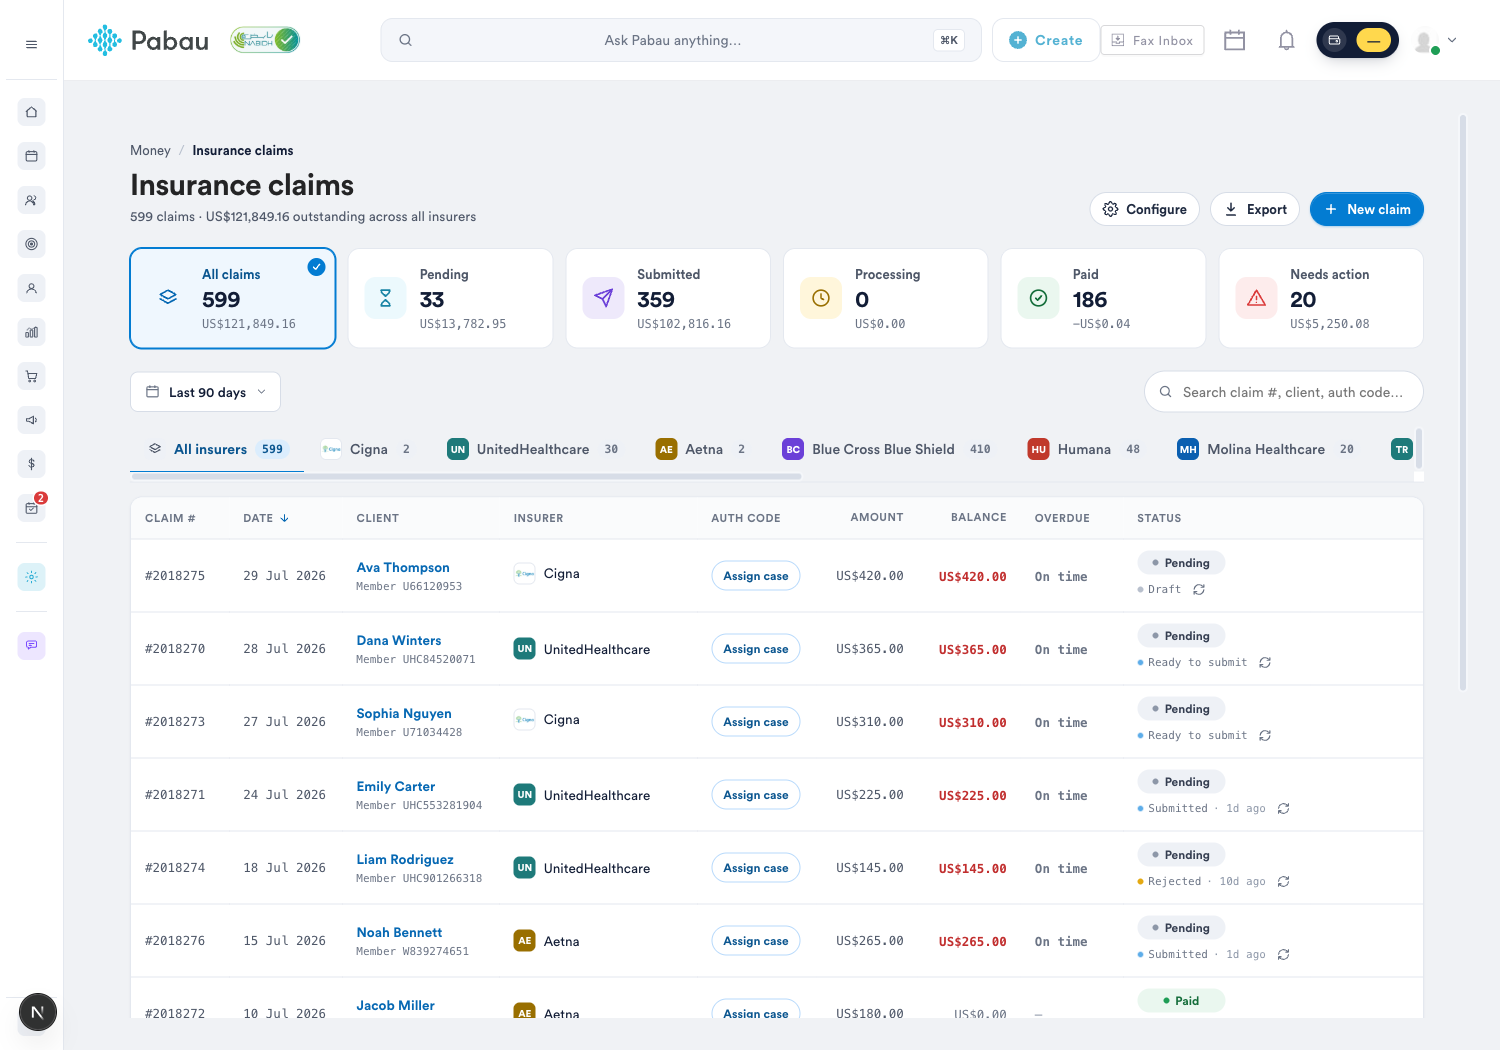
The moment the invoice is issued to an insurer, it appears on Money → Insurance claims as a draft claim - pre-filled from the appointment, the client record, and the policy:
What's next?
Your visit is booked, documented, and billed to the payer. Now submit and track the claim: Insurance Guide Part 4: Submit and track insurance claims. Or jump back to Getting started with insurance billing for the full picture.
Was this guide helpful? Let us know by voting below - your feedback helps us write clearer articles.
For more guides, browse the related articles below or use the search bar at the top of the page. You can also watch our video learning series, the Pabau Academy, or visit the Support page for additional help.