
NOTE: Wait until is an option of the Delay step in Marketing → Workflows. A Delay can wait for a set time (for example 2 days), or until a moment: a date on the record, a day and time, or the next time the location is open.
Step 1: Add a Delay Step
Go to Marketing → Workflows and open the workflow, or click Create workflow and choose a trigger. Click + where you want the pause (or drag Delay from the Drag to add bar) and choose Delay. The Configure panel opens on the right.
Step 2: Switch the Delay to Wait Until
At the top of the panel, click Wait until (instead of Wait for). Then, in the Wait until list, choose what the workflow waits for:
- A date on the record – a set time before or after a date on the record that started the workflow, such as the appointment.
- A day and time – the next chosen weekday at a set time.
- The location is open – the next time the location is open, by its opening hours.
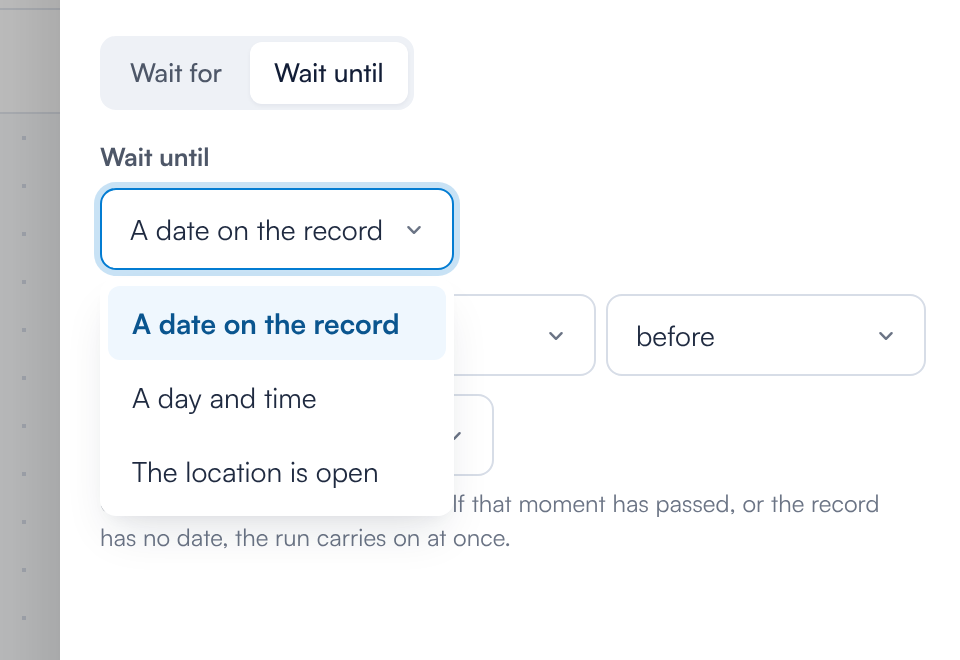
The three things a Delay can wait until
Step 3: Wait Until a Date on the Record
Choose A date on the record, then set:
- The number, and the unit: minutes, hours, days or weeks. Leave it at 0 to wait until the date itself.
- before or after.
- The date to count from. The list shows the dates on the trigger's record – for an appointment trigger, for example, Appointment Date, Appointment Date/Time, Created Date, Cancelled Date and Last updated.
For example, 24 hours before Appointment Date/Time sends the next step a day before the appointment. The step on the canvas reads Wait until 24 hours before Appointment Date/Time.
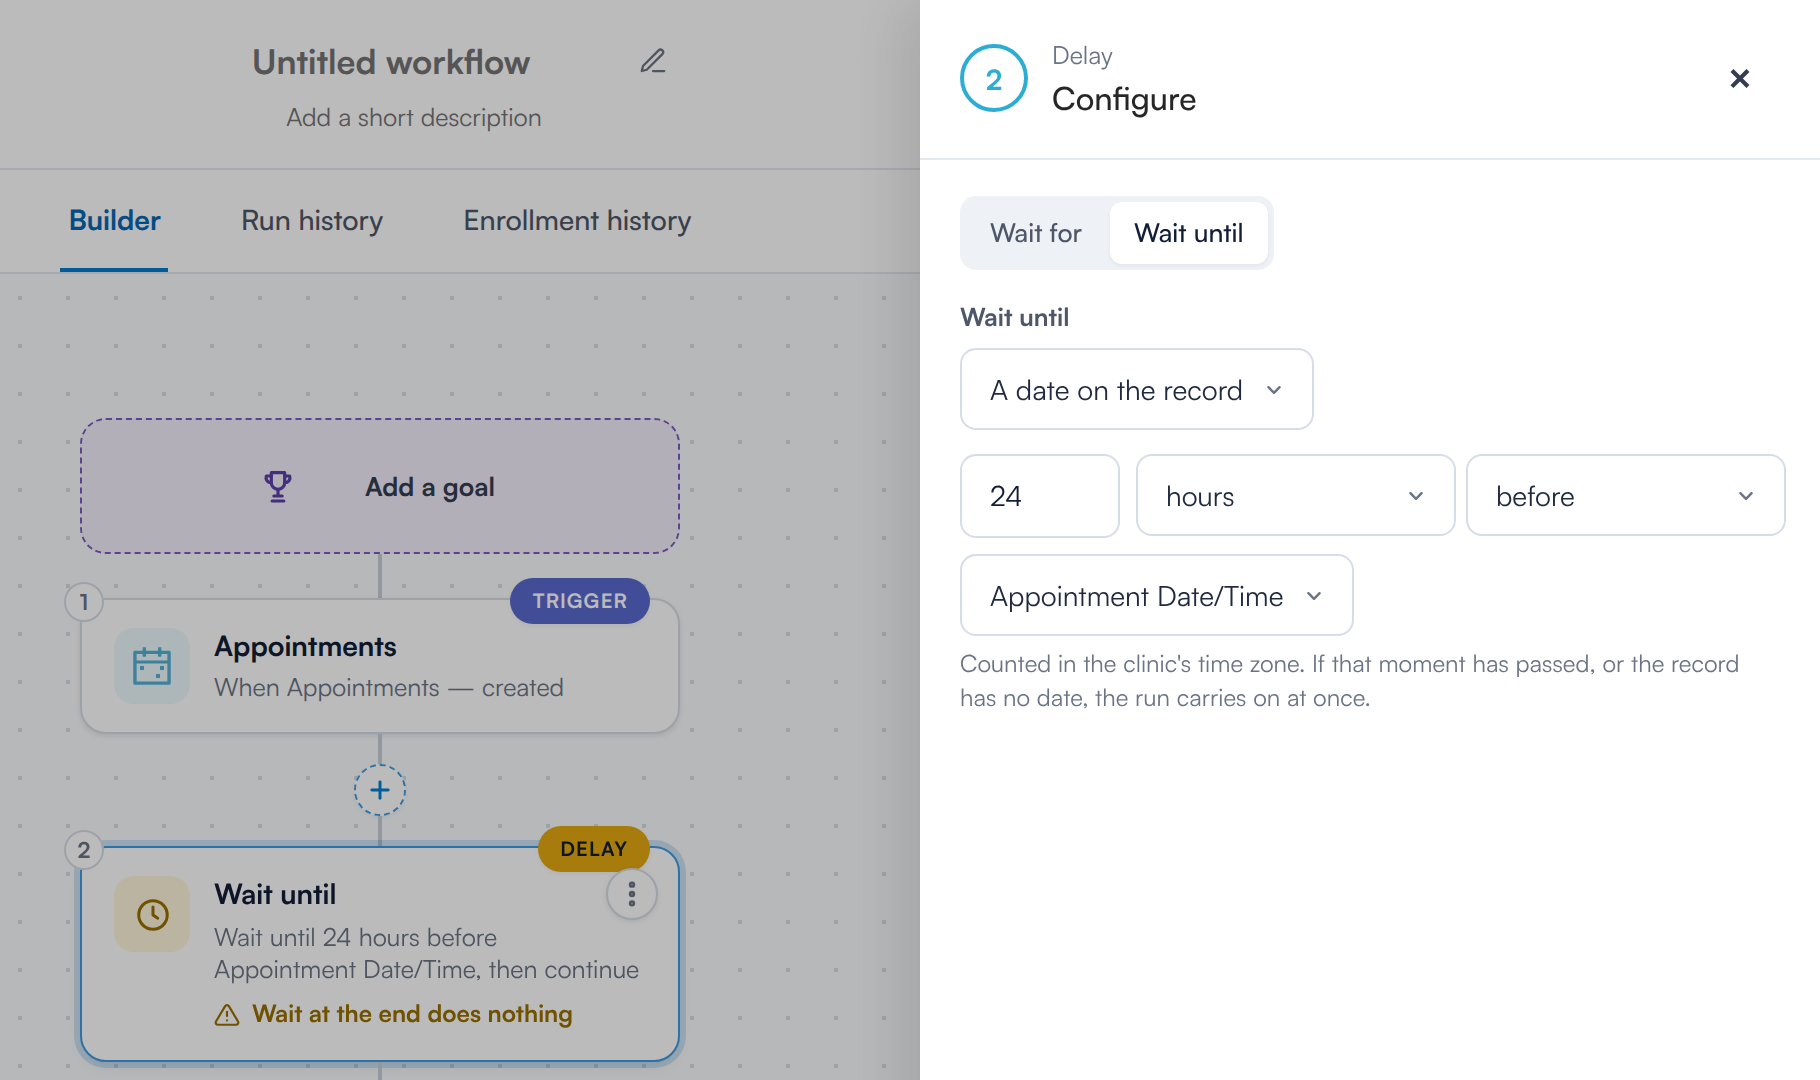
Waiting until 24 hours before the appointment
NOTE: Appointment Date counts from the start of the appointment's day (00:00). Use Appointment Date/Time to count from the time of the appointment. Minutes and hours are counted as elapsed time; days and weeks keep the same clock time, even across a clock change.
Workflows that start from a Schedule or a webhook have no record date to count from, so A date on the record can't be chosen for them.
Step 4: Wait Until a Day and Time
Choose A day and time, click one or more days (Mon to Sun) and enter the Time as HH:MM, for example 09:00. The workflow carries on at the next of those days at that time. Today counts while the time is still to come.
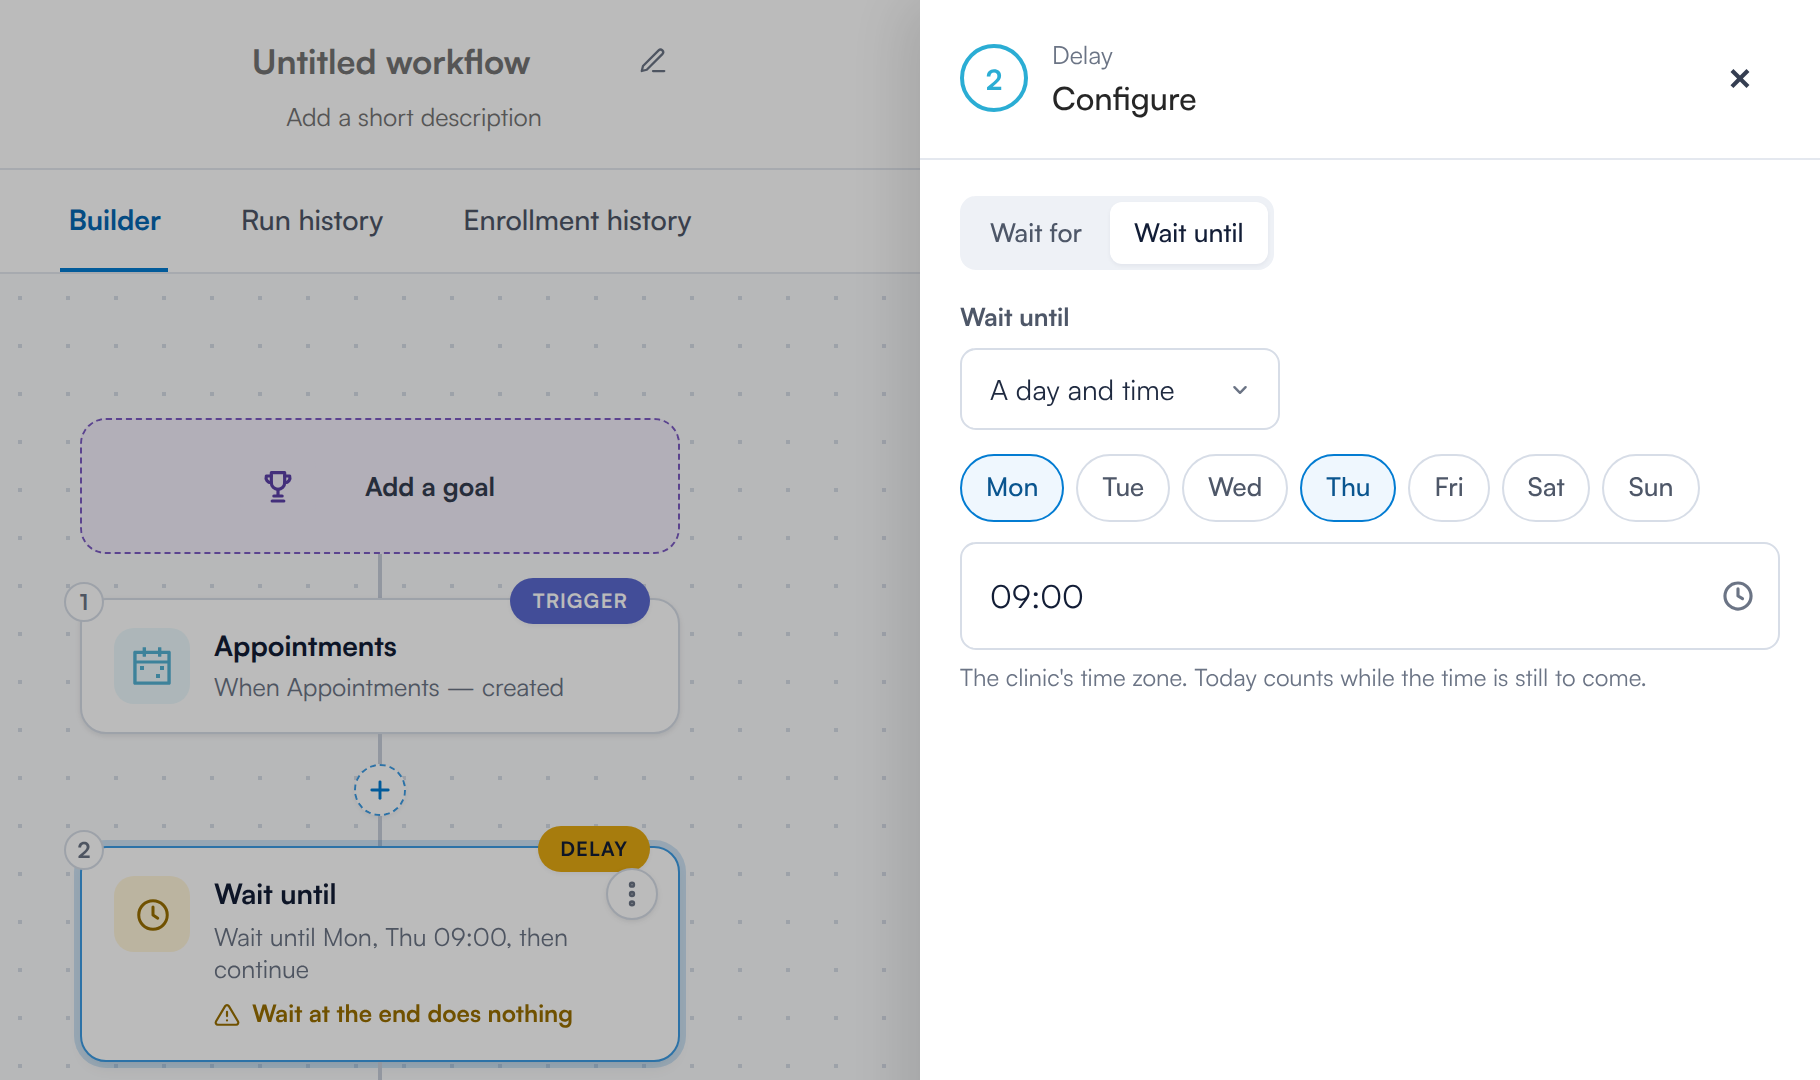
Waiting until the next Monday or Thursday at 09:00
Step 5: Wait Until the Location Is Open
Choose The location is open. There is nothing else to set. If the location is open when the step is reached, the workflow carries on straight away; otherwise it waits for the location's next opening in the next 14 days.
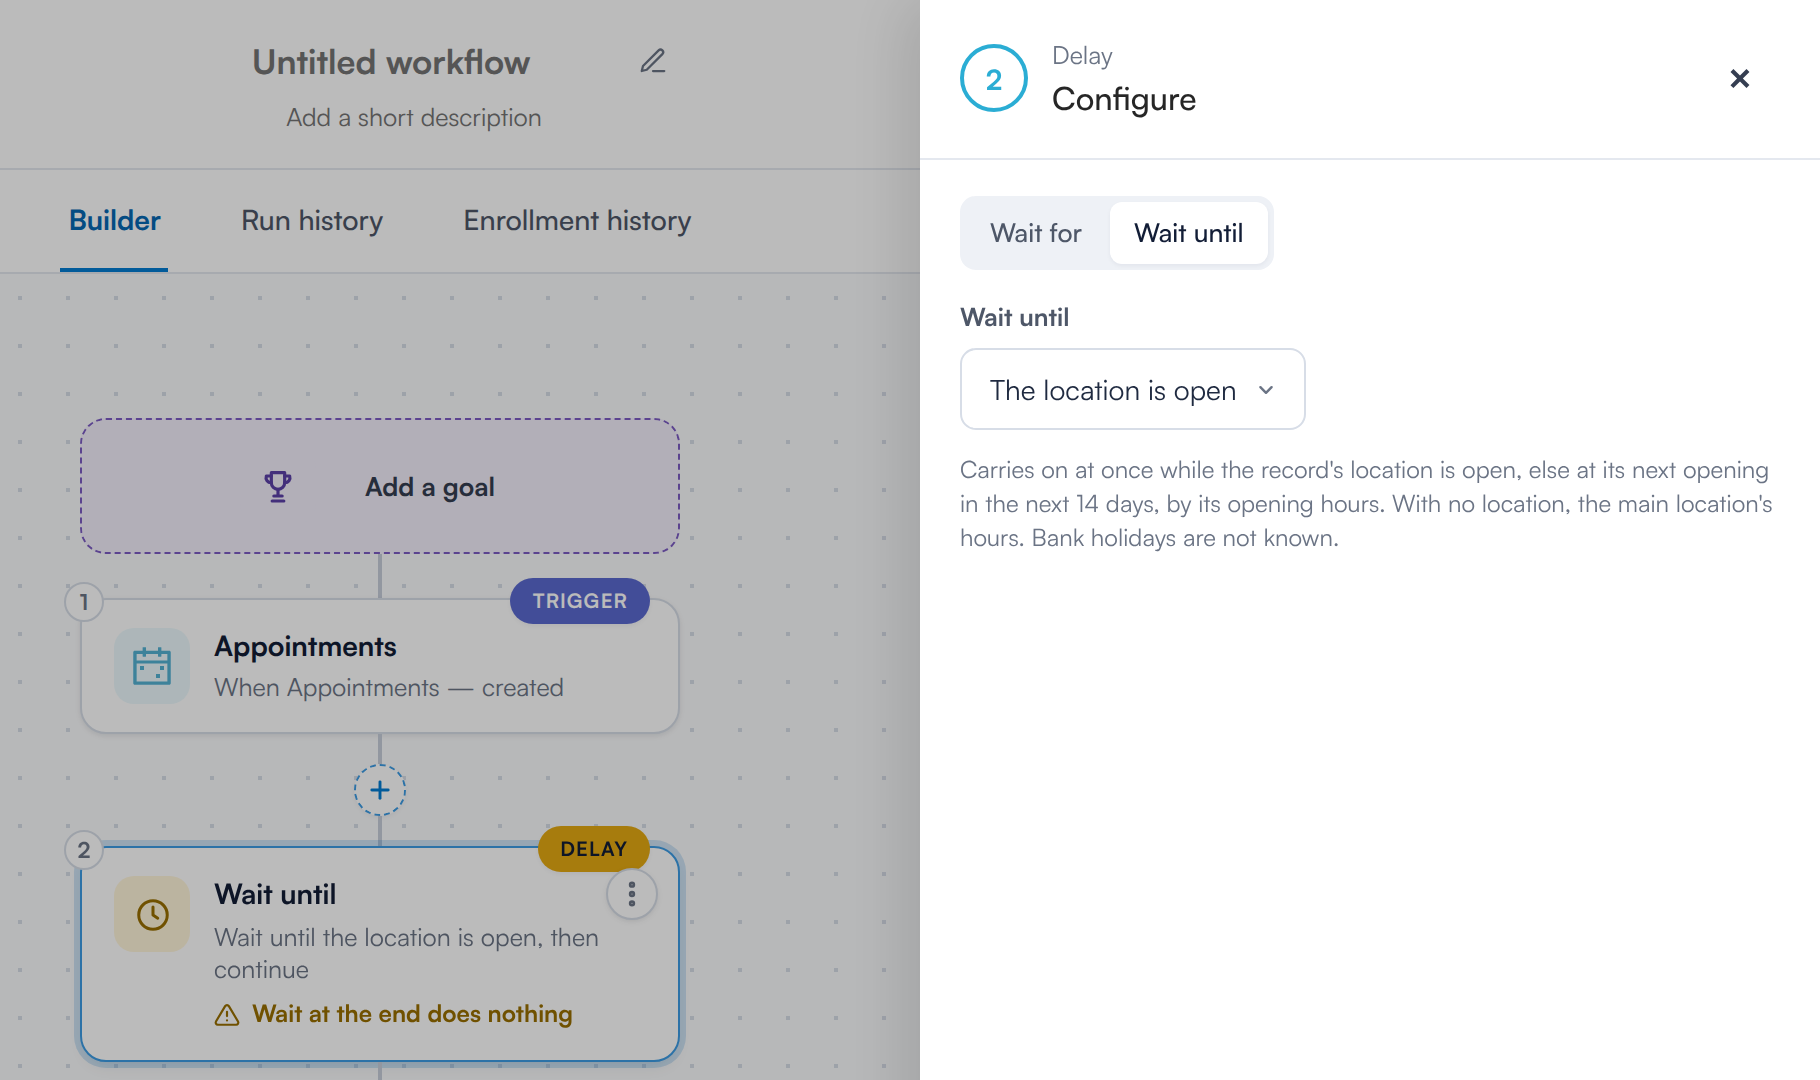
Waiting until the location is next open
Where this comes from: the opening hours of the location on the record (for example, the appointment's location), set in Setup → Locations on the location's Opening Hours tab. If the record has no location, your main location's hours are used. Bank holidays are not taken into account.
Step 6: Finish the Step and Save
Click Done, add the step that should happen after the wait (a Delay at the end of a workflow does nothing), then Save the workflow. If a choice is missing, the panel tells you what to fix, for example Pick at least one day. or Pick the date to wait until..
What Happens If the Moment Has Already Passed?
The workflow does not wait – it carries on to the next step straight away. The same happens if:
- the record has no value for the chosen date (for example, no cancelled date);
- the location has no opening hours, or doesn't open in the next 14 days.
Which Time Zone Is Used?
Your clinic's time zone, for all three options. An option set to A day and time and 09:00 means 09:00 at your clinic.
What's Next?
For everything else in the builder, see Workflows: Detailed walkthrough, or start with the Workflows: Introductory guide.
Was this guide helpful? Let us know by voting below - your feedback helps us write clearer articles.
For more guides, browse the related articles below or use the search bar at the top of the page. You can also watch our video learning series, the Pabau Academy, or visit the Support page for additional help.