
The Payor feature in Pabau allows you to assign financial responsibility to a specific person or organisation on behalf of a client. This is particularly useful for families, where a parent or guardian pays for a child's treatments, or for corporate clients where a company or insurer covers the cost. Once a payor is set, it is automatically applied across invoices, letters, emails, and the Point of Sale — reducing manual work and keeping billing accurate and consistent.
Step 1: Navigate to the Client Card
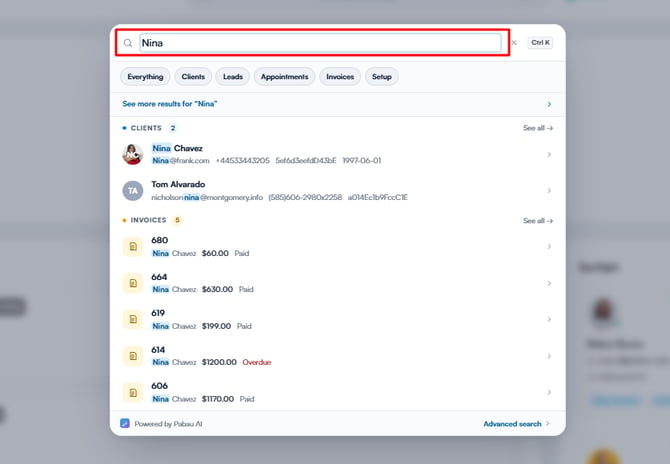
Log into your Pabau account and search for the relevant client using the search bar at the top of the screen. Open their client card.
Step 2: Access the Relationships Section
On the client card, navigate to the Relationships section. This is where you manage family members, next of kin, emergency contacts, and other linked individuals.

Step 3: Add a Family Member
Click Add Family Member to open the relationship modal.

From here you can either:
- Search for and select an existing client in Pabau to link as a family member, or
- Create a new client on the fly by clicking the Add a new client option. Enter the first and last name (required), and if the person is not being linked to an existing client record, an Email and Mobile field will also appear for you to fill in.

Step 4: Set the Relationship
Proceed to select the relationship from all options listed below, then click the 'Add' button to

Step 5: Assign a Payor
Within the same modal, you can set this family member as the Default Payor by ticking the 'Payor' option on the pop-up window. This means any invoices generated for the client will automatically be billed to this person.

Step 6: Set a Recipient (Optional)
You can also set a Default Recipient for correspondence in the same modal. When enabled, letters and emails created for this client will automatically default to the linked family member as the recipient rather than the client themselves. If no family member is set as the default recipient, correspondence will default back to the client.

Step 7: Configure Sharing Permissions (Optional)
Within the same modal, you can also configure portal access and sharing permissions — controlling whether this family member can view the client's data in the Pabau Connect portal, and in which direction data is shared.
A visual diagram is displayed within the modal to make it clear which direction the data sharing applies, so there is no ambiguity about who can see what.

NOTE: Portal access is directional. Granting access from Client A to Client B allows B to view A's data — but not the other way around, unless access is explicitly enabled in the opposite direction as well.
Step 8: Save the Relationship
Once you have configured the relationship, payor, recipient, and sharing settings, click Save. The family member will appear in the Relationships list on the client card.

To make changes later, click the Edit button next to the relationship entry — this opens the same modal in edit mode, allowing you to update any of the settings.

By following these steps, you can easily set a payor for a client in Pabau.
For more guides, refer to related articles below, select additional guides, or use the search bar at the top of the page. These guides will help you get the most out of your Pabau account.
Additionally, to help you fully utilize and understand your Pabau account, we recommend exploring additional guides and resources offered at the Pabau Academy. It offers in-depth video tutorials and lessons, offering a holistic learning experience that can equip you with the essential skills for achieving success with Pabau.